Table of Contents
Advertisement
Available languages
Available languages
Quick Links
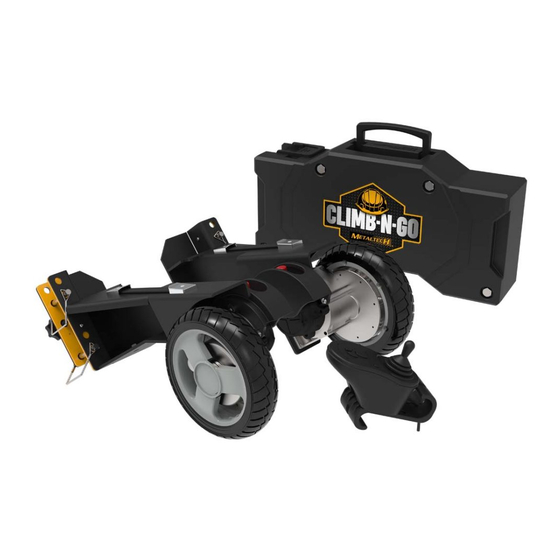
MODEL : I-CNG
OPERATIONAL SAFETY AND
ASSEMBLY INSTRUCTIONS
FOR BAKER TYPE SCAFFOLD
READ THESE INSTRUCTIONS CAREFULLY BEFORE USING THIS
PRODUCT. KEEP THIS MANUAL HANDY FOR FUTURE REFERENCE.
MOTORIZED SYSTEM
1
OSHA
YEAR
WARRANTY
MEETS STANDARD
ENGLISH
ENGLISH
MEETS STANDARD
1926.452(W)
Picture may differ from actual product
CSA
S269.2-16
Advertisement
Table of Contents

Related Manuals for MetalTech CLIMB-N-GO I-CNG


Summary of Contents for MetalTech CLIMB-N-GO I-CNG
- Page 1 MODEL : I-CNG ENGLISH ENGLISH OPERATIONAL SAFETY AND ASSEMBLY INSTRUCTIONS MOTORIZED SYSTEM FOR BAKER TYPE SCAFFOLD OSHA YEAR WARRANTY MEETS STANDARD MEETS STANDARD 1926.452(W) S269.2-16 Picture may differ from actual product READ THESE INSTRUCTIONS CAREFULLY BEFORE USING THIS PRODUCT. KEEP THIS MANUAL HANDY FOR FUTURE REFERENCE.
-
Page 3: Certification Of Compliance
Climb-N-Go®, we certify that this product was indeed designed for the above stated purpose. In fact, the Climb-N-Go® was designed and tested as an integral part of all Metaltech Baker Scaffoldings. Furthermore, an OSHA maximum speed indication is specified on our multidirectional joystick. -
Page 4: Operational Safety
Acids are corrosive and can seriously affect strength. Do not expose the Climb-N- Go® to corrosive substances. Metaltech declines all responsibility for damage to batteries caused by using this product, to the Climb-N-Go® or its components by improper use of the product. -
Page 5: Specifications
† their respective owners. Neither Metaltech nor its products are in any way affiliated with, authorized with or have been tested, certified or approved by any of the companies or trademarks listed above, including for use with any of these companies’ batteries. -
Page 6: Operational Guide
OPERATIONAL GUIDE HOW TO USE THE DRIVE WHEELS ACTIVE LOCK: To use the features of the Climb-N-Go®, lock the drive wheels by positioning the locking levers of both wheels in “Active lock” mode, this allows the automatic locking system of the wheels to be activated when using the Climb-N-Go®. - Page 7 OPERATIONAL GUIDE HOW TO USE THE CLIMB-N-GO® 1. Install all components of the Climb-N-Go® on the scaffolding as described in the “Installation” section on the following pages. 2. Press the power button on the side of the case to turn on the Climb-N-Go®. ( ) 3.
-
Page 8: Installation
INSTALLATION USE THE RECEIVER MATCHING YOUR BATTERY. IF THE BATTERY RECEIVER ALREADY INSTALLED DOES NOT FIT, FOLLOW THE STEPS BELOW. 1. Unscrew and open the front part of the Climb-N-Go® case. 2. Choose the battery receiver that matches the brand of battery you are going to use with the Climb-N-Go®. - Page 9 INSTALLATION 6. To install the Climb-N-Go® wheels more easily, slide a one-inch-thick (1 in.) piece of wood under the scaffolding casters. 7. Temporarily remove the locking-pins from the scaffolding casters. 8. Position the wheels of the Climb-N-Go® at the bottom of the scaffolding ladder. Secure them using the locking-pins provided.
- Page 10 INSTALLATION 11. Connect the cables of the wheels to the box. NOTE: The cables are easier to connect if you lay the box on the ground near the wheels. 12. Slide the Climb-N-Go® case into the fitting on the wheels.
- Page 11 INSTALLATION 13. Secure the multidirectional joystick control to the top of the guardrail or to a rung of the scaffolding. Connect its cable to the one from the box. 14. Complete the installation of the multidirectional control by fixing its cable to the scaffolding using the magnetic clips.
- Page 12 All the parts provided by our factories are CUSTOMER SERVICE genuine quality replacement parts. Using the 1 800 363-7587 chart to find the required part and its number customerservice@metaltech.co and contact our customer service for ordering. PART NAME PART NUMBER Multidirectional...
- Page 13 PART NAME PART NUMBER Wheel protectors I-CNG902 Right motorized I-CNG907 wheel Left motorized I-CNG908 wheel Power converter I-CNG909 Electronic control I-CNG910 Multidirectional I-CNG100700 joystick control Multidirectional joystick control I-CNG903 S-bracket Magnetic clips I-CNG911 Box handle I-CNG200300...
-
Page 14: Troubleshooting Guide
TROUBLESHOOTING GUIDE The troubleshooting indicator of the multidirectional joystick control displays information codes to help you understand what is occurring with your Climb-N-Go®. LIGHT CODE MEANING SOLUTION Light blinks Anti-runaway Check the joystick to make sure that it returns to the once function fault center point position. -
Page 16: One Year Limited Warranty
Metaltech-Omega Inc. guarantees this product against any material defect. Please return this product, freight prepaid, to Metaltech-Omega Inc. At its own discretion, Metaltech-Omega Inc. will replace or repair this product and return it within a reasonable time. This warranty does not cover any damage(s) caused by any incorrect or inappropriate use, care or maintenance. -
Page 17: Consignes De Sécurité Et Instructions De Montage
MODÈLE : I-CNG ENGLISH FRANÇAIS CONSIGNES DE SÉCURITÉ ET INSTRUCTIONS DE MONTAGE SYSTÈME DE MOTORISATION POUR ÉCHAFAUDAGE DE TYPE BAKER OSHA DE GARANTIE RENCONTRE LA NORME RENCONTRE LA NORME 1926.452(W) S269.2-16 L’image peut différer du produit réel LIRE SOIGNEUSEMENT CES INSTRUCTIONS AVANT D’UTILISER CE PRODUIT. -
Page 19: Certificat De Conformité
échafaudage Metaltech Baker, constitue une unité motorisée complète. Suite à ce qui précède, le système d’échafaudage Climb-N-Go® de Metaltech ne correspond donc pas à la définition de cette exigence de Cal/OSHA. Occupational Safety and Health Administration [OSHA]. (February 18, 2020). 1926.452 - Additional requirements applicable to specific types of scaffolds, https://www.osha.gov/laws-regs/regulations/... -
Page 20: Consignes De Sécurité
Les acides sont corrosifs et peuvent affecter sérieusement la solidité. Ne pas exposer le Climb-N-Go® à des substances corrosives. Metaltech décline toute responsabilité pour les dommages causés aux batteries avec l’utilisation de ce produit, au Climb-N-Go® ou à ses composants par une utilisation... -
Page 21: Spécifications
† Stanley sont la propriété de leurs propriétaires respectifs. Ni Metaltech ni ses produits ne sont en aucune façon affiliés, autorisés ou n’ont été testés, certifiés ou approuvés par l’une des sociétés ou marques énumérées ci-dessus, y compris pour une utilisation avec les batteries de ces sociétés. - Page 22 GUIDE D’UTILISATION UTILISATION DES ROUES MOTRICES VERROUILLAGE ACTIF : Pour utiliser les fonctionnalités du Climb-N-Go®, verrouiller les roues motrices en positionnant les leviers de verrouillage des deux roues en mode « Verrouillage actif », ceci permet d’activer le système de verrouillage automatique des roues lors de l’utilisation du Climb-N-Go ®...
- Page 23 GUIDE D’UTILISATION COMMENT UTILISER LE CLIMB-N-GO® 1. Installer tous les composants du Climb-N-Go® sur l’échafaudage comme indiqué dans la section « Installation » dans les pages suivantes. 2. Appuyer sur le bouton d’alimentation sur le côté du boitier pour allumer le Climb-N-Go®.
-
Page 24: Installation
INSTALLATION UTILISEZ LE RÉCEPTEUR CONCORDANT À VOTRE BATTERIE. SI LE RÉCEPTEUR DE BATTERIE DÉJÀ INSTALLÉ NE CONVIENT PAS, SUIVRE LES ÉTAPES CI-DESSOUS. 1. Dévisser et ouvrir la partie avant du boitier du Climb-N-Go®. 2. Choisir le récepteur de batterie concordant à la marque de batterie que vous allez utiliser avec le Climb-N-Go®. - Page 25 INSTALLATION 6. Pour installer les roues du Climb-N-Go® plus facilement, glisser un morceau de bois d’au moins un pouce (1 po) d’épaisseur sous les roues de l’échafaudage. 7. Retirer temporairement les tiges de verrouillage des roues de l’échafaudage. 8. Positionner les roues du Climb-N-Go® au bas de l’échelle de l’échafaudage. Les fixer à...
- Page 26 INSTALLATION 11. Connecter les câbles des roues au boitier. NOTE: Le câblage est plus facile à connecter si vous couchez le boitier sur le sol près des roues. 12. Glisser le boitier du Climb-N-Go® dans les encavures prévues à cette fin sur les roues.
- Page 27 INSTALLATION 13. Fixer la manette de commande multidirectionnelle sur le haut du garde-corps ou sur un échelon de l’échafaudage. Connecter son câble à celui qui relie le boitier. 14. Compléter l’installation de la manette de commande en fixant son câble sur l’éch- afaudage à...
- Page 28 SERVICE À LA CLIENTÈLE neuves. Utilisez le tableau pour trouver la 1 800 363-7587 pièce requise et son numéro et contactez notre serviceclient@metaltech.co service client pour commander. NOM DE LA PIÈCE NUMÉRO DE PIÈCE Câble et sangle...
- Page 29 NOM DE LA PIÈCE NUMÉRO DE PIÈCE Protecteurs de I-CNG902 roues Roue motrice I-CNG907 droite Roue motrice I-CNG908 gauche Convertisseur I-CNG909 d’alimentation Boîtier de contrôle I-CNG910 électronique Manette de commande I-CNG100700 multidirectionnelle Support en S pour Manette I-CNG903 de commande multidirectionnelle Clips magnétiques I-CNG911...
- Page 30 GUIDE DE DÉFAILLANCES L’indicateur de défaillances de la manette de commande multidirectionnelle affiche des codes d’information pour vous aider à comprendre ce qui se passe avec votre Climb-N-Go®. CODE LUMINEUX SIGNIFICATION SOLUTION Défaut de la Le voyant clignote Vérifier la manette pour s’assurer qu’elle revient fonction une fois à...
-
Page 32: Garantie Limitée De 1 An
Metaltech-Omega inc. garantit ce produit contre toute défectuosité matérielle ou de fabrication. Retourner ce produit à Metaltech-Omega inc. port payé. Metaltech-Omega inc. s’engage à réparer ou à remplacer, à sa discrétion, ce produit gratuitement et vous le retourner dans un délai raison- nable.
Need help?
Do you have a question about the CLIMB-N-GO I-CNG and is the answer not in the manual?
Questions and answers