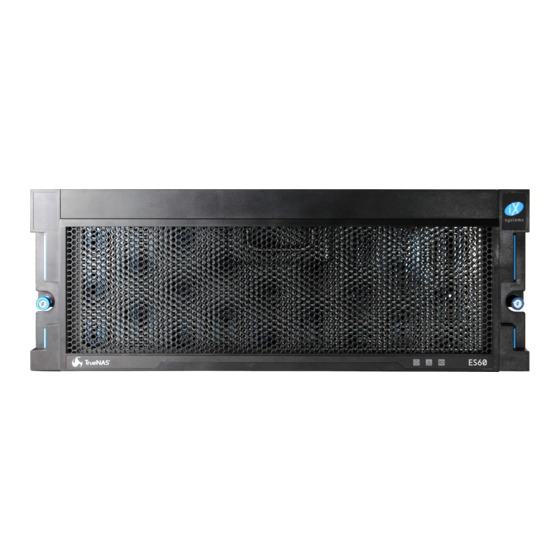
iXsystems TrueNAS ES60 Basic Setup Manual
Hide thumbs
Also See for TrueNAS ES60:
- Basic setup manual (13 pages) ,
- Basic setup manual (12 pages) ,
- Basic setup manual (20 pages)
Table of Contents
Advertisement
Quick Links
Advertisement
Table of Contents

Subscribe to Our Youtube Channel
Summary of Contents for iXsystems TrueNAS ES60
- Page 1 TrueNAS ES60 Basic Setup Guide ® Version 1.94...
-
Page 2: Table Of Contents
...................... Copyright © 2023 iXsystems, Inc. All rights reserved. All trademarks are the property of their respective owners. -
Page 3: Introduction
1 Introduction The TrueNAS ES60 is a 4U, 60-bay expansion shelf. It has redundant power supplies and two storage controllers. Review the safety considerations and hardware requirements before installing an ES60 into a rack. 1.1 Safety 1.1.1 Static Discharge Static electricity can build up in your body and discharge when touching conductive materials. Electrostatic Discharge (ESD) is harmful to sensitive electronic devices and components. -
Page 4: Es60 Components
2 ES60 Components TrueNAS units are carefully packed and shipped with trusted carriers to arrive in perfect condition. If there is any shipping damage or missing parts, please take photos and contact iXsystems support immediately at support@ixsystems.com, 1-855-GREP4-iX (1-855-473-7449), or 1-408-943-4100. -
Page 5: Front Indicators
Amber: Locate ID active 2.2 Rear Components and Ports The ES60 has two expansion controllers in a side-by-side configuration. Power Supply 1 Power Supply 2 Controller 1 Controller 2 SAS3 SAS3 SAS3 SAS3 Support: 855-473-7449 or 1-408-943-4100 Page 3 Email: support@ixsystems.com... -
Page 6: Assemble Rail Kit
Push the pins into the rack holes until they lock in place. Use the pro- vided screws to secure the rails to the cage nuts. Cage Nut Placement and Front Back Rail Alignment M5 Screws Support: 855-473-7449 or 1-408-943-4100 Page 4 Email: support@ixsystems.com... -
Page 7: Mount The Unit In The Rack
ES60 and hold them in place, then push the chassis into the rack. Use the thumbscrews on the ears are to secure the ES60 in the rack after installing drive trays Support: 855-473-7449 or 1-408-943-4100 Page 5 Email: support@ixsystems.com... -
Page 8: Install Drives
4 Install Drives 4.1 Remove Top Cover Slide the ES60 out on the rails. Unscrew the cover screws to unlock the top cover, then slide it toward the system front and lift it off. Support: 855-473-7449 or 1-408-943-4100 Page 6 Email: support@ixsystems.com... -
Page 9: Install Drive Trays
You must install the top cover and the entire first row of drive trays for proper air flow and cooling. Support: 855-473-7449 or 1-408-943-4100 Page 7 Email: support@ixsystems.com... -
Page 10: Install Cable Management Arm (Optional)
Locate the end of the flex housing with exposed pins. Unclip and open the two tabs closest to the end so the flex housing can compress enough to fit into the bracket holes. Press the flex housing firmly into the bracket until the pins seat in the holes. Support: 855-473-7449 or 1-408-943-4100 Page 8 Email: support@ixsystems.com... - Page 11 Power and data cables route through the flex housing. You can open or remove the tabs to allow access or space for cable ends. Leave some slack in the cables at both ends to allow arm and chassis movement. Support: 855-473-7449 or 1-408-943-4100 Page 9 Email: support@ixsystems.com...
-
Page 12: Connect Power Cables
Repeat the process for the second power supply and cord. Plug both power cords into outlets. The ES60 will turn on. Wait two minutes for the drives to start. Note: Do not connect cables to the Service or Management ports. The ES60 does not use them during operation. Support: 855-473-7449 or 1-408-943-4100 Page 10 Email: support@ixsystems.com... -
Page 13: Connect Sas Cables
Warning: When setting up SAS connections, please adhere to the wiring examples below. Connecting expansion shelves incorrectly causes errors. Never cable a single controller to different expanders on the same shelf. 7.1 X-Series X20 with one ES60 Expansion Shelf Support: 855-473-7449 or 1-408-943-4100 Page 11 Email: support@ixsystems.com... -
Page 14: R-Series
7.2 R-Series 7.2.1 R20 R20 with a single ES60 Expansion Shelf R20 with two ES60 Expansion Shelves Support: 855-473-7449 or 1-408-943-4100 Page 12 Email: support@ixsystems.com... -
Page 15: R40
7.2.2 R40 R40 with a single ES60 Expansion Shelf R40 with two ES60 Expansion Shelves Support: 855-473-7449 or 1-408-943-4100 Page 13 Email: support@ixsystems.com... -
Page 16: R50
7.2.3 R50 R50 with a single ES60 Expansion Shelf R50 with two ES60 Expansion Shelves Support: 855-473-7449 or 1-408-943-4100 Page 14 Email: support@ixsystems.com... -
Page 17: M-Series
7.3 M-Series 7.3.1 M40 M40 with a single ES60 Expansion Shelf M40 with two ES60 Expansion Shelves Support: 855-473-7449 or 1-408-943-4100 Page 15 Email: support@ixsystems.com... -
Page 18: M50 And M60
SAS cards. The M60 can support up to 12 total Expansion Shelves with the use of additional SAS cards. M50 supports up to 8 expansion shelves M60 supports up to 12 expansion shelves Support: 855-473-7449 or 1-408-943-4100 Page 16 Email: support@ixsystems.com... -
Page 19: Install Bezel (Optional)
Additional hardware guides and articles are in the Documentation Hub’s Hardware section: https://www.truenas.com/docs/hardware/ The TrueNAS Community forums provide opportunities to interact with other TrueNAS users and discuss their con- figurations: https://www.truenas.com/community/ 10 Contact iXsystems For assistance, please contact iX Support: Contact Method Contact Options https://support.ixsystems.com Email support@iXsystems.com... - Page 20 Notes: Support: 855-473-7449 or 1-408-943-4100 Page 18 Email: support@ixsystems.com...


Need help?
Do you have a question about the TrueNAS ES60 and is the answer not in the manual?
Questions and answers