iXsystems TrueNAS ES60 Basic Setup Manual
Expansion shelf
Hide thumbs
Also See for TrueNAS ES60:
- Basic setup manual (12 pages) ,
- Basic setup manual (20 pages) ,
- Basic setup manual (20 pages)
Table of Contents
Advertisement
Quick Links
Advertisement
Table of Contents

Subscribe to Our Youtube Channel
Related Manuals for iXsystems TrueNAS ES60


Summary of Contents for iXsystems TrueNAS ES60
- Page 1 ® TrueNAS ES60 Expansion Shelf Basic Setup Guide February 2018 Edition...
-
Page 2: Es60 Expansion Shelf
If there is any shipping damage or any parts are missing, please take photos and contact iXsystems support immediately at support@iXsystems.com or 1-855-GREP4-iX (1-855-473-7449) or 1-408-943-4100. -
Page 3: Become Familiar With The Es60
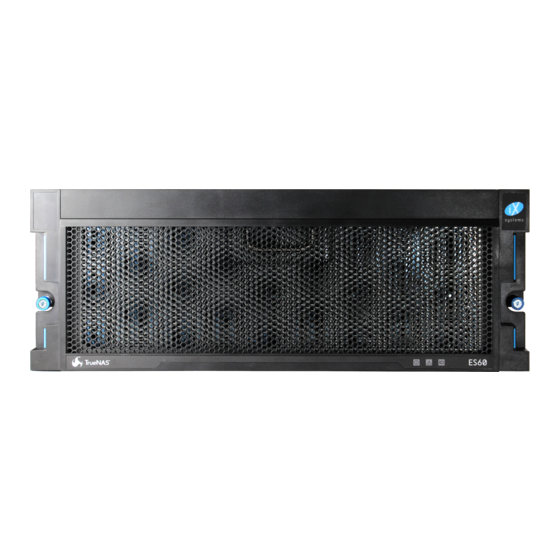
(POST) or when the TrueNAS software has issued an alert (https://support.ixsystems.com/truenasguide/tn_options.html#alert). Front view of the ES60 Expansion Shelf: Front panel indicators: Rear view of the ES60 Expansion Shelf: The ES60 contains two expansion modules in a side-by-side configuration. The connectors and features on each module... -
Page 4: Rail Kit Assembly
1: Power supply 4: Locate ID 2: Power indicator 5: Management port (not used) 3: Alarm indicator 6,7: HD Mini SAS3 connectors 1.2 Rail Kit Assembly 1.2.1 Separate Cabinet Rails from Rack Rails Each rack rail includes an inner cabinet rail that must be removed. Extend the cabinet rail until the white release tab is exposed. -
Page 5: Mount Unit In The Rack
1.3 Mount Unit in the Rack Caution: Two people are required to safely lift the chassis for rack installation or removal. Do not install drives until after the chassis has been installed in the rack, and remove all drives before removing the chassis from the rack. Slide the front rack rail forward to meet the rear of the cabinet rails. -
Page 6: Drive Tray Installation
1.4 Drive Tray Installation Note: Do not install the drives until the chassis has been installed in the rack. 1.4.1 Remove Top Cover Slide the unit out on the rails. Turn the blue screws counterclockwise to unlock the top cover. Slide the top cover toward the front of the system, then lift to remove it. -
Page 7: Es60 Cable Managment Arm
A standard drive tray installation order simplifies support and is strongly recommended: • SSD drives for SLOG, if present • SSD drives for L2ARC, if present • Hard drives or SSD drives for data storage Install the first drive tray in the front left drive bay. Install the next drive tray to the right of the first. Install remaining drive trays to the right across the row. - Page 8 1.5.1 Install the Cable Management Arm Locate the two posts on the left rear side of the ES60. Align the holes on the CMA chassis bracket with the posts on the chassis. Slide the cable management arm forward and pull the lever on the latch upward to lock the bracket into place. Locate the end of the flex housing with exposed pins.
-
Page 9: Connect Power Cords
Completed Cable Management Arm assembly: Power and data cables are routed through the flex housing. The tabs can be opened or removed to allow access or space for cable ends. Remember to leave some slack in the cables at both ends to allow for movement of the arm and chassis. 1.6 Connect Power Cords Do not plug the power cords into a power outlet yet. -
Page 10: Connect Sas Cables
® When setting up an ES60 for the first time, wait two minutes after turning on the ES60 before powering on the TrueNAS ® Unified Array. If the TrueNAS Unified Array is already in operation, the Expansion Shelf can be powered on at any time. 1.7 Connect SAS Cables Plug the ES60 power cords into power outlets. - Page 11 A second ES60 can also be connected to the Z35. Connect the first ES60 as shown above. Then connect the second ES60 1 ports to the next unused SAS ports on the Z35 as shown: ® Up to eight ES60 expansion shelves are supported on the TrueNAS Z35.
-
Page 12: Install Bezel (Optional)
2 User Guide ® ® The TrueNAS User Guide with complete configuration instructions is available by clicking Guide in the TrueNAS user inter- face or at https://support.ixsystems.com/truenasguide/truenas.html. 3 Contacting iXsystems For assistance, please contact iX Support: Contact Method Contact Options https://support.ixsystems.com Email support@iXsystems.com...
Need help?
Do you have a question about the TrueNAS ES60 and is the answer not in the manual?
Questions and answers