
Related Manuals for Casa Systems NetComm CF60


Summary of Contents for Casa Systems NetComm CF60
- Page 1 User Guide AXE11000 Wi-Fi 6E Gateway – CF60 Doc No. UG01465 AXE11000 Wi-Fi 6E Gateway – User Guide UG01465 v. 1.00 5 December 2023...
- Page 2 Copyright Copyright© 2023 Casa Systems. All rights reserved. The information contained herein is proprietary to Casa Systems. No part of this document may be translated, transcribed, reproduced, in any form, or by any means without prior written consent of Casa Systems.
-
Page 3: Table Of Contents
3 of 90 Contents Overview ........................................6 Introduction ............................................6 Prerequisites ............................................6 Notation ............................................6 Setting up your Internet connection ................................ 7 Before you begin ........................................... 7 Connecting using Ethernet WAN ....................................7 Here’s how things connect to the Ethernet WAN interface ..........................7 Configuring your gateway ........................................ - Page 4 4 of 90 PPPoE ................................................... 25 IPoE ....................................................27 Bridging ..................................................30 LAN ..............................................31 IPv4 Autoconfig ................................................31 IPv6 Autoconfig ................................................33 VLAN Setting ................................................35 NAT ..............................................35 Virtual Servers ................................................35 Port Triggering ................................................36 DMZ Host ..................................................38 ALG ....................................................
- Page 5 5 of 90 Diagnostics ............................................77 Ping ..............................................77 Traceroute ............................................. 78 Diagnostics ............................................ 79 Management ............................................80 Settings ............................................80 Backup ..................................................80 Update ..................................................80 Restore defaults ................................................. 81 System Log ............................................ 81 Security Log ........................................... 83 SNMP Agent ..........................................84 TR-069 Client - Configuration ....................................
-
Page 6: Overview
6 of 90 Overview Introduction This document provides you all the information you need to set up, configure and use the NetComm Wireless AXE11000 Wi-Fi 6E Gateway. Prerequisites To configure your Gateway a computing device with a web browser such as Microsoft® Edge, Mozilla Firefox®... -
Page 7: Setting Up Your Internet Connection
7 of 90 Setting up your Internet connection If you received your gateway from your service provider and they have provided you with their own instructions, refer to those to Note – complete the setup. In some cases, the gateway has been pre-configured for you and is ready to use. Otherwise, you will need to complete the setup yourself. -
Page 8: Configuring Your Gateway
8 of 90 Configuring your gateway To complete the setup, you will need the following information from your service provider: Connection type (PPPoE/IPoE/Bridging) ⚫ Other specifics depending on your connection type including 802.1P priority, VLAN Tag, WAN IP ⚫ Address, Subnet Mask and DNS Servers VoIP settings from your service provider if you intend to use a phone with your service. -
Page 9: Turning Wi-Fi And Lights On Or Off
9 of 90 Turning Wi-Fi and lights on or off To turn the Wi-Fi radio off and on, press the Wi-Fi button for three seconds then release. This is a quick way to completely disable / enable Wi-Fi on the gateway. Figure 3 –... -
Page 10: Using Wps
10 of 90 Using WPS Where supported by your devices, such as laptops and smart phones, you can use Wi-Fi Protected Setup (WPS) to connect your devices. To activate WPS on the gateway, press the WPS button for three seconds, then release. -
Page 11: Interfaces
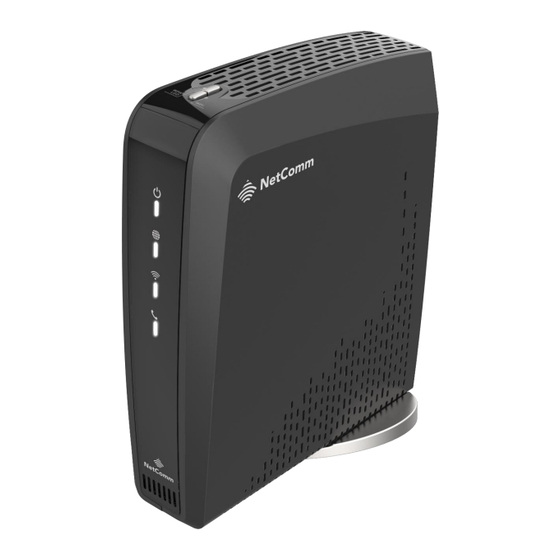
11 of 90 Interfaces Front view The front of the gateway is fitted with LED indicator lights to indicate the status of the gateway. Figure 7 – Front LED lights Front LED indicators L E D C o l o u r / D e s c r i p t i o n S t a t u s Blinking... -
Page 12: Rear View
12 of 90 Rear view The power button, Ethernet ports and VoIP ports are located on the rear for easy organization. N o . I t e m D e s c r i p t i o n Power button Push to turn the gateway on or off. -
Page 13: Ethernet Led Indicators
13 of 90 Ethernet LED Indicators Each of the Ethernet ports on the rear of the gateway include LED indicator lights to display the status of the physical Ethernet connection. The yellow LED indicator light indicates an Ethernet connection, and the green LED indicator light indicates data transfer. -
Page 14: Safety And Product Care
14 of 90 Safety and product care Your gateway is an electronic device that sends and receives radio signals. Please take the time to read this list of precautions that should be taken when installing and using the router. Do not disassemble the gateway. There are no user-serviceable parts. ⚫... -
Page 15: Avoiding Obstacles And Interference
15 of 90 Avoiding obstacles and interference Avoid placing your Gateway near devices that may emit radio “noise,” such as microwave ovens or other dense objects that can inhibit wireless communication, including: Refrigerators ⚫ Washers and/or dryers ⚫ Metal cabinets ⚫... -
Page 16: Advanced Configuration Of The Gateway
16 of 90 Advanced configuration of the Gateway To perform advanced configuration of the Gateway, you can access its web interface: Push the power button on the rear of the Gateway to turn it on. Wait a few minutes for it to complete starting up. -
Page 17: Device Info
17 of 90 The Device Info - Summary page is first displayed after you have successfully logged into the Gateway. This page gives you an overview of important information regarding the gateway and WAN connection. Figure 11 – Device Info To navigate to other areas of the user interface for advanced configuration, select an item from the menu on the left side of the screen. -
Page 18: Wan
18 of 90 The WAN page displays information about the WAN connection. Figure 13 – Device Info - WAN Statistics LAN and WLAN The LAN and WAN page displays information about the LAN and Wi-Fi network connections. Select the Reset Statistics button to reset all of the statistics about the connections to 0. -
Page 19: Arp
19 of 90 The ARP page displays the Adress Resolution Protocol (ARP) table for the Gateway. The ARP table displays a list of network interfaces connected to the gateway, including MAC addresses. Figure 16 – Device Info - ARP DHCP The DHCP Leases page displays information about devices connected to the network using DHCP, including Hostname, MAC address, IP address type (Dynamic or Status) and the DHCP lease expiry time. -
Page 20: Cpu & Memory
20 of 90 CPU & Memory The CPU & Memory page displays graphs of the current system resource usage on the Gateway. Figure 18 – Device Info – CPU and Memory System info The System Info page provides detailed information on the current system status, including CPU and memory usage and the inbuilt flash storage availability. -
Page 21: Basic Setup
21 of 90 Basic setup The Basic Setup configuration wizard guides you through setting up your Internet connection. To complete the wizard, you will need some information about your connection from your Internet Service Provider, such as the WAN connection type, authentication methods, login credentials (if required) and other settings. To perform installation also ensure you have connected the WAN port on your Gateway to your ISP provided network termination device using the supplied Ethernet cable. - Page 22 22 of 90 A summary of your settings will be displayed. Ensure they are correct, then select Apply / Save to create the connection. Figure 23 – Basic Setup – Save configuration Ensure your internet connection is working by navigating to a website such as https://www.google.com.
-
Page 23: Advanced Setup
23 of 90 Advanced setup This section provides a variety of options for configuring the gateway for advanced functions. These include settings related to the WAN service, Local Area Network (LAN), Network Address Translation (NAT), MAC filtering, Parental control, Firewall, Quality of Service (QoS), Routing and more. In most cases, you will not need to modify settings in the Advanced setup section, and we recommend that you do not change any of the settings unless you are sure of the effect that the changes will have, and have a backup of your current working configuration. - Page 24 24 of 90 Figure 26 – WAN Service - Interface Configuration Select a WAN service type to use with the WAN connection. The available options are PPP over Ethernet (PPPoE), IP over Ethernet (IPoE) and Bridging. Enter a Service Description to identify the connection, an 802.1P Priority, an 802.1Q VLAN ID and a VLAN TPID.
-
Page 25: Pppoe
25 of 90 PPPoE If configuring the WAN connection for PPPoE: Enter the Username and Password information. Select if you require NAT, Firewall, Static IP address or IGMP Multicast. This information may be provided by your ISP. Figure 28 – WAN Service – WAN Service Configuration PPPoE Select the Default Gateway for the connection. - Page 26 26 of 90 Configure where the DNS Server for the interface should be received from. To use the PPPoE WAN connection, use the first option. If you wish to use static DNS servers, such as Google or Cloudflare, enter them in the Static DNS IP addresses fields. Figure 30 –...
-
Page 27: Ipoe
27 of 90 IPoE If configuring the WAN connection for IPoE: Enter information for the WAN IP. If setting the Gateway to Obtain an IP address automatically, enter any IP options where they are provided by your ISP. If setting the Gateway to Use a static IP address enter the WAN IP address, mask, gateway and DNS configuration as supplied by your ISP. - Page 28 28 of 90 Figure 33 – WAN Service – WAN Service Configuration IPoE Select the Default Gateway for the connection. If multiple Gateways are available, they can be added to the Available Routed WAN Interfaces list in order of priority by using the arrow buttons. Figure 34 –...
- Page 29 29 of 90 Configure where the DNS Server for the interface should be received from. To use the IPoE WAN connection, use the first option. If you wish to use static DNS servers, such as Google or Cloudflare, enter them in the Static DNS IP addresses fields. Figure 35 –...
-
Page 30: Bridging
30 of 90 Bridging If configuring the WAN connection as Bridging: Review the WAN Setup – Summary page, then select Apply/Save to create the WAN connection. Figure 37 – WAN Service – WAN Service Configuration Bridging AXE11000 Wi-Fi 6E Gateway – User Guide UG01465 v. -
Page 31: Lan
31 of 90 IPv4 Autoconfig The LAN page allows you to modify settings for the Local Area Network (LAN). Figure 38 – LAN – IPv4 Autoconfig The following options are available to configure: P a r a m e t e r D e f i n i t i o n IP Address Enter the Local IP Address to use for the Gateway. - Page 32 32 of 90 Table 4 – IPv4 Autoconfig settings table Configuring the DHCP Server The DHCP server on the Gateway allows you to automatically assign addresses to devices on the network. In most circumstances you will not need to modify these settings. Do not disable the DHCP server unless you understand that you will have to manually assign IP Note –...
-
Page 33: Ipv6 Autoconfig
33 of 90 Figure 40 – LAN – IPv4 Autoconfig – Add Entries Select Apply / Save to create the entry. IPv6 Autoconfig The IPv6 LAN Auto Configuration page allows you to configure IPv6 on the LAN. Figure 41 – LAN – IPv6 Autoconfig The following parameters are configurable on the page: O p t i o n D e f i n i t i o n... - Page 34 34 of 90 Enable DHCPv6 Select the checkbox to enable the DHCPv6 Server. Server Stateless IPv6 hosts can configure themselves automatically when connected to a routed IPv6 network using Internet Control Message Protocol version 6 (ICMPv6) router discovery (for DHCPv6 messages.
-
Page 35: Vlan Setting
35 of 90 VLAN Setting The VLAN Setting page allows you to specify VLAN tagging on a specific Ethernet port. Figure 42 – LAN – VLAN Tagging Select the LAN port using the drop-down menu, then Select the Add button. Enter the VLAN ID, then, in the Pbits field, enter a value from 0-7 indicating the priority bits that dictates the priority of the VLAN. -
Page 36: Port Triggering
36 of 90 Figure 44 – NAT – Virtual Servers – Add virtual server F i e l d D e s c r i p t i o n Select a Service or Select a pre-configured port forwarding rule or choose custom server to create custom Server your own port forwarding rule. - Page 37 37 of 90 Figure 45 – NAT – Port triggering Select the Add button and configure the port settings from an existing application in the drop-down list or create your own custom application. Figure 46 – NAT – Port triggering – Add port triggering rule F i e l d D e s c r i p t i o n Select an...
-
Page 38: Dmz Host
38 of 90 DMZ Host DMZ stands for Demilitarized Zone. When the DMZ is configured, the Gateway will forward IP packets from the Wide Area Network (WAN) that do not belong to any of the applications configured in the Virtual Servers table or being used in the Virtual Server table to the DMZ host. -
Page 39: Security
39 of 90 Security IP Filtering MAC Filtering The Gateway offers the ability to use MAC Address filtering when the WAN connection type is set to Bridged mode. You can elect to block or allow connections based on MAC Address criteria. The default policy is to allow all connections. -
Page 40: Parental Control
40 of 90 Parental Control The Parental Control feature allows you to take advanced measures to ensure the devices connected to the network are can only access the internet when and how you decide. Time restriction This Parental Control function allows you to restrict access from a Local Area Network (LAN) connected device to an outside network through the router on selected days and at certain times. -
Page 41: Url Filter
41 of 90 URL filter With the URL filter, you can add certain websites or URLs to a safe or blocked list. This will provide you added security to ensure any website you deem unsuitable will not be able to be seen by anyone who is accessing the Internet via the Gateway. -
Page 42: Firewall
42 of 90 Firewall The Firewall page allows you to configure the firewall on the Gateway, including creating custom rules to allow specific traffic to transverse the Gateway. Select the Enabled checkbox to enable the Firewall. Figure 55 – Firewall Level Rule The Level Rule allows you to enable or disable a specific Chain Level. - Page 43 43 of 90 Figure 57 – Firewall – Add Chain Rule Use the following parameters to create a rule: F i e l d D e s c r i p t i o n Select Chain If this rule should apply to an existing chain, select the chain from the dropdown. If the rule should start a new chain, select New Chain from the dropdown.
- Page 44 44 of 90 Protocol Select: TCP, UDP or TCP/UDP Source Port Specify a source port. Source Port Range Specify a range of possible source ports. Dest Port Specify a destination port. Dest Port Range Specify a range of possible destination ports. Apply/Save button Select the Apply/Save button to save the firewall rule and add it to the Chain Rule table, see previous.
-
Page 45: Quality Of Service
45 of 90 Quality of Service The Quality of Service (QoS) option found in the Advanced Setup drop-down menu configures access related parameters for the following: QoS Queue ⚫ QoS Classification ⚫ QoS Port Shaping ⚫ Quality of Service offers a defined level of performance on your home network – for example the ability to guarantee that video traffic is given priority over other network traffic to ensure that video conferencing is not disrupted by other network traffic. - Page 46 46 of 90 Queue Configuration Select the Add button to add a QoS Queue. The QoS Queue Configuration page is shown. Figure 60 – Quality of Service – QoS Queue Configuration The above screen allows you to configure a QoS queue entry and assign it to a specific network interface. Each of the queues can be configured for a specific precedence.
-
Page 47: Qos Classification
47 of 90 WLAN Queue The QoS WLAN Queue page displays a summary of the QoS Configuration. Figure 61 – Quality of Service – WLAN Queue QoS Classification The QoS Classification page manages the QoS classification configuration on the Gateway. QoS Classification is the process of identifying and classifying the different types of traffic which are transiting the Gateway, so it can be correctly processed in the QoS queue. -
Page 48: Qos Port Shaping
48 of 90 Figure 63 – Quality of Service – Add Network Traffic Class Rule The Add Network Traffic Class Rule page creates a traffic class rule to classify the upstream traffic, assign queuing priority and optionally overwrite the IP header TOS (type of service) byte. A rule consists of a class name and at least one condition. - Page 49 49 of 90 1ms at the Gigabit Ethernet line rate. After 1ms of burst data at full gigabit speed, the speed is shaped to 200Mbps. Figure 64 – Quality of Service – QoS Port Shaping Setup The following table explains the parameters on the QoS Port Shaping Setup page: I t e m D e s c r i p t i o n Interface...
-
Page 50: Routing
50 of 90 Routing The Routing option found in the Advanced Setup drop-down menu configures access related parameters for the following: Default Gateway ⚫ Static Route ⚫ Policy Routing ⚫ ⚫ Default Gateway Select your preferred WAN interface from the available options. Use the arrow buttons to move the available Routed WAN Interfaces listed on the right to the group of required Default Gateway Interfaces in the list on the left. -
Page 51: Static Route
51 of 90 Static Route The Static Route page allows static routes to be configured on the Gateway. Figure 66 – Routing – Static Route To add a static route: Select the Add button to add a static route. The Static Route Add page opens. Select the IP Version from the drop-down menu, enter the Destination Network Address, select an Interface, and enter the Gateway IP Address. -
Page 52: Policy Routing
52 of 90 Policy Routing The Policy Routing page allows you to add policy rules to certain situations. Figure 68 – Routing – Policy Routing To add a policy route: Select the Add button to add a policy route. The Policy Routing Setup page is displayed. Figure 69 –... -
Page 53: Rip
53 of 90 The Routing Information Protocol (RIP) allows gateways to exchange network topology information. This information allows the automatic creation and updating of routing tables. RIP cannot be selected for a WAN interface which is NAT enabled, such as PPPoE. Note –... - Page 54 54 of 90 When a user enters a URL e.g., www.casa-systems.com into their browser, your gateway is contacting the DNS server and requesting the webserver IP address. Hostname URLs are easier for humans to understand and remember than IP address numbers. A host’s IP addresses can change from time to time hence a DNS server is required to locate and translate a hostname.
-
Page 55: Dynamic Dns
55 of 90 IPv6 DNS info from WAN Use IPv6 DNS server provided from your ISP automatically from the assigned interface interface. Static IPv6 DNS IP Specify your own Primary and Secondary IPv6 DNS server. Address Apply/Save Button Click the Apply/Save button to initiate the change. Table 14 –... -
Page 56: Upnp
56 of 90 Enter the username and password for your dynamic DNS account. Select Apply / Save. UPnP Universal Plug and Play (UPnP) is a set of networking protocols that can allow networked devices, such as computers, printers, gaming console, Wi-Fi access points and mobile phones to automatically detect each other's presence on the network and establish functional network services for data sharing, communications, and entertainment. -
Page 57: Dlna
57 of 90 Proxy names can also be custom: quick.uiaccess, goto.gatewayui, etc. DLNA The DLNA page allows you to enable or disable and configure the DLNA digital media server. DLNA allows you to stream digital media that is stored on an external storage device that is connected via USB to the Gateway. -
Page 58: Interface Grouping
58 of 90 Figure 78 – Storage Service – User Account configuration Interface Grouping Port Mapping allows you to create groups composed of the various interfaces available on your gateway. These groups then act as separate networks. Figure 79 – Interface grouping Select Add to create an Interface Group. - Page 59 59 of 90 Figure 80 – Interface grouping – Create interface group Enter a group name and then use the arrow buttons to select which interfaces you wish to group. If applicable, enter a DHCP Vendor ID to automatically place those devices in the group (for example IP telephones or network switches).
-
Page 60: Wireless
60 of 90 Wireless Your Gateway is configured with three Wi-Fi bands, 2.4GHz, 5GHz and 6GHz. Each can be configured independently of the other. All pages contain the same configuration settings, aside from 6GHz, which does not include the WPS page. Select the appropriate band you want to configure from the navigation bar to the left of the page. -
Page 61: Security
61 of 90 The following settings can be configured on this page: P a r a m e t e r D e f i n i t i o n Wireless Interface Select the wireless interface to configure. Mode Allows you to select the mode that the wireless radio operates in. -
Page 62: Wps
62 of 90 The following security settings can be configured on this page: P a r a m e t e r D e f i n i t i o n Wireless Select the SSID to apply the security settings to. Interface Network Select the Wireless security type to use with the wireless network. -
Page 63: Mac Filter
63 of 90 MAC filter The MAC Filter page allows you to add or remove the MAC Address of devices which will be allowed or denied access to the wireless network. First use the Wireless Interface drop-down list to select the wireless network you wish to configure, then change the MAC Restrict Mode setting from Disabled, then select to either Allow or Deny access to the MAC addresses listed. -
Page 64: Advanced
64 of 90 Advanced The Advanced wireless page allows you to configure detailed wireless network settings such as the band, channel, bandwidth, transmit power, and preamble settings. Figure 86 – Wireless – Advanced The following advanced configuration options are available: P a r a m e t e r D e f i n i t i o n Channel Specification... - Page 65 65 of 90 (2.4 GHz and 802.11n This option is only visible when 802.11n mode is set as Disabled. disabled only) 802.11n Protection The 802.11n standards provide a protection method so 802.11b/g and 802.11n devices can co-exist in the same network without “speaking” at the same time.
- Page 66 66 of 90 Select On to enable this is special frame-bursting accelerating technology for XPress Technology IEEE802.11g. The default is: On Beamforming Changes the Beamforming Transmission type. The default transmission type Transmission (BFR) is VHT MU + HE MU + CQI BFR. This is the recommended transmission type. Beamforming Reception Select SU (Single-User) BFE to concentrate the transmission signal at the (BFE)
-
Page 67: Voice
67 of 90 Voice This section explains how to configure the VoIP settings of the Gateway. VoIP allows you to use a traditional landline handset with your broadband connection, with calls routed over the internet. To configure VoIP, you will require a VoIP account, usually bundled alongside your internet connection as an add on. Contact your ISP for further information. - Page 68 68 of 90 Figure 88 – VoIP – SIP basic setting The individual fields shown above on the SIP Basic Settings page are explained in the following table. O p t i o n D e f i n i t i o n Bound Interface Select the Interface that the VoIP account will use to make a connection to the Name...
- Page 69 69 of 90 Use SIP Outbound Some network service providers require the use of an outbound proxy. This is an Proxy additional proxy, through which all outgoing calls are directed. In some cases, the outbound proxy is placed alongside the firewall and it is the only way to let SIP traffic pass from the internal network to the Internet.
-
Page 70: Sip Advanced Setting
70 of 90 SIP Advanced Setting The SIP Advanced page allows you to configure settings that your VoIP service provider has enabled on your SIP account and if you have the appropriate call features and other functionality on your cordless or corded phone handsets. - Page 71 71 of 90 Figure 90 – VoIP – SIP Advanced Setting Continued To configure the SIP advanced settings, the following parameters are configurable: P a r a m e t e r D e f i n i t i o n Line Displays the phone port you want to configure Call Waiting...
- Page 72 72 of 90 Select this option if your VoIP Service Provider has enabled Call Forwarding on Forward Unconditionally your SIP account and you wish to use this feature. Forward On “busy” Select this option if your VoIP Service Provider has enabled Call Forwarding on your SIP account and you wish to use this feature.
-
Page 73: Configuring A Voip Dial Plan
73 of 90 Set the DSCP QoS tagging for Real-time Transport Protocol. You can select it DSCP for RTP from the drop-down list. Dtmf Relay Setting Set DTMF transmit method, which can be following values: SIP Info: Use SIP INFO message to transmit DTMF digits. RFC2833: Use RTP packet to encapsulate DTMF events, as specified in RFC 2833. - Page 74 74 of 90 Indicates that an additional time out period of 4 Timer .t (dot t) seconds should take place before automatic dialling starts Table 20 – Dial Plan Syntax table Dial plan example: Australia Dial Plan 000|[*#]X[0-9*]|*#X[0-9*]|00[1- 9]XX.t|014XXXXXXX|016XXXXXX|0192X|0198XXXXXX|0[23478]XXXXXXXX|0500XXXXXX|11XX|123X|12 4XX|1251XX|1252XXX|1255X|1258XXX|1271X|130XXXXXXX|13[1-9]XXX|1802XXX|189XX|1[8- 9]XXXXXXXX|[2-9]XXXXXXX 000 = Australia Emergency Call Service 0011*t = International number (After 0011 the router allows entry of arbitrary digits then and dials out...
-
Page 75: Sip Star Code Setting
75 of 90 SIP Star Code Setting The SIP Star Code Setting page provides you with the ability to configure the codes used to active and deactivate call features such as call forwarding and call waiting. Please consult your VoIP provider if SIP Star Code is supported on SIP side. Figure 91 –... -
Page 76: Sip Error Information
76 of 90 P a r a m e t e r D e f i n i t i o n Dial tone time Set the Dial tone duration. Busy tone time Set the Busy tone duration. Inter digit time Set the timing between digits. -
Page 77: Diagnostics
77 of 90 Diagnostics Ping The Ping page allows you to ping a remote IP address or hostname to test the internet connection. Figure 94 – Diagnostics – Ping AXE11000 Wi-Fi 6E Gateway – User Guide UG01465 v. 1.00 5 December 2023... -
Page 78: Traceroute
78 of 90 Traceroute The Traceroute page allows you to perform a traceroute to a remote IP or hostname. A traceroute works by sending Internet Control Message Protocol (ICMP) packets, and every router involved in transferring the data gets these packets. The ICMP packets provide information about whether the routers used in the transmission can effectively transfer the data. -
Page 79: Diagnostics
79 of 90 Diagnostics The Diagnostics menu provides feedback on the connection status of the device. The individual tests are listed below. If a test displays a FAIL status: Select the Help link and follow the troubleshooting procedures in the Help screen that appears. After following the troubleshooting procedures, select Rerun Diagnostic Tests at the bottom of the screen to re-test and confirm the error. -
Page 80: Management
80 of 90 Management Settings The Settings section allows you to back up and restore your Gateway configuration and restore the Gateway to factory defaults. Backup The Backup feature allows you to take a snapshot of the current configuration of your gateway so that you can roll back to the current configuration if you plan to make changes. -
Page 81: Restore Defaults
81 of 90 Restore defaults The Restore defaults page allows you to factory reset the gateway. All settings will be erased and reset to the gateway will be reset to its default configuration. Select the Restore Default Settings button to perform the reset. - Page 82 82 of 90 Figure 101 – Management – System Log – View System Log To configure the System Log, select the Configure System Log button. Figure 102 – Management – System Log – Configure System Log To configure the System Log, update the following parameters: O p t i o n D e f i n i t i o n Enables or disables the logging function.
-
Page 83: Security Log
83 of 90 Security Log The Security Log page allows you to view a log of security events which have occurred on the Gateway, such as user log ins. Figure 103 – Management – Security Log To view the Security Log, select the View button. The Security Log opens in a new window. Figure 104 –... -
Page 84: Snmp Agent
84 of 90 SNMP Agent The Simple Network Management Protocol (SNMP) allows a network administrator to monitor a network by retrieving settings on remote network devices. To do this, the administrator typically runs an SNMP management station program such as MIB browser on a local host to obtain information from the SNMP agent, in this case the Gateway (if SNMP is enabled). -
Page 85: Tr-069 Client - Configuration
85 of 90 TR-069 Client - Configuration TR-069 enables provisioning, configuration, or diagnostics to be automatically performed on your router by your Internet Service Provider (ISP). Generally, TR-069 will be preconfigured, and you will not be required to updated these settings. Figure 107 –... -
Page 86: Internet Time
86 of 90 Internet Time The tools on the Internet Time page allow you to use the Network Time Protocol (NTP) to configure specific time servers to synchronise time, set local time zones, etc. for the modem. The time servers are correct to within a few milliseconds of Coordinated Universal Time (UTC). -
Page 87: Passwords
87 of 90 Passwords The Passwords page allows you to configure the password for your Gateway. Note – If you forget the password to your Gateway after changing it, you can reinstate the default password by performing a reset using the Reset button. -
Page 88: Access List
88 of 90 Access List The Access List page is used to restrict access to the web interface by IP. When the Access List functionality is enabled, only those IP addresses in the list can access management services on the Gateway. Figure 111 –... -
Page 89: Services Control
89 of 90 Services Control The Service Control List (SCL) allows you to enable or disable your Local Area Network (LAN) or Wide Area Network (WAN) services by selecting the LAN or WAN checkbox and specifying the service port assigned to the service. -
Page 90: Update Software
90 of 90 Update Software The Update Software page is used to manually update your Gateway’s firmware. Some ISPs may have their own custom firmware for the Gateway and manage this for you remotely. In this situation, Important – manually updating the firmware yourself could cause issues with your router, so we recommend that you consult with your ISP before installing any software updates manually.
Need help?
Do you have a question about the NetComm CF60 and is the answer not in the manual?
Questions and answers