Advertisement
Advertisement
Table of Contents

Related Manuals for Casa Systems NetComm CF30


Summary of Contents for Casa Systems NetComm CF30
- Page 1 Wi-Fi 6 Gateway CF30 SEAMLESS WI-FI COVERAGE...
-
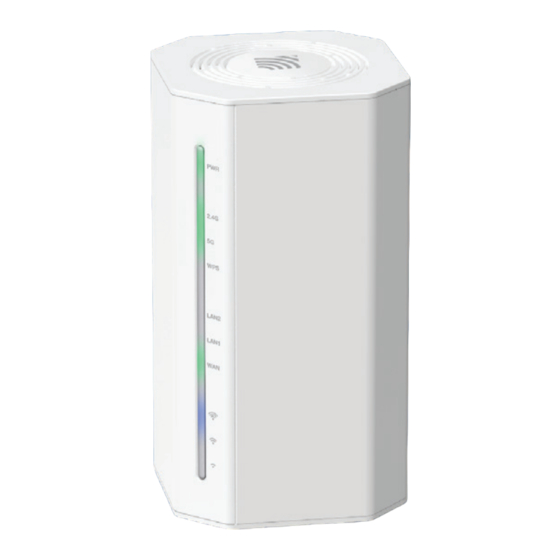
Page 2: You Will Need
PRE-CONFIGURED? If you received your gateway from your service provider and they have provided you with their own instructions, refer to those to complete the setup. In some cases, the gateway has been pre-configured for you and is ready to use. Otherwise, you will need to complete the setup yourself. -
Page 3: Before You Begin
BEFORE YOU BEGIN Ensure that you have the following information from your service provider: - How your Internet service will physically connect to your gateway - The Settings specific to your type of service. There are two primary ways to connect your gateway to the Internet service: Ethernet WAN This is the most common access type in Australia and New Zealand... - Page 4 Label The Wi-Fi Network Name and Wi-Fi Password are case sensitive Wi-Fi Security Card...
- Page 5 CONNECTING TO THE WI-FI 6 GATEWAY There are two ways that you can connect a wireless device to your Wi-Fi gateway: Using your wireless device, scan the QR code on the gateway’s label or the Wi-Fi Security Card (see example on page 4). Select “Join Wi-Fi Network”...
- Page 6 Wi-Fi 6 Gateway Ethernet cable Power outlet Power adaptor Power adaptor...
- Page 7 HYBRID FIBRE COAXIAL (HFC) nbn™ connection box Ethernet cable The Ethernet cable connects to the UNI-D port on the nbn™ connection box. Power adaptor...
- Page 8 Wi-Fi 6 Gateway Ethernet cable Power adaptor...
- Page 9 FIBRE TO THE PREMISES (FTTP) nbn™ connection box The Ethernet cable connects to the UNI-D port on the nbn™ connection box. Power adaptor Ethernet cable Power outlet...
- Page 10 Wi-Fi 6 Gateway Ethernet cable Power outlet Power adaptor Power adaptor...
- Page 11 FIBRE TO THE CURB (FTTC) nbn™ connection box Wait for the lights on the nbn™ connection box to turn blue (this may take up to 15 minutes) and then connect your Wi-Fi 6 Gateway Telephone Ethernet cable cable Power adaptor The Ethernet cable connects to the UNI-D port on the nbn™...
- Page 12 Wi-Fi 6 Gateway Ethernet cable Power adaptor...
- Page 13 FIBRE TO THE NODE (FTTN) AND FIBRE TO THE BUILDING (FTTB) CONNECTIONS Telephone wall plate DSL Box Telephone cable Ethernet cable Power adaptor Power outlet...
-
Page 14: Connecting With Wi-Fi
Wi-Fi 6 Gateway Power button CONNECTING WITH WI-FI Turn on the Wi-Fi Gateway. Wait a few minutes for it to start up. Type the Wi-Fi Network Name and Wi-Fi Password on the Wi-Fi Security Card into your wireless device when connecting or scan the QR code. - Page 15 TYPE The Wi-Fi Network Name and Wi-Fi Password are case sensitive. SCAN...
-
Page 17: Configuring Your Gateway
CONFIGURING YOUR GATEWAY To complete the setup, you will need the following information from your service provider: - Connection type (PPPoE/Dynamic IP/Static IP) - Other specifics depending on your connection type including VLAN Tag, WAN IP Address, Subnet Mask and DNS Servers When you have the necessary information, follow these steps: Push the power button on the back of the Wi-Fi Gateway to turn it on. - Page 18 PAIR TWO CF30S USING EASYMESH To pair two CF30s using EasyMesh, one CF30 is set as the Wi-Fi Gateway, the other is set as a Wi-Fi Satellite. SET ONE CF30 AS WI-FI GATEWAY To set one CF30 as the Wi-Fi Gateway: Connect the power supply to the CF30.
- Page 19 On the EasyMesh Interface Setup page: - Create a Device Name. - Select the Function as Wi-Fi Gateway. - Set the preferred System Communications Band as either 5GHz or 2.4GHz. Press the Apply Changes button to set the CF30 as the Wi-Fi Gateway. Power outlet Power adaptor Power button...
- Page 20 SET THE OTHER CF30 AS WI-FI SATELLITE To set one CF30 as the satellite: Connect the power supply to the CF30. Push the power button on the back of the Wi-Fi Satellite CF30 to turn it on. Wait a few minutes for it to complete starting up. Connect to the gateway using Wi-Fi or an Ethernet cable to the yellow LAN port.
- Page 21 INITIATE THE PAIRING PROCESS Move the two CF30s to within a metre of each other To pair, press the WPS buttons on both units within two minutes of one other. Once they are paired – the LED lights at the bottom of the LED display on the front of each CF30 will illuminate and indicate signal strength.
- Page 22 NetComm Wireless Limited is part of Casa Systems, Inc. Casa Systems, the future of NetComm ANZ HEAD OFFICE SYDNEY Casa Systems Inc. 18-20 Orion Road, Lane Cove NSW 2066, Sydney Australia +61 2 9424 2070 www.netcomm.com CORPORATE HEADQUARTERS ANDOVER Casa Systems Inc.
Need help?
Do you have a question about the NetComm CF30 and is the answer not in the manual?
Questions and answers