Advertisement
Upholstered Sleigh King Bed
Upholstered Sleigh Queen Bed
BR-310034
ASSEMBLY INSTRUCTIONS
Est. Assembly Time: 15 mins
Number of People: 2
Date:
2024/3/1
Page 1 / 10
For assistance with assembly or customer service, please contact the Abbyson Customer Experience Team
Toll Free at 1-888-406-0838
www.abbyson.com
Advertisement
Table of Contents

Related Manuals for Abbyson BR-310034


Summary of Contents for Abbyson BR-310034
- Page 1 Upholstered Sleigh Queen Bed BR-310034 ASSEMBLY INSTRUCTIONS Est. Assembly Time: 15 mins Number of People: 2 Date: 2024/3/1 Page 1 / 10 For assistance with assembly or customer service, please contact the Abbyson Customer Experience Team Toll Free at 1-888-406-0838 www.abbyson.com...
-
Page 2: Important Safety Instructions
Do not over-tighten screws or bolts. TABLE OF CONTENTS Package Contents Page 3 Parts List Pages 4 Hardware List Page 5 Assembly Instructions Page 6-9 Care & Maintenance / Warnings Page 10 Date: 2024/3/1 Page 2 / 10 www.abbyson.com | 1-888-406-0838... - Page 3 Thank you for your purchase. Be sure to check all packing material carefully for small parts which may have come loose inside the carton during shipment. Identify and count all parts and compare with the parts and hardware lists. Date: 2024/3/1 Page 3 / 10 www.abbyson.com | 1-888-406-0838...
-
Page 4: Parts List
Thank you for your purchase. Be sure to check all packing material carefully for small parts which may have come loose inside the carton during shipment. Identify and count all parts and compare with the parts and hardware lists. Date: 2024/3/1 Page 4 / 10 www.abbyson.com | 1-888-406-0838... -
Page 5: Hardware List
Thank you for your purchase. Be sure to check all packing material carefully for small parts which may have come loose inside the carton during shipment. Identify and count all parts and compare with the parts and hardware lists. Date: 2024/3/1 Page 5 / 10 www.abbyson.com | 1-888-406-0838... - Page 6 1. Attach the headboard (A) to the side rails (B & C) by fastening the sideboard connecting brackets (pre-assembled) to each side of the headboard. Insert the bolt into the location shown on the image. Once assembled it should be firmly secured. Date: 2024/3/1 Page 6 / 10 www.abbyson.com | 1-888-406-0838...
- Page 7 Insert the bolt into the location shown on the image below. Once assembled it should be firmly secured. STEP 4 Attach the support leg 1. Hand screw support legs (G) into middle bar (F). Date: 2024/3/1 Page 7 / 10 www.abbyson.com | 1-888-406-0838...
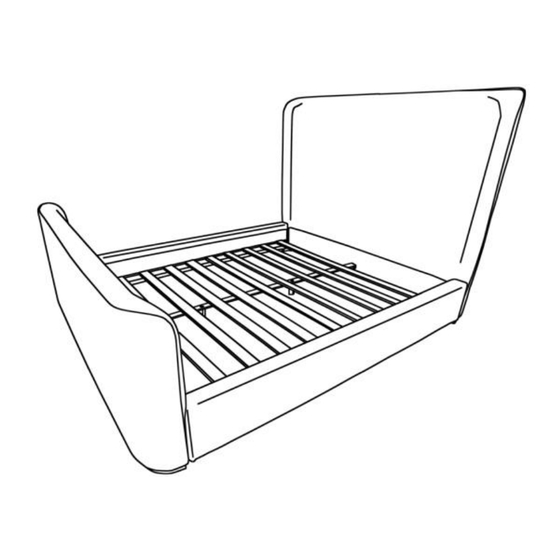
- Page 8 1. Hook middle bar (F) to pre-assembled connecting brackets on headboard (A) and footboard (D). STEP 6 Attach bed slats 1. Attach bed slats (H) to the side rails and middle bar using a Phillips screwdriver and screws (L). Date: 2024/3/1 Page 8 / 10 www.abbyson.com | 1-888-406-0838...
- Page 9 STEP 7 Adjust the support leg 1. Adjust the support leg (G) until the legs are in contact with the floor. Bed should be level when adjusted properly. Date: 2024/3/1 Page 9 / 10 www.abbyson.com | 1-888-406-0838...
-
Page 10: Care And Maintenance
Do not use this product as a stepladder. Use this product for intended purpose only. Intended for residential use only. Thank you for bringing Abbyson into your home. We truly appreciate your business. To discover more home furnishings that fit your style visit us at Abbyson.com. Date:...
Need help?
Do you have a question about the BR-310034 and is the answer not in the manual?
Questions and answers