Table of Contents
Advertisement
Quick Links
Assembly Instructions & User's Manual
For
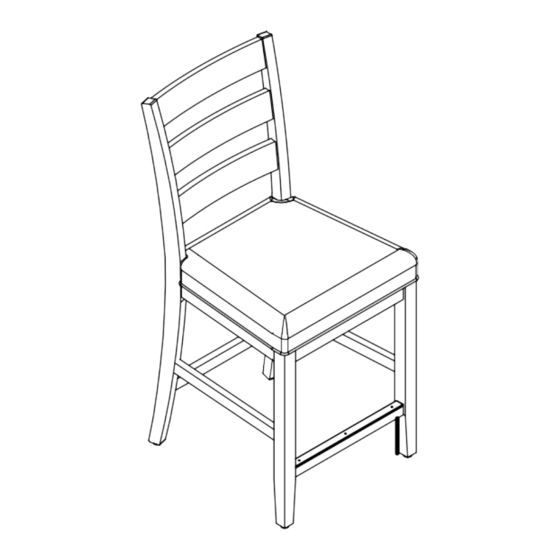
Kaylen 5pc High Dining Set, Ash blonde - Chair
Item Number: 990292966
Model Number: TP-0002ASHB5PDI
Abbyson Customer Experience Team (spare/replacement parts): 1-888-406-0838
or Email:
samsclub@abbysonliving.com
THIS ASSEMBLY MANUAL CONTAINS IMPORTANT SAFETY INFORMATION.
PLEASE READ AND KEEP FOR FUTURE REFERENCE.
1 | P a g e
Advertisement
Table of Contents

Related Manuals for Abbyson Kaylen TP-0002ASHB5PDI


Summary of Contents for Abbyson Kaylen TP-0002ASHB5PDI
- Page 1 Assembly Instructions & User’s Manual Kaylen 5pc High Dining Set, Ash blonde - Chair Item Number: 990292966 Model Number: TP-0002ASHB5PDI Abbyson Customer Experience Team (spare/replacement parts): 1-888-406-0838 or Email: samsclub@abbysonliving.com THIS ASSEMBLY MANUAL CONTAINS IMPORTANT SAFETY INFORMATION. PLEASE READ AND KEEP FOR FUTURE REFERENCE.
-
Page 2: Table Of Contents
Table of Contents Important Safety Information ......................3 Before Assembly ............................3 Care & Use ............................... 3 Package Contents ............................4 Product Information ............................ 4 Components ..............................5 Hardware ..............................5 Tools ................................5 Step 1 – Step 6............................6,9 Warning ............................ -
Page 3: Important Safety Information
Important Safety Information ● Please read all instructions carefully before assembling this product. ● Where applicable, and for your safety, assembly by an adult is strongly recommended. ● Use only vendor-supplied hardware to assemble this item. Using unauthorized hardware could jeopardize the structural integrity of the item. ●... -
Page 4: Package Contents
Package Contents Component Description Quantity Component Description Quantity Backrest Front stretcher Seat Cushion Left stretcher Right stretcher Front left leg Front right leg Product Information Product Dimensions: 40.63” x 22.13" x 19”H (103cm x 56cm x 48cm) Product Weight Capacity: Chair Supports up to 300 lbs. (136 kg) 4 | P a g e... -
Page 5: Components
Components Backrest (1) Seat Cushion (2) Front left leg (3) Qty: 1 Qty: 1 Qty: 1 Front right leg (4) Front stretcher (5) Left stretcher (6) Qty: 1 Qty: 1 Qty: 1 Right stretcher (7) Qty: 1 Hardware Hex Nut (A) Spring washer 5/16"... -
Page 6: Step 1 - Step 6
Step 1 Attach the Backrest (1) to the Seat Cushion (2) Use then bolt, spring washer, flat washer (E) to attach the assembled seat frame to the middle rail of one backrest with the provided Allen key (G) Note: Do not over tighten the bolts. 6 | P a g e... - Page 7 Step 2 Use then bolt, spring washer, flat washer (F) to attach the assembled seat frame to the middle rail of one backrest with the provided Allen key (G) Note: Do not over tighten the bolts. Step 3 Step 3.1: Attach the Right stretcher (7) to the Backrest (1) Step 3.2: Attach the Front right leg (4) to the Seat Cushion (2) and Right stretcher (7) Step 3.3: Attach the Left stretcher (6) to the Backrest (1) Step 3.4: Attach the Front left leg (3) to the Seat Cushion (2) and Left stretcher (6)
- Page 8 Step 4 Use the flat washer (C), the spring washer (B), and hex nut (A). Then tightly fasten all bolts with the provided lock wrench (H). Repeat for other side A B C Step 5 Step 5: Tighten screws (D) by screw driver into all stretchers (5) (6) (7). 8 | P a g e...
-
Page 9: Warning
Step 6 Turn the seat over when assembly is complete. To adjust chair level, twist the nylon glide on bottom of chair legs until sturdy. Repeat the same procedure to assemble the other chairs. Warning ● Do not use this product unless all screws and bolts are securely tightened. ●... -
Page 10: Care & Use And Storage Instructions
Care & Use Instructions Use clean and soft rags or cloths to wipe off dust on the surface along the grains. Always keep surfaces clear of any acid or chemical substances. Avoid cleaners that use chemical products. Avoid placing furniture in direct sunlight. Avoid extreme Care changes in temperature by arranging furniture away from radiators, heat, and air conditioning units. -
Page 11: Warranty Information
Warranty Information Warranty This product is covered by the Sam's Club Member Satisfaction Guarantee. Please visit samsclub.com for more information. This product’s components have a 1-year guarantee against defects in material and/or workmanship. If you have any questions regarding the warranty or spare / replacement parts, please call our toll-free number 1-888-406-0838 or email us at samsclub@abbysonliving.com NOTE: Please consider recycling all applicable packaging material.
Need help?
Do you have a question about the Kaylen TP-0002ASHB5PDI and is the answer not in the manual?
Questions and answers