Table of Contents
Advertisement
Quick Links
Assembly Instructions & User's Manual
For
Details by Becki Owens Ren 7-Piece Expandable
Dining Set, Distressed Natural - Table
Item Number:
990314015
Model Number:
TP-M4-NT-7PCDI
Customer Assistance
:
1-888-406-0838
(spare/replacement parts)
or Email:
samsclub@abbysonliving.com
THIS ASSEMBLY MANUAL CONTAINS IMPORTANT SAFETY INFORMATION.
PLEASE READ AND KEEP FOR FUTURE REFERENCE.
1 |
P a g e
Advertisement
Chapters
Table of Contents
Troubleshooting

Related Manuals for Abbyson TP-M4-NT-7PCDI


Summary of Contents for Abbyson TP-M4-NT-7PCDI
- Page 1 Assembly Instructions & User’s Manual Details by Becki Owens Ren 7-Piece Expandable Dining Set, Distressed Natural - Table Item Number: 990314015 Model Number: TP-M4-NT-7PCDI Customer Assistance 1-888-406-0838 (spare/replacement parts) or Email: samsclub@abbysonliving.com THIS ASSEMBLY MANUAL CONTAINS IMPORTANT SAFETY INFORMATION. PLEASE READ AND KEEP FOR FUTURE REFERENCE.
-
Page 2: Table Of Contents
Table of Contents Quality Statement ............................. 3 Important Safety Information ........................ 3 Before Assembly ............................3 Care & Use ..............................3 Package Contents ............................ 4 Product Information ..........................4 Components .............................. 5 Hardware ..............................5 Tools ................................5 Step 1 ................................6 Step 2 ................................ -
Page 3: Quality Statement
Quality Statement Important Safety Information • Please read all instructions carefully before assembling this product. • Where applicable, and for your safety, assembly by an adult is strongly recommended. • Use only vendor-supplied hardware to assemble this item. Using unauthorized hardware could jeopardize the structural integrity of the item. -
Page 4: Package Contents
• To avoid damage refrain from stacking large and/or heavy objects on top of the furniture. • Avoid cleaners which use chemical products. Many of these are harsh and not safe for use on upholstery Package Contents Component Description Quantity Component Description Quantity... -
Page 5: Components
Components TABLE TOP (A) MOUNTING PLATE(B) TABLE LEG (C) STRETCHER (D) Qty: 1 (Already on Table top) Qty: 4 Qty: 1 Qty: 2 Hardware Long bolt (E) Ø5/16" x 1 3/4"L Short bolt (F) Ø5/16" x 3"L spring washer Ø5/16" x 13mm spring washer Ø5/16"... -
Page 6: Step 10
Step 1 Remove mounting plate(B) from top table(A) by the bolt, spring washer, flat washer (E) use allen key (G). Note: Keep the bolt, spring washer, flat washer (E) for next step. Step 2 Attach the mounting plate (B) to the corresponding holes on the table leg (C). then using the allen key (G) to tighten bolts, spring washer, flat washer (E). - Page 7 Step 3 Attach the stretcher (D) to the table leg (C). then using the allen key (G) to tighten bolts, spring washer, flat washer (F). Note: don't tighten the bolts. P a g e...
- Page 8 Step 4 Attach the mounting plate (B) to the corresponding holes on the table top wood frame (A). Then using the allen key (G) to tighten bolts, spring washer, flat washer (E). Step 5 Once all fixings are fully tightened, ask somebody to assist you with turning the table over to complete assembly.
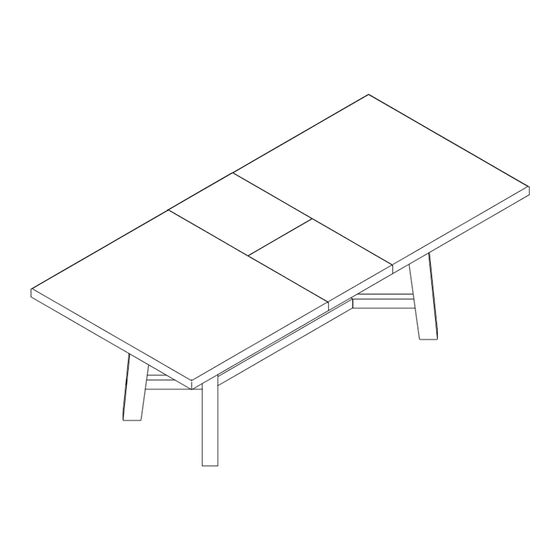
- Page 9 Step 6 Step 7 To expand the table top, twist to unlock the key Drag the table to both sides in the direction of the on bottom of the middle connection. arrow Step 8 Step 9 Flip the middle panel. Open and unfold the middle panel.
- Page 10 Step 10 Step 11 Assembly is complete. 10 | P a g e...
-
Page 11: Warning
Warning • Do not use this product unless all screws and bolts are securely tightened • Check that all screws and bolts are secure every three months or as needed • Dispose of packing material properly. Do not use plastic cover as head covering as it may cause suffocation •... -
Page 12: Warranty Information
Warranty Information Warranty This product is covered by the Sam's Club Member Satisfaction Guarantee. Please visit samsclub.com for more information. This product’s components have a 1-year guarantee against defects in material and/or workmanship. If you have any questions regarding the warranty or spare / replacement parts, please call our toll-free number 1-888-406-0838 or email us at samsclub@abbysonliving.com NOTE: Please consider recycling all applicable packaging material. - Page 13 Assembly Instructions & User’s Manual Details by Becki Owens Ren 7-Piece Expandable Dining Set, Distressed Natural - Chair Item Number: 990314015 Model Number: TP-M4-NT-7PCDI Customer Assistance 1-888-406-0838 (spare/replacement parts) or Email: samsclub@abbysonliving.com THIS ASSEMBLY MANUAL CONTAINS IMPORTANT SAFETY INFORMATION. PLEASE READ AND KEEP FOR FUTURE REFERENCE.
- Page 14 Table of Contents Quality Statement ............................. 3 Important Safety Information ........................ 3 Before Assembly ............................3 Care & Use ..............................3 Package Contents ............................ 4 Product Information ..........................4 Components .............................. 5 Hardware ..............................5 Tools ................................5 Step 1 ................................6 Step 2 ................................
-
Page 15: Quality Statement
Quality Statement Important Safety Information • Please read all instructions carefully before assembling this product. • Where applicable, and for your safety, assembly by an adult is strongly recommended. • Use only vendor-supplied hardware to assemble this item. Using unauthorized hardware could jeopardize the structural integrity of the item. -
Page 16: Package Contents
• To avoid damage refrain from stacking large and/or heavy objects on top of the furniture. • Avoid cleaners which use chemical products. Many of these are harsh and not safe for use on upholstery Package Contents Component Description Quantity Component Description Quantity... -
Page 17: Components
Components Backrest (A) Seat cushion (B) Front leg (C) Qty: 1 x 6 Qty: 1 x 6 Qty: 2 x 6 Hardware Long bolt (D) Ø5/16" x 3-1/8"L Short bolt (E) Ø5/16" x 1-1/2"L Hex nut (F) Ø5/16" spring washer Ø5/16" x 13mm spring washer Ø5/16"... -
Page 18: Step 1
Step 1 Step 1-1: Attach the seat cushion (B) to the backrest (A), then using the Allen key (I) to tighten bolts, spring washer, flat washer (D). Step 1-2: Attach the seat cushion (B) to the backrest (A), then using the Allen key (I) to tighten bolts, spring washer, flat washer (E). -
Page 19: Step 2
Step 2 Step 2-1: Attach the chair front leg (C) to the seat cushion (B) then using the lock wrench (J) to tighten hex nut (F), spring washer (G), flat washer (H). Note: Tighten all bolts. Assembly is complete. Repeat the same procedure to assemble the other chairs. -
Page 20: Warning
Warning • Do not use this product unless all screws and bolts are securely tightened • Check that all screws and bolts are secure every three months or as needed • Dispose of packing material properly. Do not use plastic cover as head covering as it may cause suffocation •... -
Page 21: Warranty Information
Warranty Information Warranty This product is covered by the Sam's Club Member Satisfaction Guarantee. Please visit samsclub.com for more information. This product’s components have a 1-year guarantee against defects in material and/or workmanship. If you have any questions regarding the warranty or spare / replacement parts, please call our toll-free number 1-888-406-0838 or email us at samsclub@abbysonliving.com NOTE: Please consider recycling all applicable packaging material.
Need help?
Do you have a question about the TP-M4-NT-7PCDI and is the answer not in the manual?
Questions and answers