
Subscribe to Our Youtube Channel
Related Manuals for Viper 50000579


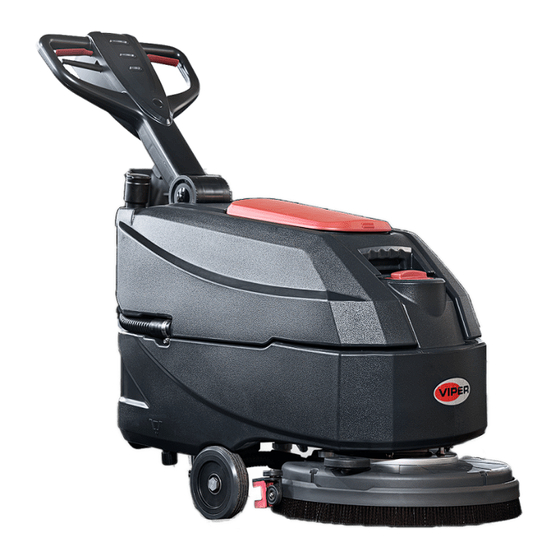
Summary of Contents for Viper 50000579
- Page 1 AS4325B INSTRUCTION FOR USE Model No.: 50000579/500005 81 VS15359 Rev. C 2021-08 Original instructio ns...
- Page 2 EU / UE / EL / EC / EE / ES / EÚ / AB Declaration of Conformity Декларация за съответствие Declaração de conformidade Prohlášení o shodě Δήλωση συμμόρφωσης Deklaracja zgodności Konformitätserklärung Megfelelősségi nyilatkozat Declaratie de conformitate Overensstemmelseserklæring Izjava o sukladnosti Декларация...
- Page 3 UK Declaration of Conformity Nilfisk Ltd Nilfisk House, Bowerbank Way Gilwilly Industrial Estate Penrith Cumbria CA11 9BQ UK Hereby declare under our sole responsibility that the Product: FC - Floor Scrubber/Sweeper - Battery; FC - Floor Scrubber/Sweeper Description: Charging mode: 100-240V 50/60Hz; Working mode: 24V DC; 220-240V 50-60Hz, IP24 Type: AS4325B, AS4335C Is in compliance with the following standards: EN 60335-1:2012+A11:2014+A13:2017+A1:2019+A2:2019+A14:2019...
-
Page 4: Table Of Contents
TABLE OF CONTENTS INTRODUCTION ........................... 1 GUIDE PURPOSE AND CONTENTS ........................1 HOW TO KEEP THIS INSTRUCTION FOR USE ....................1 DECLARATION OF CONFORMITY ........................1 ACCESSORIES AND MAINTENANCE ......................1 CHANGE AND IMPROVEMENT ........................1 SCOPE OF APPLICATION ........................... 1 MACHINE IDENTIFICATION DATA ......................... -
Page 5: Introduction
INSTRUCTION FOR USE ENGLISH INTRODUCTION NOTE The numbers in brackets refer to the components shown in Machine Description chapter. GUIDE PURPOSE AND CONTENTS The purpose of this instruction for use is to provide the operator with all basic information and technical charac- teristics, operation, machine inactivity, spare parts and safety conditions etc. -
Page 6: Transport And Unpacking
INSTRUCTION FOR USE ENGLISH TRANSPORT AND UNPACKING When the carrier delivers the machine, make sure the packaging and machine are both whole and undamaged. If there is any damage, inform the carrier before accepting the goods, and reserve the right to compensation for the damage. -
Page 7: General Safety Instruction
INSTRUCTION FOR USE ENGLISH GENERAL SAFETY INSTRUCTION Specific warnings and cautions to inform about potential damages to people and machine are shown below. DANGER! This machine must be operated by trained and authorized personnel according to guidance of the manual. - Page 8 INSTRUCTION FOR USE ENGLISH Take all necessary precautions to prevent hair, jewelry, and loose clothes from being caught by the machine moving parts. Do not use the machine in particularly dusty areas. Do not wash the machine with direct or pressured water jets, or with corrosive substances. ...
-
Page 9: Machine Description
INSTRUCTION FOR USE ENGLISH MACHINE DESCRIPTION MACHINE STRUCTURE (as shown in Figure 1) Handlebar Control panel Safety switch lever Accessory parts box (*) Handlebar adjusting lever Battery charge cable holder Recovery water drain hose Battery charge cable Recovery tank lid Security cover of charging jack Fresh water cover Charging signal lights... -
Page 10: Control Panel
INSTRUCTION FOR USE ENGLISH CONTROL PANEL (as shown in Figure 2) 31. Discharged battery warning light (red) 41. Serial number plate/technical data 32. Semi-discharged battery warning light (yellow) 42. Charging red LED 33. Charged battery warning light (green) 43. Charging yellow LED 34. -
Page 11: Machine Size
INSTRUCTION FOR USE ENGLISH MACHINE SIZE 33Inches (835mm) 22.5 Inches (570 mm) 40.2Inches (1020mm) -
Page 12: Technical Parameters
INSTRUCTION FOR USE ENGLISH TECHNICAL PARAMETERS Model Parameter Type Units AS4325B Solution tank capacity L / Gal 25 L / 6.6 Gal. Recovery tank capacity L / Gal 25 L / 6.6 Gal. Machine Length mm/Inches 1020 mm / 40.1 Inches Machine width with squeegee mm/Inches 570 mm / 22.4 Inches... -
Page 13: Wiring Diagram
INSTRUCTION FOR USE ENGLISH WIRING DIAGRAM... -
Page 14: Operating Guide
INSTRUCTION FOR USE ENGLISH OPERATING GUIDE WARNING! On some points of the machine there are some adhesive plates indicating: - DANGER - WARNING - CAUTION - CONSULTATION While reading this Manual, the operator must pay particular attention to the symbols shown on the plates. Do not cover these plates for any reason and immediately replace them if damaged. -
Page 15: Battery Installation And Battery Typesetting (Wet Or Gel/ Agm)
INSTRUCTION FOR USE ENGLISH The machine can be supplied in one of the following modes: A) Batteries (WET or GEL/ AGM) already installed and charged 1. Check that the batteries are connected to the machine with the connector (B, Figure 3). 2. - Page 16 INSTRUCTION FOR USE ENGLISH Battery installation Open the recovery tank cover (5, Figure 1) and check that the recovery tank (9, Figure 1) is empty; other- wise empty it with the drain hose. (4, Figure 1) Close the recovery tank cover (5, Figure 1). Move the recovery tank kit (A, Figure 3) carefully.
-
Page 17: Brush/Pad-Holder Installation And Removal
INSTRUCTION FOR USE ENGLISH BRUSH/PAD-HOLDER INSTALLATION AND REMOVAL NOTE Install either the brush (A, Figure 5) or pad-holder (B and C, Figure 5) according to the type of floor to be cleaned. CAUTION Before installation or removal of brush or pad-holder, make sure all the switches on machine are in off position and lifting up the squeegee and the brush/pad-holder deck from the floor. -
Page 18: Squeegee Assemble Installation And Removal
INSTRUCTION FOR USE ENGLISH SQUEEGEE ASSEMBLE INSTALLATION AND REMOVAL CAUTION! It is advisable to wear protective gloves when installation and removal the squeegee assemble because there may be sharp debris. Push the machine to a level floor. Ensure that the machine is off. Lower the brush/pad-holder deck (12, Figure 1) by lifting the pedal (36), Brush on the floor. -
Page 19: Solution Or Washing Water Tank Filling
INSTRUCTION FOR USE ENGLISH SOLUTION OR WASHING WATER TANK FILLING Open the water inlet cover (A, Figure 7). Fill with water or solution suitable for work performance. The solution temperature must not exceed +104F (+40°C). Do not overfill the tank, refer to water level indicator (B, Figure 7) for the water volume. -
Page 20: Machine Operation (Scrubbing And Drying)
INSTRUCTION FOR USE ENGLISH NOTE To move the machine forward, press either the left or right safety switch lever (J, Figure 8) or both. If necessary, press the handlebar adjusting lever (3, Figure 1) to adjusting the handlebar height. Stopping the machine Stop the machine by using the handlebar (I). -
Page 21: Tank Emptying
INSTRUCTION FOR USE ENGLISH TANK EMPTYING An automatic float shut-off system (B, Figure 10) blocks the vacuum system when the recovery water tank (C) is full. The vacuum system deactivation is signaled by a sudden increase in the vacuum system motor noise frequency, also the floor has not dried. -
Page 22: Machine Long Inactivity
INSTRUCTION FOR USE ENGLISH MACHINE LONG INACTIVITY If the machine is not going to be used for more than 30 days, proceed as follows: Perform the procedures shown in After Using the machine paragraph. Disconnect the battery connector (B, Figure 3). FIRST PERIOD OF USE After the first 8 hours, check the machine fastening and connecting parts for proper tightening and check the visible parts for wear and leakage. -
Page 23: Battery Charging
INSTRUCTION FOR USE ENGLISH BATTERY CHARGING Preliminary procedures Open the cover (C, Figure12) and check that the recovery water tank (B) is empty, otherwise empty it with the drain hose (A). Carefully move the recovery tank kit (B, Figure 12). Connect the battery connector (D, Figure 12). -
Page 24: Brush/Pad Cleaning
INSTRUCTION FOR USE ENGLISH WARNING! WET battery charging produces highly explosive hydrogen gas. Charge the batteries in well- ventilated areas and away from naked flames. Do not smoke while charging the batteries. Keep the tank open while charging the batteries. WARNING! Pay careful attention when charging the batteries as there may be battery fluid leakages. -
Page 25: Solution Filter Cleaning
INSTRUCTION FOR USE ENGLISH SOLUTION FILTER CLEANING Pushing the machine on a level floor. Ensure that the machine is off. Emptying the solution tank (Advice). Remove the cover (D, Figure14), then remove the filter strainer (E). Clean and install them on the support (F). NOTE The filter strainer (E) must be correctly positioned on the housing (H) of the... -
Page 26: Squeegee Blade Check And Replacement
INSTRUCTION FOR USE ENGLISH SQUEEGEE BLADE CHECK AND REPLACEMENT Clean the steel or the plastic squeegee, as shown in the previous paragraph. Check that the edges (E, Figure 16) of the front blade (A) and the edges (F) of the rear blade (C) lay down on the same level, along their length;... -
Page 27: Accessories/Options
INSTRUCTION FOR USE ENGLISH Check whether the contact surface of sealing strip (E) has integrity and sealing is sufficient. If necessary, take the sealing strip of the tank out of the groove (F) and replace it. Assemble the new sealing strip as shown in (Figure 17), the joint should be back in the middle area. -
Page 28: Troubleshooting
INSTRUCTION FOR USE ENGLISH TROUBLESHOOTING Trouble Probable causes Remedy The motors do not work; no The battery connector is disconnected. Connect the battery connector. warning light turns on. The batteries are completely discharged. Charge the batteries. Use less aggressive brushes, Check if vac- Press one-start button S3, indi- Brush motor overload, Vacuum motor overload. - Page 29 Company information: www.vipercleaning.eu info-eu@vipercleaning.com...
Need help?
Do you have a question about the 50000579 and is the answer not in the manual?
Questions and answers