Table of Contents
Advertisement
Quick Links
Advertisement
Table of Contents

Related Manuals for Antelope ZEN Q SYNERGY CORE


Summary of Contents for Antelope ZEN Q SYNERGY CORE
-
Page 2: Table Of Contents
Monitors & Headphones view ......................... 43 Synergy Core FX Rack ......................... 45 Digital Outs view ............................48 DAW I/O view ............................. 49 AuraVerb ............................... 51 EDGE & VERGE MIC EMULATIONS......................56 Antelope Audio Zen Q Synergy Core User Manual Page 2... - Page 3 Edge Duo ..............................59 Verge ................................61 CUSTOMER SUPPORT INFORMATION ..................... 63 MY ANTELOPE AUDIO PRODUCT ISN’T WORKING................65 LIMITED WARRANTY POLICY ........................67 SAFETY NOTES ............................. 74 TECHNICAL SPECIFICATIONS ........................75 Antelope Audio Zen Q Synergy Core User Manual Page 3...
-
Page 4: Before You Begin
BEFORE YOU BEGIN Congratulations on your purchase! We would like to turn your attention to the following: Zen Q Synergy Core unites next-gen technology with traditional console-grade circuitry. Antelope Audio’s signature sound quality comes from professional AD/DA conversion, Discrete ultra-linear preamps, and 64-bit AFC™ clocking. Empowered with the same core... - Page 5 Facebook group and ask for advice. The Knowledge Base is also a valuable source of information. We hope you will enjoy working with the Zen Q Synergy Core. Best wishes, Team Antelope Antelope Audio Zen Q Synergy Core User Manual...
-
Page 6: System Requirements
Memory (RAM): 4 GB minimum (8 GB or more recommended) • CPU: Intel Core i3™ or AMD Ryzen (Higher recommended) • Additional Information: Stable Internet connection is required to download and update your • Antelope Audio Software Antelope Audio Zen Q Synergy Core User Manual Page 6... -
Page 7: Online Activation Instructions
Read how to identify the ports on your Mac 2. Open your internet browser and navigate to https://en.antelopeaudio.com/login/ 3. Login to the Antelope Audio user area with your e-mail and password. If you don't have an account, visit https://en.antelopeaudio.com/sign-up/ to create one. - Page 8 Place a checkmark in the empty box and click on update. Wait until the installation is complete. 9. Click on 'Activate device'. Note: If the Zen Q Synergy Core does not appear in the 'Devices' tab, click on 'Not seeing your device?' and follow the on-screen instructions. Antelope Audio Zen Q Synergy Core User Manual...
- Page 9 Please proceed with the 'Setting up' chapter below to configure the Zen Q Synergy Core for use with your Windows or macOS computer. Note: The Zen Q Synergy Core will be listed in the 'My Hardware' page of the Antelope Audio user area with its serial number and activation date.
-
Page 10: Setting Up
After the update is complete, you can proceed with the instructions for your operating system. Configuring for Windows 10 Windows 10 needs a few tweaks to get the Zen Q Synergy Core up and running: 1. Enter the ‘Sounds’ options window from the Control Panel; or right-click the speaker icon in the system tray and choose ‘Open Sound settings’. -
Page 11: Configuring For Macos (10.14 And Later)
● Configuring for macOS (10.14 and later) The security settings in macOS (10.14 and later) may result in no input signal reaching your DAW, despite having everything set up correctly. Antelope Audio Zen Q Synergy Core User Manual Page 11... - Page 12 These steps apply when you are using the Zen Q Synergy Core in a DAW for the first time: 1. Launch your DAW and choose Zen Q Synergy Core as the input device. The following dialog box will appear (if using Ableton Live 10 Suite, for example): 2.
- Page 13 Note: You may have to click the padlock symbol in the bottom left corner and enter your password to make changes. Antelope Audio Zen Q Synergy Core User Manual Page 13...
-
Page 14: Thunderbolt™ 3 Functionality
A basic example would be connecting the Zen Q Synergy Core to an external hard drive with two Thunderbolt™ 3 ports. One port is occupied by the unit while the other connects to a computer or another Thunderbolt™ 3 device in the chain. -
Page 15: Antelope Launcher
Audio products. The application is organized into the following tabs: ‘Devices’ tab All Antelope Audio devices currently connected to your computer are listed in this section. The application functionality is identical for each Antelope device. The following functionality is available in the 'Devices' tab: Device Click the black field to enter a name for your device. - Page 16 Note: Feel free to bypass any operating system prompts, such as Windows Firewall. Manage Device Click to launch the Antelope Management Wizard. Use it to register/de-register devices and assign/un-assign features (such as AFX2DAW, Synergy Core FX, and so on). Device Info...
- Page 17 Click again to close. Not seeing your device? If a device is missing from the list, the most common reason is driver conflict. The Antelope Launcher makes it easy to re-install drivers and troubleshoot. Click 'Not seeing your device?' to launch the 'Add Drivers' wizard.
-
Page 18: Plug-Ins' Tab
'Plug-ins’ tab This section lets you install, update, and uninstall Antelope Audio software such as native mic emulations and AFX2DAW. By default, the Bundle Version drop-down menus show the most recent software bundle available for each product. Clicking the menu shows the currently installed software bundle version and lets you roll-back to an older build. -
Page 19: System' Tab
Restart the Manager Server and enable/disable remote connections from other • computers on your network. Install the Antelope Audio Thunderbolt™ driver. Choose a Bundle Version from the • drop-down menu, click the check mark, then click the ‘Update’ button. From this menu you can manually re-install the device driver if needed, without updating the device bundle. - Page 20 Login button Click and enter your Antelope Audio username and password, then click ‘Login’. If you don't have an Antelope Audio account, click ‘Register’ and follow the on-screen instructions. Settings button Click to open the Settings window. Antelope Audio Zen Q Synergy Core User Manual...
- Page 21 Here, you can do the following: Click ‘View Logs’ to view, save, and send activity logs to Antelope Audio Customer • Support. Click 'Advanced' to enable or disable automatic updates for each of the following: • Device firmware USB Driver...
-
Page 22: Hardware Panels Explained
Lock indicator - lights up when the unit is 'locked' to a digital audio and clock source. • Current device sample rate e.g. 32kHz - 192kHz. Note: The display is not touch-sensitive. Antelope Audio Zen Q Synergy Core User Manual Page 22... -
Page 23: Control Menu
Line Out Trim - choose an audio signal trim value for the monitor outputs (14dBu - 20dBu). By default, this option is set to 20dBu. Press the 'Antelope button' to exit the Control Menu. Antelope Audio Zen Q Synergy Core User Manual... -
Page 24: System Menu
This is useful for troubleshooting and is also a quick way to erase presets. Press the 'Antelope button' to exit the Control Menu. 'Antelope button' - when inside a menu, press the button to exit the menu. Antelope Audio Zen Q Synergy Core User Manual... -
Page 25: Front Panel
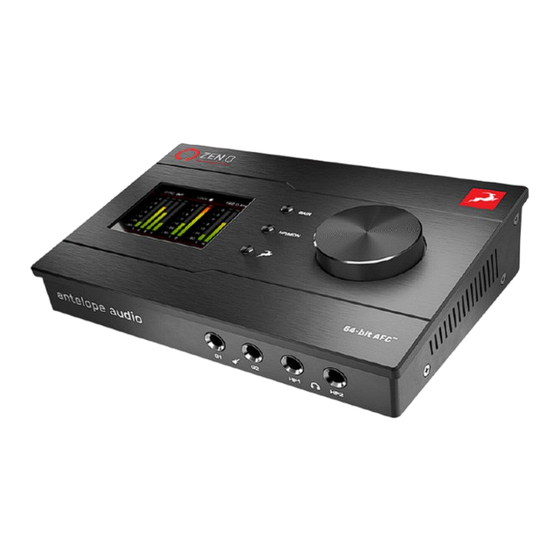
When not inside a menu, press the encoder to mute or un-mute the Line outputs. Front Panel The Zen Q Synergy Core front panel is home to a pair of switchable Line/Hi-Z instrument inputs (labeled 'G1' and 'G2') and a pair of stereo headphone outputs (labeled 'HP1' and 'HP2'). -
Page 26: Rear Panel
Rear Panel The Zen Q Synergy Core rear panel is laid out as follows (from left to right): Analog inputs A2 and A1 Dual microphone/line level/high-impedance instrument (Hi-Z) mono inputs on combined 3-pin XLR and 1/4-inch TS/TRS connectors. Use the interface's top panel controls or the Windows/macOS Control Panel application to choose the mode of operation (Mic/Line/Hi-Z) and to activate or deactivate 48V phantom power for condenser microphones. - Page 27 XLR (microphone) cables instead of 1/4-inch TS/TRS audio cables. However, this is not the correct approach here. Connecting line-level equipment to the Zen Q Synergy Core with XLR cables will activate the interface's microphone preamps and the line-level signal will be amplified to the point of audible distortion.
- Page 28 Standard ADAT Lightpipe audio limits apply according to the sample rate: • 44.1/48 kHz – 8 inputs • 88.2/96 kHz – 4 inputs • 176.4/192 kHz – 2 inputs Antelope Audio Zen Q Synergy Core User Manual Page 28...
- Page 29 Important: Note that legacy Thunderbolt™ 2 and 1 connections via external adapters are incompatible due to insufficient power delivery. The Zen Q Synergy Core is compatible only with Thunderbolt™ 3. https://support.apple.com/en- Read how to identify the ports on your Mac ( us/HT201736)
-
Page 30: Control Panel Application
CONTROL PANEL APPLICATION Welcome to the Zen Q Synergy Core Windows/macOS Control Panel application! More than just an alternative to the physical top panel controls, it provides straightforward and comprehensive access to each aspect of the interface's functionality. This includes settings, signal routing, audio mixing, effects chains, monitoring, metering, and presets. - Page 31 2. Open the Control Panel and head to the leftmost area in the 'PREAMPS' row. Choose 'Hi-Z' from the signal type selector drop-down menu. 3. Click the input selector above the 'AFX' area and choose PREAMPS > PREAMP 1 from the menu. Antelope Audio Zen Q Synergy Core User Manual Page 31...
- Page 32 Reco rd in your DAW Recording with the Zen Q Synergy Core is very simple. First, make sure the interface is chosen as your main input and output device in your DAW. Next, open the Control Panel and click on 'DAW I/O'.
-
Page 33: Mouse & Keyboard Shortcuts
• Click active clipping indicators on peak meters to clear them. • Click and drag the edges of the Zen Q Synergy Core Control Panel application window to resize it. Main View From top to bottom, the Control Panel application is organized as follows:... -
Page 34: Settings Window
On/Standby button Click to put the Zen Q Synergy Core in standby mode. Click again to power on. Settings button Click to open the Settings Window with the following options: Settings Window Click to choose an audio signal trim value for the monitor outputs (14dBu - 20dBu). - Page 35 Click to choose the output level for Level Oscillator 1 and Oscillator 2 (-18dBFS - 0dBFS). Click to choose Oscillator 2 frequency Oscillator 2 (440Hz or 1kHz). Oscillator 2 generates a Antelope Audio Zen Q Synergy Core User Manual Page 35...
- Page 36 Click to minimize the Zen Q Synergy Core Control Panel application. Maximize button Click to maximize the Zen Q Synergy Core Control Panel application window. Click the button again, or the adjacent Resize button, to return to default size. Resize button When you maximize or manually resize the Zen Q Synergy Core Control Panel application window, clicking this button will return it to its default size.
- Page 37 Session controls Sessions are 'snapshots' of Control Panel configurations. Think of them as Control Panel presets that you can save, load, and share with other computers and Zen Q Synergy Core users. Antelope Audio Zen Q Synergy Core User Manual...
- Page 38 Sessions or load the last used Session. Clicking the 'Set Defaults' button restores the component selection to its default setting. Clicking the 'Set Defaults' button followed by the 'Load' button will return the Control Panel application to its default state. Antelope Audio Zen Q Synergy Core User Manual Page 38...
- Page 39 Preamps strip Contains the following controls for the Zen Q Synergy Core's analog audio inputs: Signal type selector Click to choose the signal type you are recording from the drop-down menu: • Mic - choose this when recording a microphone.
- Page 40 Inspect your equipment, and practice proper gain-staging (make sure the output from one unit in the signal chain to the input of the next is not too weak or too strong). Antelope Audio Zen Q Synergy Core User Manual Page 40...
- Page 41 Mic emulations button Shown in 'Mic' mode. Click to open the Edge & Verge mic emulations window. Mic emulations are explained in the 'Edge & Verge Mic Emulations' chapter. Antelope Audio Zen Q Synergy Core User Manual Page 41...
- Page 42 Click to choose between three Control Panel views - 'Monitors & Headphones', 'Digital Outs', and 'DAW I/O'. The three views are explained in the Control Panel Views sub-chapter below. Understanding them is crucial to operating the Zen Q Synergy Core. AuraVerb button Click to open the AuraVerb effect window.
-
Page 43: Monitors & Headphones View
Synergy Core FX chains, mixer controls, volume controls, and peak meters for the Zen Q Synergy Core's analog and digital audio outputs. The majority of your Control Panel application activity is going to happen here. Thus, we encourage you to read this sub-chapter thoroughly. - Page 44 Up to 8 channels of incoming ADAT digital ADAT IN 1 - 8 audio. MUTE No audio input. OSCILLATOR 1 - 2 Test signals from oscillators 1 and 2. Antelope Audio Zen Q Synergy Core User Manual Page 44...
-
Page 45: Synergy Core Fx Rack
Click the drop-down menu below the audio input label to choose factory presets. • Click the 'ADD NEW EFFECT' button to add Synergy Core FX. Their graphics and parameters appear to the right. Antelope Audio Zen Q Synergy Core User Manual Page 45... - Page 46 • Hold Shift and use the mouse scroll wheel to scroll up and down through the FX rack. The Zen Q Synergy Core comes with 37 Synergy Core FX included. Additional effects can be purchased from the Antelope Audio online software store.
- Page 47 • Output volume knob with Dim and Mute buttons for the Zen Q Synergy Core's monitor output. • Output volume knob with Dim and Mute buttons for the Zen Q Synergy Core's Headphone 1 output, labeled 'HP1' on the interface's front panel.
-
Page 48: Digital Outs View
Contains the following: • Input selectors for digital output channels 'S/PDIF 1' and 'S/PDIF 2'. Click to choose the audio inputs you want to feed into the Zen Q Synergy Core's S/PDIF digital audio outputs. • Peak meters visualizing the output signal strength. Note the lack of output volume controls. -
Page 49: Daw I/O View
Use the Input Selectors to assign 'COMPUTER PLAY' inputs 1 and 2 to a pair of mixer channels in 'Monitors & Headphones' view and silence the rest of the channels from the 'Monitor/HP1' Antelope Audio Zen Q Synergy Core User Manual Page 49... - Page 50 You can also visit Antelope Audio on YouTube explore our video tutorials or join the Antelope Audio Users Facebook group and ask for advice. The Knowledge Base is also a great resource. Antelope Audio Zen Q Synergy Core User Manual Page 50...
-
Page 51: Auraverb
AuraVerb is a Send effect designed for live performance and monitoring. Turn the 'Send' knob on a mixer channel (pictured above) to hear the reverb applied to it. Drag the faders in the 'Returns' area to hear AuraVerb from the monitor and/or headphone outputs. Antelope Audio Zen Q Synergy Core User Manual Page 51... - Page 52 Fine adjustment of this parameter with respect to the tempo of the song or dramatic timing of the piece can help set the feel of the reverb within the mix. Antelope Audio Zen Q Synergy Core User Manual Page 52...
- Page 53 This sound is light or airy, but by increasing the Richness, you can add a sense of spaciousness to the sound and smoothly increase reverb time for lower frequencies. Antelope Audio Zen Q Synergy Core User Manual Page 53...
- Page 54 Reverb Time unusually high or low with respect to the Room Size parameter. Room Size Room Size increases the virtual space dimensions Reverb Level Antelope Audio Zen Q Synergy Core User Manual Page 54...
- Page 55 The Preset Manager lets you save and load presets. Use the drop-down menu to choose a preset. Click the ‘S’ button to save a preset. Click the ‘L’ button to load a preset. Antelope Audio Zen Q Synergy Core User Manual Page 55...
-
Page 56: Edge & Verge Mic Emulations
It is also possible to record 'dry' audio and mic emulation audio on separate tracks for more production flexibility. Note that the Edge & Verge mic emulations are intended for use with the Antelope Audio Edge & Verge modeling microphones only. We cannot guarantee optimal (or even usable) results with other microphones, modeling or not. - Page 57 In the ‘Mic Emulations’ window, click and rotate the dial to access the emulations available for your modeling microphone: Following is a guide to using the mic emulations for each Antelope Audio modeling microphone. Antelope Audio Zen Q Synergy Core User Manual...
-
Page 58: Edge Solo
• Recording and Monitoring Edge Solo Edge Solo is a single-membrane condenser microphone. This means the microphone will occupy one physical mic preamp input and one virtual ‘MIC EMU’ output. Antelope Audio Zen Q Synergy Core User Manual Page 58... -
Page 59: Edge Duo
Edge Duo Mic Emulations Window The following functionality is available: Choose mic emulations from the drop-down menu in the middle. • Click and turn the ‘Phase Invert’ dial to flip the signal polarity. • Antelope Audio Zen Q Synergy Core User Manual Page 59... - Page 60 Route the ‘PREAMP’ inputs occupied by Edge Duo to your desired outputs to monitor ‘dry’ audio and record from Inputs 1 – 8 in your DAW (e.g. you are using Channel 1 in the mixer, so you are recording from Input 1). Antelope Audio Zen Q Synergy Core User Manual Page 60...
-
Page 61: Verge
Verge is a small-diaphragm condenser microphone that’s as simple to use as the Edge Solo. Its dimensions and ability to handle high sound pressure levels make it a better fit for positioning in tight spaces and recording very loud sources, such as drum kits. Antelope Audio Zen Q Synergy Core User Manual Page 61... - Page 62 Route ‘PREAMP’ and ‘EMU MIC’ blocks to your desired outputs to monitor and record • both ‘dry’ and ‘mic emulation’ audio. Record from Inputs 1 – 8 in your DAW. • For more information about Verge, visit its product page. Antelope Audio Zen Q Synergy Core User Manual Page 62...
-
Page 63: Customer Support Information
CUSTOMER SUPPORT INFORMATION Antelope Audio Customer Support can be reached by the following means: Online Visit support.antelopeaudio.com Phone We are there for you around the clock, 21 hours/day, Monday to Friday. North America +1-916-238-1643 01:00 a.m. – 10:00 p.m. (EST) International +44 19 2593 3423 06:00 a.m. - Page 64 Please contact our customer support team for such inquiries. • Knowledge Base in our Customer Support section is an often-overlooked source of troubleshooting information, answers to commonly asked questions and Antelope know-how. Antelope Audio Zen Q Synergy Core User Manual Page 64...
-
Page 65: My Antelope Audio Product Isn't Working
Please, don't attempt to send us your device without receiving a RMA number first, as the device will be returned and not serviced. How do I get an RMA number? The Antelope Audio Customer Support team is in charge of issuing RMA numbers. Visit support.antelopeaudio.com and get in touch. - Page 66 The shipping costs are covered by the owner of the product. Antelope Audio will not cover any local customs charges. We recommend using a courier service of your choice (e.g. DHL, UPS, FedEx). The package...
-
Page 67: Limited Warranty Policy
Antelope Audio Limited Warranty or under their consumer law rights. All claims made under the Antelope Audio Limited Warranty will be governed by the terms set out in this warranty document. - Page 68 3) to refund the price paid. Should Antelope Audio decide to refund the price paid, it may deduct from the paid Product’s price any damages caused to the Product; where, within...
- Page 69 These warranty obligations are conditioned upon the hardware being returned to the original place of purchase, or another place as directed by Antelope Audio, with the original sales receipt attached. You will be required to pay shipping and handling charges for returning the product.
- Page 70 Antelope Audio or any of its authorized manufacturing partners; (ii) Products purchased from a person or entity which is not an authorized dealer or re-seller of Antelope Audio; (iii)Product sold “as is” or “with all faults”, to the extend permitted by local law.
- Page 71 Product. Returning Your Product In the event that you need to return your Antelope Audio products for repair or replacement, Antelope Audio will provide you with a Return Merchandise Authorization Number (RMA#) as well as return instructions.
- Page 72 (B2B) / Direct customers of Antelope Audio please email us at techsupport@antelopeaudio.com (ii) A valid proof of purchase is required for RMA processing (i.e. receipt, invoice, etc). Antelope Audio will provide you with the RMA number within 2 working days as of the claim submission date.
- Page 73 If any term hereunder is held to be illegal or unenforceable, it shall be severed from this warranty and the legality or enforce ability of the remaining terms shall not be affected. Antelope Audio Zen Q Synergy Core User Manual Page 73...
-
Page 74: Safety Notes
Both occasional and continued exposure to high sound pressure levels can cause permanent ear damage via headphones and monitors. • The device is designed to operate in a temperate environment, with a correct Operating Temperature of 0-50° C, 32-122° F. Antelope Audio Zen Q Synergy Core User Manual Page 74... -
Page 75: Technical Specifications
EIN: -128 dBu (A-weighted) Dynamic Range: -121 dB (A-weighted) THD: -106 dB Max input level: +20 dBu Max Gain: 65 dB Monitor Max output level +20 dBu D/A Monitor Converter Antelope Audio Zen Q Synergy Core User Manual Page 75... - Page 76 THD + N: -116 dB Digital Inputs 1 × S/PDIF 1 x ADAT IN (up to 8 channels @ 44.1/48.0 kHz) Digital Outputs 1 × S/PDIF Computer I/O 1 × Thunderbolt 3 Clocking System Antelope Audio Zen Q Synergy Core User Manual Page 76...
- Page 77 4th Generation Acoustically Focused Clocking (AFC™) 64-bit DDS Sample Rates (kHz) 44.1, 48, 88.2, 96, 176.4, 192 Physical Dimensions: 198 х 137 х 57.5 mm Weight: 800 g (approx.) Antelope Audio Zen Q Synergy Core User Manual Page 77...
Need help?
Do you have a question about the ZEN Q SYNERGY CORE and is the answer not in the manual?
Questions and answers