Table of Contents
Advertisement
Advertisement
Table of Contents

Subscribe to Our Youtube Channel
Related Manuals for Antelope ORION STUDIO Synergy Core


Summary of Contents for Antelope ORION STUDIO Synergy Core
- Page 1 User Manual ORION STUDIO Synergy Core THUNDERBOLT™ 3 & USB 2.0 AUDIO INTERFACE...
- Page 2 12 discrete preamps and 6x DSP + 2x FPGA FX processors Orion Studio Synergy Core User Manual...
-
Page 3: Table Of Contents
Antelope Launcher ‘Devices’ Tab 'Plug-Ins’ Tab 'System’ Tab Front Panel Explained System Menu Control Menu Presets Menu Rear Panel Explained Integrating External Analog Equipment Control Panel Quick Start Mouse & Keyboard Shortcuts Main View Orion Studio Synergy Core User Manual... - Page 4 Edge Quadro Verge AFX2DAW Meters Tab Advanced User Tips Use The Orion Studio Synergy Core As A Master Clock Send And Receive Cv (Control Voltage) Commands To Eurorack Modular Synths Customer Support Information My Antelope Audio Product Limited Warranty Policy...
- Page 5 Orion Studio Synergy Core User Manual...
-
Page 6: Before You Begin
DAW. It is possible to use the Orion Studio Synergy Core in this manner, relying on the front panel display and controls for monitoring, gain control and setup while using the DAW for recording, mixing and mastering. -
Page 7: Mandatory Online Activation
Base is also a good source of information. Best wishes, Team Antelope MANDATORY ONLINE ACTIVATION Please note that the mandatory device activation procedure requires an active Internet connection on your computer. Activating an Antelope device offline is not possible. Orion Studio Synergy Core User Manual... -
Page 8: Setting Up
Note : Bypass any security prompts from your operating system, e.g. Windows Defender Firewall and macOS alerts. 6. Connect your analog and digital equipment of choice to the Orion Studio Synergy Core. 7. Launch your preferred DAW and: Choose the Orion Studio Synergy Core as your main input and output device. - Page 9 Make sure your DAW and operating system sample rates match the device sample ● rate. Need any help? Visit the A ntelope Audio Customer Support page, choose your device and go from there. Orion Studio Synergy Core User Manual...
-
Page 10: Configuring For Windows 10
1. Enter the ‘ Sounds’ options window from the Control Panel or right-click the speaker icon in the system tray and choose ‘Open Sound settings’. 2. Make sure the Orion Studio Synergy Core is chosen under 'Output' and 'Input'. Next, click 'Device Properties' under 'Output'. Then, click 'Additional Device Properties'. - Page 11 ‘Playback’ Properties might help when running multiple playback applications at the same time. ● Disabling the 32kHz sample rate isn’t mandatory, but it might help in general. Further Reading ● Antelope Audio Knowledge Base - W indows 10 Optimization Orion Studio Synergy Core User Manual...
-
Page 12: Configuring For Macos Mojave 10.14 (Or Later)
The new security settings introduced in macOS Mojave 10.14 and later releases may result in no input signal reaching your DAW, despite having everything set up correctly. These steps apply when you are using the Orion Studio Synergy Core in a DAW for the first time: 1. -
Page 13: Thunderbolt™ 3 Functionality
Device Charging While the Orion Studio Synergy Core cannot be bus-powered, it is able to power any Type-C device from the Thunderbolt™ 3 port. For example, you can power a laptop (e.g. -
Page 14: Backwards Compatibility
Antelope Audio products. The application is organized into the following tabs: ‘Devices’ tab All Antelope Audio devices currently connected to your computer are listed in this section. In this example, we have connected the Discrete 4 Synergy Core. However, the application functionality is identical for each Antelope device. - Page 15 ‘Update’ button. Manage Click to launch the Antelope Registration Wizard. Use it to register or de-register devices and features (such as AFX2DAW, Synergy Core FX, HDX Activation and so on).
- Page 16 Software Bundle version ● Click the information window to close it. Orion Studio Synergy Core User Manual...
- Page 17 Antelope Launcher. Can't see your device? If a device is missing from the list, the most common reason is driver conflict. The Antelope Launcher makes it easy to re-install drivers and troubleshoot. Click "Can't see your device?"...
-
Page 18: Plug-Ins' Tab
'Plug-ins’ tab This section lets you install, update, and uninstall Antelope Audio software such as native mic emulations and AFX2DAW. By default, the Bundle Version drop-down menus show the most recent software bundle available for each product. Clicking the menu shows the currently installed software bundle version and lets you roll-back to an older build. -
Page 19: System' Tab
Restart the Manager Server and enable/disable remote connections from other ● computers on your network. Install the Antelope Audio Thunderbolt™ driver. Choose a Bundle Version from the ● drop-down menu, click the check mark, then click the ‘Update’ button. Orion Studio Synergy Core User Manual... - Page 20 Uninstall the Antelope Audio Thunderbolt™ and/or USB driver(s) present on your ● system. Login button Click and enter your Antelope Audio username and password, then click ‘Login’. If you don't have an Antelope Audio account, click ‘Register’ and follow the on-screen instructions. Settings button Click to open the Settings window.
- Page 21 Here, you can do the following: Click ‘View Logs’ to view, save, and send activity logs to Antelope Audio Customer ● Support. Click 'Advanced' to enable or disable automatic updates for each of the following: ● Device firmware USB Driver...
-
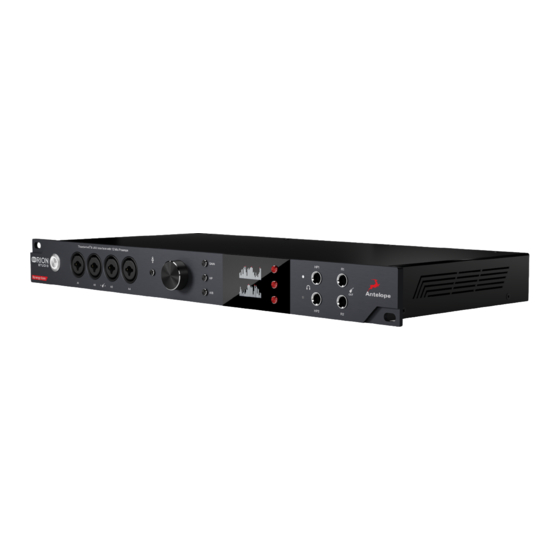
Page 22: Front Panel Explained
Make your selection(s) in the drop-down menu(s) and click 'OK'. Click ‘Network’ to view network status and logs. ● FRONT PANEL EXPLAINED 1. ON/STANDBY BUTTON Toggles between 'Standby' and 'On' states. P ress to power on. Press again to enter Standby. Orion Studio Synergy Core User Manual... - Page 23 Note : Orion Studio Synergy Core will remain in Standby mode as long as it’s connected to an AC outlet. Unplug the power adapter to completely shut down the unit. 2. FOUR PREAMP/COMBO INPUTS 4 Class-A ultra-linear discrete mic preamps with phantom power on combo XLR inputs.
- Page 24 (Mic/Line/Hi-Z/Direct) for Preamp/Combo inputs 1 to 4, 5 to 8, 9 to 12. The penultimate press shows the current clock source and device sample rate. The final press returns to peak metering and restarts the ‘cycle’. ● Press-and-hold to enter the System Menu. Orion Studio Synergy Core User Manual...
-
Page 25: System Menu
Route the Talkback mic input to the Monitor Outputs. May be On by default. Press the rotary control to turn off. Factory Reset Perform a factory reset of the unit. Note : All presets, mixer and FX settings will be lost after factory reset. Orion Studio Synergy Core User Manual... -
Page 26: Control Menu
Choose if the S/PDIF input will be sample rate-converted to match the sample rate of the Orion Studio Synergy Core. For example, if you want the interface to run at 192 kHz and your S/PDIF input is in 44.1 kHz, it will be converted to match the device sample rate. -
Page 27: Presets Menu
‘off label’ and results may vary. Audio is output at instrument-level, which is significantly quieter than line-level and typically requires a preamp for amplification. We recommend using the insert points on the rear panel for Send/Return configurations instead. Orion Studio Synergy Core User Manual... -
Page 28: Rear Panel Explained
REAR PANEL EXPLAINED 10. DC POWER CONNECTION For use with the Antelope DC power supply unit only! 11. USB HIGH-SPEED USB 2.0 Type-B port. Supports up to 24 I/O audio channels. 12. THUNDERBOLT™ 3 PORT Thunderbolt™ 3 Type-C port. Supports up to 32 I/O audio channels. - Page 29 Control Panel. Read the 'Edge & Verge mic emulations' chapter to learn more. 19. AD INSERTS Two ¼” TRS inserts (I1 & I2) for integrating external analog equipment such as dynamics processors and EQs. Orion Studio Synergy Core User Manual...
-
Page 30: Integrating External Analog Equipment
1/4-inch TRS connector connects to the AD Insert. Note : An active audio source must be connected to A1 and/or A2 for the AD Inserts to function. Orion Studio Synergy Core User Manual... -
Page 31: Control Panel
Introduction Welcome to the Orion Studio Synergy Core Control Panel application! Upgraded with a new stylish design, the Control Panel is more than just an alternative to the front panel controls. It provides intuitive and comprehensive access to each aspect of the interface's functionality. -
Page 32: Quick Start
Hi-Z (high-impedance) signals from instruments with magnetic pickups, such as the electric guitar and bass, whereas the eight preamp/combo inputs on the back panel cannot. This is important. Orion Studio Synergy Core User Manual... - Page 33 Note that the Edge Solo and Verge each occupy a single input, whereas the Edge Duo takes two and the Edge Quadro takes four. Open the Orion Studio Synergy Core Control Panel and enter the ‘Routing’ tab. Drag the colored blocks labeled ‘EMU MIC’, with numbers corresponding to the input(s) which your mic is connected to, onto the colored number blocks labeled ‘HP1’.
-
Page 34: Mouse & Keyboard Shortcuts
/ gain value. ● Adjust parameter values in smaller increments (all knobs and faders): Hold Ctrl (Windows) / Command (macOS) and drag. ● Detach, move and resize Control Panel tabs: Orion Studio Synergy Core User Manual... - Page 35 ● Click and drag the corners of the Control Panel application window to freely resize the interface. Note that black bands will be automatically added to the window to preserve the screen ratio. This is by design and it's not a bug. Orion Studio Synergy Core User Manual...
-
Page 36: Main View
АuraVerb. It features the following areas: Function Strip The Function Strip contains the following items (from left to right): Click to switch the Orion Studio Synergy Core between Power Button On/Standby mode Drop-down menu with the following options: ●... - Page 37 ● Line (line level sources) ● Hi-Z (high-impedance musical instruments) ● Direct (direct input) Link button Links adjacent channels in pairs. Any change made to one channel applies the same exact change to its adjacent channel. Orion Studio Synergy Core User Manual...
- Page 38 It’s available on inputs 5 – 12 in ‘Mic’ mode. 48V button Enable/disable 48V phantom power for condenser microphones by pressing Ctrl + Left Click Phase button Flips signal polarity. Text Label Below the gain knob. Click to change the channel name. Orion Studio Synergy Core User Manual...
- Page 39 (THD) as follows: Measurement Regular recording Direct recording Dynamic Range 121dB 124dB THD (+N) -106dB -112dB These values reflect the These values reflect the mic preamps. A/D converters. ADAT IN Tab Orion Studio Synergy Core User Manual...
- Page 40 ● Click and drag the gain knob to adjust Talkback volume. ● Click the 'On' button to activate or deactivate Talkback. ● Click the 'MON A', 'MON B', 'HP1', 'HP2' buttons to route Talkback signal to any of these outputs. Orion Studio Synergy Core User Manual...
- Page 41 Session files for storage and sharing from the Save As button. When loading a session, you can browse your computer for session files and choose which components to load. Hardware presets Use the Save and Load buttons to save or load a preset into the chosen slot. Settings Orion Studio Synergy Core User Manual...
- Page 42 PANNING LAW Specify Panning Law compensation between 0dB (none) to -4.5dB. LINE OUT VOLUME Adjust line outputs volume (in dB). REAMP VOLUME Adjust REAMP outputs 1 & 2 volume (in dB). Orion Studio Synergy Core User Manual...
- Page 43 Info Tab This tab contains helpful links and information useful when troubleshooting. Contact Tech Support, read the online manual or get access to Antelope Audio’s contacts. It also lets you launch the Antelope Registration Wizard to register/unregister Antelope Audio devices...
-
Page 44: Routing Tab
Route audio between them by dragging and dropping the colored number blocks. The following functionalities are also available: Click on a number block to highlight the destinations it’s currently routed to. ● Double-click a number block to change its text label. ● Orion Studio Synergy Core User Manual... -
Page 45: Routing Matrix - Terminology
● Sessions). Right-click (Windows) or Command + Click (Mac) on the 'Routing' tab button and ● drag to have the Routing Matrix in a separate window. Routing Matrix - Terminology Input (Source) Section: Orion Studio Synergy Core User Manual... - Page 46 A DAT runs on S/MUX. This row represents 2 channels of incoming stereo S/PDIF IN S/PDIF audio over coaxial RCA cable. The AFX OUT row (‘AFX’ short for 'Antelope FX') AFX OUT represents up to 32 mono audio channels with Synergy Core FX applied.
- Page 47 S/PDIF OUT S/PDIF-compliant equipment over coaxial RCA cable. The AFX IN row (‘AFX’ short for 'Antelope FX') lets AFX IN you route audio into the Synergy Core FX. You can route up to 32 mono channels and stack up to 8...
-
Page 48: Mixer Tab
Pan, Volume, Solo, and Link controls (on odd-numbered channels), as well as metering. The Master channel has Volume and Mute controls. Note the colored sliders above and below the Master fader. Drag it left and right to scroll horizontally between mixer channels 1 - 32. Orion Studio Synergy Core User Manual... - Page 49 The Mixer’s signal meters are now updated to show the peak indicator. Mixer 1 has AuraVerb available as a Send effect for monitoring purposes. Turn the Send knob on an audio channel to hear the reverb. The mixers are otherwise identical. Orion Studio Synergy Core User Manual...
-
Page 50: Auraverb
“0” there is less dampening and a brighter decay. This sound is light or airy, but by increasing the Richness, you can add a sense of spaciousness to the sound and smoothly increase reverb time for lower frequencies. Orion Studio Synergy Core User Manual... -
Page 51: Effects Tab
The Preset Manager lets you save and load presets. Click the drop-down menu to choose a preset. Click the ‘Save’ button to save a preset. Click the ‘Load’ button to load a preset. Effects Tab Orion Studio Synergy Core User Manual... - Page 52 FX inside your DAW. Please visit the A FX2DAW product page for more information. FX List Orion Studio Synergy Core ships with a library of 50 Synergy Core FX. The following products are included: MIC PREAMPS 1. Gyraf Gyratec IX Orion Studio Synergy Core User Manual...
- Page 53 41. VEQ-STU 089 (Vintage EQ) 42. VEQ-STU 169 (Vintage EQ) 43. VEQ-STU 900 (Vintage EQ) 44. VEQ-HLF (Passive High/Low Filter) REVERB 45. AuraVerb 46. PowerFFC (Compressor) UTILITY EFFECTS 47. Power EX (Expander) 48. Power Gate (Gate) Orion Studio Synergy Core User Manual...
- Page 54 The Meters tab provides up to 32 individual volume meters for each row from the ‘Routing’ tab, selectable from the drop-down menu. Note that you can right-click (Command + Click on a Mac) to detach the Meters tab and have it in a separate window. Orion Studio Synergy Core User Manual...
-
Page 55: Guitar Amps & Cabs
Guitar Amps & Cabs Among everything else it does, the Orion Studio Synergy Core rocks! A suite of 11 guitar amps and matching cabinets lets you monitor and record the roar of your electric guitar in real-time. There’s a bass rig in there too, so plug-in and get slappin’! If you don’t play... -
Page 56: Re-Amping
‘uncolored’ signal from the instrument’s pickups, through all kinds of guitar amplification and recording equipment. This way, guitar performances can be tightly edited prior to amplifying, and professionally recorded in conditions that are impractical or out of the player’s reach. Orion Studio Synergy Core User Manual... -
Page 57: Software Re-Amping
You are better off using the insert patch points on the Orion Studio Synergy Core’s rear panel for Send/Return configurations. Software re-amping Orion Studio Synergy Core User Manual... - Page 58 5. Hit ‘Play’ in your DAW’s transport controls to hear the sound as you shape your tone. 6. If you want to record the result, route the corresponding ‘AFX OUT’ block onto an available ‘COMP REC’ output and record from it in your DAW. Orion Studio Synergy Core User Manual...
-
Page 59: Edge & Verge Mic Emulations
1. The mic emulations for your modeling microphone are installed from the ‘Software’ tab in the Antelope Launcher. Install them if they are not. 2. The installed mic emulation bundles are assigned to your Orion Studio Synergy Core. Getting Started Mic emulations are accessed by clicking the tiny ‘Mic’... - Page 60 Following is a guide to using the mic emulations for each Antelope Audio modeling microphone. Orion Studio Synergy Core User Manual...
-
Page 61: Edge Solo
Edge Solo is a single-membrane condenser microphone. This means the microphone will occupy one physical mic preamp input, one block in the Routing Matrix ‘PREAMP’ row, and one block in the ‘MIC EMU’ row. Orion Studio Synergy Core User Manual... - Page 62 Route ‘PREAMP’ and ‘EMU MIC’ blocks to your desired outputs and ‘COMP REC’ ● channels to monitor and record both ‘dry’ and ‘mic emulation’ audio. For more information about Edge Solo, visit its p roduct page . Orion Studio Synergy Core User Manual...
-
Page 63: Edge Duo
Edge Duo is a dual-membrane condenser microphone – it has one capsule with dual membranes and connects with an Y-XLR cable (included), one XLR connector for each membrane. The Left (white) connector is the front membrane, the Right (red) is for the rear membrane. Orion Studio Synergy Core User Manual... -
Page 64: Edge Quadro
‘mic emulation’ tracks. ‘Dry’ audio comes from the ‘PREAMP’ inputs, and ‘Mic Emulation’ audio comes from the ‘MIC EMU’ outputs. Route them anywhere you want in the Routing Matrix. For more information about Edge Duo, visit its p roduct page Edge Quadro Orion Studio Synergy Core User Manual... - Page 65 – T (Top) or B (Bottom). The inputs on the microphone are labeled too, letting you know where each cable needs to be connected. There’s a bevy of options for connecting Edge Quadro to your Orion Studio Synergy Core: As a single-membrane (rotatable) condenser mic. Connect just one XLR from the Top (rotatable) or Bottom head using the corresponding cable.
- Page 66 With so many signals available, the routing and processing possibilities are extensive. Put the manual down and explore your skills and creativity. For more information about Edge Quadro, visit its p roduct page Orion Studio Synergy Core User Manual...
- Page 67 Orion Studio Synergy Core User Manual...
-
Page 68: Verge
Verge is a single-membrane, small-diaphragm condenser microphone. This means the microphone will occupy one physical mic preamp input, one block in the Routing Matrix ‘PREAMP’ row and one block in the ‘MIC EMU’ row. Orion Studio Synergy Core User Manual... - Page 69 Route ‘PREAMP’ and ‘EMU MIC’ blocks to your desired outputs and ‘COMP REC’ ● inputs to monitor and record both ‘dry’ and ‘mic emulation’ audio. For more information about Verge, visit its p roduct page Orion Studio Synergy Core User Manual...
-
Page 70: Afx2Daw
1. Log-in to a ntelopeaudio.com and head to the 'Claim Features' page to enter your Claim Code. 2. Open Antelope Launcher and click the 'Plug-ins' button. Download and install the latest version of 'AFX2DAW'. Orion Studio Synergy Core User Manual... - Page 71 Command-click and drag on an FX parameter to adjust it in smaller increments. ● 7. You will notice that a new instance of the Orion Studio Synergy Core Control Panel has been loaded in the background. The ‘Routing’ tab now features an ‘AFX2DAW’ button immediately above the ‘MATRIX’...
-
Page 72: Advanced User Tips
This is done in a Master - Slave arrangement where the Master device "clocks" the Slave device with its timing reference signal. To set up the Orion Studio Synergy Core as a Master clock, connect Word Clock Out to the Slave device's Word Clock In using a standard BNC cable. - Page 73 The Orion Studio Synergy Core’s wealth of analog I/O, all DC-coupled, provides ample room to control modular synths. T hrough the ‘Routing’ tab in the Control Panel application, Ableton Live can access a total of 12 inputs and 40 outputs for a total of 52 CV-ready channels: ●...
-
Page 74: Customer Support Information
Orion Studio Synergy Core. For help with setting up Ableton Live, visit the A bleton Knowledge Base CUSTOMER SUPPORT INFORMATION Antelope Audio Customer Support can be reached by the following means: Online Visit s upport.antelopeaudio.com Phone US time: 12AM (midnight) –... -
Page 75: My Antelope Audio Product
Please, don't attempt to send us your device without receiving a RMA number first, as the device will be returned and not serviced. How do I get an RMA number? The Antelope Audio Customer Support team is in charge of issuing RMA numbers. Visit support.antelopeaudio.com and get in touch. -
Page 76: Limited Warranty Policy
The shipping costs are covered by the owner of the product. Antelope Audio will not cover any local customs charges. We recommend using a courier service of your choice (e.g. DHL, UPS, FedEx). The t racking ... - Page 77 3) to refund the price paid. Should Antelope Audio decide to refund the price paid, it may deduct from the paid Product’s price any damages caused to the Product; where, within fourteen (14) days of the expiration of the warranty period,(i) Antelope Audio has received written notice of any nonconformity;(ii) after Antelope Audio’s written authorization,...
- Page 78 Audio, at its sole discretion, determines were not manufactured by Antelope Audio or any of its authorized manufacturing partners; (ii) Products purchased from a person or entity which is not an authorized dealer or re-seller of Antelope Audio; (iii)Product sold “as is” or “with all faults”, to the extend permitted by local law.
- Page 79 ASSUME FOR IT ANY OTHER LIABILITY IN CONNECTION WITH ITS PRODUCTS. Data Recovery In the event of data loss using Antelope Audio storage devices, Antelope Audio is not responsible for backing up or recovering any data that you may have lost.
- Page 80 (B2B) / Direct customers of Antelope Audio please email us at techsupport@antelopeaudio.com (ii) A valid proof of purchase is required for RMA processing (i.e. receipt, invoice, etc). Antelope Audio will provide you with the RMA number within 2 working days as of the claim submission date. RMA Return Addresses We have multiple RMA receiving locations worldwide.
-
Page 81: Safety Notes
● DC power supply cable should be routed so that it is not likely to be walked on or squeezed by items placed upon or against it. ● To completely turn off the device, unplug the power cable first from the outlet and then from the rear panel of the unit. Orion Studio Synergy Core User Manual... -
Page 82: Technical Specifications
THD + N: -112 dB D/A Converters Dynamic Range: 128dB THD + N: - 115dB Digital Inputs 2 x ADAT (up to 16CH) 1 x S/PDI Digital Outputs 2 x ADAT (up to 16CH) 1 x S/PDI Orion Studio Synergy Core User Manual... - Page 83 Oven-controlled crystal oscillator Clock Stability <+/-0.02 ppm, oven controlled at 64.5ºC/ 148.1ºF Clock Aging < 1 ppm per year Clock Calibration < +/-0.001 ppm Sample Rates (kHz) 32, 44.1, 48, 88.2, 96, 176.4, 192 Orion Studio Synergy Core User Manual...
Need help?
Do you have a question about the ORION STUDIO Synergy Core and is the answer not in the manual?
Questions and answers