Table of Contents
Advertisement
Advertisement
Table of Contents

Subscribe to Our Youtube Channel
Related Manuals for Antelope ORION 32+ GEN4


Summary of Contents for Antelope ORION 32+ GEN4
-
Page 2: Table Of Contents
CONTENTS BEFORE YOU BEGIN System Requirements PRODUCT ACTIVATION Configuring for Windows 10 Configuring for macOS (10.14 and later) FRONT PANEL EXPLAINED REAR PANEL EXPLAINED CONTROL PANEL APPLICATION Introduction Mouse & Keyboard Shortcuts Main View 1 'S/PDIF' View 'ADAT' View 'METERS' View 'MONITORS' View 'SESSION' View 'INFO' View... - Page 3 CUSTOMER SUPPORT INFORMATION MY ANTELOPE AUDIO PRODUCT ISN’T WORKING. TECHNICAL SPECIFICATIONS...
-
Page 4: Before You Begin
BEFORE YOU BEGIN Congratulations on your purchase! We would like to turn your attention to the following: Orion 32+ Gen4 is a multi-channel audio interface and high-end AD/DA converter for professional recording studios and high-profile production facilities. For over a decade now the Orion 32 line of interfaces has been revolutionizing the world of professional audio. - Page 5 Thus, we encourage you to familiarize yourself with the 'Control Panel Application' chapter before you begin working with the Orion 32+ Gen4. Should you ever find yourself struggling, do not hesitate to contact our Customer Support team over phone, live chat, and our ticket system.
-
Page 6: System Requirements
Memory (RAM): 4 GB minimum (8 GB or more recommended) • CPU: Intel Core i3™ or AMD FX (Higher recommended) Additional Information: • Stable Internet connection is required to download and update your Antelope Audio software • The device does not come with a Thunderbolt cable included... -
Page 7: Product Activation
Note: The switching power supply automatically accommodates mains electricity in any country. Always use the provided power supply to prevent accidental damage. 2. Connect the Orion 32+ Gen4 to your Windows or Mac computer using a USB-C cable or a Thunderbolt™ 3 cable (not included). - Page 8 Antelope Audio user area and click 'Login'. 9. Click on 'Activate' to open the Device Management Wizard. Note: If the Orion 32+ Gen4 does not appear in the 'Devices' tab, click on 'Not seeing your device?' and follow the on-screen instructions.
- Page 9 The following warning message advises to power off or unplug any devices connected to the Orion 32+ Gen4 to avoid any potential damage during the firmware installation process. Click ‘Continue’ when ready and go through the instructions that follow.
-
Page 10: Configuring For Windows 10
Orion 32+ Gen4 for use with your Windows or macOS computer. Note: The Orion 32+ Gen4 will be listed in the 'My Hardware' page of the Antelope Audio user area with its serial number and activation date. -
Page 11: Configuring For Macos (10.14 And Later)
DAW, despite having everything set up correctly. These steps apply when you are using the Orion 32+ Gen4 in a DAW for the first time: 1. Launch your DAW and choose Orion 32+ Gen4 as the input device. The following dialog box will appear (if using Ableton Live 10 Suite, for example): 2.Click 'OK' and your DAW should function normally. -
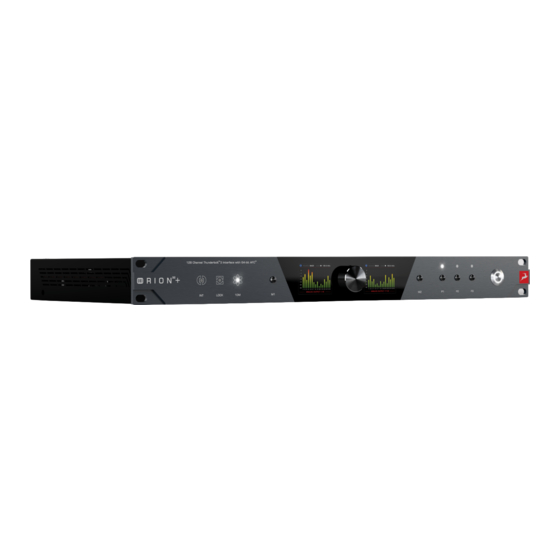
Page 12: Front Panel Explained
Note: You may have to click the padlock symbol in the bottom left corner and enter your password to make changes. FRONT PANEL EXPLAINED The Orion 32+ Gen4 front panel features the following items (left to right): Internal clock indicator... - Page 13 Lights up when the Orion 32+ Gen4 is locked to its internal clock signal generator. External clocking lock indicator Lights up when the Orion 32+ Gen4 is locked to an external clock signal source. Atomic clock indicator Lights up when the Orion 32+ Gen4 is locked to an external Antelope Audio 10M/10MX Atomic Clock.
- Page 14 The jog wheel has the following functionality by default: • Turn clockwise or counterclockwise to adjust the volume of the physical line or monitor outputs, or the volume of the Surround monitoring tab’s main output (in dB). Press and hold down the jog wheel with the Surround output selected, to switch between 1dB and 0.1dB increments.
- Page 15 • S/PDIF Gain – Allows digital gain adjustment of the left and right S/PDIF input channels. Press down the volume knob to enable selection between the left and right channels, press down again to confirm the selection. • ADAT Gain – Allows digital gain adjustment of the ADAT input channels. Press down the volume knob to enable selection between all available channels, press down again to confirm the selection.
- Page 16 • Presets 4 – 5 – here, you can recall presets 4 – 5 as stored in the Control Panel application. Presets 1, 2 and 3 are recalled from Preset keys 1, 2 and 3 on the Orion 32+ Gen4's front panel. •...
-
Page 17: Rear Panel Explained
On/standby button When the unit is on, press the button to enter standby mode. Press again to resume. REAR PANEL EXPLAINED Power Connector For use with the provided power supply only. Thunderbolt™ 3 / USB 2.0 Computer Connection Thunderbolt™ 3 / USB 2.0 Type-C port providing PC/Mac connection. Legacy Thunderbolt™... - Page 18 Supported sample rates 44.1 kHz—192 kHz, 24-bit PCM USB Specs: Interface Connection: USB 2.0 (Type-C) Port, I/O I/O Channel Count 32 Channels (24ch mode available) Supported sample rates 44.1 kHz—192 kHz, 24-bit PCM External Clock Inputs 1x Word Clock input and 1x Atomic Clock input on BNC connectors for synchronizing to external clock sources.
- Page 19 2x Word Clock outputs on BNC connectors for synchronizing external equipment to the Orion 32+ Gen4. Word Clock Output Specs 2x Output @ 75 Ohms 3Vpp on Word Clock Output S/PDIF Connections S/PDIF I/O on RCA connectors. S/PDIF Specs: Interface Connection:...
- Page 20 MADI I/O carrying digital audio over fiber optic cables with SC-Plugs on both ends. Standard MADI audio limits apply per connector: MADI Specs: Interface Connection: 4 x Optical SC Connectors MADI Mode Dual Wire, Optical SMUX Supported MADI Protocol AES10-2003 128 Channels @44.1/48.0 kHz I/O Channel Count 64 Channels @88.2/96.0 kHz...
- Page 21 4 Channels @88.2/96 kHz 2 Channels @176.4/192.0 kHz Supported sample rates 44.1 kHz—192 kHz, 24-bit PCM Monitor Speaker Outputs L/R studio speaker outputs on 1/4-inch TRS connectors. Monitor Output Specs: Output connection: 2 x 1/4” 6.35 mm Jack (3 pin) Channel count 2 Mono Channels Output level...
- Page 22 Output connection: 4 x D-sub 25-pin (Tascam Standard) I/O Channel count 32 Channels Output level -inf to 24dBu // 1 dB step Dynamic range 130 dB Supported sample rates 44.1 kHz—192 kHz, 24-bit PCM THD+N (A) -115 dB TASCAM’s DB-25 Pinout Standard: Line Inputs 32 line audio inputs on 4x DC-coupled DB25 connectors (TASCAM pin-compatible).
- Page 23 Supported sample rates 44.1 kHz—192 kHz, 24-bit PCM THD+N (A) -116 dB Impedance Load 12 kiloohms TASCAM’s DB-25 Pinout Standard:...
-
Page 24: Control Panel Application
CONTROL PANEL APPLICATION Introduction Welcome to the Orion 32+ Gen4 Control Panel application! It provides intuitive and comprehensive access to each aspect of the unit's functionality. This includes settings, signal routing, audio mixing, monitoring, metering, and presets. We encourage you to get comfortable with the software and make the most of your new audio interface. -
Page 25: Mouse & Keyboard Shortcuts
Main View 1 is always visible in the Control Panel's top section. It features the following areas: Function Strip From left to right, the Function Strip features the following items: On/Standby button Click to power on the Orion 32+ Gen4 or enter standby. Clock Source... - Page 26 Internal clock, External clock, S/PDIF, ADAT (2x, 4x), MADI. External Sync Indicator Lights up when the Orion 32+ Gen4 is locked to an external clock source. Sample Rate Drop-down menu to choose the device sample rate. The following choices are available: 32kHz, 44.1kHz, 48.0kHz, 88.2kHz, 96.0kHz, 176.4kHz, 192kHz.
- Page 27 Choose the Thunderbolt™ latency mode. Experiment with the different modes if you experience audio interruptions and glitching. BRIGHTNESS SLIDER Click and drag to adjust the brightness of the Orion 32+ Gen4's dual display screens. DC COUPLED INPUTS Click to enable DC-coupling for the Orion 32+ Gen4 line inputs.
-
Page 28: S/Pdif' View
Back to Function strip 1… Blink button Click to make the LEDs on the Orion 32+ Gen4 front panel blink. This way, you can easily identify the unit that's currently connected to your computer. This is useful in situations where several units are racked. -
Page 29: Adat' View
● Link button - Links adjacent S/PDIF or AES/EBU channels. Adjustments made to one channel will be reflected by its neighboring channel. ● Gain knob - click and drag to adjust signal gain. ● Peak meter - provides gain metering. 'ADAT' View This view contains controls for the ADAT digital audio channels. -
Page 30: Monitors' View
'MONITORS' View This view provides several controls for the Orion 32+ Gen4's Monitor outputs, as well as Surround/Immersive audio monitoring meters and global controls, explained in the ‘SURROUND’ view section of this document: Monitor output controls – applicable to the physical, mastering-grade stereo monitor output on the back panel of the interface. - Page 31 *.as file format, click the 'Save' button to save any changes you have made to it. In the Load Session window, you can browse your computer for Antelope Session files (*.as) and choose which components to load. You can also choose from a drop-down list of recently loaded Sessions or load the last used Session.
- Page 32 Software Presets Project Session files can be loaded into the 5 quick recall Software Preset slots. Storing only certain settings in a file allows loading them exclusively, while keeping all other settings unaffected. The 5 buttons are also available in the monitoring pop-out widget, allowing easy access.
-
Page 33: Info' View
● Firmware, hardware and software information. ● The 'Registration Wizard' button which opens the Antelope Registration Wizard, used for registering devices and assigning purchased add-ons. ● Shortcuts to Antelope Audio Tech Support, the Orion 32+ Gen4 user manual, and contact information. Main View 2 Main View 2 is always visible below Main View 1. -
Page 34: Routing' View
'ROUTING' view This view contains the Routing Matrix for analog and digital audio routing. The Routing Matrix is row-based. Each row has its own unique color and represents a specific audio input or output with its maximum number of channels. The Routing Matrix is split in two main sections: Input (Source) and Output (Destination). - Page 35 LINE IN 1-32 These rows represent the 32 line inputs. DAW OUT 1-32, 33-64, 65-96, 97-128 These rows represent DAW 'Outputs 1 - 128'. This is where you receive audio from your DAW. Create a new track in your DAW and assign the output with matching number - e.g. DAW 'Output 1' = 'DAW OUT' 1.
-
Page 36: Mixer' View
DAW IN 1-32, 33-64, 65-96, 97-128 This row represents DAW Inputs 1 – 128. This is where you send audio to be inputted and recorded into your DAW via the Thunderbolt/USB connection. To record from a ‘DAW IN’ device output, route audio to it from the ‘Routing’ tab. Create a new track in your DAW and assign the input with the matching number - e.g. -
Page 37: Auraverb
Note the colored slider immediately below the Master fader. Click and drag left and right to scroll the entirety of the mixer horizontally. Limitations ● There is no grouping/bus/sub-mixing functionality, but the four full-fledged mixers give plenty of space to set up sub-mixes alongside your main mix. ●... - Page 38 PreDelay Common for most reverbs, the pre-delay lets you create a bit of space between the source and the onset of reverb. This happens by controlling the amount of delay time that precedes the initial sound from the reverb. This parameter is used to place the reverberated signal later in time with respect to the unprocessed signal.
- Page 39 either creating echoes or supporting the spatial impression of the simulated acoustic space. Richness Richness controls the complexity of the reverb envelopment and dampening nuances. At 0, there is less dampening and a brighter decay. This sound is light or airy, but by increasing the Richness, you can add a sense of spaciousness to the sound and smoothly increase reverb time for lower frequencies.
- Page 40 Room Size increases the virtual space dimensions Reverb Level This is the output level control of the reverb. Since inputs for AuraVerb are assigned to Send knobs on Mixer 1’s channels, we recommend balancing the channel volume levels from the Send controls and using Reverb Level to adjust the amount of reverb in the Master bus.
-
Page 41: Surround' View
9.1.6 Dolby Atmos are supported, while maintaining customizability within the 16-channel limit for any unorthodox setup requirements. Important Note! The functionality in this tab is available only as an optional upgrade for the Orion 32+ Gen4. To unlock it the following options are available: •... - Page 42 The processed signals are outputted via the (Surround Out) channels, which can be routed to any analog or digital output, or even a combination of such. These routing capabilities allow for full flexibility when integrating the processing into any setup. Format selector Select your preferred format from the list of readily available ones or configure custom signal routing via the tab’s inputs in the routing matrix.
- Page 43 Path order selector After selecting a format, different channel orders are available for the relevant speaker layout, also known as path orders. Complete list of readily available ones below, and to note again, any channel order within the 16-channel limit can be achieved via the routing matrix tab.
- Page 44 Speaker layout and selector Selected format and channel order is visualized here, allowing control over each speaker's settings by left clicking it. Each channel routed via the routing tab is allocated a speaker and labeled according to the selected path order. Customized path orders are possible when routing the processed output channels.
- Page 45 Peak meters for each channel of the selected format, with color-coding and labeling, along with pre- and post-processing switch. The Monitors tab can be viewed independently of the Surround tab, which helps keeping an eye on the meters while using other functionality. Surround level Main surround output level affecting all channels, along with dim and mute monitoring functions.
- Page 46 Monitor out level Applicable to the physical, mastering-grade stereo monitor output on the back panel of the interface (explained in the Monitoring view section above). Surround global (lip-sync) delay Offsets all the processed channels by up to 100ms, useful for syncing the audio to picture (lip sync delay).
- Page 47 Speaker settings Provides access to the selected speaker channel’s settings. • Full name of the selected channel/speaker. • Bypass button for all of the channel's processing, excluding the level setting. • Phase invert button. Channel EQ reset, copy and paste settings buttons.
- Page 48 • Level setting in dB - hold down Cmnd (Ctrl on Windows) for fine 0.1 dB steps. • Total gain - sum read-out of the channel's level setting and the main output level. • Delay - time offset of the channel in milliseconds, up to 100ms. Holding down Cmnd (Ctrl on Windows) enables offsetting by 0.1ms steps.
- Page 49 Channel EQ graph and settings 8-band parametric EQ with cut and shelf filters available for the low and high bands, and bell filters available for the remaining bands. Adjustable graph amplitude range, when hovering over the minimum and maximum values to the left of the graph. Color coded graph visualization of the selected channel's frequency calibration.
- Page 50 ‘BASS MANAGEMENT’ mixer The above mixer is available via the Bass Management Mixer button in the Monitoring tab. It provides all bass management settings allowing monitoring low frequency content of the surround/overhead channels via the LFE channel. Each channel is labeled, and color coded according to the selected format and path order.
- Page 51 Low pass filters’ settings • Cutoff frequency for each channel, with setting linking available. • Filter type switch for each channel, choice between Linkwitz-Riley and Butterworth filters, with linking. • Filter order settings available providing second, fourth and eighth order filters (12dB, 24dB, 48dB per octave respectively), with linking.
- Page 52 LFE channel settings Control over the following settings of the LFE’s low pass filter: • Cutoff frequency. • Filter type switch, choice between Linkwitz-Riley and Butterworth filters. • Filter order (2nd, 4th, 8th). • Filter bypass for each channel, with linking. •...
-
Page 53: Trims' View
A basic example would be connecting the Orion 32+ Gen4 to an external hard drive with two Thunderbolt™ 3 ports. One port is occupied by the unit while the other connects to a computer or another Thunderbolt™... -
Page 54: Device Charging
Device Charging Orion 32+ Gen4 is able to power any device with USB and/or Thunderbolt™ Type-C connectors from its Thunderbolt™ 3 port. For example, you can power a laptop (e.g. 2016 MacBook Pro or later). - Page 55 CUSTOMER SUPPORT INFORMATION Antelope Audio Customer Support can be reached by the following means: Online Visit support.antelopeaudio.com Phone We are there for you around the clock, 21 hours/day, Monday to Friday. North America +1-916-238-1643 01:00 a.m. – 10:00 p.m. (EST) International +44 19 2593 3423 06:00 a.m.
- Page 56 • Knowledge Base in our Customer Support section is an often-overlooked source of troubleshooting information, answers to commonly asked questions and Antelope know-how.
- Page 57 Please, don't attempt to send us your device without receiving a RMA number first, as the device will be returned and not serviced. How do I get an RMA number? The Antelope Audio Customer Support team is in charge of issuing RMA numbers. Visit support.antelopeaudio.com and get in touch.
- Page 58 The shipping costs are covered by the owner of the product. Antelope Audio will not cover any local customs charges. We recommend using a courier service of your choice (e.g. DHL, UPS, FedEx). The package...
- Page 59 Consumers have the right to choose whether to claim service under the Antelope Audio Limited Warranty or under their consumer law rights.
- Page 60 3) to refund the price paid. Should Antelope Audio decide to refund the price paid, it may deduct from the paid Product’s price any damages caused to the Product; where, within fourteen (14) days of the expiration of the warranty period,(i) Antelope Audio has received written notice of any nonconformity;(ii) after Antelope Audio’s written authorization,...
- Page 61 These warranty obligations are conditioned upon the hardware being returned to the original place of purchase, or another place as directed by Antelope Audio, with the original sales receipt attached. You will be required to pay shipping and handling charges for returning the product.
- Page 62 (ii) Products purchased from a person or entity which is not an authorized dealer or re-seller of Antelope Audio; (iii)Product sold “as is” or “with all faults”, to the extend permitted by local law. This warranty is not valid in case any manufacturer label(s), serial numbers, date stamp(s) or warranty sticker(s) has been altered or removed from the Product.
- Page 63 (B2B) / Direct customers of Antelope Audio please email us at techsupport@antelopeaudio.com (ii) A valid proof of purchase is required for RMA processing (i.e. receipt, invoice, etc). Antelope Audio will provide you with the RMA number within 2 working days as of the claim submission date. RMA Return Addresses We have multiple RMA receiving locations worldwide.
- Page 64 Republic of Bulgaria with UIN: 131052590, is doing business and is worldwide known. Elsewhere in this document where the trade name Antelope Audio is used shall refer to Elektrosfera ltd., with address of management: Tsarigradsko Shose Blvd., 7th km, Building of BIC IZOT, floor 6, Mladost region, Sofia, Bulgaria.
- Page 65 SAFETY NOTES To reduce the risk of electrical shocks, fire, and related hazards: ● Do not remove screws, cover, or cabinet. There are no user serviceable parts inside. Refer servicing to qualified service personnel. ● Do not expose this device to rain, moisture or spillover of liquid of any kind. ●...
- Page 66 ● The device is designed to operate in a temperate environment, with a correct Operating Temperature of 0-50° C, 32-122° F.
- Page 67 TECHNICAL SPECIFICATIONS AD Line Input 4 x D-sub 25-pin (Tascam Input Connection: Standard) 32 Channels I/O Channel Count 12 dBu to 24 dBu in steps of 1 dB Input level trim Dynamic Range 122 dB Supported sample rates 44.1 kHz—192 kHz, 24-bit THD+N (A) ...
- Page 68 Digital Interface – Thunderbolt™ 1 x Thunderbolt™ 3 (Type-C) Port, Interface Connection: I/O - Doubles as USB port 128 Channels I/O Channel Count Supported sample rates 44.1 kHz—192 kHz, 24-bit Supported Control Panel Support Digital Interface – USB 1 x USB 2.0 (Type-C) Port, I/O - Interface Connection: ...
- Page 69 Digital Interface - ADAT 2 x Optical Connectors Interface Connection: SMUX MODE Supported 8 Channels @44.1/48 kHz I/O Channel Count 4 Channels @88.2/96 kHz 2 Channels @176.4/192.0 kHz Supported sample rates 44.1 kHz—192 kHz, 24-bit Clocking System 4th Generation Acoustically Focused Clocking Technology ...
- Page 70 Dimensions 1.8” Other Operational Temperature 0-50°C/32-122°F Electrical Specs 45 Watts Weight 3.4 kg/ 7.49 lbs W482.6 Dimensions D279...
Need help?
Do you have a question about the ORION 32+ GEN4 and is the answer not in the manual?
Questions and answers