Table of Contents
Advertisement
Available languages
Available languages
Quick Links
Advertisement
Table of Contents

Related Manuals for Midea MB-FS5017B


Summary of Contents for Midea MB-FS5017B
- Page 1 Model No.:MB-FS5017B Thank you for purchasing the MIDEA Electric Rice Cooker. Please read the Operation Instructions carefully before using and keep it cautiously after reading for future reference. Pictures are for reference only, subject to our available products.
-
Page 2: Important Safeguards
Contact Midea customer service for examination, repair or adjustment. 8. The use of accessory attachments not recommended by Midea Housewares may result in fire, electrical shock or injury. 9. Do not use outdoors. - Page 3 19. Use extreme caution when opening the lid during or after cooking. Hot steam will escape and may cause scalding. 20. Rice should not be left in the inner cooking pot with the Keep-Warm function on for more than 12 hours. 21.
-
Page 4: Polarized Plug
Polarized Plug This appliance has a polarized plug (one blade is wider than the other); follow the instructions below: To reduce the risk of electric shock, this plug is intended to fit into a polarized outlet only one way If the plug does not fit fully into the outlet, reverse the plug. If it still does not fit, contact a qualified electrician. -
Page 5: Product Instructions
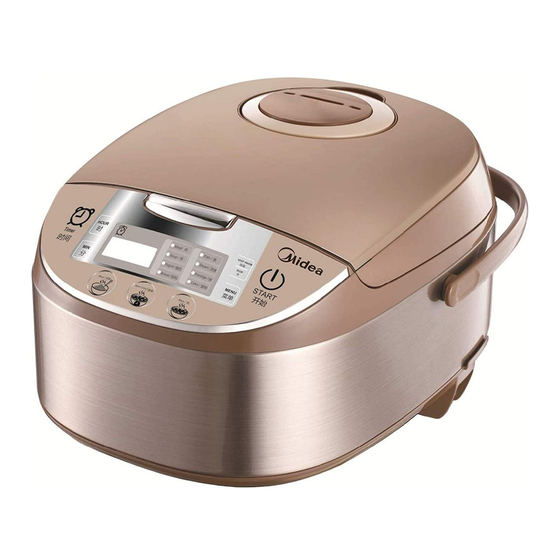
Product Instructions Cover Uncovering button Control panel Handle Main unit Power Cord Accessories Measuring Spoon Scoop Steamer... -
Page 6: Usage Instructions
Usage Instructions Dry the external surface of the inner pot with fabric, put it into the cooker, please turn the inner pot for 2-3 times to make it perfectly contact the heating tray; then press the cooker cover till it makes “Click”... -
Page 7: Switching On/Off
Use of the Functional Buttons Switching on/off Place the product on an even and stable surface. Connect the plug to a socket outlet. Entering the standby mode: Tap the START button (U). Switching the product off: Tap the START button (U) while the product is in standby mode. -
Page 8: Cooking Programs
Usage Instructions Cooking programs Programs selectable by tapping the MENU button (V). Program Approx. 80 min Refer to the “cooking (not adjustable) examples”. Approx. 55 min Refer to the “cooking (not adjustable) examples”. The food is steam 5 to 30 min cooked in the steam 1 min (5 min) - Page 9 Usage Instructions Approx. 60 min Refer to the “cooking (not adjustable) examples”. The defrosting 10 to 15 min temperature is 149°F 1 min (5 min) (65°C). Approx. 45 min Refer to the “cooking (not adjustable) examples”. Cooking examples Brown Rice, White Rice, Quick Rice Refer to the rice scale on the inside of the cooking pot (B) to use the correct amount of water.
- Page 10 Usage Instructions Cooking examples Brown Rice, White Rice, Quick Rice Refer to the rice scale on the inside of the cooking pot (B) to use the correct amount of water. 1 scale level of water is sufficient for 1 measurement cup (D) of rice. Example: For cooking 4 measurement cups of rice the water should reach level 4 on the rice scale.
-
Page 11: Keep Warm Function
Keep warm function After a program is finished, the keep warm function automatically switches on (except in Browning / Saute and Defrost programs). While the keep warm function is activated, 0 appears on the display (R). The indicator of the WARM/CANCEL button (T) lights up. The keep warm function runs for up to 12 hours. -
Page 12: Cleaning And Maintenance
Cleaning and Maintenance Wipe the WARM panel with Dry the water storage wet fabric, do not directly tank with dry dishcloth. flush it with water. Cleaning and Maintenance Remove the rice from the Please dry the water on the heating tray with dishcloth, front part with toothpick or clean the burnt rice from the dishcloth. - Page 13 Method of disassembling and cleaning the cover plate Press here Clean the cover plate Open the cover, remove the cover plate Install the plate Cleaning and Maintenance Disassembling, cleaning and installing the steam valve Note: It is suggested to clean the steam valve frequently to ensure smooth steam outlet, please clean it after cooling for avoiding scald.
- Page 14 Cleaning and Maintenance Drawing of opening it. Clean it with water after opening. As shown in drawing: turn Press it down to install clockwise, it means the the steam valve. steam valve is well installed when it makes one sound. Note: aim at the valve cover and base pointer before installing.
-
Page 15: Schematic Circuit Diagram
Schematic circuit diagram 120V~60Hz Temperature fuse Connection wire Display Black panel Power panel Heating tray Blue Bottom sensor White Cover sensor Black... - Page 16 Modèles n° :MB-FS5017B Félicitations pour l'achat de votre cuiseur de riz électrique MIDEA. Veuillez lire attentivement le mode d'emploi avant avant l'utilisation et le conserver à un endroit sûr pour une référence future. Les illustrations sont fournies uniquement à titre indicatif et...
-
Page 17: Mesures De Sécurité Importantes
7. N'utilisez pas un appareil si le cordon ou la prise est défectueux ou après une défectuosité de l'appareil ou lorsqu'il a été endommagé d'une quelconque manière. Veuillez contacter le service après-vente de Midea pour tout examen, réparation ou mise au point. - Page 18 19. Soyez très prudent lors de l'ouverture du couvercle avant et après la cuisson. La vapeur chaude qui s'échappe pourrait causer des brûlures. 20. Évitez de laisser le riz dans le pot de cuisson en mode « Keep-Warm » (garde- au-chaud) pendant plus de 12 heures.
-
Page 19: Fiche Polarisée
Fiche polarisée L'appareil dispose d'une fiche polarisée (une des broches est plus longue que l'autre). Veuillez respecter les consignes suivantes : Pour réduire les risques d'électrocution, la fiche polarisée est conçue pour s'insérer dans la prise polarisée d'une seule manière. Si la fiche n'épouse pas correctement la prise, retournez-la. -
Page 20: Présentation De L'appareil
Présentation de l'appareil Couvercle Bouton de dégagement du couvercle Panneau de commande Poignée Élément principal Cordon d'alimentation Accessoires Panier Tasse à mesurer Spatule à riz Louche vapeur... - Page 21 Mode d'emploi Utilisez un linge pour sécher la paroi externe du pot de cuisson intérieur. Mettez le riz dans le cuiseur et remuez 2 ou 3 fois pour permettre au riz d'être parfaitement au contact du plateau chauffant. Appuyer le couvercle jusqu'à ce qu'il produise le son «...
- Page 22 Utilisation des boutons de fonctions Mise sous/hors tension Placez le produit sur une surface plane et stable. Branchez la fiche à une prise de courant. Accès au mode Veille : Appuyez sur la touche START (Démarrer) (U). Mise hors tension du produit. Appuyez sur la touche START (Demarrer) (U) pendant que le produit est en mode Veille.
- Page 23 Mode d'emploi Veuillez vous référer aux《 exemples de (Riz brun/ cuisson》. Quinoa) Veuillez vous référer Env. 55 min (Riz blanc) aux《 exemples de (non réglable) cuisson》. Les aliments sont 5 à 30 h (Vapeur) cuits à la vapeur 1 min (5 min) dans l’accessoire de cuisson à...
- Page 24 Mode d'emploi Programmes à sélectionner en appuyant sur les touches de sélection rapide (W). Veuillez vous référer Env. 60 min aux《exemples de (Brunissement/ (non réglable) cuisson》. Sauté) Température de 10 à 15 min 1 min dégivrage: 149°F (Dégivrage) (5 min) (65°C).
- Page 25 Mode d'emploi Exemples de cuisson Brown Rice, White Rice, Quick Rice (Riz brun, Riz blanc, Riz à cuisson rapide) Veuillez vous référer à la graduation de riz à l’intérieur du récipient de cuisson (B) afin d’utiliser la quantité appropriée d’eau. 1 niveau de graduation d’eau suffit pour 1 tasse à...
- Page 26 Manual (Manual) Appuyez sur la touche MENU (V) jusqu’a ce que le voyant de programme Manual (Manuel) (S) s’allume. Appuyez sur les touches +/- (P) pour sélectionner le temps de cuisson souhaité. Appuyez sur touche TIMEER/TEMP (Minuteur/Température) (O) pour confirmer votre choix. Appuyez sur les touches +/- (P) pour sélectionner la température de cuisson souhaitée.
-
Page 27: Nettoyage Et Entretien
Nettoyage et entretien Utilisez un linge humide pour Utilisez une lavette sèche pour nettoyer le panneau WARM. nettoyer le réservoir de stockage Évitez de l'asperger d'eau d'eau. directement. Nettoyage et entretien Utilisez un cure-dent ou une Nettoyez l'eau sur le plateau lavette pour enlever le riz collé... - Page 28 Technique de désassemblage et de nettoyage de la plaque interne du couvercle Appuyez ici Nettoyez la plaque interne du couvercle Ouvrez le couvercle et enlevez la plaque interne du couvercle Fixez de nouveau la plaque Nettoyage et entretien Désassemblage, nettoyage et installation de la soupape à vapeur Remarque : Pour une bonne évacuation de la vapeur, il est recom- mandé...
- Page 29 Nettoyage et entretien Après ouverture, nettoyez Illustration de l'ouverture. avec de l'eau. Comme illustré, tournez dans Appuyez dessus pour le sens horaire. Il se produit fixer la soupape à vapeur. un son pour indiquer que la soupape à vapeur est bien fixée. Remarque : Fixez le cache- soupape et le pointeur avant l'installation.
-
Page 30: Schéma Du Circuit Électrique
Schéma du circuit électrique Fusible de 120 V~60 Hz température Rouge Fil de connexion Cadran Noir Panneau d'affichage d’alime- ntation Plateau chauffant Bleu Rouge Capteur du fond Blanc Capteur du couvercle Noir...
Need help?
Do you have a question about the MB-FS5017B and is the answer not in the manual?
Questions and answers