
Related Manuals for Liectroux L200


Summary of Contents for Liectroux L200
- Page 1 Robot Vacuum Cleaner L200 English Robot Vacuum Cleaner Instruction Manual Please read this manual carefully before using the product and keep it safe.
-
Page 2: Table Of Contents
Content 1. Safety information 2. Packing list 3. Technical specification 4. Product introduction 5. Quick install Guide 6. Method of usage * APP connection 7. Maintaining 8. Troubleshooting... -
Page 3: Safety Information
SAFETY INFORMATION PACKING LIST Limitations of use The illustrations of the product, accessories, user interface, etc. in the Please keep the plastic bags away from infants and young children to avoid suffocation. manual are schematic diagramsfor reference only. Due to product Please do not use it outdoors (such as open balconies) or in commercial and industrial area, this product is only used for floor cleaning at room. -
Page 4: Technical Specification
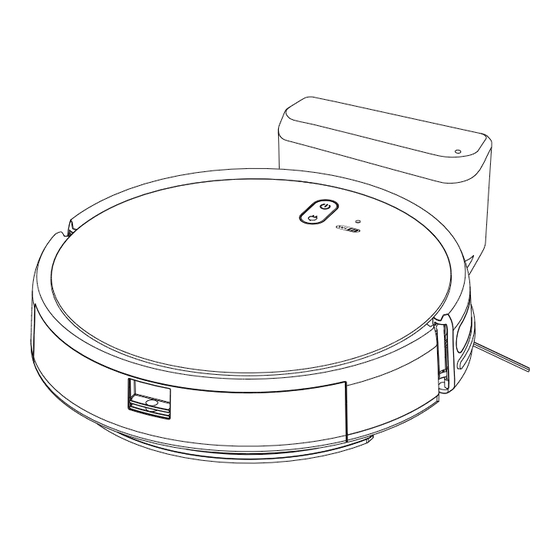
TECHNICAL SPECIFICATION PRODUCT INTRODUCTION 1. About the host Product name Robot vacuum Product model L200 Product dimensions 300*300*75mm Input voltage 0.6A Bumper operating voltage 14.4V Power button Rated power Battery type Lithium battery Recharge button Battery capacity 2600mAh Input 0.6A Output 0.6A... -
Page 5: Quick Install Guide
PRODUCT INTRODUCTION QUICK INSTALL GUIDE 2. Charging base Quick Install Guide 1. Please remove the protective foams from the main unit and install the side brush correctly. Signal indicator Infrared lens Power adapter plug 2. Place the charging base on a flat ground against the wall. Do not place Charging plate any objects within 0.5m by sides and 1.5m in front of the charging dock. -
Page 6: Method Of Usage
METHOD OF USAGE METHOD OF USAGE 2、Use of mopping function Method Of Usage 1. Before using Robot, pick up objects like clothing, loose papers, pull 2.1. Press the dust box buckle and pull 2.2. Please inject amounts of water to the dust box, and remove the water cords for blinds or curtains, power cords, and any fragile objects. -
Page 7: App Connection
METHOD OF USAGE METHOD OF USAGE 3、Use of cleaning function APP Connection 4. APP download, installation and registration. 3.1. The mop module be installed when the robot vacuum leaves factory, Please remove the mop module before using only the vacuum function. Use your finger to clasp the middle of the mop module and remove the mop module. - Page 8 METHOD OF USAGE METHOD OF USAGE B4.7. After clicking "EZ A4.11. After the completion of A4.12.Click “ON” to default A4.8. Please select the WiFi A4.7. Click "Go to the add up, the device to work in "auto" mode", the application Connect"...
- Page 9 METHOD OF USAGE METHOD OF USAGE 5. Start/Pause( After the robot vacuum power on, short press the “ ” 7. Working modes button on the device to start or pause the device, or use App or press 7.1. Automatic cleaning (after startup, the vacuum cleaner will clean the whole house in a bow shape.
- Page 10 METHOD OF USAGE METHOD OF USAGE 7.3. Edge Cleaning(The robot vacuum cleans the periphery of the indoor fixed objects (such as walls, table corners, etc.), and returns to the charging dock after working along the edges. Also could press “ ”...
-
Page 11: Maintaining
MAINTAINING MAINTAINING Maintaining 1. Suction inlet cleaning(Once a week is recommended) 3.3. Remove the filter gauze, HEPA filter and sponge, wash the filter gauze with Gently turn the device over and wipe the suction port with a clean dry cloth. water, and use cleaning tools to clean up the rubbish mixed in HEPA. - Page 12 MAINTAINING MAINTAINING 4. Mop board cleaning (Once a week is recommended) 5.3. Clean the charging contact 5.4. Clean the signal transmission area, 4.1. Remove the mop board vertically 4.2. Fasten a new (clean) mop to the area with a soft dry cloth maintenance with a soft dry cloth.
-
Page 13: Troubleshooting
TROUBLESHOOTING Troubleshooting *When the battery is low, place the device on the charging base, align it with the contact point, and the device will start up automati- cally. *If the ambient temperature is lower than 0°C, use it in an environment of 0 to 40°C.
Need help?
Do you have a question about the L200 and is the answer not in the manual?
Questions and answers
Waar zit de resetknop bij de L200
The location of the reset button on the Liectroux L200 is not provided in the given context.
This answer is automatically generated