FUTABA T26SZ Full Manual
Digital proportional radio control system
Hide thumbs
Also See for T26SZ:
- Short manual (39 pages) ,
- How to update firmware (3 pages) ,
- Short manual (40 pages)
Advertisement
Table of Contents
Advertisement
Table of Contents

Related Manuals for FUTABA T26SZ


Summary of Contents for FUTABA T26SZ
- Page 1 WEB FULL MANUAL 1M23Z10502...
- Page 2 Introduction ........6 ....Application, Export, and ................6 ........Support and Service ......6 ....30 .......7 ..31 without reading) .......7 ........33 ...........10 .......34 Model ID ................10 ..36 .......11 ....13 ......37 ..39 ........14 ........40 ..........16 Helicopter .........43 ........17 Multicopter ........43 ......17 ......44 ........18 ..........
- Page 3 .............84 ..................86 ............90 ..........91 ...................93 .............94 ........60 ..............63 ...96 ..........99 End point ..........66 ..100 ........67 ....101 ...........67 ....103 ......68 → ....104 Function ...........69 ..........71 .........................106 ........74 ....................107 Idle down ..........76 .....77 ........108...
- Page 4 ..................147 ......118 .............119 Snap roll ........Sound Select ................................Ailevator ............Acceleration ................Motor ..............................Winglet ...................160 AFR ...........160 Dual rate ................................163 Sequencer ........131 ......169 ......
-
Page 5: Sequencer
........184 AFR ................Dual rate ...............186 ....... Sequencer ......→ 131) ............187 ................188 ............190 ..................193 ................................196 ..........198 .................199 ......................................................⇒ Expert Menu ............... - Page 6 French: Cet appareil radio est conforme au CNR d’Industrie Canada. L’utilisation Please contact your Futaba importer in your region of the world to assist de ce dispositif est autorisée seulement aux deux conditions suivantes : you with any questions, problems or service needs. Please recognize that (1) il ne doit pas produire de brouillage, et (2) l’utilisateur du dispositif...
- Page 7 Center. as the presence and location of spectators, the wind direction, and Futaba is not responsible for the use of this product by the customer. Company and product names in this manual are trademarks or lines, tall buildings, or communication facilities as there may be radio registered trademarks of the respective company.
- Page 8 Do not touch the engine, motor, or ESC during and immedi- Before turning on the transmitter: ately after use. These items may become hot during use. For safety, fly so that the aircraft is visible at all times. Flying behind buildings or other large structures will not only cause you When turning off the transmitterʼ s power switch after the to lose sight of the aircraft, but also degrade the RF link performance engine ...
- Page 9 If left in such an environment, the plastic may be damaged. Futaba is not responsible for damage sustained by combination with Since the metal parts of the case may corrode, always keep them clean. instruction manual and catalog.
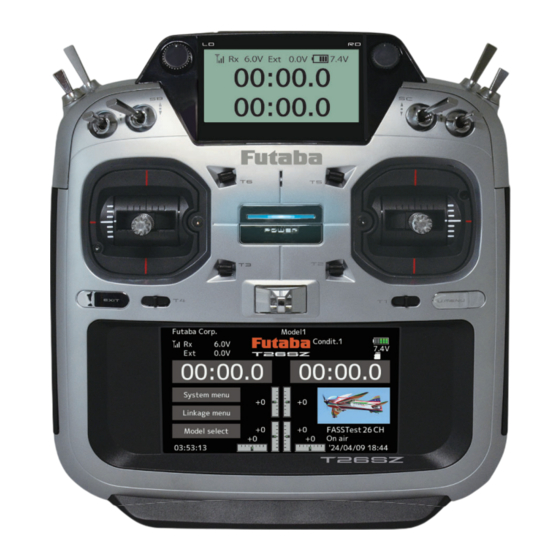
- Page 10 By using the S.BUS2 system multiple servos, gyros and telemetry sensors are easily installed with a minimum amount of cables. T26SZ has a LCD sub-display. It will be possible to know telemetry information or timer separately from the main display.
- Page 11 Antenna Charge/PC Port USB type-C The transmitter can be used as a game controller b y c o n n e c t i n g i t t o a computer with a USB cable. (Some games cannot be used.) Monitor LED SUB Display Front Right Dial (RD)
- Page 12 Stick tension adjustment port Back Right Slider Left Slider Right Slider Left Slider S.BUS (S.I/F) Earphone connector Jack Trainer connector Battery cover Bottom micro SD Slot Battery port The LCD displays shown in this manual may vary from your own, depending upon your model type. LCD displays may also vary as a result of version upgrades or other changes.
- Page 13 As with all radio frequency transmissions, the strongest area of signal transmission is from the sides of the creates this situation, easily move the antenna to correct this situation. If you fly with your transmitter facing The antenna can be rotated 90 degrees and angles 90 degrees. the model at the ...
- Page 14 Connect the battery Press the OPEN connector part of the battery cover. Remove the battery cover Close the battery cover completely Battery cover Be careful not to pinch the wiring Install the battery into the transmitter This connector connects to the transmitter. LT2F2000B LiPo Battery Battery port Insert the wiring into this space.
- Page 15 When charging WARNING by removing the battery from the Be sure to unplug the transmitter. power plug from the outlet after using the USB AC adapter. Charging time for a Use a commercially available fully used battery pack USB Cable USB charger AC adapter is approximately 5 USB-A type 5 V-2 A hours using the Futaba Charging LED optional adapter. Red: Charging However, the charging --- : Full time may differ from the above depending Blinking: Charging was canceled due to on the ambient an abnormal condition. (If the battery is overheated, let it cool down before charging.) temperature and battery pack condition. Do not supply power to the transmitter charging port and battery charging port at the same time. Be sure to check the battery voltage before each flight. Do not charge batteries other than the dedicated battery. When charging the battery by removing it from the transmitter, charge from the USB side. Do not charge from the 3-wire side. The T26SZ has a Lipo charging circuit, so it can be charged from the 3-wire side.
- Page 16 RF conditions. The status of the transmitter is displayed by LED at the upper part of the front of a T26SZ. *If THR stick is high, a WARNING screen will appear. Another warning will appear if a power supply is attached.
- Page 17 Tapping the settings buttons for each value on the settings screen will cause value input buttons to be careful so that you don't scratch the Touch appear at the top of the panel. Display with anything hard such as a metal object. Don't push the Touch Display with excessive force or drop anything on the panel. Pressing and holding a value will return it to its default setting.
- Page 18 With the home screen displayed. Press the EXIT button for about 1 second. "Key Icon" 2. is displayed and the keys will be disabled. EXIT Press and hold Press the EXIT button for about 1 second, and the 1. CAUTION display will then become unlocked. T h e ...
- Page 19 You can adjust the length of stick levers, if you like. It is recommended to adjust the length of the sticks in line with your hand size. Lever head A Lever head B Hold the lever head "B" and turn the lever head "A" Securely lock the stick lever by holding lever head A 3. ...
- Page 20 You can adjust the tension of stick-levers. The rubber cover in the back is removed For helicopters: For airplanes: Adjust the screw Adjust the [Adjustment of tension] on the right. screw on the left. Adjustment of Throttle Stick (Ratchet System) You can choose either airplane ratchet system *In the Mode 1/3, arrangement of a screw is opposite.
- Page 21 e.g. Stick mode 2 → Stick mode 1 Loosen this screw and Tighten this screw to release Back side add spring tension. the spring tension. Loosen the screws for both of them. For helicopters: Adjust the For airplanes: Adjust the screw screw on the left. on the right. System menu ⇒...
- Page 22 This transmitter is equipped with 6 digital trims. Each time you press a trim button, the trim position moves one step. If you continue pressing it, the trim position starts to move faster. In addition, when the trim position returns to the center, the tone will change.
- Page 23 When T26SZ update software is released, the software is updated using an micro SD card. The T26SZ is capable of using SD and SDHC cards (SD:32MB-2GB SDHC:4GB-32GB). When you have a problem of saving or reading data Futaba) into the micro SD card, you can use those after a long period of use, please get a new micro files on your T26SZ transmitter.
- Page 24 -When a micro SD card is installed in the T26SZ transmitter, a folder called "Futaba" is created. CAUTION Folders called "LOG" and "MODEL" are created in this folder. The "MODEL" folder stores the Be sure to turn off the power to ...
- Page 25 (Typical installation) R7208SB The R7208SB has a port switching The R7208SB has a port switching function. If SB2/4 to SB2/7 ports are function. If SB2/4 to SB2/7 ports are also set to S.BUS2, sensors can be also set to S.BUS2, sensors can be connected.
- Page 26 By connecting the receiver to the T26SZ using the receiver setting/update cable (included), can change the following three receiver settings. By installing two receivers in one aircraft, if one The R7208SB is capable of changing its channel receiver becomes unable to communicate, the other allocations as described in the table below.
- Page 27 Turn on the power switch while pressing the U.MENU button on the transmitter. *For safety reasons, receiver settings And turn on U.MENU cannot be made while radio waves are Keep pressing and… being transmitted. *When using the receiver after setting the and on again. Tap [Receiver setting] on the System menu.
- Page 28 Transmitter in link mode For FASSTest 26/18CH Select dual Servos other than those listed here can be used as mode and link secondary Updating requires a PC that can connect to the Internet and Futaba CIU-3. Refer to Futaba homepage for update software and Turn on the sub update method. receiver and link *In the case of FASSTest 26CH, it is possible to link with three receivers. In that case, select "Triple".
- Page 29 • In FASSTest/T-FHSS AIR • The condition name •When battery is low, the alarm mode, this data displayed. that is currently used will beep. Land your aircraft RX voltage and Ext voltage is displayed here. immediately. display → (Menu) • Model menu Tap the Icon to call Model Menu screen.
- Page 30 ● File format : Windows bitmap file (24-bit color) ● Size : 160×80 pixels Use your PC. Insert the picture file into the T26SZ once, connect the formatted microSD card to your PC, and save it to the “FUTABA\PICTURE” folder on the microSD card.
- Page 31 The T26SZ comes with the turned on by default. Tap : Model menu → Air brake Switch setting mixing (function) Status : INH → ON Activate the mixing (function) Tap : Switch A warning message will only appear the first time. [Yes] → It will not be displayed next time. It will be selected automatically. Operate switch C to either position. Switch to turn mixing (function) ON/OFF. Operate it to the position you want to turn ON. Position to turn mixing (function) ON If want to turn on the middle positions (2 positions) as well, tap the screen. Press the EXIT button or [Hardware select] to complete the switch selection.
- Page 32 Call up the function screen (Air brake) Turn switch C ON/OFF Check the Status ON/OFF Do not check on the [Hardware select] screen, as there is a risk that the ON/ OFF position may change. When switch H (return) is set to ON at the front position It will be selected automatically. Operate switch H to either position. Operate the switch position to the front side. While keeping the switch position on the front side, press the EXIT button or [Hardware select]. If you release switch H, the other side will turn ON.
- Page 33 The sub-display can display timer or telemetry data. (The sub display is not a touch panel. The setting operation is performed on the main display.) Telemetry receiving status Receiver Voltage Extra Voltage Transmitter Voltage Timer 1 Timer 2 Adjust the contrast of the LCD How to display telemetry information screen in the “Display” in the Open the “Linkage menu”...
- Page 34 Each transmitter has an individually assigned, unique ID code. In order to start operation, the receiver must be linked with the ID code of the transmitter to which it is being paired. Once the link is made, the ID code is stored in the receiver and no further linking is necessary unless the receiver is to be used with another transmitter.
- Page 35 For the sake of safety, this function does not operate the receiver if the model data of the model program settings that does not match the aircraft is used by mistake. Conventional system Model ID Rx 1 Rx 1 Operation Not Operation Operation Operation Rx 2 Rx 2 Operation Rx 3...
- Page 36 It is extremely important to range check your models prior to each flying session. This enables you to The T26SZ transmitter incorporates a system that reduces its power output and allows you to perform such a range check. During this mode, the RF power output is reduced so the range test can be performed.
- Page 37 Built-in wireless trainer module *The wireless trainer function is for using the T26SZ as a teacher. When using the T26SZ as a student, the teacher must have a transmitter compatible with the wireless trainer. *When using the wireless trainer function, the student transmitter must be compatible with T-FHSS AIR.
- Page 38 On the student side, “Link completed” is displayed on the link status display screen. Turn on the T26SZ trainer master switch and the “operation” display changes to “ON”. The wireless trainer ID and software version are displayed at the bottom of the T26SZ information screen. ● System menu → Information *The ID/version of the wireless trainer ...
- Page 39 The T26SZ transmitter channels are automatically assigned for optimal combination according to the type selected with the Model type function of the Linkage menu. The channel assignment (initial setting) for each model type is shown below. Connect the receiver and servos to match the type used.
- Page 40 1AIL 2AIL 2AIL+1FLAP 2AIL+2FLAP 2AIL+4FLAP 4AIL+2FLAP 4AIL+4FLAP RX The output CH of each Airplane Glider Airplane Glider Airplane Glider Airplane Glider Airplane Glider Airplane Glider Airplane Glider system Aileron Aileron Aileron Aileron Aileron Aileron Aileron Aileron Aileron Aileron Aileron Aileron Aileron Aileron Elevator Elevator Elevator Elevator Elevator Elevator Elevator Elevator Elevator Elevator Elevator Elevator Elevator Elevator Throttle Motor Throttle...
- Page 41 2AIL 2AIL+1FLAP 2AIL+2FLAP 2AIL+4FLAP 4AIL+2FLAP 4AIL+4FLAP RX The output CH of each Airplane Glider Airplane Glider Airplane Glider Airplane Glider Airplane Glider Airplane Glider system Aileron Aileron Aileron Aileron Aileron Aileron Aileron Aileron Aileron Aileron Aileron Aileron AUX4 AUX4 AUX4 AUX4 AUX4 AUX4 Aileron2 Aileron2 Aileron2 Aileron2 Aileron2 Aileron2 Throttle Motor...
- Page 42 2AIL 2AIL+1FLAP 2AIL+2FLAP 2AIL+4FLAP 4AIL+2FLAP 4AIL+4FLAP RX The output CH of each Airplane Glider Airplane Glider Airplane Glider Airplane Glider Airplane Glider Airplane Glider system Aileron Aileron Aileron Aileron Aileron Aileron Aileron Aileron Aileron Aileron Aileron Aileron Rudder2 Rudder2 Rudder2 Rudder2 Rudder2 Rudder2 Aileron2 Aileron2 Aileron2 Aileron2 Aileron2 Aileron2 Throttle Motor Throttle...
- Page 43 The output The output CH of each CH of each H-4/H-4X Swash All other H-4/H-4X Swash All other system system Aileron Aileron Aileron Aileron Elevator Elevator Elevator Elevator Throttle Throttle Throttle Throttle Elevator2 Rudder Rudder Rudder Pitch Pitch Gyro Gyro Gyro Gyro Pitch Pitch Governor Governor Governor Governor Rudder Governor2 Elevator2 Governor2 Gyro2...
- Page 44 This does not set up any model data. button that you want to enter. Display Display adjustment. Sound volume Adjust the volume of: Other sound, Warning, Voice Date and Time Resets the Date and Time. H/W setting Stick mode selection (Mode 1 - Mode 4 ). J1-J4 sticks correction can be performed. Battery Battery alarm voltage setting. Auto power off time setting. Range check The output of the transmitter is lowered, for Range checking. S.Bus servo S.BUS servo setting. Receiver setting Connect the receiver and T26SZ and set the receiver mode. DLPH-2 setting Connect the DLPH-2 and T26SZ and set the DLPH-2 mode. SBD setting Connect the SBD and T26SZ and set the channel settings. Update Connect the update compatible devices and T26SZ and update. Switch type This is the switch type setting when the switch is changed. Information Sets the User name, Language, and Unit system. Displays the program version, and microSD card information. ● Return to Home screen...
- Page 45 The following LCD screen adjustments: ● Backlighting brightness adjustment ● Backlighting decrease time adjustment ● Touch screen calibration ● Sub display contrast adjustment ● Tap the [Display] button in the System menu to call the setup screen shown below. ● Return to System menu 1.
- Page 46 Integrating timer resetting This function adjusts the Date and Time of the *The time is displayed on the Home screen. T26SZ transmitter. The system timer can also be reset. ● Tap the [Date and Time] button in the System menu to call the setup screen shown below.
- Page 47 Stick mode selection and J1-J4 sticks calibration Usually, this H/W setting is unnecessary. Please perform this calibration only if a change at the center of a stick should arise after prolonged use. ● Tap the [Calibration] button in the System menu to Mode 1-4 can be call the setup screen shown below.
- Page 48 Low battery vibrator and auto power off set Vibrator settings for low battery warning and auto ● Return to System menu Vibrator Types This function prevents battery discharging if Type 1 the transmitter power supply does not erase. 1. Adjust the auto power off time with the value input buttons.
- Page 49 An S.BUS(2) servo can memorize the channel and various settings you input. Servo setting can be performed on the T26SZ screen by wiring the servo * With some S.BUS(2) servos, there are some functions which cannot be used. If a function cannot be used, the display screen will change.
- Page 50 Each S.BUS servo has an ID number stored in it. the aircraft can also be read and displayed in a list. 1. Select [S.Bus servo] of the System menu. 3. INH → ACT 3-way hub or Y-harnesses 4. Press [Read]. The ID and current setting of that servo are displayed. 5.
- Page 51 *There are functions that can and cannot be performed according to the servo type. • ID Displays the ID of the servo whose parameters are to be read. It cannot be changed. Channel of the S.BUS system assigned to the servo. Always assign a channel before use. The direction in which the servo rotates can be changed. Restricts operation in the specified direction the instant the power is turned on. By using this setting, the first initial movement when the power is turned on slowly moves the servo to the specified position. The state of the servo when the servo input signal is lost can be specified. The "Hold" mode setting holds the servo in its last commanded position even if using AM or FM system. This function changes smoothness of the servo operation relative to stick movement changes. Smooth setting is used for normal flight. Select the "OFF" mode when quick operation is necessary such as 3D. The neutral position can be changed. When the neutral offset is large value, the servo's range of travel is restricted on one side. Speeds can be matched by specifying the operating speed. The speed of multiple servos can be matched without being affected by motor fluctuations. This is effective for load torques below the maximum torque. However, note that the maximum speed will not exceed what the servo is capable of even if the servo's operating voltage is increased. The dead band angle at stopping can be specified. [Relationship between dead band set value and servo operation] Small Value Setting Dead band angle is small and the servo is immediately operated by a small signal change. Large Value Setting Dead band angle is large and the servo does not operate at small signal changes. (Note) ...
- Page 52 OFF : It is the boost ON at the time of low-speed operation.(In the case of usual) ON : It is always the boost ON.(When quick operation is hope) The characteristic when the servo is stopped can be set. When smaller than the standard value, the characteristic becomes an overshoot characteristic. If the value is larger than the standard value, the brake is applied before the stop position. Especially, when a large load is applied, overshoot, etc. are suppressed by inertia and hunting may occur, depending on the conditions. If hunting (phenomena which cause the servo to oscillate) occurs even though the Dead Band, Stretcher, Boost and other parameters are suitable, adjust this parameter to a value larger than the initial value. [Relationship between damper set value and servo operation] Small Value Setting When you want to overshoot. Set so that hunting does not occur. Large Value Setting When you want to operate so that braking is not applied. However, it will feel like the servo response has worsened. (Note) If used in the hunting state, not only will the current consumption increase, but the life of the servo will also be shortened. The servo hold characteristic can be set. The torque which attempts to return the servo to the target position when the current servo position has deviated from the target position can be adjusted. This is used when stopping hunting, etc., but the holding characteristic changes as shown below. [Relationship between stretcher and servo operation] Small Value Setting Servo holding force becomes weaker. Large Value Setting Servo holding force becomes stronger. (Note) When this parameter is large, the current consumption increases. When a servo is powered up without a transmitter signal, a buzzer sounds. (When transmitter signal is lost, a buzzer sounds until the servo regains the signal. This is not unusual. The transmitter has been turned OFF ahead of a servo power supply → The buzzer sound of about 1.25 Hz continues sounding as servo power supply end failure alarm. Do not insert or remove the servo connector while the receiver power is ON. A buzzer may sound by incorrect recognition. ) * Buzzer sound is generated by vibrating the motor of a servo. Since current is consumed and a servo generates heat, please do not operate the number more than needed or do not continue sounding a buzzer for a long time. WARNING While S.BUS servo writes, you aren't supposed to remove a connection of a servo and turn off a power supply of a ...
- Page 53 Receiver can setting the channel mode, dual RX link mode and FASSTest12ch telemetry off mode you input. Receiver setting can be performed on the T26SZ screen by wiring the receiver as shown SB2/RX port S.I/F port 5. The receiver settings will be displayed. The displayed contents vary depending on the model.
- Page 54 DLPH-2 mode setting Setting of DLPH-2 is possible with T26SZ. DLPH- 2 setting can be performed on the T26SZ screen by S.I/F port RX1 port 1. Connect the power supply to the BAT.1 or BAT.2 port of DLPH-2. 2. Connect the RX1 port of the DLPH-2 and the S.I/F port of the transmitter with a cable.
- Page 55 SBD S.BUS Decoder channel setting SBD S.BUS Decoder channel setting is possible with T26SZ. SBD setting can be performed on the T26SZ screen by wiring the SBD as shown in the S.I/F port 1. Connect the SBD and the S.I/F port of the transmitter with a cable.
- Page 56 2. Extract the update file on your computer. The "FUTABA" folder will be created on your computer. 3. Copy the "FUTABA" folder into your microSD card. 4. Insert the microSD card with "FUTABA" folder that contained the update software into the SD card slot on your transmitter.
- Page 57 The program version and microSD card size are displayed. The User name, language and Unit system used by the system can also be changed. This function registers the T26SZ user name and The Information screen displays the T26SZ system the language displayed at proportional can be program version information, microSD card changed.
- Page 58 The Linkage menu is made up of functions which perform model addition, model type selection, end point setting, and other model basic settings. Servo monitor Displays the servo test and operation position Model select Model addition, call, deletion, copy, model name setting Model type Model type, wing type, tail type, swash type, selection Servo reverse Servo direction reversal End point Servo basic rate adjustment and limit setting Servo speed Servo speed setting Sub-trim Adjusts the neutral position of each servo Function Channel assignment of each function can be changed Fail safe Fail safe function and battery fail safe function setting ...
- Page 59 Servo Test & Graph Display / Displays servo positions. This is used for testing servo movement. “Moving In order to prevent any potential difficulties, Test” (repetition mode) and “Neutral Test” (fixed the servo test function will be inoperable, or position mode) are available. the Servo Test function is not operational if the Throttle cut is ON in either airplane or helicopter position of a servo horn.
- Page 60 This function is used to load the settings of the long as 15 characters, and the model name always desired model into the T26SZ’s memory. appears in the display screen. The settings may be selected from either the The Copy function is used to copy one set of model transmitter’s built-in memory.
- Page 61 1. Select the desired model on the model selection 1. The model data chosen at current model can be screen. changed. The current model name, tap. 2. Tap the desired model in the model list. 2. When [Rename] is tapped, a keyboard appears on the screen.
- Page 62 2. Copy the model data of another transmitter to T26SZ. The data will be converted for T26SZ. 3. Select the converted model data. *The model data converted for T26SZ cannot be used in another transmitter. 3. When [Internal]or [SD card] is tapped, copying is executed.
- Page 63 This function selects the model type from among airplane, glider, helicopter, and multicopter. Seven types of main wings (six types of flying functions, and mixing functions for the chosen wing) and three types of tail wings are available model type. for airplanes.
- Page 64 Set the type you choose by tapping. Airplane/Glider : Choose the Helicopter : Choose the swash wing type and tail. type.
- Page 65 Use to reverse the servo throw direction. Servo Reverse changes the direction of an individual servo’s response to a control stick memory, hook ups, and radio function. movement. For CCPM helicopters, be sure to read the section WARNING on Swash AFR before reversing any servos. With CCPM helicopters, always complete your servo Before a flight, always check that your ...
- Page 66 Sets the travel, limit point. The End point function adjusts the left and right correct improper linkage settings. 30 〜 30 〜 140% 140% The travel rate (normal full stick movement at high rates) can be varied from 30% to 140% in each direction on channels 1 to 16.
- Page 67 Sets the speed of each servo. The Servo speed setting is used to set the servo speed setting can be varied from 0 to 27 in each delay for each channel, from channel l to channel channel. 16. The system uses the programmed speed (delay) to slow down servo position changes.
- Page 68 Setting of Fine adjustment during operation of each servo. In contrast to the neutral position correction For example, when one large aileron is driven for each channel using sub-trim, balance is an by multiple servos, it is used to absorb variations additional function that allows you to set an in operation between the multiple servos and arbitrary correction amount for the servo operating...
- Page 69 Channel assignment for each function can be changed to suit your needs. When you select model and wing (swash) types, you will find that the optimized combinations of These two channels can be used as switch (On/ servo output channels and functions have been already preset.
- Page 70 1. Tap the trim button to call the trim setup screen. This function reverses the operation signal of the 2. The following items can be set at the trim setup sticks, switches, trim levers, and knobs. screen. ● Hardware setting (Selection of switch, etc. which Note: This setting reverses the actual operation controls trim) signal, but does not change the display of the...
- Page 71 For safety, always set the fail safe functions. mode for each channel. The T26SZ system also provides you with an servo moves to the maximum slow side for airplanes and to the advanced battery monitoring function that warns slow side from the hovering position for helicopters. Crashing...
- Page 72 ● Return to Linkage menu The T26SZ is for 2.4 GHz only. The system can be changed from among 5 choices: FASSTest 26CH, The voltage at which battery fail-safe FASSTest18CH, FASSTest12CH, T-FHSS AIR, activates can be set when you link. (3.5- S-FHSS.
- Page 73 If a DL interval is increased, the response of the sensor data display becomes slower, but stick response will improve. T26SZ has been made compatible with the CRSF *Bidirectional communication function of CRSF is not supported. (TBS) protocol. *When using CRSF, the S.BUS servo setting function and ● Call page 2/2 from the [System type] menu.
- Page 74 Digital trim settings This function adjusts the digital trim's control step When the flight conditions are set, the trim amount and operation mode (T1-T6). operation can be coupled with any of the conditions selected through combination mode. ● Select [Trim setting] at the linkage menu and call the setup screen shown below.
- Page 75 Stops the engine safely and easily. Throttle cut provides an easy way to stop the idle. The action is not functional at high throttle to avoid accidental dead sticks. The switch’s location and direction must be chosen, as it defaults to " − Tapping this will change ...
- Page 76 Lowers the engine idling speed. The Idle down function lowers the engine's idle The action is not functional at high throttle to avoid accidental dead sticks. The switch’s location and Tapping this will change direction must be chosen, as it defaults to " −− " . INH to either OFF or ON ...
- Page 77 (Helicopter only) This function limits the travel of the swash plate to prevent linkage damage as the aileron and elevator operation is used. It is useful for 3D heli setting. ● Tap the [Swash ring] button in the Linkage menu to call the setup screen shown below.
- Page 78 Swash operation linkage correction function (helicopter only, except swash type H-1). Mixing Rate At your linkages, if the servo horn deviates from This compensation mixing is used to correct the a perpendicular position at neutral, the linkage tendency of the swash-plate for each control. The compensation functions in this menu may not following compensation mixing is possible: PIT compensate effectively.
- Page 79 Move the aileron stick to the left and right and adjust the aileron compensation amount so that *Becomes the compensation reference point. interference in the elevator or pitch direction at *Adjusting the servo horn so that the neutral point position is that time is minimal.
- Page 80 An alarm (single beep) can be sounded at the Tapping this will change INH to ON and activated. I f t h e t h r o t t l e s t i c k ● Return to Linkage menu reaches the yellow line, an alarm will sound. T h i s i s t h e c u r r e n t This is the throttle stick alarm ...
- Page 81 Timer setting The Timer function may be set for Each timer may be set for count-down or count up operation any desired time, i.e. engine run time, with a target time. specified times for competitions, etc. If a target time is set and the timer reaches the set time, a Two independent timers are provided buzzer sound for each count is generated.
- Page 82 Integration Timer INT (integration) Timer is the function which changes progress of a timer according to the location of the throttle stick. When the throttle stick is raised for faster speed, the speed of the timer usually increases. With the throttle stick at mid-range speed, the timer speed decreases (to 50%). When the throttle is positioned at low end, the timer's progress stops.
- Page 83 Function name can be changed The name of the spare functions (Auxiliary 1-8) can be changed for the full name (10 characters) or for the abbreviated name (4 characters). ● Tap the [Function name] button in the Linkage menu to call the setup screen shown below. ●...
- Page 84 ● When the receiver voltage is turned off, the receiver voltage will be displayed as 0V. Viewing the receiver voltage. Setting is unnecessary. When menu telemetry P.84 is listened to, the voltage appears. Viewing the drive battery CA-RVIN-700 and wiring work are necessary. P.92 voltage. Using various optional Optional telemetry sensors are necessary. P.86 telemetry sensors. T26SZ setting is unnecessary. Using several telemetry Setting by "sensor" in the menu is necessary. P.88 sensors of the same type. (Register is necessary.) Setting alarms from the Setting by "Telemetry" in the menu is P.93 〜 112 telemetry information. necessary. < Home display > Receiver → Transmitter. The reception of the signal from the receiver to the transmitter is shown. This does not ...
- Page 85 Home display 16 of telemetry data is displayed EXIT is pushed *Be aware that pressing and holding this activates the key lock Y o u c a n c h o o s e which type of sensor t o d i s p l a y f o r f o u r displays. Tap the sensor ...
- Page 86 Various telemetry sensors setting This screen registers the telemetry sensors used with the transmitter. When only one of a certain type of sensor is used, this setting is unnecessary and the sensor can be used by simply connecting it to the S.BUS2 port of the transmitter. When using 2 or more of the same kind of sensor, they must be registered here.
- Page 87 1 , 2 , 8 , 9 , 1 0 , 1 6 , 1 7 , 1 8 , S.BUS Servo sennsor (SBS- 6 slots 01S) 2 4 , 2 5 , 2 6 Futaba ESC (MC-980H/A, MC-9130H/A, MC-9200H/A) 8 slots 8 , 1 6 , 2 4 HobbywingESC SBS-01ML 16 slots...
- Page 88 When using multiple sensors of the same type the sensors must be registered in the transmitter. Connect all the sensors to be used to the T26SZ as the following procedure. The ID of each sensor is registered in the transmitter.
- Page 89 *For some transmitters (e.g., T6K), when the start slot of a sensor is changed, the sensor cannot be used. 1. Connect the sensor to the T26SZ as shown in the 2. Tap “Change slot” on page 3/3 of the <Sensor>...
- Page 90 Displaying data from the receiver This screen displays your choice of data from the receiver. Also warnings can be activated regarding the data. For example, if the receiver voltage drops, the user can be warned by an alarm (and vibration). T a p ...
- Page 91 Displaying data from the receiver battery voltage In this screen, the battery voltage of a receiver is displayed. If it becomes higher or lower than the settin, an alarm and/or vibration will alert you. ● Tap the [Receiver] button in the Telemetry screen to call the setup screen shown below.
- Page 92 Displaying data from the EXT battery voltage port *CA-RVIN-700 must be installed in the aircraft. The EXT-VOLT screen will display the data from You will be alerted by an alarm or vibration if the the EXT-battery output from the R7208SB or voltage set by you is exceeded. R7308SB receiver.
- Page 93 Displaying data from the temperature *A temperature sensor must be installed in the aircraft. Temperature is a screen which displays/sets up the temperature information from an optional temperature sensor. The temperature of the model (engine, motor, If it becomes higher or lower than the setting, an alarm and/or vibration will alert you. ●...
- Page 94 Displaying data from the rpm *An rpm sensor must be installed in the aircraft. The RPM Sensor screen is used to set up an optional rpm sensor and display the rotation information it transmits. The rotation of the model (engine, motor, etc.) If it becomes higher or lower than the setting, an alarm and/or vibration will alert you.
- Page 95 Displaying data from the altitude *An altitude sensor or GPS sensor must be installed in the aircraft. Altitude is a screen which displays / sets up the altitude altitude from atmospheric pressure. Atmospheric pressure information from an optional altitude sensor or GPS sensor. will get lower as you go up in altitude. Using this, the sensor will estimate the altitude.
- Page 96 D i s p l a y i n g d a t a f r o m t h e variometer *An altitude sensor or GPS sensor must be installed in the aircraft. VARIO is a screen which displays / sets up the variometer information from an optional altitude for ascent and descent. Additionally, depending sensor or GPS sensor.
- Page 97 Tap the [Set] button Current variometer *These settings can be made for each sensor. Next page Range Deadband When the variometer is greater When the variometer is less than When the variometer is less W h e n t h e v a r i o m e t e r i s than this value, Vario melody is this value, Vario melody is not than this value, Vario melody...
- Page 98 Delay The output vario melody does not change during the delay time. In other words, this is a minimum time of Vario melody output. Setting range:0.0 s,0.5 s,1.0 s,1.5 s :0.0 s *This parameter is effective to all variometers. Actually Variometer 0.0m/s 1.0m/s 3.0m/s 4.0m/s 2.0m/s -1.0m/s Output Vario Melody 0.0m/s 1.0m/s...
- Page 99 Displaying data from the receiver battery voltage *SBS-01V must be installed in the aircraft. In this screen, the battery voltage is displayed. In this screen, the battery voltage of a receiver is In order to use this function, it is necessary to displayed. connect External voltage connector of R7208SB If it becomes higher or lower than the settin, an (R7308SB) ⇔...
- Page 100 Displaying data from the EXT battery voltage port *SBS-01V must be installed in the aircraft. In this screen, the EXT battery voltage is displayed. In order to use this function, it is necessary to connect External voltage connector of R7208SB (R7308SB) ⇔ SBS-01V ⇔ Battery SBS-01V measures two batteries. The power battery connected to two lines is displayed on EXT- VOLT.
- Page 101 Displaying data from the Distance Screen *A GPS sensor must be installed in the aircraft. The Distance screen displays and sets altitude data *The GPS sensor is necessary, and is sold separately. Mount and from an SBS-01/02G GPS Sensor (sold separately), connect the sensor in accordance with the sensor instruction and allows the distance to the airborne aircraft to manual.
- Page 102 5. To terminate the input and return to the original state, push the EXIT button. 1. The model and transmitter to which the GPS sensor was connected are turned on. 2. Tap to the [Preset] of "Reference" item. 1. Tap Alarm and choose from Buzzer, Voice, and Inhibit.
- Page 103 Displaying data from the speed *A GPS sensor must be installed in the aircraft. The speed screen displays and sets the speed data from an SBS-01/02G (GPS sensor) sold separately. *The GPS sensor is necessary, and is sold separately. Mount and The speed of the aircraft during flight can be displayed. connect the sensor in accordance with the sensor instruction After flight, the maximum speed during flight can be manual.
- Page 104 *A GPS sensor must be installed in the aircraft. The Altitude, Variometer, Position screen displays and sets the data from an SBS-01/02G (GPS sensor) sold separately. *The GPS sensor is necessary, and is sold separately. Mount and connect the sensor in accordance with the sensor instruction manual. ● Select [GPS] in the Telemetry screen and access the setup screen shown below.
- Page 105 *Servo sensor must be installed in the aircraft. current, operating angle, and internal temperature of up to two S.BUS2 servos. If you forget to connect the servo wiring during fuselage assembly, or the servo was disconnected, an alarm can be activated at the transmitter. Tap here and go to the Servo 2 settings page. ● Select [Servo sensor] in the Telemetry screen (Display and settings ...
- Page 106 *Servo sensor must be installed in the aircraft. ● Select [Servo sensor] in the Telemetry screen and access the setup screen shown below. ● Return to Linkage menu ● Temperature ↑ A n u p w a r d a r r o w i n d i c a t e s t h e a l a r m will ...
- Page 107 The SBS-01C has the capability of measuring *Current sensor must be installed in the current, voltage and capacity (consumption) from aircraft. drive battery all at the same time. ● Select [Current] in the Telemetry screen and access the setup screen shown below. ● Return to Linkage menu Tapping this will take you to ...
- Page 108 Displaying data from the airspeed *Airspeed sensor must be installed in the aircraft. The speed screen displays and sets the speed *The Airspeed sensor is necessary, and is sold separately. data from an SBS-01TAS (Airspeed sensor) sold Mount and connect the sensor in accordance with the sensor instruction manual.
- Page 109 Complete registration and remove SBM-2 from the transmitter. *Please note that the proper default slot for this accessory is number 8 (8-15). This sensor uses eight slots. Being made to a start slot are 8, 16, and 24. ◆ The registered ESC will be displayed as "Futaba ESC". For details on Hobbywing ESC telemetry support, refer to the Hobbywing ◆ The registered Hobbywing ESC is displayed as "Hobbywing ESC". website. ...
- Page 110 ◆ MC-9130H / A telemetry connection example To CH3 Throttle To free port To S.BUS2 SBM-2 To drive battery ◆ ESC telemetry display screen Tap to move to the The ESC status is displayed. Alarm setting is also possible. temperature setting page. Tap to move to the current setting page. Tap to move to the voltage setting page. Tap to move to the capacity setting page. Tap to move to the rotation setting page. Display max / min value Press and hold to reset. Display max / min value Shows the output level from the ESC ◆ Alarm setting Press and hold to reset. to the motor, not the position of the throttle stick. ↑ An upward arrow Even if the stick is in the 50% indicates the alarm position, the output may not be 50% will sound when the depending on the ESC setting. current reaches above Tap to move to the throttle setting Sets the current on your set value. page. ...
- Page 111 S.BUS Port S.BUS2 Port TELEM Port S.BUS Port S.BUS2 Receiver Pixhawk Futaba *When using FASSTest26CH, update SBS-01ML to Ver.2~. T26SZ ◆ Register SBS-01ML to transmitter by method 1 or 2. ◆ Linkage menu → Sensor → 3/3 1. Registration to transmitter ● Call page 3 of [Sensor]. Connect the SBS-01ML to the transmitter as shown, then tap Register. Registration is complete when Connect the SBS-01ML to the S.I/F this screen appears connector on the back of the transmitter. Complete registration and remove SBS-01ML from the transmitter. *Please note that the proper default slot for this accessory is number 16 (8-16).
- Page 112 ◆ SBS-01ML telemetry display screen Displays the status of the drone. Alarm setting is also possible. ● Tap the [SBS-01ML] button in the Telemetry screen to call the setup screen shown below. Tap to move to the GPS1 Satellites setting page. Tap to move to the GPS1 HDOP setting page. Display max / min value Press and hold to reset. Tap to move to the GPS2 Satellites setting page. Tap to move to the GPS2 HDOP setting page. Tap to move to the Altitude setting page.
- Page 113 ③ Set the switch set by Logging switch to OFF. A beeping sound is generated and recording of the telemetry data stops. ④ Turn off the transmitter power and remove the microSD card. ■ L og file A log file is created in the microSD card LOG folder. Two files with the same filename, but a different extension are created. (Example: 00001234.FLI, 00001234.FLD) ■ E xtension FLI: Slot allocation information file ■ E xtension FLD: Log data file *When copying or moving a log file, always select both the .FLI file and .FLD file. Log files can be converted to CSV format by using the telemetry log converter available at the Futaba website. ■ N otes ◇ Altimeter altitude data and GPS distance and altitude data output with the point that time logging started as the reference (0 m). When the transmitter preset position and the log start position are different, the transmitter display and the log data display will also be different. The altitude and distance from the take-off position can be recorded by starting logging immediately after take-off. ◇ The transmitter gear ratio or number of fins setting is not reflected in the speedometer log data (speed). Multiply the gear ratio or number of fins by the speed data. ◇ When the microSD card becomes full, recording stops and does not resume even if logging is restarted.
- Page 114 Telemetry Alarm Duration and Repeat time The repeat time and duration time for the telemetry alarm (buzzer, vibration and speech) can be set. ● Tap the [Telemetry Setting] button in the Linkage menu to call the setup screen shown below. Duration is not displayed when Repeat is INH. Duration Repeat It is an alarm output time. It is a repeat time of an alarm Setting range:1 s 〜 30 s output. Initial value:INH Setting range:INH,1 s 〜 240 s Duration value has to be less than Initial value:INH repeat value. Duration time is extended when the other alarm event occurs.
- Page 115 When the Instructor activates the trainer switch, the PPM. student has control of the aircraft (if MIX/ FUNC/ If being used as the student, T26SZ can be connected to NORM mode is turned on, the Instructor can make the instructor's transmitter which requires the student's mode to be PPM.
- Page 116 "ACT/INH": Enable operation by changing to [ACT]. "ACT/INH": Enable operation by changing to [OFF] or [ON]. "16/12/8 CH": When the student uses the T26SZ, T14SG, T18SZ, T16IZ, T16SZ, T18MZ, T32MZ select "16/12/8 CHANNEL": When the student uses the [16CH]. When the student uses the T14MZ, T12Z, T26SZ (including the T18MZ, T32MZ, T14SG) select T12FG or FX-40, select [12CH].
- Page 117 (See "Switch selection in the trainer student mode. method" at the end of this manual for selection method details.) Futaba is not responsible for damage sustained by combination with parts other than Futaba Genuine equipment. In training mode, the instructor's transmitter can When connecting Futaba transmitters to ...
- Page 118 Mixing warning normal reset "Vibrator" type The warning display at power ON can be turned If the following types are selected, the transmitter ON/OFF for each function. Use by setting functions will vibrate during the warning. which may be dangerous if operated at power ON Type 1 to ON. Initial setting is all ON (Buzzer). Type 2 menu to call the setup screen shown below.
- Page 119 Original menu screen making *Any change made to data entered from the User menu or T26SZ has a menu for each of the following: from the normal method of use are the same. Changes made System, Linkage, and Model. Also, you can in either way are saved into the transmitter memory.
- Page 120 The Sound select function adds sounds to switch positions. T26SZ has a menu for each of the following: System, Linkage, and Model. Also, you can create a personalized User menu that can include all of the menus that you use most often.
- Page 121 The sub-display can display timer or telemetry data. (The sub display is not a touch panel. The setting operation is performed on the main display.) Telemetry receiving status Receiver Voltage Extra Voltage Transmitter Voltage Timer 1 Timer 2 Adjust the contrast of the LCD How to display telemetry information screen in the “Display” in the Open the “Linkage menu”...
- Page 122 ● File format : Windows bitmap file (24-bit color) ● Size : 160×80 pixels Use your PC. Insert the picture file into the T26SZ once, connect the formatted microSD card to your PC, and save it to the “FUTABA\PICTURE” folder on the microSD card.
- Page 123 Model memory setting data reset. (by item) This function is designed to allow you to reset *The trim step amount and trim rate are not reset. selected portions or all of the settings saved in Model menu setting: the active model memory. You may individually Resets all the functions in the Model menu except choose to reset the following sets of data: condition select.
-
Page 124: Sequencer
(Up to 8 conditions can be used) in this Model menu functions section. First use Note: The T26SZ is designed so that the airplane and the Model type function of the Linkage menu to glider model types can handle aircraft of the same wing type. - Page 125 Flight condition's addition, deletion, copy, condition renaming, and condition delay can be set. [All model types] time between channels during condition switching The functions in the Model menu can be used by can be suppressed. The delay can be set for each switching the settings of up to 8 flight conditions channel.
- Page 126 Currently selected condition name The ON/OFF switch of Conditions List condition is chosen. 1. Tap the [Copy] button. The Copy screen 1 . S e l e c t t h e c o n d i t i o n b y appears. tapping the condition you want to reset in Conditions 2.
- Page 127 The angle and curve of each operation function can be set. [All model types] AFR function is used to adjust the throw and operation curve of the stick, lever, and switch the maximum throw. When mixing is applied from one channel to another channel, both channels can be adjusted at the same time by adjusting the Rate operation rate through the AFR function.
- Page 128 100% D/R curves which can be switched by switch, etc. can be added. The curve can be adjusted by the AFR function. ● Up to 6 rates can be added for each condition. ● other conditions. ● D/R at the top of the D/R list has priority. ● Select [Dual rate] at the model menu and call the setup screen shown below.
- Page 129 Program mixing which can be freely customized. Up to 10 mixings can be used for each condition. [All model types] Programmable mixing may be used to correct to the programmed channel servo operation and undesired tendencies of the aircraft, and it may also may control up to four circuits simultaneously.
- Page 130 ● Group/single mode selection ● Mixing curve type selection A c t i v a t i n g f u n c t i o n s f o r o n l y t h e s e l e c t e d 1.
- Page 131 Setting the operating timing of the landing gear and door (gear cover). [All model types] Door opens Door closes Gear down the setup screen shown below. Once set, this display will appear. Fore sequencers can be set. The sequencer has three settings to choose from. ● Basic 1.Gear down after a set time after the door opens. 2.The door closes after a set time after gearing up. ● Cycle 1. Gear down after a set time after the door opens. 2. Door closes after a set time after gear down. 3. Gear up after a set time after the door opens. 4.The door closes after the set time after gearing up. ● Boost 1. Gear down after a set time after the door opens. 2. Door closes after a set time after gear down. 3. Close the door strongly for the set time.
- Page 132 Basic 1.Select the switch to operate. Tap the desired SW SW direction 2.Select gear operation output function. Tap the function to operate the gear 3.Select door operation output function. Tap the function to operate the door Functions using the sequencer will be hidden. Gear down servo 4.Setting each rate and timing speed setting Gear down servo rate setting Dood servo rate setting Time difference me difference Time difference diff between door from door opening and opening to Door opening/closing gear down gear up servo rate setting...
- Page 133 Cycle 1.Select the switch to operate. Tap the desired SW SW direction 2.Select gear operation output function. Tap the function to operate the gear 3.Select door operation output function. Tap the function to operate the door Functions using the sequencer will be hidden. Gear down servo speed setting 4.Setting each rate and timing Gear down servo rate setting Dood servo rate setting Time difference fference Time difference Time difference between door between gear opening and up and door Door opening/closing gear down closing servo rate setting Time difference between Time difference gear down and door from door opening closing to gear up...
- Page 134 Boost 1.Select the switch to operate. Tap the desired SW SW direction 2.Select gear operation output function. Tap the function to operate the gear 3.Select door operation output function. Tap the function to operate the door Functions using the sequencer will be hidden. Strong Gear down servo closing servo speed setting rate 4.Setting each rate and timing Gear down servo rate setting Door servo rate setting Time difference ifference Time difference Time difference between door Strong close between gear opening and time up and door Door opening/closing gear down closing servo rate setting Time difference Time difference between gear down from door opening and door closing to gear up...
- Page 135 [Airplane/glider, 2 ailerons or more] The left and right aileron differential can be adjusted independently. The differential rate can also be adjusted according to the flying state by AIL1 AIL 2 (Main Aileron) (Main Aileron) AIL 3 AIL 4 (Chip Aileron) (Chip Aileron) ● Select [Aileron differential] at the model menu and call the setup screen shown Currently selected condition name below.
- Page 136 [Corresponding model type]: Airplane/ The up/down travel of each flap (camber flaps: FLP1/2, brake flaps: FLP3/4) can be adjusted independently at each servo according to the wing type. FLP 4 FLP 3 (Brake Flap) (Brake Flap) offset FLP 1 FLP 2 (Camber Flap) (Camber Flap) The camber flaps of a 4-flap model can be mixed ●...
- Page 137 [Corresponding model type]: Airplane/ This mix operates the camber flaps (FLP1/2) in the aileron mode. When the aileron stick is manipulated, the ailerons and camber flaps perform aileron operation simultaneously and the operation characteristic of the roll axis is improved. FLP 1 FLP 2 (Camber Flap)
- Page 138 [Corresponding model type]: Airplane/ This mix operates the brake flaps (FLP3/4) in the aileron mode. When the aileron stick is manipulated, the aileron and brake flaps perform the aileron operation simultaneously and the operation characteristic of the roll axis is FLP 4 improved.
- Page 139 [Corresponding model type]: Airplane/glider, general Use this mix when you want to mix the rudders with aileron operation. AIL1 AIL 2 (Main Aileron) (Main Aileron) AIL 3 AIL 3 setting a switch. (Always ON at [--] setting) (Chip Aileron) (Chip Aileron) RUDDER 2 RUDDER 1 Winglet Winglet ( ) ( ) at Flying wing at Flying wing V-TAIL...
- Page 140 [Corresponding model type]: Airplane/glider, 2 ailerons or more This function is used when you want to mix the be increased. setting a switch. (Always ON at [--] setting) ● menu and call the setup screen shown below. Currently selected condition name Elevator → Camber ●...
- Page 141 [Corresponding model type]: Airplane/glider, 2 ailerons or more elevator servos can be adjusted by curve. When This function adjusts the rate of camber operation the mixing direction is reversed by the linkage, which operates the wing camber (ailerons, camber adjustments can be made by changing the flaps, brake flaps) in the negative and positive directions.
- Page 142 (Curve/rate setup screen) ● The curve and rate are adjusted by calling the ● Tap [INH]. (ON is displayed.) The rate and curve of each servo can be set by ● When setting a switch, tap to the [--] item of the calling each screen.
- Page 143 [Corresponding model type]: Airplane/glider, general AIR BRAKE This mix is used when you want to mix the elevators with airbrake (spoiler) operation. It raises the elevators to correct for dropping of the nose during airbrake operation. AILVATOR *This function does not operate when airbrake is not assigned V-TAIL at the Function menu in the Linkage menu.
- Page 144 [Corresponding model type]: Airplane/ glider, This mixing is used to correct changes (elevator adjusted. When the mixing direction is reversed by the linkage, adjustments can be made by FLP 1 FLP 2 (Camber Flap) (Camber Flap) AILVATOR V-TAIL setting a switch. (Always ON at [--] setting) ELEVATOR ELEVATOR ELEVATOR 2...
- Page 145 [Corresponding model type]: Airplane/glider, general This function is used when you want to mix the ailerons with rudder operation. It is used when rudder is applied during roll maneuvers, knife AIL1 AIL 2 (Main Aileron) (Main Aileron) edge, etc. of acrobatic planes. It can be used to AIL 3 AIL 3 (Chip Aileron)
- Page 146 [Corresponding model type]: Airplane, general This function is used when you want to mix elevator operation with rudder operation. It is used (Fine tuning) to correct undesirable tendencies when rudder is applied in roll maneuvers, knife edge, etc. of acrobatic planes. setting a switch.
- Page 147 [Corresponding model type]: Glider, 2 ailerons or more setting a switch. (Always ON at [--] setting) This function allows powerful brake operation by simultaneously raising the left and right ailerons offset. When the screen is tapped with the offset item selected when operated to the position to This setting will allow the ailerons to be raised be changed, the reference point is offset.
- Page 148 Select the Mixing Rate AIL and FLP box. Adjust the mixing rates. Elevator rate adjustment (To elevator curve setup screen) Fine tuning *In case of tailless wing not display. setting (Elevator correction rate setup screen) The offset position is indicated by a red dotted line by an elevator curve. Overall adjustment by Rate A and Rate B Mixing curve setting *For a description of the curve setting method, see the description at the back of this manual. FLP 4 FLP 3 (Brake Flap) (Brake Flap) FLP 1 FLP 2 (Camber Flap) (Camber Flap) AIL1 AIL 2 (Main Aileron) (Main Aileron) AIL 3 AIL 4 (Chip Aileron) (Chip Aileron)
- Page 149 (Normal) (Throttle stick full stroke MODE) neutral position (50) of the throttle stick. full stroke of the throttle stick. At offset 20 At offset 20 At offset 70 At offset 70 The direction of butterfly motion is reversed. The direction of butterfly motion is not reversed.
- Page 150 [Corresponding model type]: Glider, general These functions call the ailerons, elevators, and 1. Move to the [INH] item Set the trim mix function to [ON]. *When separating the settings for each condition, move to The amount of ailerons, elevator, and flaps the [Group] item and set it to [Single].
- Page 151 [Corresponding model type]: Airplane, general This function selects the switch and rate adjustment a snap roll is performed. executing snap roll) right/down, left/up, left/down) *The snap roll up side left and right and down side left and the Snap Roll function is turned ON/OFF by master right direction switches are selected here.
- Page 152 [Corresponding model type]: Airplane, general This function is used when an air brake is necessary when landing or diving, etc. Elevator Aileron 2 Aileron 1 servos can be adjusted as needed. Also the speed of the aileron, elevator, and flap servos can be adjusted.
- Page 153 [Corresponding model type]: Airplane/glider/multicopter, general This function is used when a GYA Series gyro *Initial setting does not assign a sensitivity channel. Use the Function menu of the Linkage menu to assign the sensitivity is used to stabilize the aircraft's attitude. The channel (Gyro/Gyro2/Gyro3) used to a vacant channel sensitivity and operation mode (Normal mode/GY beforehand.
- Page 154 (GYA451AIL), (GYA451ELE), (GYA450RUD), : at 5CH → Gyro 7CH → Gyro2 8CH → Gyro3 Control and Trim → "--" the Function menu of the Linkage menu. Rate Type Switch Gyro Gyro 2 Gyro 3 OFF/ON AVCS : 60% AVCS : 60% AVCS : 60% ON/OFF Normal : 60% Normal : 60% Normal : 60% *Set so that Rate 1 is turned on at the back position of switch E and Rate 3 is turned ON at the front position.
- Page 155 [Corresponding model type]: Airplane/glider, Tail type Ailevator This function improves the operating performance of the roll axis by operating the elevators as ailerons. Ailevator is where each elevator in a standard (conventional) or v-tail moves independently, like ailerons on a wing. In addition to each elevator side moving up and down together, each side moves in opposite directions when moving as an ailevator.
- Page 156 [Corresponding model type]: Airplane/glider general Acceleration setting can be performed at Elevator, only) setting. The setting method is the same. to camber mixing. Setting is not performed when Ele to camber mixing is INH. side and down side. and call the setup screen shown below. Condition group/single ...
- Page 157 [Corresponding model type]: Airplane/glider, general This function lets you set the operation speed when activated at initial operation only. (1 time the motor of an F5B or other EP glider is started by operation) However, operation can be repeated switch. The operation speed can be set in 2 ranges by setting the switch to OFF before operation is Speed 2).
- Page 158 [Corresponding model type]: Airplane/glider, Tail type V-tail This function lets you adjust for left and right rudder angle changes at elevator and rudder operation of a V-tail airplane. V-tail is when 2 servos are used together to control rudder movement as elevators. In addition to each ELEVATOR rudder side moving up and down together, each side RUDDER...
- Page 159 [Corresponding model type]: Airplane/glider, winglet(2RUD) This function adjusts the left and right rudder angles of airplanes with winglets. It can be used for special airplanes with two rudders. The amount of movement of the two mounted rudder servos can be adjusted separately. RUDDER 1 Two servos are operated with one rudder stick.
- Page 160 Gyro setting GYA553 By connecting the T26SZ and the 6-axis gyro GYA553 for airplanes, you can set the GYA553. Connection T26SZ and GYA553 T26SZ S.I/F CGY 接続コード(ジャイロに付属) Reciver Connection Cable (included with gyro) GYA553 CAUTION Be sure to connect and disconnect the GYA553 and T26SZ connection cable with the power off.
- Page 161 Gyro setting GYA553 SETTING 1. Select “Gyro setting” on the last page of Airplane Model Menu * At this time, if Gyro is not connected to T26SZ by wire, this screen appears. When "GY Settings Transfer" is selected, the gyro setting data saved in T26SZ is written to the gyro. 2. Select "Start" Tap "Yes" to display the GYA553 data saved in T26SZ. Select "Start" This will download the gyro data to the T26SZ. To Basic menu 3. Home screen is displayed ◆ When copying data from Gyro A to Gyro B Connect the gyro A to the T26SZ and press [Start]. (Enter the data of A into T26SZ) If you press Start here, the B data will be download to the T26SZ and the A data will be lost. Connect Gyro B to T26SZ and press [GY Settings Transfer]. (Put data on A into gyro B)
- Page 162 Gyro setting GYA553 Home screen Home screen On the home screen, basic information such as gyro operation mode, sensitivity, battery voltage are displayed. Battery voltage Displays the voltage of the Gyro operation mode / Gyro receiver battery connected to gain GYA. Displays "AVCS" or "Normal" opera-tion mode and gyro gain of aileron (roll), elevator ...
- Page 163 Gyro setting GYA553 Config Config Config 1/9 Gyro set mounting direction Set the mounting direction of GYA. Set mounting direction Config 1/9 WING/TAIL Set with the wing type/tail type of GYA553. The wing type/tail type of the transmitter is not used and is normal. ・ ・ ・ Select wing type Select tail type...
- Page 164 Gyro setting GYA553 Config Config Config 1/9 Servo type Select the servo type according to the servo to be used. Digital servo → DG : 285 Hz Analog servo → AN : 70 Hz The stability of digital-servo mode of a flight increases in order to perform a high-speed control action. Digital servo Analog servo Config 1/9 SB/R2 OUT Select the SB/R2 port. S.BUS Rudder 2 Throttle...
- Page 165 Gyro setting GYA553 Config Config Config 2/9 Gyro direction It is the direction settting of the gyro. Be careful as it will crash if the direction is reversed. For dual aileron, dual elevator, and dual rudder aircraft, check the operating direction of each second aileron/elevator/rudder. Tilt the airplane to the left ...
- Page 166 Gyro setting GYA553 Config Config Config 4/9 5/9 Servo limit This is the limit setting for each servo. The position of the maximum operation is read into the Aileron example Maximum angle Stick to full right Adjust the value (%) to reach the maximum operating position Maximum angle Stick to full left Adjust the value (%) to reach the ...
- Page 167 Gyro setting GYA553 Config Config Config 6/9 Holding Power It is a function to adjust the posture holding force of the aircraft in AVCS mode. Decreasing the value weakens the holding power and makes the operation feeling closer to the normal mode. The current rate numbers C1 to C5 are displayed by operating the channel of the transmitter. holding force rate of the aircraft in AVCS mode by operating the switch from the transmitter, and switch between them.
- Page 168 Gyro setting GYA553 Config Config Config 7/9 4D Flight (Backward flight) Gyro Reverse Mode Adjustment also reversed. Switching between forward (FW) and reverse (BK) uses the same CH12 signal as the holding force. Up from near the midpoint of the throttle stick is forward, and down is reverse. For details on setting the switching point, please refer to the transmitter settings. In gyro reverse mode, the gyro controls in the same direction as the aircraft’s tilt.
- Page 169 Set the CH for each function according to the transmitter to be used. Any unused functions should be set to INH (Inhibited). WARNING Always verify that the S.BUS function assignments match your transmitterʼ s function (in the FUNCTION menu) assignments. If any changes are made within the transmitter function assignments, then it will also be necessary to make the changes within the S.BUS function assignments. To change the channel, GYA553 and T26SZ must be connected. The channel of each function can be changed. Tap to move to the rate switching CH setting page. Holding Power C2 to C5 Tap the CH used for rate switching to select it. Reset each S.BUS function. It returns to the initial value.
- Page 170 This section contains information on the commands that apply to helicopters only. For instructions screen if necessary before setting the model data at on airplane, glider and multicopter, refer to the each function. (Up to 8 conditions can be used) sections pertaining to those aircraft.
- Page 171 Flight condition's addition, deletion, copy, condition renaming, and condition delay can be set. [All model types] time between channels during condition switching The functions in the Model menu can be used by can be suppressed. The delay can be set for each switching the settings of up to 8 flight conditions channel.
- Page 172 Currently selected condition name The ON/OFF switch of Conditions List condition is chosen. 1. Tap the [Copy] button. The Copy screen 1 . S e l e c t t h e c o n d i t i o n b y appears. tapping the condition you want to reset in Conditions 2.
- Page 173 The angle and curve of each operation function can be set. [All model types] AFR function is used to adjust the throw and operation curve of the stick, lever, and switch the maximum throw. When mixing is applied from one channel to another channel, both channels can be adjusted at the same time by adjusting the operation rate through the AFR function.
- Page 174 D/R curves which can be switched by switch, etc. can be added. The curve can be adjusted by the AFR function. other conditions. the setup screen shown below. The ON/OFF switch of dual rate is chosen. Activate the D/R function by When the function select button is tapping the [INH] . tapped, a selection screen appears. Select the function you want to set at the selection screen. ● Setting rudder angle, EXP On this D/R screen you can set functions and Rate, EXP settings switchover switches. Rudder angle (rate) and EXP ...
- Page 175 Program mixing which can be freely customized. Up to 10 mixings can be used for each condition. [All model types] Programmable mixing may be used to correct to the programmed channel servo operation and undesired tendencies of the aircraft, and it may also may control up to four circuits simultaneously.
- Page 176 1. Tap the curve type selection button of the curve type you want to use to display the selection A c t i v a t i n g f u n c t i o n s f o r o n l y t h e s e l e c t e d screen.
- Page 177 This function adjusts the pitch operation curve for *Up to 17 points can be set for the point curve types. each flight condition for the optimal flight state create a curve, a simple curve can be created by reducing relative to movement of the throttle stick. the number of input points to 3 or 5, and then entering the a curve.
- Page 178 the same setting contents at other conditions, perform setting in the group mode. In this case, the same contents are input to the other conditions set in the group mode. When you want to set each condition independently, select the single mode (initial setting).
- Page 179 The hovering pitch, low pitch, and high pitch trim setup screen can be called from the Pitch curve setup screen. Hovering pitch trim Low/high pitch trim setting setting The Hovering Pitch trim function trims the pitch the conditions, set them in the group mode. near the hovering point.
- Page 180 point data is used, a simple curve can be easily This function adjusts the throttle operation curve for each condition for optimum engine speed to created by reducing the number of input points of the curve to 5 and entering the specified value at throttle stick movement.
- Page 181 created by reducing the number of points on the The curves shown below are created by using the line to 5. When actually creating a curve, enter point curve type and inputting the data of the 5 points 0% (low side), 25%, 50% (center), 75%, value).
- Page 182 This function is used to adjust the pitch and the throttle rise characteristic at acceleration/ deceleration operation. An acceleration function which temporarily increases the pitch and throttle operations at throttle stick acceleration/deceleration operation can be set. function is effective when you want to quicken the response of the fuselage at 3D When used, high pitch temporarily exceeds maximum pitch, but immediately returns to...
- Page 183 and (Idle), using it in the Idling mode This function sets the throttle cut position for during training and in the Cut mode when autorotation. The throttle position can also be set to stopping the engine at contest, etc. is an idling position.
- Page 184 undesirable tendencies in the roll direction. The swash mix function is used to correct the swash plate in the aileron (roll) direction and elevator Elevator, set this function to ON. When (cyclic pitch) corresponding to each operation of raising the nose at a right roll, when the each condition.
- Page 185 When correction is necessary, tap to the mixing item corresponding to the mixing that needs correction and tap the screen to call the curve setup This function corrects slowing of engine speed caused by swash plate operation during aileron screen, and then correct the slowing. or elevator operation.
- Page 186 This mixing is used when the engine is equipped increases needle operation at throttle stick with needle control or other fuel-air mixture acceleration/deceleration operation can be set. adjustment. A needle curve can be set. The rise characteristic of the needle servo at acceleration and deceleration operation can be An acceleration function which temporarily adjusted.
- Page 187 Use this mix when you want to suppress the However, when a GY Series or other heading hold reaction torque generated by main rotor pitch and gyro is used, since correction is performed by the speed changes during pitch operation. Adjust so gyro, this mix is not used.
- Page 188 Note: [Gyro] [Gyro2] [Gyro3] Default function This function is used to adjust gyro sensitivity. The sensitivity and operation mode (Normal mode/ [Gyro]: CH6(FASSTest12CH) CH5(Other system type) AVCS mode) can be set for each condition. [Gyro2] : CH9 The gyro sensitivity can be switched with each [Gyro3] : condition or the switch.
- Page 189 Usage example #1: Using gyro for only the rudder and adjusting sensitivity for each condition * Gyro gain channel Gyro : CH5 For the FASSTest12CH, Gyro/RUD is 6ch. The gyro sensitivity adjustment connector connects to 6ch. model menu and call This is all that is needed the setup screen. for use in this case. Tapping here will let you select either Normal or AVCS. Because the sensitivity Set gain of a rudder is switched (Sngl) per condition, Rate 2 and Rate 3 are not used. Because sensitivity changes for hovering and idleup, perform switchover for each condition and adjust sensitivity. Usage example #2: Using 3-axis gyro CGY750 and adjusting sensitivity for each condition * Gyro gain channel Gyro RUD : CH5 For the FASSTest12CH, Gyro/RUD is 6ch. Gyro2 AIL : CH9 Gyro3 ELE : CH10 For the CGY750, simply connect the S.BUS; functions do not need to be set. (For the FASSTest12CH, change Gyron/RUD to 6ch.) model menu and call This is all that is needed the setup screen. for use in this case.
- Page 190 When using a Futaba governor, this function is *When using the Fuel Mixture function, the mixture servo is controlled from the governor. When transmitting the used to switch the RPM of the helicopter's head. mixture curve data from the transmitter to the governor, the Up to 3 rates can be set for each condition.
- Page 191 "Mode" is changed. Calibration should be performed via the governor. Tap to the rate item. * In order to use the Governor function of the T26SZ, it is necessary to change the settings on the governor for the low buttons.
- Page 192 Gyro setting CGY770R The T26SZ has the same functions as the GPB-1. The CGY770R can be set up from the T26SZ screen by connecting to the T26SZ. Some functions can be set wirelessly. A. Wired connection: Advanced settings (all functions same as GPB-1) Notes T26SZ CGY770R gyro setting value cannot be changed.
- Page 193 Gyro setting CGY770R SETTING A. Wired connection: Advanced settings C AUTION Be sure to connect and disconnect the CGY770R and T26SZ connection cable with the power off. *If "CRSF" is ON in the system type of the linkage menu, "Gyro setting" cannot be selected. 1. Select "Gyro setting" on the last page of Helicopter Model Menu * At this time, if Gyro is not connected to T26SZ by wire, the EQ ID screen appears. When "GY Settings Transfer" is selected, the gyro setting data saved in T26SZ is written to the gyro. 2. Select "Start" ◆ Connection of T26SZ gyro data and CGY when “Start” is selected Selecting “Yes” will start loading the CGY770R. Model data is CGY760R/ CGY755 Selecting “Yes” will start loading the CGY770R. No gyro data Model data is CGY770R Home display Selecting “Yes” will start loading the CGY760R/CGY755. Model data is CGY770R...
- Page 194 Gyro setting CGY770R Select "Start" This will download the gyro data to the T26SZ. To basic menu To expert menu To receiver 3. Home screen is displayed ◆ Connection of T26SZ gyro data and CGY when “Write” is selected Select “Yes” , the data from the CGY760R will be written to the CGY770R. Model data is CGY760R/ CGY755 No gyro data Model data is CGY770R ◆ When copying data from Gyro A to Gyro B Connect the gyro A to the T26SZ and press [Start]. (Enter the data of A into T26SZ) If you press Start here, the B data will be written to the T26SZ and the A data will be lost. Connect Gyro B to T26SZ and press [GY Settings Transfer]. (Put data on A into gyro B)
- Page 195 Gyro setting CGY770R SETTING B. Wireless tunings Before making Wireless tunings, it is necessary to download the setting data from the gyro to the T26SZ via a wired connection. First, wired connection T26SZ WARNING CGY770R Do not connect the gyro and T26SZ connection cord to the RPM port. *There is a risk of breakdown or burning. P.BOX S.I/F CGY Connection Cable (included with gyro) When "GY Settings Transfer" is selected, the gyro setting data saved in T26SZ is written to the gyro. 1. Select “Gyro setting” on the last page of 2. Select "Start" Helicopter Model Menu This will download the gyro data to the T26SZ. Next, Wireless tunings Once the gyro data is stored in the T26SZ, if it is the same gyro, there is no need to make a wired connection from the second time on. If you want to use another gyro, you need to reconnect the cable and download the data. To configure the Wireless tunings, set Linkage menu → Function two consecutive free channels to use Example using 13CH and 14CH for Wireless tunings in SBUS Basic 5/5. 2 consecutive free channels Set Control and Trim to NULL ( -- ). 1. Select “Gyro setting” on the last page of 2. Select "Start" Helicopter Model Menu 3. Select "Wireless Tuning" 4. Items that can be set wirelessly are displayed Check that the gyro to be set matches the EQ ID.
- Page 196 Gyro setting CGY770R Home Screen Home Screen Home Screen Display Condition number On the home screen, basic information such as swash type, With switch operation from the transmitter, several parameters can be switched by gyro operation mode, sensitivity and governor ON / OFF, setting up to 5 types of data. If you set the condition switch to the channel having the AFR function of the transmitter and set the point for each flight condition with engine operating time etc, are displayed. the AFR point curve, it can also be linked with the flight condition switch. • When either the DG1 or DG 2 switch is selected, the following options are available. Function Menu of your transmitter (DG1). Assigning DG1 to a switch or flight mode allows the use of two separate values for the condition selectable parameters. For functions that can set conditions in ...
- Page 197 Gyro setting CGY770R Home Screen Home Screen Home Screen Basic menu screen ◆ Flight Tune( ) ◆ Swash Basic(Swash) ◆ Rud Basic(Rudder) ◆ Gov Basic(Governor) ◆ Expert menu screen ◆ Swash Detail(Swash) ◆ (Aileron) ◆ (Rudder) ◆ (Governor) Receiver screen ◆ ◆ RF type...
- Page 198 Gyro setting CGY770R Basic Menu Basic Menu As the name suggests, this menu allows changes to the basic settings of CGY. Make sure to set each " BASIC MENU " . Basic menu screen ◆ Flight Tune( ) ◆ Swash Basic(Swash) ◆ Rud Basic(Rudder) ◆ Gov Basic(Governor) ◆...
- Page 199 AFR function of the transmitter and setting the point for each flight set the condition change channel of the transmitter. In this example, DG1 is condition with the AFR point curve, you can switch the condition of CGY the conditional change channel. in conjunction with the flight condition switch of the transmitter. This resets the S.BUS channel assign- ments back to the defaults. 2 consecutive free channels Wireless channel CAUTION The wireless channel uses two consecutive channels. For example, if CH13 is set to "# 1", CH14 is automatically set to "# 2". Therefore, when using this func- Be sure to check the operation for all conditions 1 to 5 before flying. tion, two consecutive free channels are required for the transmitter. It is not The setting of "wireless CH" is possible only when the transmitter and possible to use a channel assign that is used for another function. the CGY are powered off and the CGY is turned on. Be sure to connect and disconnect the CGY and T26SZ connection cable with the power off.
- Page 200 (3) Servo Type This selects the swash servo types. There are four types or modes of the servo driving frequency selection, AN:70 Hz, DG:95 Hz, DG:140 Hz, DG285 Hz, and 760 μs. All Futaba digital servos can be operated with fastest DG:285 Hz mode but some of other brands of servos do not support DG:285 Hz mode. In this case, select the proper servo driving fre- quency per the manufacturerʼs ...
- Page 201 Gyro setting CGY770R Swash Basic Swash Basic (4) SWASH Type: Swash change to plate type Select the swash plate type. When you change the setting, other data is initialized. Setting: H3-120 / H3-140 / H3-90 / H4-00 / H4-45/H1 Initial setting: H3-120 WARNING All of the swash plate parameters are reset when the swash plate type is changed. Doing so eliminates any possible errors or malfunc- tions within the system. After changing the swash plate type, Please proceed through the entire setup process once again before attempt- ing to fly the model.
- Page 202 Gyro setting CGY770R Swash Basic Swash Basic (6)AIL, ELE, PIT. Ntr: Servo neutral adjustment Adjust the neutral position of the swash servo (aileron, elevator, pitch, second elevator). The second elevator (ELE2) is displayed only when the swash type is H4-xx. Setting ranges: +240 ~ -240 Initial value: 0 (7) SWS. Dir: Swash direction setting This selects the aileron, elevator and collective pitch direction. Reverse the direction when the stick movement and swash movement are op- posite. Each time you press the +/- button, the polarity switches.
- Page 203 Gyro setting CGY770R Swash Basic Swash Basic (14) Pit. High: Pitch high memorizing This parameter saves the full positive collective pitch point into the CGY. [Setting method] Touch the "Pit. High" rate button to enter the setting mode. Operate the throttle stick fully to the high. Touch the “Pit. High” rate button again. ” Sure?” Is displayed. If you touch the [Yes] button. The full positive pitch signal will be saved to the CGY. (15) Pit. Zero: Pitch zero memorizing This parameter saves the zero collective pitch point into the CGY. [Setting method] Touch the "Pit. Zero" rate button to enter the setting mode. Operate the throttle stick to 0 degree pitch. Touch the “Pit. Zero” rate button again. “Sure?” Is displayed. If you touch the [Yes] button. The zero pitch signal will be saved to the CGY. (16) Pit. Low: Pitch low memorizing This ...
- Page 204 Gyro setting CGY770R Flight Tune(Aileron / Elevator Basic settings) Flight Tune(Aileron / Elevator Basic settings) Flight tune sets control of helicopter roll (aileron) and pitch (elevator) axis. "FLT. TUNE" screen from the "BASIC MENU" screen. (1) Base. Gain: Gyro base gain setting Cond This sets the Cyclic Gyro Base Gain. If the Rotor Head Gain (Rot HD Gn) Channels are set to "INH" within the CGY "SBUS.BASIC" menu, then the remote ...
- Page 205 Gyro setting CGY770R Flight Tune(Aileron / Elevator Basic settings) Flight Tune(Aileron / Elevator Basic settings) (3) Cnt. AuthAIL: Control Authority Aileron Cond Aileron Control Authority changes the rate at which the gyro will try to achieve the set "CYC. Rt". A higher value will create a quicker accelerated reaction to a stick input to reach and stabilize to the "CYC. Rt" value; a lower value will reach the desired "CYC. Rt" slower and accelerate slower ...
- Page 206 Gyro setting CGY770R Flight Tune(Aileron / Elevator Basic settings) Flight Tune(Aileron / Elevator Basic settings) Note: To effectively operate the next "ELE Comp" (elevator correction), make sure to set "Pit High", "Pit Zero", "Pit Low" on the "SWASH BASIC" menu. (7) ELE. Comp: Elevator pre compensation Cond A helicopter that has a head that rotates clockwise, will exhibit a tenden- cy whereby the nose will be pulled towards the disk with positive blade pitch. Conversely, the helicopter will push the nose away from the rotor disk during negative pitch inputs. In an instance of a slower servo set-up or larger (heavier) rotor blades, a small amount of elevator pre compen- sation may be needed to keep the nose of the helicopter flat at all times during collective pitch changes. In most cases with helicopter high- speed servos and standard 3D rotor blades, this function is not needed. ...
- Page 207 Gyro setting CGY770R Rudder Basic Rudder Basic In the " Rudder Basic " menu, you make the basic setting of the rudder gyro. WARNING " Rudder Basic " screen from the " BASIC MENU " screen. The servo type parameter within the CGY must match the type of servo you are using. Incorrect set- tings may damage the CGY or the servo. An incorrect ...
- Page 208 Gyro setting CGY770R Governor Basic Governor Basic This menu sets the governor’s fundamental functions. The menu Servo limit point set- Note: When using the governor function, be sure to make each setting of "Governor Basic". Note: After completing the linkage of the throt- " Governor Basic " screen from the " BASIC MENU " screen. tle, be sure to set the "Servo limit point setting" first, and then set the other functions. (1) Governor: Governor active Set the governor operation mode of CGY. The initial setting is "ACT (ac- tive)" where, as the designation implies, the governor is active. If you do ...
- Page 209 Gyro setting CGY770R Governor Basic Governor Basic (6) Stick sw.: Stick switch The governor can be activated by throttle stick position. [Setting method] Touch the "Stick SW" button to enter the setting mode. Operate the throttle stick to the position where you want to turn Gover- nor ON. Touch the “Stick SW” button again. “Sure?” Is displayed. If you touch the [Yes] button, the ON position is memorized. This stick switch function is always enabled when the next "ON / OFF sw" is "INH" or the "Governor ON / OFF switch is not set by S.BUS setting.
- Page 210 Gyro setting CGY770R Governor Basic Governor Basic (11) SenseTyp: Sensor type Select the type of governor sensor. Nitro (BPS-1 backplate; Magnet Type) 1:1 Magnet "1:1 Magn" (Magnet type applied to helicopter part that turns at the same RPM as the main rotor) HPoleEP: For Electric motors 8 poles and above LPoleEP: For electric motors 6 poles. (12) GOV Gain: Governor gain Cond Governor Gain. If the value of the Governor Gain is set too low, the heli- copter's RPM will fluctuate with collective and cyclic pitch changes. Con- versely, if the number is too high, the RPM itself will fluctuate and surge during flight. Setting ranges: 1 ~ 100% Initial value: Nitro = 40%, 1:1Magn = 60%, HPoleEP= 30%, LPoleEP = 10% (13) L Lmt. L rpm / H rpm: Low limit RPM Cond Low RPM Limit sets the minimum amount of throttle that the governor will command during an over-speed situation. Too low of value the en- gine could shut off or not recover power quickly enough during the next ...
- Page 211 Gyro setting CGY770R Expert Menu Expert Menu Expert Menu ◆ Swash Detail(Swash) ◆ (Aileron・ ) ◆ (Rudder) ◆ (Governor)...
- Page 212 Gyro setting CGY770R Rudder Expert Rudder Expert 3D" screen. (1) RUD Ntr: Rudder servo neutral setting This parameter is used to set the neutral position of the rudder servo. Po- sition the rudder servo arm as perpendicular as possible to the tail rotor pushrod prior to making adjustments with this parameter. Setting ranges: -240 ~ 0 ~ +240 Initial value: +0 (2) EXP. AVCS / EXP. NORM: Rudder exponential This parameter sets the feel of the tail rotor control around center. When set to [0] the control curve is linear. Using a [+] value the tail rotor will be more sensitive around neutral conversely, using a [-] value will soften the feeling around neutral. The RUD EXP parameter in your transmitter can also be used to tune the tail rotor to a desired feeling. Setting ranges: -100 ~ 0 ~ +100% Initial value: AVCS = -20%, NORM = -20% Sports = AVCS -60% / NORMAL -40%, 3D = AVCS -20% / NORMAL -20%>...
- Page 213 Gyro setting CGY770R Rudder Expert Rudder Expert (3) CNT. DlIn: Control delay in This parameter sets the delay as you move the stick from neutral toward left or right. Larger values result in a softer tail rotor feel off center. This parameter must be adjusted individually for LEFT and RIGHT tail rotor commands. Follow these same procedures to adjust the tail rotor feel in the opposite direction. [ Setting method ] Move the transmitter Rudder stick right or left in the direction you want to set. Touch the green button to enter the setting mode and set the de- lay amount. Do the same for the other side. Setting ranges: 0 ~ 20 n Initial value: 15 n (4) CNT. DlOut: Control delay out This parameter sets the delay when the stick is returned back to the neutral ...
- Page 214 Gyro setting CGY770R Rudder Expert Rudder Expert (6) F/F.Rate U / F/F.Rate D: F/F mixing rate Feed Forward mix is used to counteract sudden increases in torque from the motor during fast collective pitch changes. If you notice a tail kick, using (right rudder on Clockwise rotor disk, left rudder on CCW) F/F mixing can be tuned to reduce the tail kick. The mixing amount can be individually set for high pitch side (U) and low pitch (D) side with zero pitch as the center. Setting ranges: -100 ~ 0 ~ +100% Initial value: +0% (7) ACC Gain: F/F mixing acceleration gain In low head speed situations where a lot of F/F Mixing might be needed, acc. gain boosts the input and removes it immediately after to help cure the sudden change in torque, but it does not allow the large tail rotor input to alter the axial behavior of the helicopter. ...
- Page 215 Gyro setting CGY770R Flight Tune Expert(Aileron/Elevator Gyro Expert Setting) Flight Tune Expert(Aileron/Elevator Gyro Expert Setting) The " Flight Tune Expert " " Flight Tune Expert " screen from the " EXPERT MENU 3D " screen. (1) HeadHld A / HeadHld E: Head hold aileron / elevator Cond This features is used to adjust the heading hold aspect of the gyro con- trol. If the helicopter is not holding angle or cyclic control rates, increas- ing the heading hold gain will improve holding the helicopter at a certain angle and improve the cyclic rate consistency. If this is set too high you could see an oscillation on that axis. Lowering the heading hold below default would be used if the transmitter gain is reduced and a consistent ...
- Page 216 Gyro setting CGY770R Swash Detail Swash Detail The swash detail setting is used to keep the swash plate level at high and low collective pitch to cyclic interactions and cyclic pitch to collective pitch interactions. " Swash Detail " screen from the " EXPERT MENU 3D " screen. (1) PIT AIL: collective pitch aileron mixing rate...
- Page 217 Gyro setting CGY770R Swash Detail Swash Detail (7) ELE PIT: elevator collective pitch mixing rate During back and forward elevator inputs at middle collective, check if the swash plate is raising or lowering during the input. [Setting method] Operate the transmitter stick in the direction you want to set. Touch the button lit in green to enter the setting mode and adjust the mixing rate. Do the same for the other side. Note: This setting can not be used when H4-00 swash mode is selected. Setting ranges: 30 ~ 150% Initial value: H3-120 = 50%, except H3-120 = 100% (8) ELE AIL: elevator aileron mixing rate While moving the elevator back and forth at middle collective, check to make sure the aileron axis is staying level. [Setting method] Operate the transmitter stick in the direction you want to set. Touch the button lit in green to enter the setting mode and adjust the mixing rate. Do the same for the other side. Note: This setting can not be used when H4-00 swash mode is selected. Setting ranges: 30 ~ 150% Initial value: H3-120 = 50%, except H3-120 = 100% (9) ELE ELE2: elevator 2nd elevator mixing rate This parameter adjusts the elevator to 2nd elevator mixing rate. The rate ...
- Page 218 Gyro setting CGY770R Gyro setting CGY770R Swash Detail Swash Detail (12) ELE High / ELE Low: Linkage compensation elevator At both the HIGH pitch and LOW pitch check to make sure that the swash plate is staying level on the aileron and collective axis when using eleva- tor inputs. If the swash plate is rising or falling: [Setting method] Operate the transmitter stick in the direction you want to set. Touch the button lit in green to enter the setting mode and adjust the mixing rate. Do the same for the other side. Note: check all four directions: high/back; high/forward; low/back; low/ forward. Setting ranges: 0 ~ 100% Initial value: 0% (13) ELE Dir: Compensation direction of the elevator If the above Data (+/-) correction from 0-100 is NOT in the correct com- pensation direction, change the value from [+] or [-]. Setting: +/- Initial setting: + (14) Speed Comp: Speed compensation In 120 degrees CCPM all servos do not travel the same distance on eleva-...
- Page 219 Gyro setting CGY770R Gyro setting CGY770R Governor Expert Governor Expert "Governor Expert" screen from the "EXPERT MENU 3D" screen. (1) Work Mode: Governor working mode Sets the governing type mode. - GOVERNOR (Governor Mode) ‒ RPM is entirely controlled by the GOV once it has engaged. The GOV will do whatever it takes to hold a con- stant RPM throughout flight. ...
- Page 220 Gyro setting CGY770R Governor Expert Governor Expert (6) Revo. Up Dly: Revolution change up delay How quickly the RPM changes when increasing RPM between two differ- ent RPM conditions and flight modes. A higher number slows the RPM change rate; a lower value speeds up the RPM change rate. Setting ranges: 2 ~ 40 Frm Initial value: 8 Frm (7) Revo. Dn Dly: Revolution change down delay How quickly the RPM changes when reducing RPM between two differ- ent ...
- Page 221 The dedicated mixes, etc. usable when multicopter model type is selected are displayed in this Model condition, as required. When you want to use menu functions section. the system by switching the settings for each condition by switch or stick position, use the (Up to 8 conditions can be used) Servo monitor Displays the servo test and operation position...
- Page 222 Flight condition's addition, deletion, copy, condition renaming, and condition delay can be set. [All model types] time between channels during condition switching The functions in the Model menu can be used by can be suppressed. The delay can be set for each switching the settings of up to 8 flight conditions channel.
- Page 223 Currently selected condition name The ON/OFF switch of Conditions List condition is chosen. 1. Tap the [Copy] button. The Copy screen 1 . S e l e c t t h e c o n d i t i o n b y appears. tapping the condition you want to reset in Conditions 2.
- Page 224 The angle and curve of each operation function can be set. [All model types] AFR function is used to adjust the throw and operation curve of the stick, lever, and switch the maximum throw. When mixing is applied from one channel to another channel, both channels can be adjusted at the same time by adjusting the operation rate through the AFR function.
- Page 225 D/R curves which can be switched by switch, etc. can be added. The curve can be adjusted by the AFR function. other conditions. the setup screen shown below. The ON/OFF switch of dual rate is chosen. Activate the D/R function by When the function select button is tapping the [INH] . tapped, a selection screen appears. Select the function you want to set at the selection screen. ● Setting rudder angle, EXP On this D/R screen you can set functions and Rate, EXP settings switchover switches. Rudder angle (rate) and EXP ...
- Page 226 Program mixing which can be freely customized. Up to 10 mixings can be used for each condition. [All model types] Programmable mixing may be used to correct to the programmed channel servo operation and undesired tendencies of the aircraft, and it may also may control up to four circuits simultaneously.
- Page 227 1. Tap the curve type selection button of the curve type you want to use to display the selection A c t i v a t i n g f u n c t i o n s f o r o n l y t h e s e l e c t e d screen.
- Page 228 This function is used when a Futaba GY Series *Initial setting does not assign a sensitivity channel. Use the Function menu of the Linkage menu to assign the sensitivity gyro is used to stabilize the aircraft's attitude. The channel (Gyro/Gyro2/Gyro3) used to a vacant channel sensitivity and operation mode (Normal mode/GY beforehand.
- Page 229 This section describes the functions often used at the function setup screen. Refer to it when setting each function. Tapping the value setting buttons on each screen will cause value input buttons to appear at the top of the panel. Value input buttons display ...
- Page 230 Operation mode selection *The operation modes which can be selected depend on the function. VR selection Rate adjustment (Fine tuning VR operation position) [Setting method] [Fine tuning VR operation mode] Control selection When the VR is turned clockwise and Tap the [Control] "--" button to call the counterclockwise, the mixing rate <Hardware select> screen, and then select increases and decreases, respectively.
- Page 231 Linear (First) 0 〜 27 ( Slowly) (First) 0 〜 27 ( Slowly) In case of Linear Speed In speed The servo speed at each function operation Out be adjusted. The servos operate smoothly Out speed Speed at a fixed speed corresponding to the set speed. The operating speed (In side) and return speed (Out side) can be set individually.
- Page 232 This section describes the setting procedure of curves which are used with the AFR function and each mixing function. Four types of curves (EXP1, EXP2, Point and Spline) can be selected. 1. Tap the button of the curve type you want to use.
- Page 233 When the curve type is selected as described above, adjustment items corresponding to the curve type appear on the screen. Adjust each curve as described below. 1. Tap to the [Offset] setting item. (EXP1 curve) 2. Move the curve in the vertical direction (When the value is tapped, the rate is reset to the initial value.) Using the EXP1 curve is effective in smoothing...
- Page 234 Point curves or spline curves of up to 11/17 points can be used. (Initial value: 7/9 points) The set points can be freely increased, decreased, and 5. Press "Rate" and use the up/down arrows 1.Open the screen of a mixing curve with the to adjust the rate points up or down.
- Page 235 with function) A smoother curve is made. Initial point number: 9 points (17 points Setting method is same at spline and point. curve), 7 points (11 points curve) *The set points can be freely increased, decreased, and Point Spline [Rate adjustment of each point] 1.
- Page 236 The various functions used in the T26SZ can be selected by switch. The switch (including when stick, trim lever, or VR are used as a switch) setting method is common to all functions. System menu → H/W setting Switch quick assign function is ON (Default) Tap : Model menu → Air brake Switch setting mixing (function) Status : INH → ON Activate the mixing (function)
- Page 237 Call up the function screen (Air brake) Turn switch C ON/OFF Check the Status ON/OFF Do not check on the [Hardware select] screen, as there is a risk that the ON/ OFF position may change. When switch H (return) is set to ON at the front position It will be selected automatically. Operate switch H to either position. Operate the switch position to the front side. While keeping the switch position on the front side, press the EXIT button or [Hardware Selection]. If you release switch H, the other side will turn ON.
- Page 238 System menu → H/W setting Switch quick assign function is OFF (Switch selection screen example) Tap the chosen switch. Switch ON/OFF setting is possible at each position. When a stick, trim lever, or VR is used as a switch, the following 4 modes can be selected. 1. When the ON/OFF "Set" position switch is tapped after the switch was selected, the screen shown below appears.
- Page 239 When a stick, trim lever, or VR is used as a switch, the following 4 modes can be selected. ◆ Linear・Hysteresis mode ◆ Symmetry・Hysteresis mode This setting method selects function ON/OFF based The operation is the same as the linear hysteresis on the set point.
- Page 240 When shifting the ON/OFF point ◆ Area Green:ON The ON/OFF and hysteresis (dead band) boundary point (there ◆ Area Red:OFF are 2 points: top and bottom) position can be shifted. ON/OFF is ◆ Area Yellow:Hysteresis (Dead band) possible at a free position. [ Setting method ] Reverse of ON/ OFF direction point you want to shift and T h e b o u n d a r y p o i n t s change.
- Page 241 condition is activated when 2 switches are turned on. AND: When both switches are ON, the condition is ON. OR: When either switch is ON, the condition is ON. EX-OR: When the two switches are in different states, the condition is ON. Tap to the [Mode] "Single"...
- Page 242 The transmitter can be used as a game controller by connecting it to a computer with a USB cable. (Some games cannot be used.) ● PC Port 1. Connect the T26SZ PC port to your PC with *Channels 1 to 8 can be used with a USB connection. ・ RealFlight 8 (Update to the latest version) ・...
- Page 243 "Select Controller" dialog. button. lever fully left and right or up and down to enter the operating range. After confirming that the correction is return to the "Select Controller" dialog. Controller" dialog to close the dialog.
- Page 244 Download 6. Turn on the transmitter power while pressing down the "EXIT" button. The update screen appears on the LCD display of your T26SZ and the software update is started. 3. The "FUTABA" folder will be created on your computer.
- Page 245 3. Attach the battery to the transmitter while pressing down the "EXIT" button. 4. The update will start. 8. Turn off the power switch of your T26SZ and remove Even after the above steps, if the transmitter the microSD card from the card slot.
- Page 246 The model data (only latest version) of T14SG/FX-22/T12K can be copied to T26SZ. * microSD card is required. * The model data of T26SZ cannot be copied to T14SG/FX-22/T12K. * Use an SD card conversion adapter (not included) to insert a microSD card into the T14SG/FX-22/T12K.
- Page 247 "Author" refers to any designer, engineer, programmer, technical writer or other person who contributed to the Font Software. PERMISSION & CONDITIONS Permission is hereby granted, free of charge, to any person obtaining a copy of the Font Software, to use, study, copy, merge, embed, modify, redistribute, and sell modified and unmodified copies of the Font Software, subject to the following conditions: 1) Neither the Font Software nor any of its individual components, in Original or Modified Versions, may be sold by itself. 2) Original or Modified Versions of the Font Software may be bundled, redistributed and/or sold with any software, provided that each copy contains the above copyright notice and this license. These can be included either as stand-alone text files, human-readable headers or in the appropriate machine-readable metadata fields within text or binary files as long as those fields can be easily viewed by the user. 3) No Modified Version of the Font Software may use the Reserved Font Name(s) unless explicit written permission is granted by the corresponding Copyright Holder. This restriction only applies to the primary font name as presented to the users. 4) The name(s) of the Copyright Holder(s) or the Author(s) of the Font Software shall not be used to promote, endorse or advertise any Modified Version, except to acknowledge the contribution(s) of the Copyright Holder(s) and the Author(s) or with their explicit written permission. 5) The Font Software, modified or unmodified, in part or in whole, must be distributed entirely under this license, and must not be distributed under any other license. The requirement for fonts to remain under this license does not apply to any document created using the Font Software. TERMINATION This license becomes null and void if any of the above conditions are not met. DISCLAIMER THE FONT SOFTWARE IS PROVIDED "AS IS", WITHOUT WARRANTY OF ANY KIND, EXPRESS OR IMPLIED, INCLUDING BUT NOT LIMITED TO ANY WARRANTIES OF MERCHANTABILITY, FITNESS FOR A PARTICULAR PURPOSE AND NONINFRINGEMENT OF COPYRIGHT, PATENT, TRADEMARK, OR OTHER RIGHT. IN NO EVENT SHALL THE COPYRIGHT HOLDER BE LIABLE FOR ANY CLAIM, DAMAGES OR OTHER LIABILITY, INCLUDING ANY GENERAL, SPECIAL, INDIRECT, INCIDENTAL, OR CONSEQUENTIAL DAMAGES, WHETHER IN AN ACTION OF CONTRACT, TORT OR OTHERWISE, ARISING FROM, OUT OF THE USE OR INABILITY TO USE THE FONT SOFTWARE OR FROM OTHER DEALINGS IN THE FONT SOFTWARE. FUTABA CORPORATION 1080 Yabutsuka, Chosei-mura, Chosei-gun, Chiba-ken, 299-4395, Japan TEL: +81-475-32-6051, FAX: +81-475-32-2915 ©FUTABA CORPORATION 2024, 06 (1)
Need help?
Do you have a question about the T26SZ and is the answer not in the manual?
Questions and answers
bonjour je voudrai savoir comment arrêter les alarmes vocales de la télémétrie
To stop voice alarms on the FUTABA T26SZ telemetry, set the alarm option to "Inhibit" in the telemetry alarm settings.
This answer is automatically generated