Table of Contents
Advertisement
Quick Links
Advertisement
Table of Contents

Related Manuals for Carl Valentin DuoPrint 107/12


Summary of Contents for Carl Valentin DuoPrint 107/12
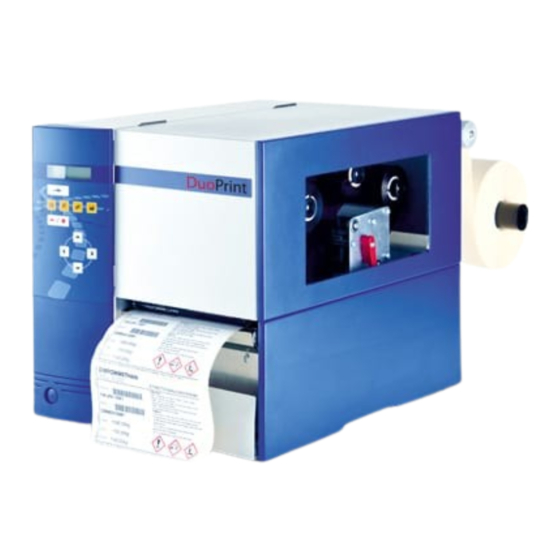
- Page 1 DUOPRINT Operating Manual...
- Page 2 It must not be concluded from the missing labelling that it is not a registered brand or a registered trademark. Carl Valentin label printers comply with the following safety guidelines: Low-Voltage Directive (2014/35/EU) Electromagnetic Compatibility Directive (2014/30/EU)
-
Page 3: Table Of Contents
DuoPrint Table of Contents Table of Contents Introduction ................5 General Instructions ..............5 Intended Use ................5 Product Description ..............6 Safety Instructions ..............7 Operating Conditions ............... 8 Two-Colour Printing ............13 Label Design ................13 Printhead 2 Offset..............14 Label Photocells .............. - Page 4 Table of Contents DuoPrint Maintenance and Cleaning ..........71 General Cleaning ..............72 Clean the Transfer Ribbon Drawing Roller ......72 Clean the Print Roller ............72 Clean the Printhead ............... 74 Clean the Label Photocell ............. 75 Replace the Printhead ............76 Adjust the Printhead ..............
-
Page 5: Introduction
DuoPrint Introduction Introduction 1.1 General Instructions Important information and instructions in this document are designated as follows: DANGER identifies an extraordinarily great and immediate danger which could lead to serious injury or even death. WARNING identifies a possible danger could lead to serious bodily injury or even death if sufficient precautions are not taken. -
Page 6: Product Description
Introduction DuoPrint The label printer may only be used while in proper working order and for the intended purpose. Users must be safe, aware of potential dangers and must comply with the operating instructions. Faults, in particular those which affect safety, must be remedied immediately. The label printer is solely intended to print suitable media which have been approved by the manufacturer. -
Page 7: Safety Instructions
DuoPrint Safety Instructions Safety Instructions The label printer is designed for power supply systems of 110 … 230 V AC. Connect the label printer only to electrical outlets with a ground contact. Couple the label printer to devices using extra low voltage only. Before making or undoing connections, switch off all devices involved (computer, printer, accessories etc.). -
Page 8: Operating Conditions
Safety Instructions DuoPrint 2.1 Operating Conditions Before initial operation and during operation these operating conditions have to be observed to guarantee save and interference- free service of our printers. Therefore please carefully read these operating conditions. Shipment and storage of our printers are only allowed in original packing. - Page 9 DuoPrint Safety Instructions Technical data of Power line voltage and power line frequency: See type plate power supply Allowable tolerance of power line voltage: +6 % … −10 % of nominal value Allowable tolerance of power line frequency: +2 % … −2 % of nominal value Allowable distortion factor of power line voltage: ≤...
- Page 10 Safety Instructions DuoPrint Connecting lines to All connecting lines have to be guided in shielded lines. Shielding has external machines to be connected on both sides to the corner shell. It is not allowed to guide lines parallel to power lines. If a parallel guiding cannot be avoided a distance of at least 0.5 m has to be observed.
- Page 11 DuoPrint Safety Instructions Guarantee We do not take any responsibility for damage caused by: • Ignoring our operating conditions and operating manual. • Incorrect electric installation of environment. • Building alterations of our printers. • Incorrect programming and operation. • Not performed data protection.
- Page 12 Safety Instructions DuoPrint Operating Manual 12.21...
-
Page 13: Two-Colour Printing
DuoPrint Two-Colour Printing Two-Colour Printing For printing in a second colour, the DuoPrint is equipped with an additional printing unit. Figure 1 A = Front printhead B = Rear printhead 3.1 Label Design When creating a label, it must, in addition to the contents to be printed, also be determined which contents are to be printed in the second colour, i.e. -
Page 14: Printhead 2 Offset
Two-Colour Printing DuoPrint Creation by using (Windows) software Labelstar Office and printing via the CV printer driver Any labels can be designed. Coloured contents in a defined colour are recognised by the driver and edited for the rear printhead. Further information on the settings can be found in the printer driver’s help menu. -
Page 15: Test Print
DuoPrint Two-Colour Printing 3.4 Test Print The print is only ever printed at one of the two printheads. The output is controlled by the state of the rear printhead. Printhead down = The test print is printed at the rear printhead. Printhead up = The test print is printed at the front printhead. -
Page 16: Colour Processing
Two-Colour Printing DuoPrint Mode: I/O Print stop at missing data is effected in the same way as in mode Dialog. However, no indication of waiting state is shown at the display only the output Waiting state is set. As long as no subsequent print order is transferred the Print start input is inactive. -
Page 17: Error Correction
DuoPrint Two-Colour Printing Operating mode „print only on the rear“ (Print to PH2) The front printhead is opened to avoid a paper jam. CAUTION! Paper jam between the rear and the front printhead. Pay attention to a safe label guiding. We recommend using a rewinder unit. - Page 18 Two-Colour Printing DuoPrint Operating Manual 12.21...
-
Page 19: Technical Data
DuoPrint Technical Data Technical Data DuoPrint 107/12 DuoPrint 160/12 Print Resolution 305 dpi 305 dpi Max. Print Speed 150 mm/s 120 mm/s Print Width 106,6 mm 160 mm Passage Width 116 mm 176 mm Printhead Corner Type Corner Type Labels... - Page 20 Technical Data DuoPrint Operation Panel Keys Test print, function menu, quantity, CF Card, feed, enter, 4 x cursor LCD Display 2 x 16 characters Settings Date, time, shift times 11 language settings (others on demand) Label and device parameters, interfaces, password protection, variables Monitoring Stop printing if...
-
Page 21: Accessories
DuoPrint Technical Data 4.1 Accessories • Standard Equipment Tear-off edge • Real time clock with printout date and time Automatic daylight saving time Storage of data with shut-down • Variables: link field, counter, date/time, calculation and shift variable, CF data •... -
Page 22: Control Inputs And Outputs
Technical Data DuoPrint 4.2 Control Inputs and Outputs By means of a maximum of 16 control inputs and outputs which, in the following, are also referred to as ports, different functions of the printer system can be triggered and operating states can be displayed. The ports are provided by means of a D-Sub bushing (26pin HD) at the rear panel of the printer system and are galvanically isolated from protective earth (PE) by means of an optocoupler semi-conductor... - Page 23 DuoPrint Technical Data Configuration of D-Sub socket Figure 3 Cable identification Number Color white brown green yellow grey pink blue black violet grey-pink red-blue white-green brown-greed white-yellow yellow-brown white-grey grey-brown white-pink pink-brown white-blue brown-blue white-red brown-red white-black brown-black 12.21 Operating Manual...
- Page 24 Technical Data DuoPrint Port 1 to Port 16 = Assignment for I/O Profile Std_Label Identification Description / Function Port 1 Print start (Input) Port 2 No function Port 3 Counter Reset (Input) Port 4 No function Port 5 Reset error (Input) Port 6 Terminate waiting state (Input) Port 7...
- Page 25 DuoPrint Technical Data Identification Description / Function + 5 VDC 5 Volt DC output for external use. Max. 1 A. This voltage is provided from direct print module and can be used e.g. as control voltage. Never apply any external voltage to this output.
- Page 26 Technical Data DuoPrint Example 1 Device connection to a machine with S7-300 SPS. Figure 4 Example 2 Device connection to a operating panel. Figure 5 Operating Manual 12.21...
- Page 27 DuoPrint Technical Data Example 3 Device connection version if 'Option: 2. LED'. Figure 6 When connecting a reed contact with a control input, the contact must Precautions have a switching capacity of min. 1 A in order to prevent the contact from sticking due to the inrush current.
- Page 28 Technical Data DuoPrint Operating Manual 12.21...
-
Page 29: Installation
DuoPrint Installation Installation Unpack the Lift the label printer on the bottom and remove the printer from label printer the carton. Check the label printer for transport damages. Check delivery for completeness. • Scope of delivery Label Printer. •... -
Page 30: Connect The Label Printer
Installation DuoPrint 5.2 Connect the Label Printer The label printer is equipped with a versatile power supply unit. The Connect to the power device may be operated with a mains voltage of 110 … 230 V AC / supply 50-60 Hz without any adjustments or modifications. CAUTION! The label printer can be damaged by undefined switch-on currents. -
Page 31: Start-Up
DuoPrint Installation 5.4 Start-Up When all connections are completed, switch on the label printer. The main menu appears which shows the printer type, current date and time. Insert label material and transfer ribbon (see chapter 6. Loading Media, page 33). Go to menu Label layout, select menu item Measure label and start measuring (see chapter 7.4 Label Layout, page 42). - Page 32 Installation DuoPrint Operating Manual 12.21...
-
Page 33: Loading Media
DuoPrint Loading Media Loading Media 6.1 Load Label Roll Load label roll in tear-off mode Figure 8 1. Open the printer cover. 2. Open the printheads (A) by turning the red pressure levers (B) anticlockwise. 3. Remove the optional outside label mounting plate from the unwinder. -
Page 34: Load Label Roll With Option Pa 8X
Loading Media DuoPrint 6.2 Load Label Roll with Option PA 8X Figure 9 1. Open the printer cover. Retrofit with option CV label unwinder PA 8X 2. Insert the CV label unwinding device PA 8X from behind in the provided cut-out in the rear wall and fasten it using 3 Philips head screws. -
Page 35: Load Transfer Ribbon
DuoPrint Loading Media 6.3 Load Transfer Ribbon NOTICE! For the thermal transfer printing method it is necessary to load a ribbon, otherwise when using the printer in direct thermal print it is not necessary to load a ribbon. The ribbons used in the printer have to be at least the same width as the print media. - Page 36 Loading Media DuoPrint 3. Load the transfer ribbon rolls (D) with outer winding onto the unwinding rolls (E). 4. Place the empty ribbon rolls onto the rewinding rolls (C) and lead the transfer ribbon below the printheads (A). 5. Fix the beginnings of each transfer ribbon with an adhesive tape in rotating direction at the empty roll of the rewinding rolls (C).
-
Page 37: Function Menu
DuoPrint Function Menu Function Menu 7.1 Keyboard Back to the main menu. Start a test print. Delete a stopped print order. Change to the function menu. In function menu: one menu item back. Change to the quantity (number of pieces) menu. Press keys to select the number of labels that should be printed. -
Page 38: Menu Structure
Function Menu DuoPrint 7.2 Menu Structure Print Settings Speed Contrast Ribbon control Y offset X offset Tear-off offset Label Layout Label length Gap length Column printing Measure label Label type Material selection Photocell Scan position Label error length Synchronisation Flip label Rotate label Alignment Device Settings... - Page 39 DuoPrint Function Menu Dispenser I/O (Option) Operating modes Photocell level I/O port 1-8 I/O port 9-16 Debounce Start signal delay I/O protocol Save signal I/O profile Material Savings Ribbon save mode Label save mode Auto feed delay Network IP address Netmask Standard Gateway Speed/Duplex...
- Page 40 Function Menu DuoPrint Date/Time Set date/time Summertime Start of summertime - format Start of summertime - date Start of summertime - time End of summertime - format End of summertime - date End of summertime - time Time shifting Service Functions Label parameters Photocell settings Photocell/sensors...
-
Page 41: Print Settings
DuoPrint Function Menu 7.3 Print Settings Switch on the label printer and the display shows the main menu. Press the key to access the function menu. Press the key to select the menu Print settings. Speed Indication of print speed in mm/s (see chapter Technical Data, page 19). -
Page 42: Label Layout
Function Menu DuoPrint 7.4 Label Layout Switch on the label printer and the display shows the main menu. Press the key to access the function menu. Press the key until the menu Label layout is displayed. Press the key to select the menu. Label length Indication of label length in mm (see chapter Technical Data, page 19). - Page 43 DuoPrint Function Menu Press the key to move to the next menu item. Label error length In case an error occurs, indication after how many mm a message appears in the display. Value range:1 mm … 999 mm. On: If a label is missed on the liner an error message is displayed. Synchronisation Off: Missing labels are ignored, i.e.
-
Page 44: Device Settings
Function Menu DuoPrint 7.5 Device Settings Switch on the label printer and the display shows the main menu. Press the key to access the function menu. Press the key until the menu Device settings is displayed. Press the key to select the menu. Codepage Indication of the font used in the printer. - Page 45 DuoPrint Function Menu Press the key to move to the next menu item. Customized entry Off: No question appears at the display. In this case the stored default value is printed. On: The question referring the customized variable appears once before the print start at the display.
-
Page 46: Dispenser I/O (Option)
Function Menu DuoPrint 7.6 Dispenser I/O (Option) Switch on the label printer and the display shows the main menu. Press the key to access the function menu. Press the key until the menu Dispenser I/O is displayed. Press the key to select the menu. - Page 47 DuoPrint Function Menu After selection of desired Dispenser I/O operating mode, press the key Additional parameters for Dispenser I/O to select additional parameters. First value = Indication of the current sensor level. This indication Dispenser photocell is for checking purposes and cannot be modified. Second value = Indication if a label (value = 1) or if no label (value = 0) was found.
- Page 48 Function Menu DuoPrint Press the key to move to the next menu item. Start signal delay Indication in time per second of the delay for the start signal. Value range: 0.00 … 9.99. Press the key to move to the next menu item. I/O protocol Indication of interface at which the modifications of input signals and output signals (I/O) are sent.
- Page 49 DuoPrint Function Menu List of registered Print start (Input) functions for Error reset (Input) StdFileSetLabel Number of the file to load Bit 0 (Input) Number of the file to load Bit 1 (Input) Number of the file to load 2 (Input) Number of the file to load 3 (Input) Number of the file to load 4 (Input) Number of the file to load 5 (Input)
-
Page 50: Material Savings
Function Menu DuoPrint 7.7 Material Savings Ribbon save = maximum exploitation of transfer ribbon Label Transfer gibbo w/o ribbon save Transfer ribbon with ribbon save In general, the maximum exploitation of the transfer ribbon is achieved Procedure in that the transfer ribbon stops in the event of gaps within the label and/or the distance between two labels and the printhead folds in, i.e. - Page 51 DuoPrint Function Menu Switch on the label printer and the display shows the main menu. Press the key to access the function menu. Press the key until the menu Ribbon save is displayed. Press the key to select the menu. Press the keys to select the desired ribbon save mode.
-
Page 52: Network
Function Menu DuoPrint Press the key to move to the next menu item. Auto feed delay Setting of time after that the remaining labels between the printheads were automatically printed. Value range 0 … 255 seconds 7.8 Network Switch on the label printer and the display shows the main menu. Press the key to access the function menu. - Page 53 DuoPrint Function Menu Operation Password Entering a 4-digit numeric password. Press the key to move to the next menu item. Protection Printer settings can be changed (contrast, speed, operating mode, ...). configuration The password protection prevents modifications at the printer settings. Press the key to move to the next menu item.
-
Page 54: Interface
Function Menu DuoPrint 7.10 Interface Switch on the label printer and the display shows the main menu. Press the key to access the function menu. Press the key until the menu Interface is displayed. Press the key to select the menu. COM1 / Baud / COM1: 0 - serial interface Off. -
Page 55: Date & Time
DuoPrint Function Menu 7.11 Date & Time Switch on the label printer and the display shows the main menu. Press the key to access the function menu. Press the key until the menu Date/Time is displayed. Press the key to select the menu. Setting of The upper line of the display shows the current date, the second line date and time... -
Page 56: Service Functions
Function Menu DuoPrint 7.12 Service Functions NOTICE! So that the distributor res. the manufacturer in case of service can offer fast support the necessary information such as selected parameters can be taken directly from the service functions menu of the device. Switch on the label printer and the display shows the main menu. - Page 57 DuoPrint Function Menu Press the key to move to the next menu item. Setting mode Setting Mode ON: The Printheads can be adjusted more easily. The following parameters are set automatically: continuous labels, label size = 50 mm. These settings can be changed manually. The following control functions are desactivated: 'printhead open' control, transfer ribbon control, label photocell Off (continuous labels).
- Page 58 Function Menu DuoPrint Press the key to move to the next menu item. Motor Ramp This function is often used for high printing speed as the tearing of transfer ribbon can be prevented. The higher the '++' value is set, the slower the feeding motor is accelerated.
- Page 59 DuoPrint Function Menu Press the key to move to the next menu item. Online / Offline This function is activated e.g. if the transfer ribbon is to be changed. It is avoided that a print order is processed although the module is not ready.
-
Page 60: Main Menu
Function Menu DuoPrint The files are in directory 'log': LogMemErr.txt: Logged errors with additional information such as date/time and file name/line number (for developers). LogMemStd.txt: Logging of selected events. LogMemNet.txt: Data latest send via port 9100. Parameters.log: All printer parameters in human readable form. TaskStatus.txt: Status of all printer tasks. -
Page 61: Compact Flash Card / Usb Memory Stick
DuoPrint Compact Flash Card / USB Memory Stick Compact Flash Card / USB Memory Stick 8.1 General Information On the back side of the label printer is the slot for the CF card and the USB port for inserting the USB memory stick. The mass storage menu (memory menu) permits the access to CF cards or USB memory sticks attached to the printer. -
Page 62: Navigation
Compact Flash Card / USB Memory Stick DuoPrint 8.3 Navigation The memory menu is operated with the keys of the foil keyboard of the control unit or with different function keys of an attached USB keyboard. Return to the previous menu. Function Load layout: Change to the File Explorer. -
Page 63: Define User Directory
DuoPrint Compact Flash Card / USB Memory Stick 8.4 Define User Directory NOTICE! An user directory is to be defined: • before using and/or navigating through the memory menu. • if formatting of CF card is effected at PC and thus the STANDARD directory was not created automatically. -
Page 64: Load Layout
Compact Flash Card / USB Memory Stick DuoPrint Press the key to access the memory menu. Press the key to call the File Explorer. Press the keys to select the directory. Press the key to display all available functions. Select the function Set as user dir and press the key to confirm the selection. -
Page 65: File Explorer
DuoPrint Compact Flash Card / USB Memory Stick 8.6 File Explorer The File Explorer is the file manager of the printing system. The File Explorer provides the main functions for the user interface of memory menu. In the user directory, press the key to access the File Explorer. - Page 66 Compact Flash Card / USB Memory Stick DuoPrint Load file Loads a file. This can be a configuration saved before, a layout, etc. Press the key to access the memory menu. Press the key to call the File Explorer. Press the keys to select the file.
- Page 67 DuoPrint Compact Flash Card / USB Memory Stick Save configuration Saves the complete, current printer configuration under the selected name. Press the key to access the memory menu. Press the key to call the File Explorer. Press the key to move to the menu Save file. Select the function Save configuration and confirm the selection with the key If an USB keyboard is attached a new file name for config.cfg can be...
- Page 68 Compact Flash Card / USB Memory Stick DuoPrint Format the memory Formats irrevocably the memory card. card NOTICE! USB sticks cannot be formatted at the printer! Press the key to access the memory menu. Press the key to call the File Explorer. Select the drive which is to format with the navigation keys.
- Page 69 DuoPrint Compact Flash Card / USB Memory Stick Copy the memory card Creates a duplicate of the original file and/or the original directory to make changes independently of the original. Press the key to access the memory menu. Press the key to call the File Explorer.
-
Page 70: Firmware Update
Compact Flash Card / USB Memory Stick DuoPrint 8.7 Firmware Update Starting from firmware version 1.58, updates can be performed via the memory menu. Both the USB stick as well as the CF card can be used for this. Procedure On the CF card / USB memory stick a directory is created in which the necessary update files are stored (firmware.prn, data.prn). -
Page 71: Maintenance And Cleaning
DuoPrint Maintenance and Cleaning Maintenance and Cleaning DANGER! Risk of death by electric shock! Before opening the housing cover, disconnect the label printer from the mains supply and wait for a moment until the power supply unit has discharged. NOTICE! When cleaning the label printer, personal protective equipment such as safety goggles and gloves are recommended. -
Page 72: General Cleaning
Maintenance and Cleaning DuoPrint 9.1 General Cleaning CAUTION! Abrasive cleaning agents can damage the label printer! Do not use abrasives or solvents to clean the outer surface of the label printer. Remove dust and paper fuzz in the printing area with a soft brush or vacuum cleaner. - Page 73 DuoPrint Maintenance and Cleaning Figure 11 1. Open the printer cover. 2. Turn the red lever (D) counter clockwise to lift up the printhead (A). 3. Remove labels and transfer ribbon from the label printer. 4. Remove deposits with the roller cleaner and a soft cloth. 5.
-
Page 74: Clean The Printhead
Maintenance and Cleaning DuoPrint 9.4 Clean the Printhead Printing can cause accumulation of dirt at printhead e.g. by colour particles of transfer ribbon, and therefore it is necessary to clean the printhead in regular periods depending on operating hours, environmental effects such as dust etc. CAUTION! Printhead can be damaged! ... -
Page 75: Clean The Label Photocell
DuoPrint Maintenance and Cleaning 9.5 Clean the Label Photocell CAUTION! Label photocell can be damaged! Do not use sharp or hard objects or solvents to clean the label photocell. The label photocell can be soiled with paper dust. This may affect the label scanning. -
Page 76: Replace The Printhead
Maintenance and Cleaning DuoPrint 9.6 Replace the Printhead CAUTION! Danger of abrasion when removing/installing the printhead! Pay attention to the toothing when the tear-off edge is installed. CAUTION! The printhead can be damaged by static electricity discharges and impacts! ... - Page 77 DuoPrint Maintenance and Cleaning Figure 15 Install the printhead 1. Attach the plug connections. 2. Position the printhead in the printhead mounting bracket in such a way that the pins are secured in the corresponding holes in the head plate. 3.
-
Page 78: Adjust The Printhead
Maintenance and Cleaning DuoPrint 9.7 Adjust the Printhead An important characteristic for a high quality print is the parallelism of Parallelism the focal line of the thermal printhead to the pressure roll. Because of the fact that the position of focal line of the printhead depends on fluctuations caused by production, it is necessary to adjust the parallelism. - Page 79 DuoPrint Maintenance and Cleaning Pressure Increasing the printhead contact pressure leads to an improvement of the print image density on the corresponding side and to a shifting of the ribbon feed path in the corresponding direction. CAUTION! Damage of printhead by unequal use! ...
- Page 80 Maintenance and Cleaning DuoPrint Operating Manual 12.21...
-
Page 81: Error Correction
DuoPrint Error correction 10 Error correction Error message Cause Remedy Line too high Line rises up completely or Move line down (increase Y partly over the upper edge of value). label. Check rotation and font. Line too low Line rises up completely or Move line up (reduce Y value). - Page 82 Error correction DuoPrint Error message Cause Remedy Length mask Invalid length of received mask Check sent data. statement. Check connection PC - printer. Unknown mask Transferred mask statement is Check sent data. invalid. Check connection PC - printer. Missing ETB No end of data found.
- Page 83 DuoPrint Error correction Error message Cause Remedy System clock Real Time Clock function is Change battery. selected but the battery is Change RTC component. empty. Defective RTC. No CF interface Interrupted connection CPU - Check connection CPU - CF CF card. card interface.
- Page 84 Error correction DuoPrint Error message Cause Remedy No file/directory File does not exist on CF card. Check file name. Invalid file name File name contains invalid Correct entry of name, remove characters. special characters. Internal file error Internal file system error. Please contact your distributor.
- Page 85 DuoPrint Error correction Error message Cause Remedy Scanner The connected bar code Check the connection scanner signals a device error. scanner/printer. Check scanner (dirty). Scanner NoRead Bad print quality. Increase contrast. Printhead completely soiled or Clean printhead or replace (if defective.
- Page 86 Error correction DuoPrint Error message Cause Remedy No font data Font and web data is missing. Run a software update. No layout ID Layout ID definition is missing. Define layout ID onto the label. Layout ID Scanned data does not Wrong label loaded from CF correspond to defined ID.
- Page 87 DuoPrint Error correction Error message Cause Remedy Load software Error when programming Please contact your printhead FPGA printhead-FPGA. responsible distributor. Upper position Option applicator: Check input signals / compressed-air supply. Sensor signal up is missing. Lower position Option applicator: Check input signals / compressed-air supply.
- Page 88 Error correction DuoPrint Error message Cause Remedy Right position Option applicator: Check RIGHT final position switch for correct function and Right final position switch is not position. in correct position. Check function of pneumatics for cross traverse. Print position Option applicator: Check TOP and RIGHT final position switch for correct The applicator is not in the print...
- Page 89 DuoPrint Error correction Error message Cause Remedy Speed too low Print speed is too slow. Increase the speed of customers' machine. DMA buffer Communication problem HMI. Restart the printer. UID conflict Configuration RFID Run RFID initialising. programming faulty. Module not found RFID module not available.
- Page 90 Error correction DuoPrint Operating Manual 12.21...
-
Page 91: Additional Information
DuoPrint Additional Information 11 Additional Information 11.1 Column Printing With this label printer several columns can be printed, i.e. the information of one column can be printed several times (depending on its width) on a label. Caused by this the use of the complete print width is possible and the generating time is enormously reduced. -
Page 92: Photocells
Additional Information DuoPrint 11.2 Photocells NOTICE! When using reflection photocells you should observe that the label printer cover is closed and in this way other light (e.g. working lamp) on the photocell is prevented. Transmission For this photocell type the transmitter is at the top res. the receiver at the bottom, i.e. -
Page 93: Environmentally-Friendly Disposal
It may only be organised, used and disposed of by the manufacturer. Valentin products accordingly labelled can therefore be returned to Carl Valentin GmbH. This way, you can be sure your old equipment will be disposed of correctly. - Page 94 Environmentally-Friendly Disposal DuoPrint Operating Manual 12.21...
-
Page 95: Index
DuoPrint Index 13 Index column printing ................... 89 compact flash card change directory ................65 copying.................... 69 define user directory ..............63, 64 delete file ..................67 display structure ................61 filter ....................70 firmware update ................70 formatting ..................68 load file.................... - Page 96 Index DuoPrint maintenance/cleaning general cleaning ................72 label photocell cleaning ..............75 maintenance schedule ..............71 print roller cleaning ..............72, 73 printhead adjusting ................. 78 printhead cleaning ................74 printhead, replacing ..............76, 77 ribbon drawing roller, cleaning ............72 material, loading .................
- Page 98 Carl Valentin GmbH Neckarstraße 78 – 86 u. 94 . D-78056 Villingen-Schwenningen Phone +49 7720 9712-0 . Fax +49 7720 9712-9901 info@carl-valentin.de . www.carl-valentin.de...
Need help?
Do you have a question about the DuoPrint 107/12 and is the answer not in the manual?
Questions and answers