INVENTOR V1MFI-50B User Manual
Floor standing air conditioning systems
Hide thumbs
Also See for V1MFI-50B:
- User manual (22 pages) ,
- User manual (22 pages) ,
- User manual (44 pages)

Related Manuals for INVENTOR V1MFI-50B


Summary of Contents for INVENTOR V1MFI-50B
- Page 1 AIR CONDITIONING SYSTEMS FLOOR STANDING • USER’S MANUAL • ΕΓΧΕΙΡΙΔΙΟ ΧΡΗΣΗΣ • MANUAL UTILIZATORULUI MODELS: V1MFI-50B/V1MFO-50B V1MFI-66B/V1MFO-66B...
-
Page 3: Table Of Contents
CONTENTS SOCIABLE REMARK Sociable remark..........................2 SAFETY PRECAUTIONS Warning ............................3 Caution ............................4 Prior to operation ........................5 OPERATING INSTRUCTIONS Product overview ...........................6 Unit control panel ..........................7 Airflow direction control .........................10 Operation tips ..........................11 CARE AND MAINTENANCE Cleaning the indoor unit .......................12 Cleaning the air outlet ........................12 Cleaning the lower front panel and air filter .................13 TROUBLESHOOTING TIPS... -
Page 4: Sociable Remark
SOCIABLE REMARK When using this unit in the European countries, the following informations must be followed: DISPOSAL: Do not dispose this product as unsorted municipal waste. Collection of such waste separately for special treatment is necessary. It is prohibited to dispose of this appliance in domestic household waste. For disposal, there are several possibilities: A) The municipality has established collection systems, where electronic waste can be disposed of at least free of charge to the user. -
Page 5: Safety Precautions
SAFETY PRECAUTIONS To prevent injury to the user or other people and property damage, the following instructions must be followed. Incorrect operation due to ignoring of instructions may cause harm or damage. The seriousness is classified by the following indications. This symbol indicates the possibility of death or serious injury. -
Page 6: Caution
SAFETY PRECAUTIONS CAUTION When the air filter is to be Do not clean the air Ventilate the room well conditioner with water. when used together removed, do not touch the with a stove, etc. metal parts of the unit. An oxygen shortage It may cause an injury. -
Page 7: Prior To Operation
SAFETY PRECAUTIONS Prior to operation 1. Contact an installation specialist for installation. 2. Make sure the unit is grounded efficiently. 3. Do not use a damaged or non-standard power cord. 4. Do not share the same outlet with other appliances. 5. -
Page 8: Operating Instructions
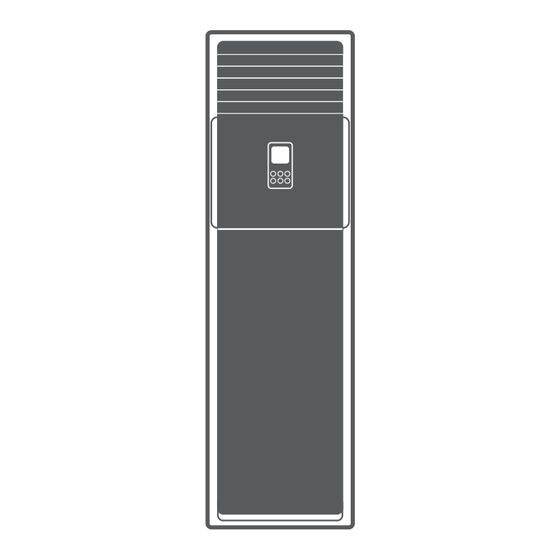
OPERATING INSTRUCTIONS Product Overview Indoor unit Outdoor unit Air outlet Connection cable Operation panel Connection pipe Horizontal airflow control louver Cut-off valve Vertical airflow control louver Fan hood Front panel (upper and lower) Air inlet Drain pipe TEST RUN LOCK ASSITANT ON/OFF MODE... -
Page 9: Unit Control Panel
OPERATING INSTRUCTIONS Unit Control Panel Room Temp/Set Temp /Set Timer display TEST RUN TIMER ON TIMER OFF LOCK AUXILIARY ADJUST ON/OFF MODE FAN SPEED FUNCTION Indicators Swing operation display Auto operation display Sleep operation display Cooling operation display Turbo operation display On timer operation display TIMER ON Dry operation display... - Page 10 OPERATING INSTRUCTIONS TIMER ON TIMER OFF TIMER OFF TIMER ON...
- Page 11 OPERATING INSTRUCTIONS Once the desired feature is established, press the AUXILIARTY FUNCTION button again to register . NOTE: The above illustration is for explanation purpose only. The features are different depending on models. Relative indicator lights up under the different mode settings: Left/Right airflow: Enables you to set the desired horizontal airflow direction.
-
Page 12: Airflow Direction Control
OPERATING INSTRUCTIONS Airflow Direction Control Horizontal Airflow Direction(AUTO) The Left/Right(Horizontal Airflow) can be adjusted by using the remote control or unit control. Press the"AUXILIARY FUNCTION" button on the unit control panel, then press the ADJUST button to select the feature and the ouvers will swing left and right. -
Page 13: Operation Tips
OPERATING INSTRUCTIONS Operation Tips Operation Tips The following events may occur during normal operation. 1. Protection of the air conditioner. Compressor protection The compressor can't restart for 3 minutes after it stops. Anti-cold air (Cooling and heating models only) The unit is designed not to blow cold air on HEAT mode, when the indoor heat exchanger is in one of the following three situations and the set temperature has not been reached. -
Page 14: Care And Maintenance
CARE AND MAINTENANCE 8. Heating mode (For cooling and heating models only) The air conditioner draws in heat from the outdoor unit and releases it via the indoor unit during heating operation. When the outdoor temperature falls, heat drawn in by the air conditioner decreases accordingly. -
Page 15: Cleaning The Lower Front Panel And Air Filter
CARE AND MAINTENANCE Cleaning the Lower front panel and Air Filter: If the air filter becomes clogged, the performance will decrease and electricity will be wasted. The air filter should be checked and cleaned about once every 2 weeks to maintain optimal performance of the air conditioner. -
Page 16: Troubleshooting Tips
TROUBLESHOOTING TIPS Before calling for service, please review the following list of common problems and solutions. Solutions Problem Possible Cause Wait for power restoring Power failure Air conditioner Switch on the main power switch The power supply is disconnected. does not operate at all Change the fuse The power fuse is blown. - Page 17 show on the LCD of the indoor unit when the unit is in the normal operation.The three icons imply the three function respectively. The icon implies the remote control function. implies the defrosting function. The icon implies the forced cooling function. The icon CAUTION: If the supply cord of this appliance is damaged, replacement work shall be performed by authorized...
- Page 18 Activate your warranty..Connect to the following link http://www.inventoraiconditioner.com /warranty-inventor simple steps! Select the product type (airconditioner or appliance) for which the warranty will be activated Choose the warranty that corresponds to your product purchase Fill in the required information...
- Page 19 ΠΕΡΙΕΧΟΜΕΝΑ ΟΔΗΓΙΕΣ ΠΡΟΣ ΤΟ ΚΟΙΝΟ Οδηγίες προς το κοινό........................17 ΟΔΗΓΙΕΣ ΑΣΦΑΛΕΙΑΣ Προειδοποίηση..........................18 Προσοχή .............................19 Έλεγχοι πριν τη λειτουργία......................20 ΟΔΗΓΙΕΣ ΛΕΙΤΟΥΡΓΙΑΣ Περιγραφή προϊόντος ........................20 Οθόνη ............................21 Έλεγχος κίνησης περσίδων......................24 Συμβουλές για τη λειτουργία ......................25 ΦΡΟΝΤΙΔΑ ΚΑΙ ΣΥΝΤΗΡΗΣΗ Καθαρισμός της εσωτερικής μονάδας ...................26 Καθαρισμός...
- Page 20 Ε Μην απορρίπτετε το συγκεκριμένο προϊόν δεν πρέπει να το απορρίπτετε με τα αστικά λύματα. Θα πρέπει να απορρίπτονται ξεχωριστά προς ειδική επεξεργασία. Απαγορεύεται να απορρίπτετε αυτό το προιόν στα αστικά λύματα. Για την απόρριψη υπάρχουν πολλές επιλογές: A) Έχουν δημιουργηθεί ειδικά συστήματα περισυλλογής για ηλεκτρονικά απορρίματα και...
- Page 21 Ο ΗΓΙΕΣ ΑΣΦΑΛΕΙΑΣ Για την αποφυγή τραυματισμού του χρήστη ή άλλων ατόμων και καταστροφή περιουσίας, θα πρέπει να ακολουθούνται οι παρακάτω οδηγίες. Ακατάλληλη λειτουργία εξαιτίας αγνόησης των οδηγιών μπορεί να προκαλέσει τραυματισμό ή καταστροφή. Η σοβαρότητα κατηγοριοποιείται σύμφωνα με τις παρακάτω ενδείξεις. Αυτό...
- Page 22 Ο ΗΓΙΕΣ ΑΣΦΑΛΕΙΑΣ ΠΡΟΣΟΧΗ Κατά την αφαίρεση του Μην καθαρίζετε τη μονάδα Αερίστε καλά τον χώρο φίλτρου μην ακουμπάτε τα όταν χρησιμοποιείτε με νερό. μεταλλικά μέρη της μονάδας. παράλληλα σόμπα κλπ. Μπορεί να προκληθεί Μπορεί να προκληθεί Μπορεί να διαρρεύσει νερό και έλλειψη...
- Page 23 Ο ΗΓΙΕΣ ΑΣΦΑΛΕΙΑΣ Έλεγχοι πρίν τη λειτουργία 1. Επικοινωνήστε με εξειδικευμένο προσωπικό για την εγκατάσταση. 2. Βεβαιωθείτε πως η μονάδα έχει γειωθεί σωστά. 3. Μην χρησιμοποιείτε φθαρμένο ή μη εγκεκριμένο καλώδιο. 4. Μην χρησιμοποιείτε την ίδια πρίζα και για άλλες συσκευές 5.
- Page 24 Ο ΗΓΙΕΣ ΛΕΙΤΟΥΡΓΙΑΣ Περιγραφή Μονάδας Εσωτερική Μονάδα Εξωτερική μονάδα Έξοδος αέρα Καλώδιο σύνδεσης Οθόνη Σωλήνες σύνδεσης Περσίδες οριζόντιας κίνησης Βάνες Περσίδες κάθετης κίνησης Πλέγμα προστασίας ανεμιστήρα Μπροστινό πάνελ (πάνω και κάτω) Είσοδος αέρα Αγωγός αποστράγγισης TEST RUN LOCK ASSITANT ON/OFF MODE FAN SPEED ADJUST...
- Page 25 Ο ΗΓΙΕΣ ΛΕΙΤΟΥΡΓΙΑΣ Οθόνη Θερμοκρασία χώρου/επιλεγμένη θερμοκρασία /ένδειξη επιλογής timer(χρονοδιακόπτη) TEST RUN TIMER ON TIMER OFF LOCK AUXILIARY ADJUST ON/OFF MODE FAN SPEED FUNCTION Ενδείξεις Ένδειξη κίνησης των περσίδων (swing) Ένδειξη αυτόματης λειτουργίας (auto) Ένδειξη λειτουργίας sleep Ένδειξη λειτουργίας σε ψύξη (cool) Ένδειξη...
- Page 26 Ο ΗΓΙΕΣ ΛΕΙΤΟΥΡΓΙΑΣ Πλήκτρο ρύθ ιση : 1. Ρύθ ιση θερ οκρασία : πιέστε τα πλήκτρα και για να ορίσετε τη θερ οκρασία ε εύρο 17ºc ~ 30ºc. ώρε ) 3. Επιλογή εφεδρική λειτουργία : Επιλέξτε τη επιθυ ητή εφεδρική λειτουργία πιέζοντα τα πλήκτρα...
- Page 27 Ο ΗΓΙΕΣ ΛΕΙΤΟΥΡΓΙΑΣ Όταν επιλέξετε την επιθυ ητή ρύθ ιση, πιέστε άλλη ια φορά το πλήκτρο auxiliary function για την επιβεβαίωση. Ση είωση: αυτή η περιγραφή είναι ενδεικτική. Οι ρυθ ίσει διαφέρουν ανάλογα το οντέλο. Η σχετική ένδειξη φωτίζει ανάλογα την επιλογή λειτουργία : Κίνηση...
- Page 28 Η κίνηση των περσίδων δεξιά/αριστερά μπορεί να οριστεί είτε από το ασύρματο τηλεχειριστήριο είτε από τα πλήκτρα της οθόνης. Πιέστε το πλήκτρο auxiliary function που βρίσκεται στην οθόνη. Πιέστε το πλήκτρο ρύθμισης και για να επιλέξετε την λειτουργία και τότε οι περσίδες θα αρχίσουν να κινούνται δεξιά και αριστερά.
- Page 29 Ο ΗΓΙΕΣ ΛΕΙΤΟΥΡΓΙΑΣ Operation Tips Μπορεί να εμφανιστούν τα παρακάτω κατά τη λειτουργία Ο συμπιεστής δεν επανεκκινεί αν δεν περάσουν 3 λεπτά από την απενεργοποίησή του. Προστασία για την αποφυγή εξόδου κρύου αέρα (μόνο για μονάδες τύπου αντλίας θερμότητας) Η μονάδα έχει σχεδιαστεί ώστε να μην φυσάει κρύο αέρα κατά τη λειτουργία της θέρμανσης, όταν ο εσωτερικός...
- Page 30 ΦΡΟΝΤΙ Α ΚΑΙ ΣΥΝΤΗΡΗΣΗ Λειτουργία θέρμανσης (μόνο για μονάδες τύπου αντλίας θερμότητας). Κατά τη λειτουργία της θέρμανσης η μονάδα απορροφά θερμότητα από το εξωτερικό περιβάλλον και την απελευθερώνει στον χώρο μέσω της εσωτερικής μονάδας. Όταν η εξωτερική θερμοκρασία πέφτει, μειώνεται αντίστοιχα και η θερμότητα που απορροφάται. Την ίδια στιγμή το θερμικό φορτίο της...
- Page 31 ΦΡΟΝΤΙ Α ΚΑΙ ΣΥΝΤΗΡΗΣΗ Εάν το φίλτρο είναι φραγμένο θα μειωθεί η απόδοση της μονάδας και θα υπάρχει σπατάλη ρευματος. Το φίλτρο αέρα θα πρέπει να καθαρίζεται κάθε 2 βδομάδες ώστε να διατηρείται η καλή απόδοση της μονάδας. Φιλτρο αέρα 1.
- Page 32 Περιμένετε να επανέλθει το ρεύμα Διακοπή ρεύματος Η μονάδα δεν λειτουργεί Συνδέστε την παροχή ρεύματος Έχει αποσυνδεθεί η παροχή ρεύματος Αλλάξτε την ασφάλεια Έχει πέσει η ασφάλεια Περιμένετε ή ακυρώστε την λειτουργία timer Έχει ενεργοποιηθεί το timer Οι μπαταρίες του ασύρματου τηλεχειριστηρίου χρειάζονται Αντικαταστήστε...
- Page 33 Εμφανίζονται στην lcd οθόνη της εσωτερικής μονάδας όταν η λειτουργία είναι ομαλή. Αυτές οι 3 ενδείξεις υποδηλώνουν τις 3 λειτουργίες: Η ένδειξη υποδηλώνει τη λειτουργία του ασύρματου τηλεχειριστηρίου Η ένδειξη υποδηλώνει τη λειτουργία αποπάγωσης Η ένδειξη υποδηλώνει εξαναγκασμένη λειτουργία ψύξης Εάν...
- Page 34 Ενεργοποιήστε την εγγύηση σας... σε Inventor Συνδεθείτε στο site της στον ακόλουθο σύνδεσµο http://www.inventoraircondition.gr/ egiisi-inventor/ απλά Επιλέξτε τον τύπο του προϊόντος (κλιµατιστικό ή συσκευή) για το οποίο θα ενεργοποιηθεί η εγγύηση Επιλέξτε την εγγύηση που αντιστοιχεί στο προϊόν που έχετε στην κατοχή σας...
- Page 35 CUPRINS Mentiune Indicatii..............................2 Masuri de siguranta Avertisment............................3 Precautii............................4 Instructiuni inainte de folosire.......................5 Prezentarea produsului Prezentarea produsului........................6 Panoul de control ..........................7 Directionarea uxului de aer......................10 Sfaturi de operare..........................11 Mentenanta Curatarea unitatii interioare......................12 Curatarea sistemului de evacuare a aerului..................12 Curatarea panoului inferior si a ltrelor de aer...................13 SFATURI DE DEPANARE Sfaturi de depanare .........................14 ATENTIONARE...
-
Page 36: Mentiune
Mentiune Daca montarea si utilizarea acestui tip de produs se va face in Uniunea Europeana, va rugam sa urmati instructiunile de mai jos : Inlaturarea deseurilor : Acest produs nu va fi aruncat impreuna cu deseurile menajere. Colectarea si distrugerea acestui tip de deseu se va face de catre firme sau in locatii specializate. -
Page 37: Indicatii
Masuri de siguranta Pentru a evita ranirea utilizatorului sau pagubele material, va rugam sa respectati urmatoarele instructiuni. Folosirea necorespunzatoare a dispozitivului, prin ignorarea acestor instructiuni va puteti expune ranilor sau pagubelor material. Importanta acestor instructiuni este clasificata conform urmatoarelor indicatii. Acest simbol indica posibilitatea de rani grave sau moarte. - Page 38 Masuri de siguranta Atentionari Nu atingeti partile metale Aerisiti bine incaperea Nu curatati aparatul cu ale unitatii atunci cand daca folositi impreuna apa! cu un aragaz/cuptor. scoatei ltrele. Va puteti ranii. Cantitatea de oxigen Apa se poate in ltra in unitate, poate scadea.
- Page 39 Masuri de siguranta Inainte de utilizare 1. Contactati o rma specializata pentru instalare. 2. Aveti grija ca impamantarea sa e corespunzatoare. 3. Nu folositi un cablu de alimentare deteriorat sau neconform. 4. Nu alimentati aparatul din aceeasi priza cu alte dispozitive. 5.
-
Page 40: Prezentarea Produsului
INSTRUCTIUNI DE UTILIZARE Prezentarea Produsului Unitatea interioara Unitatea exterioara Sistemul de evacuare al aerului Panoul de comanda Cablu de conectare Conducta de conectare Lamele de control al uxului de aer orizontal Valva de expansiune Lamele de control al uxului de aer vertical Protectia ventilatorului Panoul frontal (superior și inferior) Priza de aer... - Page 41 OPERATING INSTRUCTIONS setata / TEST RUN TIMER ON TIMER OFF LOCK AUXILIARY ADJUST ON/OFF MODE FAN SPEED FUNCTION Indicators Simbol miscare oscilanta a flapsurilor. Simbol functie AUTO Simbo functie SLEEP Simbol racire Simbol functie TURBO Simbol TEMPORIZATOR PORNIT TIMER ON Simbol functie Dezumidi care Simbol TEMPORIZATOR OPRIT TIMER OFF...
- Page 42 INSTRUCTIUNI DE FOLOSIRE TIMER ON TIMER OFF TIMER OFF TIMER ON...
- Page 43 INSTRUCTIUNI DE FOLOSIRE Odata cu alegerea setarii dorite, apasati inca odata butonul AUXILIARY FUNCTION pentru a o inregistra. NOTA : Ilustratiile de mai sus sunt folosite cu titlu de prezentare. Functiile disponibile depind de model. Indicatoarele luminoase se aprind in functie de setarile alese : Left/Right airflow: Va permite setarea directiei orizontale dorita pentru fluxul de aer.
- Page 44 INSTRUCTIUNI DE FOLOSIRE Controlul directional al fluxului de aer Flux orizontal (AUTO). Modul orizontal (stanga/dreapta) poate fi ajustat folosind telecomanda sau panoul de control al unitatii. Apasati butonul AUXILIARY FUNCTION aflat pe panoul central si dupa aceea apasati butonul ADJUST pentru a putea selecta functia si flapsurile se vor misca de la stanga la dreapta.
- Page 45 INSTRUCTIUNI DE FOLOSIRE Sfaturi Situatiile prezentate mai jos sunt normal si se pot intampla in timpul functionarii. Protectia aparatului de aer conditionat. Protectia compresorului Compresorul nu va porni 3 minute dupa ce s-a oprit. Functia ANTI-COLD (disponibila doar pentru modelele cu incalzire si racire). Unitatea este conceputa pentru a nu genera aer rece in modul HEAT.
-
Page 46: Curatarea Unitatii Interioare
MENTENANTA 8. Functia de incalzire (doar pentru aparatele cu functie de racire/incalire). Aparatul de aer conditionat preia caldura generata de unitatea exterioara si o distribuie in incapera cu ajutorul unitatii interioare. Atunci cand temperatura exterioara scade, volumul de aer cald preluat scade direct proportional. -
Page 47: Curatarea Panoului Inferior Si A Ltrelor De Aer
Mentenanta Curatarea panoului inferior si a filtrelor de aer: Atunci cand filtrele de aer devin incarcate, performanta si eficienta energetica aparatului de aer conditionat vor scadea. Pentru a mentine o perofmanta optima a aparatului, va recomandam curatarea filtrelor o data la 2 saptamani. Filtru de aer. -
Page 48: Sfaturi De Depanare
Sfaturi de depanare Inainte de a ne contacta, va rugam sa verificati lista de mai jos. Aceasta lista contine cele mai comune probleme si solutiile de rezolvare. Solutia Problema Cauza probabila Asteptati sa revina curentul electric. Pana de curent Porniti sursa de curent. Aparatul de Sursa de curent este oprita aer conditionat... - Page 49 Acest mesaj apare pe afisajul LCD al unitatii interioare atunci can aparatul functioneaza in parametrii normali. Cele 3 mesaje sunt descrise mai jos. The icon Aparatul poate fi operat din telecomanda. Functia DEFROSTING The icon Functia de racire fortata. The icon Atentie: In cazul in care cablul de alimentare este defect, inlocuirea lui se va face doar de catre personal autorizat.
- Page 50 Activati-va garantia... Accesati link-ul de mai jos: https://www.inventoraerconditionat.ro/ certificatul-de-garantie-inventor- aer-conditionat-si-electrocasnice Pasi Alegeti tipul de produs pentru simpli! care vreti sa activati garantia (aparat de aer conditionat, alt aparat electrocasnic). Alegeti tipul de garantie corespunzator produsului achizitionat. Completati formularul cu informatiile cerute (numele...
- Page 52 AIR CONDITIONING SYSTEMS FLOOR STANDING...
Need help?
Do you have a question about the V1MFI-50B and is the answer not in the manual?
Questions and answers