Table of Contents
Advertisement
Quick Links
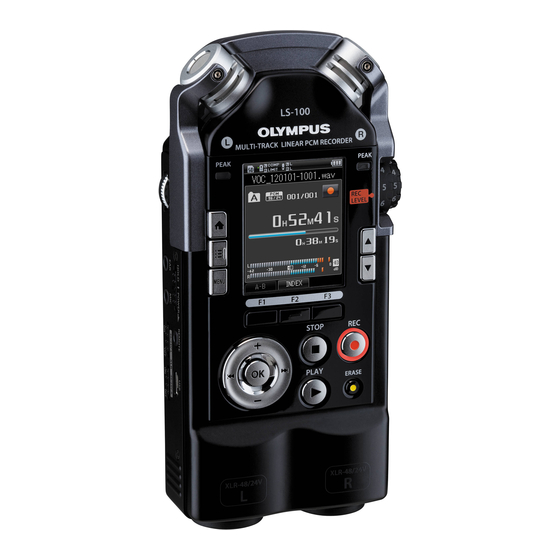
Multi-Track Linear PCM Recorder
LS-100
Multi-Track Linear PCM Recorder
Us e r ' s M a n u a l
Thank you for purchasing the Multi-Track Linear PCM Recorder. Carefully read through this manual
to ensure that you use the product properly and safely. Be sure to keep this manual on hand so
that you can refer to it at any time.
To ensure successful recording, perform a trial recording beforehand.
EN
Advertisement
Table of Contents

Related Manuals for Olympus LS-100


Summary of Contents for Olympus LS-100
- Page 1 Thank you for purchasing the Multi-Track Linear PCM Recorder. Carefully read through this manual to ensure that you use the product properly and safely. Be sure to keep this manual on hand so that you can refer to it at any time.
-
Page 2: Description Of This Manual
Preface Description of This Manual • This manual is subject to change without notice. For the latest information such as the product name and model number, contact our customer support center. • The illustrations of LCD screens and the recorder in this manual may differ from the actual product. - Page 3 ▌ I N D E X Preface P.11 Overview of Recorder P.21 Startup P.32 Recorder Mode P.53 Multi-Track Mode About the Tuner, the Lissajous, and the Metronome P.66 P.71 Menus P.116 About the PC P.122 For Quick Reference...
-
Page 4: Table Of Contents
Inserting the battery •••••••••••••••••••••••••••22 Partially erasing a file ••••••••••••••••••••••••••51 Recharging the battery •••••••••••••••••••••••22 Chapter 4 How to Use the Power/Hold Switch •••• 25 Turning the power on •••••••••••••••••••••••••25 Multi-Track Mode Turning the power off •••••••••••••••••••••••••25 Activating the hold mode •••••••••••••••••••26 What You Can Do in Clearing the hold mode ••••••••••••••••••••••26... - Page 5 Sleep [Power Save] •••••••••••••••••••••••••••108 Time setting [Time&Date] •••••••••••••••••108 Menus USB setting [USB Settings] •••••••••••••••••109 Setting reset [Reset Settings] •••••••••••••111 How to set the menus ••••••••••••••••••••• 72 Format [Format] •••••••••••••••••••••••••••••••113 List of menus •••••••••••••••••••••••••••••••• 74 Memory information Recording menu [Rec Menu] ••••••••••••• 79 [Memory Info.] ••••••••••••••••••••••••••••••115...
-
Page 6: Safety Precautions
Before using your new recorder, read this Instructions for use manual carefully to ensure that you know • Do not leave the product where it will be subject how to operate the recorder safely and to high temperatures and/or humidity such as in correctly. - Page 7 – Accidentally wrap the headphone cord Doing so could cause an ignition or explosion. around the neck and suffocate Do not use or store the product for a – Perform a wrong operation, causing injury long time where there is a lot of dust, or electric shock humidity, oil, smoke, or steam.
- Page 8 “Disposal of rechargeable battery” ( ☞ p.9) in this manual. Do not use or leave the battery at a Do not apply a strong shock to the place with high temperatures such as battery or throw it.
- Page 9 Do not damage the power supply cord. 1 Do not touch the exposed interior. Doing • Do not pull the cord to remove the power so could cause an electric shock, burn or supply plug from the outlet.
-
Page 10: Checking Accessories
Checking Accessories The accessories shown below come with the purchased product. Contact your dealer if any accessory is missing or damaged. Recorder Strap Carrying case Manual (including warranty) USB cable USB AC adapter (A514) USB conversion connector Lithium ion battery (LI- 50B) The AC plug is included. -
Page 11: Overview Of Recorder
Chapter 1 Overview of Recorder... -
Page 12: Main Features
▌ Tuner function This recorder has a tuner function that supports tuning of guitar and bass guitar in addition to the basic chromatic tuner. ▌ Metronome function The metronome can be used as a rhythm guide during recording or when practicing an instrument. -
Page 13: Name Of Each Part
Name of Each Part Built-in stereo microphone (L/R) PEAK display lamp (L/R) REC LEVEL dial These two dials can be used to adjust m button (Home) Display (LCD panel) the recording levels of the left and right channels. n button (List) - Page 14 Name of Each Part Battery/SD card cover Lock switch Battery slot SD card slot XLR/standard phone combo jack (L) Strap hook XLR/standard VOLUME dial phone combo jack (R) EAR jack MIC jack Power/hold switch (microphone/line input) REMOTE jack XLR Power...
-
Page 15: Connecting With External Devices
Connecting with External Devices Connect commercially available external devices suitable for your situation. Headphone φ3.5 mm Remote control To REMOTE jack CD drive To USB terminal Stereo φ3.5 mm To EAR jack Mixer To XLR/standard phone To MIC jack combo jack φ6.3 mm... -
Page 16: Let's Use Ls-100
Let's use LS-100! Recorder Mode Band practice Solo practice Concert See page for details. Overdubbing Record your singing while listening to a recording of instruments. Dub over the previous recording to create a new file. See page for details. - Page 17 Let's use LS-100! Multi-Track Mode Record and edit each sound source separately, Track 1 and mix them into a single file. Track 2 Track 3 Track 4 Save as a single file. Track 5 See page for details. Tuner/Lissajous/Metronome Mode Control your tempo with the metronome.
-
Page 18: Recording Tips For Each Instrument
If breathing noises are audible Piano When recording the sound of a grand piano, position the recorder pointing to the center of the open lid. To String instrument record acousmato as well, move the recorder slightly When recording the sound of a string instrument away to get a richer sound. - Page 19 Acoustic guitar Electric guitar Position the recorder pointing to a place slightly To record sound directly from the speaker of a guitar away from the sound hole of the guitar.For a rhythm amplifier, position the recorder slightly away from the...
-
Page 20: Supply
• For details on the settings, refer to "Microphone Power Supply" ( ☞ p.83). • Slide the XLR Power switch to [OFF] if the condenser microphone that needs the phantom power supply is not connected. XLR/standard phone combo jack... -
Page 21: Startup
Chapter 2 Startup... -
Page 22: Power Supply
(label) on the recorder matches the direction of the arrow on the battery. . Close the battery cover. • After closing the battery cover, slide the lock switch to [LOCK]. • The PEAK display lamp (R) lights up in orange and recharging starts. - Page 23 USB cable for recharge The battery indicator on the display changes as described below according to Note • Stop or turn off the recorder before connecting the USB cable. the remaining battery level. Start up the PC. • When [ ] appears on the display, recharge the battery as soon as possible.
- Page 24 The battery is a chemical product. Although the play files). battery performance varies even if the battery is • You may have to reset the time if the battery is used in the recommended temperature range, this removed from the recorder for 15 minutes or if variation is not a failure.
-
Page 25: How To Use The Power/Hold Switch
• The home screen appears. • The existing data or the settings for each mode Sleep mode are retained even after the power is turned off. If the recorder remains stopped for 10... -
Page 26: Activating The Hold Mode
Slide the power/hold switch to [HOLD]. • [HOLD] appears on the display. Note • If a button is pressed in the hold mode, the PEAK display lamp (R) flashes in orange but the recorder does not operate. • If the hold mode is activated during playing (or... -
Page 27: Initial Settings Before Using The Recorder
Initial Settings before Using the Recorder Setting the date and time [Time & Date] When the date and time are set, the recording time information is automatically recorded for each file. Set the date and time in advance for easy management of recorded files. -
Page 28: How To Set The Voice Guide
(initial value) • When you set “Year”, “Month”, or “Day”, the display order switches every time the F2 • The recorder is ready to use when the date/ button is pressed. time and voice guide settings are complete. Example: March 24, 2012 For how to use the recorder, refer to "Let's... -
Page 29: Sd Card
• The recorder may not recognize an SD card Terminal formatted (initialized) on a PC or other device. Be surface sure to format your SD card on this recorder ( ☞ p.113). • Insert the SD card with the terminal face facing up, as shown in the figure. -
Page 30: Removing The Sd Card
• Be sure to read the attached SD card manual before use. • If the SD card is not recognized, remove the SD card and then insert it again to see if the recorder Press the SD card all the way into the recognizes it. -
Page 31: Operations On The Home Screen
Operations on the Home Screen When the recorder is turned on, the home screen appears.This recorder has the following five modes. Each mode can be accessed from the home screen. For each mode, refer to the relevant page. [Recorder] ☞ p.33... -
Page 32: Recorder Mode
Chapter 3 Recorder Mode... -
Page 33: What You Can Do In The Recorder Mode
What You Can Do in the Recorder Mode Recorder Mode This recorder has four recording modes: [Normal], [Overdub], [Play Sync], and [V-Sync. Rec].You can select the appropriate mode for a wide range of recordings, such as recording of musical performances and field recording. ▌... -
Page 34: Files And Folders
Folder B LS-100 Folder C Folder D Folder E * Any files or folders directly under the [Recorder] folder will not be displayed on this recorder. ▌ Selecting folders and files Home Screen [Recorder] Folder List Screen File List Screen •••... - Page 35 1 User ID: This is the user ID of this device. 2 Recording date: The date of recording is represented by 6 digits. Ex: "120201" represents February 1st of 2012. 3 File number: A serial number automatically assigned by a Digital Voice Recorder.
-
Page 36: Before Recording
▌ Adjusting the recording level properly Recorded sound will be distorted if the recording level meter swings all the way to the right, or the PEAK indicator (R) lights in orange. Adjust the recording level so that the recording level meter does not exceed [-6dB]. -
Page 37: Recording
Recording Before starting to record, select a folder from [Folder A] through [Folder E]. We recommend that you selectively use the folders to organize your recordings based on their contents. Normal Recording [Normal] Press the REC button to start recording. - Page 38 Recording ▌ Pausing the recording Notes • To protect your ears, turn the volume down to [0] before putting on the headphones. Press the REC button during recording. • To avoid feedback, do not bring the headphones near the microphone during recording.
-
Page 39: Overdubbing [Overdub]
In this mode, you can easily dub over a previously recorded file. This is handy when you create music or practice musical instruments, since it allows you to dub a new track over a file that is being played back. - Page 40 • Playback will start from the beginning of the file. • Recording of the input sound • The file to be dubbed over will be played back through the EAR jack. and playback of the file will start P.34, Select a file to dub over ( ☞...
-
Page 41: Play Sync [Play Sync]
Recording Play Sync [Play Sync] The Play Sync mode allows you to record only the input sound that is being played along with the playback of a previously recorded file. ▌ Usage Example File 1 Playback Instruments Record the vocal part in sync with the playback of recorded band performance. - Page 42 EAR jack. a Level of the input sound to be recorded Select a file for sync recording ( ☞ P.34, b Level of the output sound that is being played back Press the STOP button to stop Press the PLAY button to start recording.
-
Page 43: Voice Sync Recording [V-Sync. Rec]
• If [Mode] setting of the [V-Sync. Rec] is set to [Continuous], the recorder • The voice sync level will be shown in will close the file after recording, and 15 steps on the display. -
Page 44: Recording Using The Metronome
( ☞ P.79). ▌ Important Notes on Recording Select [Detail] from [Metronome • When you have an SD card inserted in the Menu], and set [Display] to [ON] recorder, make sure to check if your memory ( ☞ P.100). selection is set to [Internal memory] or [SD card] ( ☞... -
Page 45: Searching For Files
Press the OK button. • Enter the folder list screen. Press the OK button. • You will get a list of files that were recorded on the date you specified. Press the F1 (SEARCH) button. • Enter the date list screen. -
Page 46: Playback
VOLUME dial. Note • Variable bit rate MP3 files (in which conversion bit rates vary within a file) may not play back properly. • The higher you set the number on the dial, the louder the volume will be. - Page 47 Press and hold the 0 button when Notes the recorder is stopped. • If an index mark is placed in a file and you try • Rewinding stops once you release the skipping to the beginning of the file while it is being played back, the recorder will stop at the 0 button.Press the PLAY button to...
-
Page 48: Placing An Index Mark
An index mark will help you quickly locate a desired playback position when you fast- forward, rewind, or cue a file. • Be sure to assign the [INDEX] function to the Fn button in advance ( ☞ P. 1 06). At the position you wish to place an index mark, press the preassigned Fn button. -
Page 49: Segment Repeat Playback
▌ Segment repeat playback Releasing the segment repeat playback This feature allows you to play back a part of a file in repeat. Pressing any of the following buttons will release the segment repeat playback. • Be sure to assign the [A-B] function to the Fn button in advance ( ☞... -
Page 50: Erasing
Erasing Erasing a File Erasing a Folder You can erase a file from its folder. You can You can erase all files in a folder. also erase all files in a selected folder. Select a folder to erase ( ☞ P.34). -
Page 51: Partially Erasing A File
Partially erasing a file Press the ERASE button again at the position where you wish to You can erase an unwanted part of a PCM end the partial erase. format file recorded with this recorder. • [Start point] and [End point] will Play the file you wish to partially flash alternately on the display. - Page 52 Important Notes on Erasing • Once erased, files cannot be recovered. Check carefully before erasing files. • When you have an SD card inserted in the recorder, make sure to check if your memory selection is set to [Internal memory] or [SD card] ( ☞...
-
Page 53: Multi-Track Mode
Chapter 4 Multi-Track Mode... -
Page 54: What You Can Do In The Multi-Track Mode
The multi-track mode allows you to separately record and play back different parts/sound sources (guitar, bass, drums, keyboard, vocal, etc.). You can manage up to 8 tracks under 1 project. Recorded tracks can be edited separately to adjust the output level or balance, which is ideal for creating a demo. -
Page 55: Files And Folders
Files and Folders ▌ Folders In the multi-track mode, there are folders for managing [PRJ] (Project). Files are managed by the project, and each project has a number assigned. Recorder PRJ_001 PRJ_002 LS-100 PRJ_003 PRJ_999 ▌ Selecting a project and track... - Page 56 Output scale Input/output Mute level meter Track number Function Guide ▌ File list screen under a project Icon display Project number Files assigned to tracks Files that have been bounced or are available to be assigned to tracks Function Guide...
-
Page 57: Creating A Multi-Track Project
Creating a Multi-Track Project Select [Multitrack] Create a project Select a track Adjust the recording level Start recording Continued on next page... - Page 58 Creating a Multi-Track Project Stop recording Check the track (playback) Adjust the track Add tracks Repeat steps 3 to 6 to add more sound sources to empty tracks. Bounce the tracks See pages 59 to 63 for details.
-
Page 59: Creating A Multi-Track Project
1 Use the +/-/ 9/0 button to select [NEW PROJECT], and press the OK button. Select a track • You can record up to 8 tracks; recording can be 1-track or 2-track recording. In 1-track recording, input sound from L/R is recorded as a mixed, monaural signal. - Page 60 2 Adjust the REC LEVEL dial according to the sound source ( ☞ P.36). Start recording 1 Press the REC button. • [ K ] appears on the display, and recording starts. a Elapsed recording time b Recording level meter...
- Page 61 1 Press the PLAY button. • The multiple tracks you have recorded under • You can change the pitch by pressing the p / q the project will be played back together. button while a track is selected. Pressing the p 6), while the q button lowers it by a semitone button will raise the pitch by a semitone (#1–...
- Page 62 LEVEL dial. 4 Press the PLAY button to play back the previously recorded track. • All files assigned to the track will be mixed and played back. Continued on next page • The audio of mixed playback will be output...
- Page 63 6 Press the STOP button to stop recording tracks. and playback. Bounce the tracks This recorder allows you to save up to 8 tracks under 1 project. Once you run out of empty tracks, create bounce files and assign them to tracks.
-
Page 64: Erasing A Project
• The erase confirmation screen appears. • The multi-track screen appears. Press the + button to select [START]. Press the 9 button to go to the final list screen. Press the OK button. • The display switches to [Erasing!], and erasing starts.[Erased] appears... - Page 65 • Once erased, projects or tracks cannot be recovered. Check carefully before erasing them. • When you have an SD card inserted in the recorder, make sure to check if your memory selection is set to [Internal memory] or [SD...
-
Page 66: About The Tuner, The Lissajous, And The Metronome
Chapter 5 About the Tuner, the Lissajous, and the Metronome... -
Page 67: Using The Tuner
Set up the calibration of the tuner. The frequency This function enables you to perform accurate of the reference tone A can be adjusted by 1Hz tuning according to the type of musical increments in the range of 435Hz to 445Hz. - Page 68 String number/Note name 1 Tune the musical instrument by plucking a single note a The number of the string to tune b The tuning chord • The reference value of the string that has been plucked appears.
-
Page 69: About The Lissajous Measurement
About the Lissajous measurement In facilities for sound recording (such as broadcasting studios), the distance between a microphone and a sound source is automatically measured from the phase difference. The Lissajous waveform helps you obtain the optimal positioning of a dynamic microphone or a condenser microphone. -
Page 70: Using The Metronome
Tempo instruction Press the Play button to start the metronome • Use the VOLUME dial to adjust the volume of the metronome. • Select the [Metoronome Menu] from the [MENU] to make additional settings for the metronome ( ☞ page100). -
Page 71: Menus
Chapter 6 Menus... -
Page 72: How To Set The Menus
Items in the menus are classified by the tabs. Therefore, when shifting between items, you can quickly set the target item by selecting the tab to which it belongs. Take the following steps to set each item in the menu. - Page 73 • If no operation is conducted for three minutes during setup in stop mode, the screen returns to the status before the setting operation was started. In this case, the item that was being set remains unchanged. • If no operation is conducted for eight seconds during setup in the recording or playback mode, the menu function is cancelled.
-
Page 74: List Of Menus
[300Hz][100Hz][OFF] [Low Cut Filter] ☞ P.85 Pre-recording × [ON][OFF] [Pre-Recording] ☞ P.86 Recording monitor [ON][OFF] [Rec Monitor] ☞ P.87 * In the Multi track mode, [Rec Mode] and [Pre-Recording] do not function. - Page 75 [Skip Space] ☞ P.88 [Reverse Skip]: [File Skip][1sec.][3sec.][5sec.] [10sec.][30sec.][1min.][5min.] * In the Multi track mode, [Skip Space] do not function. ▌ File menu [File Menu]: Menu settings that relate to files Operation mode : Setting OK × : Setting NG...
- Page 76 × [Bounce] ☞ P.98 to one file. * In the Multi track mode, [File Divide] does not function. * In the recorder mode, [Bounce] does not function. ▌ Metronome Menu [Metronome Menu]: Menu settings that relate to the metronome Operation mode : Setting OK...
- Page 77 List of menus ▌ LCD/Sound Menu [LCD/Sound Menu]: Menu settings that relate to the LCD and sound Operation mode : Setting OK × : Setting NG Set items Choices [Lighting time]: [5sec.][10sec.][30sec.] [1min.][Always on] Backlight [Dim light time]: [30sec.][1min.][2min.] ...
- Page 78 List of menus ▌ Device Menu [Device Menu]: Menu settings that relate to the device Operation mode : Setting OK × : Setting NG Set items Choices [Fn. Recorder]: [F1][F2][F3] Fn key setting [Fn. MTR]: [F1][F2] ...
-
Page 79: Recording Menu [Rec Menu]
( ☞ P.37). [Overdub] [Mode] setting While a file is playing, the input sound can be recorded over the current file. ( ☞ P.39). 1 By pressing the +/− button, select [Play Sync] either [One time] or [Continuous] and then press the OK button. -
Page 80: Microphone Gain [Mic Gain]
• For [Built-in Mic] and [External Mic], you can select from [Hi], [Mid], and Press the OK button. [Lo], and for [XLR (L)] and [XLR (R)], you can select from [Hi] and [Lo]. Press the OK button to finish the Press the +/−... -
Page 81: Recording Level [Rec Level]
Press the +/− button to select a menu item. This setting can set either automatic or manual adjustment of the recording level. In addition, with the limiter/compressor of the input source , it can adjust the audio range for limiting. [Rec Menu] [Rec Level] [Menu]... -
Page 82: Input Switch [Input Switch]
Recording menu [Rec Menu] [Limiter 2] Input switch [Input Select] [Compressor 2] This setting sets the input channel of the Select these settings to equalize the audio source. sound, which is suitable for voice recording. Your recording will have a... -
Page 83: Microphone Power Source
Recording menu [Rec Menu] Microphone power source [Mic Power] [When [Phantom Power] is selected This setting sets the voltage used when a 1 Select the voltage by pressing the +/ microphone or an external unit which needs − button and then the OK button. -
Page 84: Recording Format[Rec Format]
MPEG, the working group of ISO (International Organization for Caution Standardization), has established. • Corresponding formats for [MP3 Convert] ( ☞ P.95) and [CD Write] ( ☞ P.97) functions are the PCM format with [44.1kHz/16bit]. No other formats correspond. -
Page 85: Low Cut Filter [Low Cut Filter]
[300Hz] [Use this setting when the [100Hz] setting is not sufficiently effective. [100Hz] This function diminishes the noise generated by air conditions, projec- tors, and so on. It is effective when recording indoors. [OFF] This setting stops the function. -
Page 86: Pre-Recording [Pre-Recording]
To record sound using Pre-Recording, set [Pre-Recording] to [ON]. The pre-recording function starts recording a maximum of two seconds* prior to the start of Press the REC button during recording. For example, if you want to record the sound of a bird singing and you press recording. -
Page 87: Recording Monitor [Rec Monitor]
Recording menu [Rec Menu] Recording monitor Caution • When [Rec mode] is set to [Overdub] or [Play [Rec Monitor] Sync], set [Rec Monitor] to [ON]. • When a speaker with built-in amplifier or other This setting selects whether the recording device is connected, microphone feedback could sound is output from the EAR jack. -
Page 88: Play Menu [Play Menu]
This setting enables you to select your This function skips (forwards) or reverse skips preferred play mode. (reverses) by the set time while playing a file. It is convenient for moving quickly to the playing position or for playing short phrases... - Page 89 • The set space is skipped or reverse skipped and then playback starts. Caution • If there is an index mark or a cue position that is nearer than the skip space position, the recorder skips or reverse-skips to that position.
-
Page 90: File Menu [File Menu]
Setting the erase lock for a file prevents erroneous deletion of important files. In addition, it prevents a file from being deleted even when you conduct a file erase. ( ☞ P.50). Select a file to set the erase lock. ( ☞ [ON] P.34, P.45) -
Page 91: File Move/Copy[File Move/Copy]
File Move/Copy [Move/Copy] Press the +/− button to select a menu item. This setting can move or copy a file saved in the built-in memory or the SD card within the memory. In addition, it can also move/copy a file between memories. - Page 92 The specified file is selected. [Selected files] Several files are selected. [All files] 2 Repeat step 1, select a file to be All files in the folder are selected. moved or copied, and then press the F2 (Determine) button. Press the OK button.
- Page 93 For all other files, the process is cancelled. • All files for which Erase Lock ( ☞ P.90) is set Moving/copying to [Multitrack] continue to be protected by Erase Lock after the moving or copying process.
-
Page 94: File Divide [File Divide]
File menu [File Menu] File divide [File Divide] Press the + button to select [Start]. When a file with a large capacity or a file that has a long recording time is divided, the File divide function makes it easier to manage and edit the file. -
Page 95: Property [Property]
This function enables you to check information about a file or folder. This function converts an already-saved PCM format WAV file into a bit rate 128 kbps MP3 Select the file or folder for which file. A large-sized WAV file can be downsized. - Page 96 [MP3 Convert] • The converted file becomes the [MP3 128kbps] format. • When [MP3 Convert] ( ☞ P.106) is set to the Fn button, pressing the allocated button starts the conversion. Press the OK button. • The convert check screen appears.
-
Page 97: Cd Write [Cd Write]
PCM (WAV) files recorded with this recorder can be directly written to an external CD drive. Caution • Files that can be written to a CD are PCM format [1File] [44.1kHz/16bit] files only. A single file will be written to the CD. -
Page 98: Bounce [Bounce]
CD Write starts. [When process. [Done] is displayed, CD Write is finished. • When [CD Write] ( ☞ P.106) is set to the Fn button, pressing the allocated button starts the CD write. Caution • To make the writing more reliable, use the AC power supply to power the external CD drive. - Page 99 File menu [File Menu] [File Menu] [Menu] [Bounce] • When [Bounce] ( ☞ P.106) is set to the Fn button, pressing the allocated button starts the bounce process. Caution • [Bounce] does not function in the recorder mode. Press the OK button.
-
Page 100: Metronome Menu [Metronome Menu]
Metronome menu [Metronome Menu] Metronome [Metronome] Press the OK button. Use this function as a guide when recording • When [Detail] is selected, the Menu an instrument playing or when practicing a screen opens. musical instrument. [Menu] [Metronome Menu] [Display] setting Press the OK button. - Page 101 The metronome speed can be adjusted [Volume] setting between [40] and [208]. The metronome volume can be 1 Press the +/− button to select adjusted between [01] and [10]. the speed and then press the OK button. 1 Select the volume by pressing the +/−...
-
Page 102: Lcd/Sound Menu [Lcd/Sound Menu]
LCD/Sound menu [LCD/Sound Menu] Backlight [Backlight] Press the OK button. Every time a button is pressed, the display • The selected menu screen appears. backlight turns on for approximately 10 seconds (default). Press the +/− button to select a menu item. -
Page 103: Led [Led]
LCD/Sound menu [LCD/Sound Menu] LED [LED] Beep sound [Beep] This function can be set so that the LED lamp This recorder outputs a beep sound to does not turn on. indicate that a button is being operated and to warn you in case of erroneous operation. -
Page 104: Language Switch (Lang)
[LCD/Sound Menu] [Menu] [Language(Lang)] • You can use the Voice Guide function on this recorder in the language you have downloaded from our website. For more information, please refer to the support page. Press the OK button. -
Page 105: Intro Play [Intro Play]
Intro play [Intro Play] [ON/OFF] setting This setting sets ON/OFF of the voice When the cursor is placed on a file in a folder, guide. the first few seconds of the file can be played. This function is convenient when you want to 1 By pressing the +/−... -
Page 106: Device Menu [Device Menu]
Device menu [Device Menu] Fn key setting [Fn. Setting] Press the +/− button to select a Fn button for allocation. The Fn buttons (F1, F2, and F3) of the devicecan be allocated to the desired operations. [Menu] [Device Menu] [Fn. Setting] Press the OK button. -
Page 107: Memory Select[Memory Select]
[Fn. MTR] setting [Memory Select] A function cannot be When an SD card is inserted, recording to allocated to the Fn the built-in memory or to the SD card can be button. selected. ( ☞ P.29). Input Select ☞ P.82 Metronome ☞... -
Page 108: Sleep [Power Save]
• From "Year," "Month," "Day," "Hour," menu item. and "Minute," set the blinking cursor at the item to be set. [5 min.], [10 min.], [30 min.], and [1 hr.] Set the preferred time. [OFF] Sleep mode does not function. If the device is not put into sleep mode, the battery runs out fast. -
Page 109: Usb Setting [Usb Settings]
USB setting [USB Settings] Press the +/− button to select the setting item. You can select [PC], which enables files to be sent/received through a connection to a PC, and [AC Adapter], which charges the recorder via connection of a USB connecting AC adapter (A514). - Page 110 This setting is to check the connecting method every time the USB is con- Caution nected. • When the recorder is connected to a PC for the first time as an external storage device, the driver of this device is automatically installed to the PC.
-
Page 111: Setting Reset [Reset Settings]
Setting reset Menu setting after setting reset (default setting) [Reset Settings] Recording Menu This setting resets each function to the default setting (the setting at the time of Menu item Default setting shipping from the factory). [Rec Mode] [Normal] ( ☞ P.79) - Page 112 ( ☞ P.109) USB class:[Storage] [Intro Play] [OFF] ( ☞ P.105) Caution • After setting reset, the time setting, file number, and folder name return to the values before the setting reset. They do not return to the initial settings.
-
Page 113: Format [Format]
Device menu [Device Menu] Format [Format] Press the OK button. When the recorder is formatted, all stored files are deleted. Before conducting formatting, be sure to transfer important files to your PC. [Menu] [Device Menu] [Format] • [All data will be erased] is displayed Press the OK button. - Page 114 Device menu [Device Menu] Caution • Never format the recorder from the PC. • Upon formatting, all existing data including files for which Erase Lock was set and read-only files are lost. • A file recorded after formatting may be named [0001].
-
Page 115: Memory Information
• The capacity of the recording medium displayed on the recorder includes the capacity of the management file used by the recorder. The capacity displayed in the SD card is lower than the specified capacity. However, it is not an error. -
Page 116: About The Pc
Chapter 7 About the PC... -
Page 117: Using The Recorder On Your
USB ports Note • This is the operational environment for saving files recorded by this recorder to your PC via the USB con- nection. • The support service does not cover the recorder if your PC has been updated from Windows 95/98/ Me/2000 to Windows XP/Vista/7. -
Page 118: Connecting To Your
While an SD card is inserted, [Removable Disk] appears. • When you connect the recorder to Mac OS, it will be recognized by the drive name of the product name on the desktop. While an SD card is being inserted, [Untitled] appears. -
Page 119: Disconnecting From Your
• NEVER disconnect the USB while the [PEAK] indicator light (R) is flashing. If you do, the data may be destroyed. • When the recorder is connected to a PC, the power will be supplied from the USB cable supplied with the recorder. No power supply is required from the batteries or the AC adapter to this recorder. -
Page 120: To Your
• In the Windows operating environment, 24 bit WAV format files cannot be played back. • If the sound board of your PC does not support the 24 bit WAV format, the recorder cannot play back 24 bit supporting software correctly. -
Page 121: Using The Recorder As A Usb Microphone/Speaker
If connecting an external microphone to this recorder, use a stereo microphone. Using the recorder as an external memory for your PC This recorder enables you to transfer data stored in it to your PC, or to save data stored in your PC to this recorder. -
Page 122: For Quick Reference
Chapter 8 For quick reference... -
Page 123: Alarm Message List
Alarm message list Message Description Action Charge the batteries ( ☞ page 22). If you run out of battery power soon after charging, [Battery Low] Battery power is getting low. the battery has reached its life. Replace it with a new one. ( ☞ page 22). - Page 124 Please select another folder. (copied).] the same folder. A file with the same filename, [Some files can't be moved or a file with DRM exists in the Please select another file. (copied)] destination folder for a move (copy) operation. Attempting to split a file other...
-
Page 125: Troubleshooting
Troubleshooting Symptom Probable cause Action Verify that the battery's polarities + and - are correct ( ☞ The battery is not loaded properly page 22). Nothing appears on Charge the battery or replace with a new battery the display Battery power is getting low. - Page 126 [Input Select] is incorrectly Make sure the [Input Select] is correctly set ( ☞ page set. 82). No sound from the Use the [Rec Level] dial to adjust the recording level ( ☞ connected musical The recording level is low. page 37). instrument [ The [Rec Monitor] is set to Set the [Rec Monitor] to [ON] ( ☞...
-
Page 127: Accessories (Optional)
Accessories (optional) Accessories exclusive to the Olympus voice recorder can be purchased directly from Online Shop on our company's website. http://shop.olympus-imaging.jp/index.html Stereo microphone: ME51SW Telephone pickup: TP8 The built-in large-diameter microphone enables This earphone type microphone can be plugged sensitive stereo recording. -
Page 128: Glossary
(such as MP3 and WMA), even if the bit rates are the same.Even if the bit rates are the same, sound quality varies depending on the digital audio compression algorithm (such as MP3). -
Page 129: Specifications
[44.1kHz/mono] format [320kbps], [256kbps], (MPEG-1 Audio Layer3) [128kbps], [64kbps (mono)] format Built-in memory Recording SD card (16MB to 2GB) medium SD card SDHC card (4GB to 32GB) SDXC card (32GB to 64GB) Metronome sound source Metronome Irregular meter 1/1, 1/4 to 8/4, 6/8 Tempo 40.0 to 208.0BPM... - Page 130 Output Built-in ø 20 mm round dynamic speaker Built-in speaker 430mW (8Ω) Phantom power 48V, 24V L/R channels: less than 20mA in total USB2.0High Speed Mass storage operation, audio interface operation Olympus lithium ion battery (LI-50B) Input power External power supply: AC adapter (A514) (DC 5V) External 159.0mm ×...
- Page 131 20 Hz to 23 kHz 20 Hz to 20 kHz 48.0 kHz/16bit 20 Hz to 23 kHz • However, when recording in the MP3 format, 44.1 kHz/24bit 20 Hz to 21 kHz the upper limit value of the frequenc y response depends on each recording mode 44.1 kHz/16bit...
-
Page 132: Specifications
• Available recording time may be shorter if many short recordings are made (The displayed available recording time and recorded time are approximate indications). • Variations in the available recording time will arise as there may be differences in the available memory depending on your SD card. - Page 133 Approx. 11h. 45min. Approx. 16h. 15min. 64 kbps (mono) Approx. 12h. 30min. Approx. 16h. 15min. Caution • The values above are for reference only. • Battery life is measured by Olympus. It varies greatly according to the conditions of use.
-
Page 134: Index
U.S.A. Telephone Number :1-888-553-4448 This device Complies with Part 15 of the FCC Rules. Operation is subject to the following two conditions: (1) This device may not cause harmful interference, and (2) this device must accept any interference received, including interference that may cause undesired operation. - Page 135 Tokyo 163-0914, Japan. Tel. +81 (0)3-3340-2111 http://www.olympus.com OLYMPUS IMAGING AMERICA INC. 3500 Corporate Parkway, P.O. Box 610, Center Valley, PA 18034-0610, U.S.A. Tel. 1-888-553-4448 http://www.olympusamerica.com OLYMPUS EUROPA HOLDING GMBH (Premises/Goods delivery) Wendenstrasse 14-18, 20097 Hamburg, Germany. Tel. +49 (0)40-237730 (Letters) Postfach 10 49 08. 20034 Hamburg, Germany. http://www.olympus-europa.com OLYMPUS IMAGING AUStRALIA PtY LtD. 82 Waterloo Rd, North Ryde NSW 2113, Australia TEL: (61) 2-9886-3999 http://www.olympus.com.au EN-BD3592-01 CL1111...
Need help?
Do you have a question about the LS-100 and is the answer not in the manual?
Questions and answers