Table of Contents
Advertisement
Quick Links
This system is an auxiliary system; it is not designed to provide complete protection from property loss. Panasonic
will not be held responsible in the event that property loss occurs while this system is in operation.
Customer care number: (+971) 48007262
Email:customercare@ae.panasonic.com
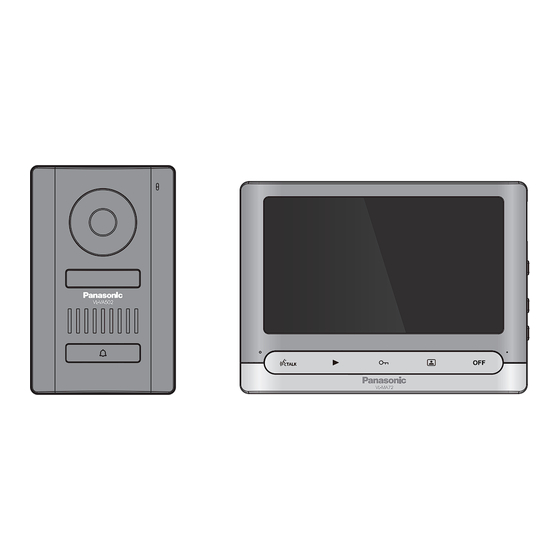
VL-SA72CX
VL-MA72CX
VL-VA502CX
2
4
6
7
9
17
18
19
Advertisement
Table of Contents

Related Manuals for Panasonic VL-SA72CX


Summary of Contents for Panasonic VL-SA72CX
- Page 1 VL-MA72CX VL-VA502CX This system is an auxiliary system; it is not designed to provide complete protection from property loss. Panasonic will not be held responsible in the event that property loss occurs while this system is in operation. Customer care number: (+971) 48007262...
- Page 2 VL-MA72CX VL-VA502CX VL-SA72CX 1.3 Features 7" TFT digital screen. Hands-free intercom. Smart video recording Snapshot with built-in memory of 100 images Support max 32 GB micro SD card. IP65 waterproof, damage-proof with IK10. Electronic-lock unlocking. Outdoor monitoring. Brightness, color, contrast, melody volume and talking volume can be adjusted.
-
Page 3: General Information
1.4 General information In the event of problems, you should contact your equipment supplier in the first instance. The available products differ depending on your region. For more information, please consult your dealer. In this document, the suffix of each model number (e.g., the "SX/CX" in "VL-SA72SX/CX") is omitted unless necessaryWhen the suffixes are used to describe models (e.g., "SX/CX models"), the sufixes refer to all models in the series. -
Page 6: Operation Buttons
Operation Buttons SD Card Slot Indoor Unit / Menu Button Monitor Button/Up Button/Down Microphone Talk Hang Up Playback Monitor Door Unlock Microphone Camera Camera Angle Adjustment White LED Wiring Terminals Speaker Call Button Note: For camera angle adjustment and wiring, please refer to installation guide. - Page 7 Operation Instruction VISITOR CALL The Visitor press the call The Visitor press the call button on Door station 1 button on Door station 2 A ringtone is heard inside and outside NOTICE: The visitor's image automatically If both the call buttons on two door stations are pressed displayed on the screen approximately at the same time, the preference will be given to the door station on which call button was press...
-
Page 8: Monitoring Mode
Monitoring Mode Option in the settings in the menu: DOOR1, CAM1, DOOR2, CAM2 operating mode (open or closed) Standby mode Monitoring Monitoring Monitoring Monitoring Monitoring DOOR1 CAM1 DOOR2 CAM2 Standby Show DOOR1 Show CAM1 Show DOOR2 Show CAM2 Close LCD image image image... -
Page 9: Standby Mode
5.Menu Operations Standby Mode In standby page, date and time, unread recorded files and SD card status will be shown here. 03:47 01-01-2019 Number of recorded videos or snapshot, “9+” stands for more than 9 recorded files are unread. SD card inserted SD card not inserted Menu Operations In standby mode, press the button “... -
Page 10: System Setting
5.Menu Operations 1. System Setting If the system is unattended for 60s, it will automatically return to standby mode. In standby mode, press the button “ ” to enter the main menu as below. Then move the cursor to the “System” option, and press the button “... -
Page 11: System Time
5.Menu Operations 1.2 System Time DD-MM-YY 20-03-2023 17:05 Press the cursor button “ ” or “ ” to select and adjust the date and time, then press “ ” to confirm. 1.3 System Information On system menu, move the cursor to “Information” and press “ ”... -
Page 12: Ringtone Setting
5.Menu Operations 2. Ringtone Setting On main menu, move the cursor to the option “Ring”, then press “ ” to enter the “Ring” menu. Ring setup includes: “Ring select” and “Ring volume”. 2.1 Ring Select On ring menu, move the cursor to “Ring select” and press “ ”... -
Page 13: Mode Setting
5.Menu Operations [Schedule 1]: You can select the time period (as below), and then set the volume (range: 01-10) and Ring Time(range: 15-60s). The factory default setting for the volume is 08 and Ring Time is 30s. [Schedule 2]: You can select the time period (as below), and then set the volume (range: 01-10) and Ring Time(range: 15-60s). - Page 14 5.Menu Operations 4. Security Alarm Setting On main menu, move the cursor to the option “Alarm”, then press “ ” to enter the “Alarm” menu. Video [CAM 1 Sensor Type]: Enable or disable (ON/OFF) sensor 1. If disabled, sensor 1 will not trigger alarm. [CAM 2 Sensor Type]: Enable or disable (ON/OFF) sensor 2.
-
Page 15: Video Files
5.Menu Operations On the color menu the video color of Door1/Door2/CAM1/CAM2 attributes can be adjusted. Scroll the button “ ” or “ ” to move the cursor to the option “Door1” or “Door2” or “CAM1” or “CAM2” , then press “... -
Page 16: Connection Diagram
5.Menu Operations 6.2 Snapshot Files On “Files” menu scroll the button “ ” or “ ” to move the cursor to the option “snapshot Files”, press the button “ ” to enter snapshot files list. Scroll the button “ ” or “ ”... - Page 17 6.Alarm instructions AC/DC power adapter for camera (not included) DC 12V 1 Alarm input 2 GND 3 Video 4 +12V(150mA)
-
Page 18: Technical Specifications
7.Specifications Technical Specifications Door Station(VL-VA502CX) Night vision White light Operating temperature -20℃~+70℃ Illumination 0.1LUX Camera Resolution 2 MP Streaming Resolution (Video) 720x576 Viewing angle 120° diagonal, 90° horizontal, 66° vertical Size 150 (L) X 95 (W) X 37.7 (H)mm... -
Page 19: Troubleshooting
8.Troubleshooting Caution 1. To prevent damage, the adapter should be fastened on the wall according to instruction. 2. Keep the power plug in a convenient location for easy disconnection of the device. 3. When connecting AC power wire, please finish the connection before plugging in the power. Troubleshooting Problem Solutions... - Page 20 Panasonic Marketing Middle East & Africa FZE https://www.panasonic.com...
Need help?
Do you have a question about the VL-SA72CX and is the answer not in the manual?
Questions and answers