Advertisement
Quick Links
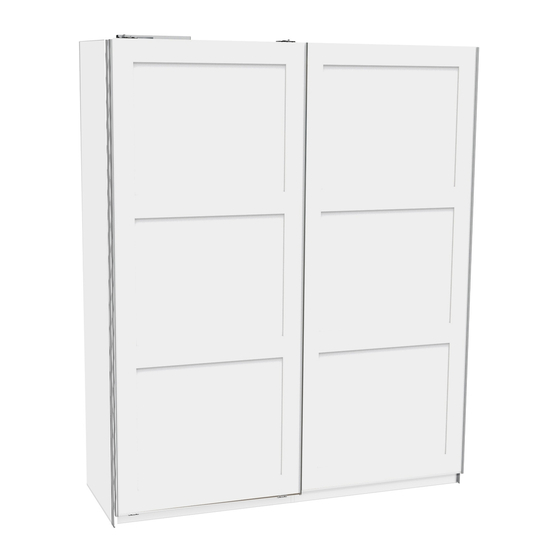
Fitted Bedrooms: Sliding Wardrobe
Assembly Instructions
Dimensions
Height - 221.8cm
Width - 180cm
Depth - 66.5cm
Important
– Please read these instructions fully before starting assembly
If you need help or have damaged or missing parts, please return to your local store.
V1_2023
Produced for
HHGL Limited, MK9 1BA; HHGL (ROI) Limited, D02 X576
- Please keep for future reference
IM1973_00
Advertisement

Related Manuals for Homebase House Beautiful Realm 658393


Summary of Contents for Homebase House Beautiful Realm 658393
- Page 1 Fitted Bedrooms: Sliding Wardrobe Assembly Instructions - Please keep for future reference Dimensions Height - 221.8cm Width - 180cm Depth - 66.5cm Important – Please read these instructions fully before starting assembly If you need help or have damaged or missing parts, please return to your local store. Produced for HHGL Limited, MK9 1BA;...
- Page 2 Safety and Care Advice Important – Please read these instructions fully before starting assembly • Check you have all the • During assembly do not stand • To reduce the components and tools listed on or put weight on the product, likelihood of damaging this could cause damage.
- Page 3 Components - Panels If you have damaged or missing components, please return to your local store. Please check you have all the panels listed below Doors x 2 (90,2 x 213,1cm) AVAILABLE TO BUY SEPARATELY Components - Profiles If you have damaged or missing components, please return to your local store.
- Page 4 Components - Fittings Please check you have all the fittings listed below Note: The quantities below are the correct amount to complete the assembly. In some cases more fittings may be supplied than are required. Sliding system pack: fittings 16mm screws x 13 15mm screws x 32 24mm screws x 4 (12 + 1 extra)
- Page 5 Assembly Instructions Step Step 1 WARDROBE ASSEMBLY: Fitting soft close for external door Firstly, join 2 double wardrobes together before proceeding to the sliding system assembly. Note: For instructions on how to join multiple units together, refer to the double wardrobe instruction manual.
- Page 6 Assembly Instructions Step Step 3 Fitting upper rail Place the upper rail over the wardrobe top panels, as shown. The profile is shorter than the wardrobe’s length, Upper rail so please place it centrally. (176.8cm) Then, fix it in position, using 6 screws PLEASE NOTE: Place the profile centrally, over the wardrobe.
- Page 7 Assembly Instructions Step Step 4 Fitting lower rail Place the lower rail front of the wardrobe, against the plinth panels and the bottom panels edge, as shown. Lower rail The profile is shorter than (176.8cm) the wardrobe’s lenght, so you have to place it centered.
- Page 8 Assembly Instructions Step Step 5 Fitting external door filler Place the external door filler External door along the edge of the filler (219.6cm) wardrobe side panel on the left, as shown. The profile has the same height as the side panel. Then, fix it in position, using 5 screws : we suggest to...
- Page 9 Assembly Instructions Step Step 6 Fitting internal door filler Place the internal door filler Internal door along the edge of the filler (219.6cm) wardrobe side panel on the right, as shown. The profile has the same height as the side panel. Then, fix it in position, using 5 screws : we suggest to...
- Page 10 Assembly Instructions Step Step 7 Fitting rail stops Fix 2 rail stops with 2 screws on each rail stop. Rail stops must be placed inside the wardrobe, right behind the upper rail profile and the side panel. (View from inside the wardrobe) (View from inside the wardrobe)
- Page 11 Assembly Instructions Step Step 8 Fitting the base for the internal door soft close device The soft close device for the internal door must be placed inside the wardrobe, and requires a specific base. Place the base for soft close device inside the wardrobe, under the top...
- Page 12 Assembly Instructions Step Step 9 Fitting the internal door soft close device Now connect the soft close device to the base previously placed, using 2 screws (View from inside the wardrobe)
- Page 13 Assembly Instructions Step Step 10 INTERNAL DOOR ASSEMBLY: (Internal door) Fixing upper slides Place upper slide upper slide at the top of the door as shown. Fix them by using euro screws (4 per slide). Step Step 11 Fixing plates for lower slides Place 2 plates at the...
- Page 14 Assembly Instructions Step Step 12 Fixing plate for soft close Fix the plate at the top of the door, using 2 screws and one screw Step Step 13 Fitting handle Place the handle over the door, as shown.
- Page 15 Assembly Instructions Step Step 14 Fixing handle Fix the handle in position using 7 screws : we suggest to impress the holes using an awl, to facilitate the entrance of the screws. Step Step 15 Fixing the adhesive dust seal strip Measure the adhesive dust seal in-line with the door...
- Page 16 Assembly Instructions Step Step 16 Placing internal door Position the internal door, hanging it into the upper rail. Please note: The rail has 2 tracks, the wheels of the door slides must be placed in the external one, as shown. (Door) Position the wheels on the door into the external track of the rail.
- Page 17 Assembly Instructions Step Step 17 Securing the door to the upper rail Once the door is placed, you must secure it in position, in the upper rail’s track. From inside the wardrobe, behind the door, you must press the clip in both the slides to block the door.
- Page 18 Assembly Instructions Step Step 18 Fitting lower slides to the door and fixing the door to the lower rail Now you need to place the lower slides on the door, please follow instructions below: In the back of the door, insert 2 lower slides into the plates at the bottom of...
- Page 19 Assembly Instructions Step Step 19 EXTERNAL DOOR ASSEMBLY: (External door) Fixing upper slides Place 2 upper slides the top of the door as shown. Fix them in place using euro screws (4 per slide). Step Step 20 Fixing plates for lower rails Place 2 plates at the...
- Page 20 Assembly Instructions Step Step 21 Fixing plate for soft close Fix the plate at the top of the upper slide (the one in the left side), as shown. Secure in place using 4 screws Step Step 22 Fitting handles Place 2 handles over the door, as shown.
- Page 21 Assembly Instructions Step Step 23 Fixing handles Fix the handles in position using 7 screws (per handle): we suggest to impress the holes using an awl, to facilitate the entrance of the screws. Step Step 24 Fixing the adhesive dust seal strip Measure the adhesive dust seal...
- Page 22 Assembly Instructions Step Step 25 Placing external door Position the external door, hanging it into the upper rail. Please note: The rail has 2 tracks, the wheels of the door slides must be placed in the internal one, as shown. Position the wheels (Int.
- Page 23 Assembly Instructions Step Step 26 Securing the door to the upper rail Once the door is placed, you must secure it in position, in the upper rail’s track. At the top of the door, you must press the clip in both the slides to block the door.
- Page 24 Assembly Instructions Step Step 27 Fitting lower slides to the door and fixing the door to the lower rail Now you need to place the lower slides on the door, please follow instructions below: In the back of the door, insert 2 lower slides into the plates at the bottom of...
Need help?
Do you have a question about the House Beautiful Realm 658393 and is the answer not in the manual?
Questions and answers