
Related Manuals for Homebase ERIK


Summary of Contents for Homebase ERIK
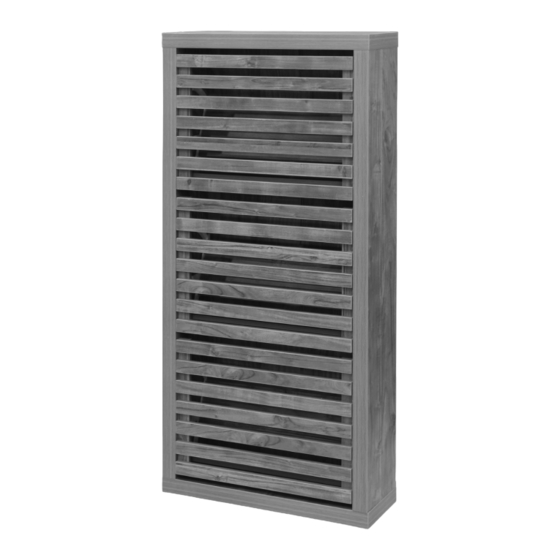
- Page 1 ERIK SLATTED SHOE STORAGE UNIT INSTRUCTION MANUAL IMPORTANT: Please read these instructions before using the product and retain for future use.
- Page 2 SAFETY AND CARE ADVICE THIS PRODUCT SHOULD BE PERMANENTLY ANCHORED TO THE WALL OR OTHER SUITABLE SURFACE TO AVOID SERIOUS INJURY OR DEATH. To help avoid any serious injury or death, this product includes a bracket to prevent toppling. We strongly recommend that this product be permanently fixed to the wall or other suitable surface. Fixing hardware is not included since different surface materials require different attachments.
- Page 3 STEP 1 Insert 4 x male camlocks (A) into the top panel (1). 2. Attach the metal bracket (H) using a 14mm screw (G) to the top panel. 3. Insert 3 x door stoppers (N) into each side panel (2 & 3). STEP 2 Secure the side panels (2 &...
- Page 4 STEP 3 STEP 4 Insert the back panel (8) into the slots on the side Attach the bottom panel (4) to the side panels and top panels. using 4 x 60mm Screws (E). Ensure that the slot in the bottom panel align with the top of the back panel (8).
- Page 5 STEP 5 Add 4 x base pads (C) to the corners of the bottom panel (4). STEP 6 Secure the left and right plastic mechanism (P & Q) to each of the 3 door panels (5) using 3 x 12mm screws (D) for each mechanism.
- Page 6 STEP 7 Attach the back and bottom drawer panels (6 & 7) to the plastic mechanisms using 4 x 12mm screws on each side. STEP 8 Cover internal screw holes with 4 x cover stickers (R). Insert the bottom drawer into the unit and secure with 2 x 12mm screws (D) in nut inserts (O).
- Page 7 STEP 9 Secure the back panel to the bottom, top and side panels by placing 10 x corner inserts (L) evenly along the corners and securing with 14mm screws (M). STEP 10 Mark the bracket hole on the wall using a pencil 2.
Need help?
Do you have a question about the ERIK and is the answer not in the manual?
Questions and answers