Table of Contents
Advertisement
Available languages
Available languages
Quick Links
Advertisement
Table of Contents

Related Manuals for DeLonghi LM 64 IND


Summary of Contents for DeLonghi LM 64 IND
- Page 1 ENGLISH Manuale di istruzioni per il piano cottura a induzione ITALIANO Mod: LM 64 IND THANK YOU FOR PURCHASING THE DE'LONGHI INDUCTION HOB. PLEASE READ THIS INSTRUCTION MANUAL CAREFULLY BEFORE USING THE HOB KEEP IT IN A SAFE PLACE FOR FUTURE REFERENCE.
-
Page 2: Safety Warnings
SAFETY WARNINGS PLEASE READ THE FOLLOWING INSTRUCTIONS CAREFULLY BEFORE USING THE APPLIANCE. Installation Electrical Shock Hazard • Disconnect the appliance from the mains electricity supply before carrying out any work or maintenance on it. • Connection to a good earth wiring system is essential and mandatory. - Page 3 • This appliance is to be properly installed and earthed only by a suitably qualified person. • This appliance should be connected to a circuit which incorporates an isolating switch providing full disconnection from the power supply. • WARNING: Use only hob guards designed by the manufacturer of the cooking appliance or indicated by the manufacturer of the appliance in the instructions for use as suitable or hob guards incorporated in the appliance.
- Page 4 • During use, accessible parts of this appliance will become hot enough to cause burns. • Do not let your body, clothing or any item other than suitable cookware contact the ceramic glass until the surface is cool. • Metallic objects such as knives, forks, spoons and lids should not be placed on the hob surface since they can get hot.4 •...
- Page 5 stand, or climb on it. • Do not store items of interest to children in cabinets above the appliance. Children climbing on the cooktop could be seriously injured. • Do not leave children alone or unattended in the area where the appliance is in use.
- Page 6 • WARNING: The appliance and its accessible parts become hot during use. Young children should be kept away. • Care should be taken to avoid touching heating elements. • Children less than 8 years of age shall be kept away unless continuously supervised.
-
Page 7: Product Overview
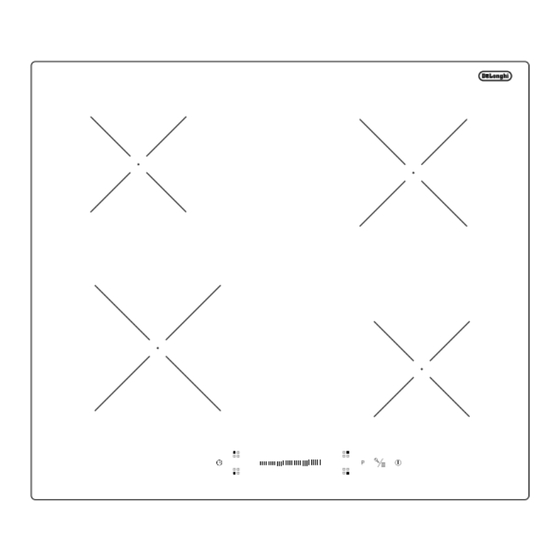
continuously. • Power cord can’t accessible after installation. Product Overview Top View 1. 2300 W zone, boost to 3000 W 2. 1200 W zone, boost to 1500 W 3. 1800 W zone, boost to 2100 W 4. 1200 W zone, boost to 1500 W 5. -
Page 8: A Word On Induction Cooking
A Word on Induction Cooking Induction cooking is a safe, advanced, efficient, and economical cooking technology. It works by electromagnetic vibrations generating heat directly in the pan, rather than indirectly through heating the glass surface. The glass becomes hot only because the pan eventually warms it up. -
Page 9: Choosing The Right Cookware
Choosing the right Cookware • Only use cookware with a base suitable for induction cooking. Look for the induction symbol on the packaging or on the bottom of the pan. • You can check whether your cookware is suitable by carrying out a magnet test. - Page 10 Use pans whose diameter of the ferromagnetic area (base of the pan) is in the range of dimensions in the table below. (Table 1) - If you use smaller pots, performance could be affected - If you use pot with a diameter smaller than the one indicated in the table above, pots may not be detected According to the dimension of the zone you can use pots of different diameters as picture below:...
-
Page 11: Using Your Induction Hob
Using your Induction Hob To start cooking • After power on, the buzzer beeps once, all the indicators light up for 1 second then go out, indicating that the hob has entered the state of standby mode. 1. Touch the ON/OFF switch. - Page 12 Beware of hot surfaces “H” will show which means cooking zone is too hot to touch. It will disappear when the surface has cooled down to a safe temperature. It can also be used as an energy saving function if you want to heat further pans, use the hotplate that is still hot.
-
Page 13: Using The Pause Function
Using Boost function Activate the boost function 1. Select the zone with boost function (front left zone). Note: The power setting of bridge zone works the same as any other normal area. 2. Touch the booster key when the display is blinking, power level indication shows “P”. -
Page 14: Locking The Controls
Locking the Controls • You can lock the controls to prevent unintended use (for example children accidentally turning the cooking zones on). • When the controls are locked, all the controls except the ON/OFF control are disabled. To lock the controls Touch the keylock control for 2 seconds. -
Page 15: Using The Timer
Using the Timer You can use the timer in two different ways: You can use it as a minute minder. In this case, the timer will not turn any cooking zone off when the set time is up. You can use it as cut-off timer to turn one or more cooking zones off after time is ... - Page 16 Using the timer to switch off one or more cooking zones 1. Touching the heating zone selection control that you want to set the timer for. 2. Touch timer control, “10” will show in the timer display and “0” will flashes. 3.
-
Page 17: Cooking Guidelines
If the timer is set on more than one zone: When you set timer for several cooking zones, red dots of the relevant cooking zones are indicated. The timer display shows the min. timer. The dot of the corresponding zone blinks. (set to 15 minutes) (set to 45 minutes) 2. - Page 18 Simmering, cooking rice • Simmering occurs below boiling point, at around 85˚C, when bubbles are just rising occasionally to the surface of the cooking liquid. It is the key to delicious soups and tender stews because the flavours develop without overcooking the food. You should also cook egg-based and flourthickened sauces below boiling point.
-
Page 19: Heat Settings
Heat Settings Heat setting Suitability • delicate warming for small amounts of food 1 - 2 • melting chocolate, butter, and foods that burn quickly • gentle simmering • slow warming • reheating 3 - 4 • rapid simmering • cooking rice •... -
Page 20: Care And Cleaning
Care and Cleaning What? How? Important! Everyday soiling on glass 1. Switch the power to the cooktop off. • When the power to the cooktop is (fingerprints, marks, 2. Apply a cooktop cleaner while the switched off, there will be no ‘hot stains left by food or glass is still warm (but not hot!) surface’... -
Page 21: Hints And Tips
Hints and Tips Problem Possible causes What to do The cooktop cannot No power. Make sure the cooktop is connected to Be turned on. the power supply and that it is switched on. Check whether there is a power outage in your home or area. If you’ve checked everything and the problem persists, call a qualified technician. -
Page 22: Failure Display And Inspection
The above are the judgment and inspection of common failures. Please do not disassemble the unit by yourself to avoid any dangers and damages to the induction hob. Technical Specification Induction Hob LM 64 IND Cooking Zones 4 Zones Supply Voltage 220-240V~ 50/60Hz... -
Page 23: Selection Of Installation Equipment
D(mm) A(mm) B(mm) X(mm) LM 64 IND 50 mini Under any circumstances, make sure the hob is well ventilated and the air inlet and outlet are not blocked. Ensure the hob is in good work state. As shown below Note: The safety distance between the hotplate and the cupboard above the hotplate... -
Page 24: Before Locating The Fixing Brackets
A(mm) B(mm) C(mm) 50 mini 20 mini Air intake Air exit 5mm Before you install the hob, make sure that • the work surface is square and level, and no structural members interfere with space requirements. • the work surface is made of a heat-resistant material. •... - Page 25 Cautions The hob must be installed by qualified personnel or technicians. We have professionals at your service. Please never conduct the operation by yourself. The hob shall not be mounted to cooling equipment, dishwashers and rotary dryers. The hob shall be installed such that better heat radiation can be ensured to enhance its reliability.
- Page 26 If the cable is damaged or needs replacing, this should be done by an after-sales technician using the proper tools, so as to avoid any accidents. If the appliance is being connected directly to the mains supply, an omnipolar circuit breaker must be installed with a minimum gap of 3mm between the contacts.
-
Page 27: Avvertenze Per La Sicurezza
AVVERTENZE PER LA SICUREZZA PRIMA DI UTILIZZARE L'ELETTRODOMESTICO, LEGGERE ATTENTAMENTE LE ISTRUZIONI CHE SEGUONO. Installazione Rischio di scosse elettriche • Scollegare l'elettrodomestico dalla rete elettrica prima di effettuare operazioni di manutenzione o altre attività simili. • Il collegamento a un impianto di messa a terra perfettamente funzionante è... - Page 28 • Questo elettrodomestico deve essere collegato a un circuito provvisto di interruttore di isolamento che garantisca il distacco totale dalla fonte di alimentazione. • AVVERTENZA: utilizzare solo le protezioni per il piano cottura progettate dal produttore dell'elettrodomestico da cucina o indicate dal produttore dell'elettrodomestico nelle istruzioni per l'uso come protezioni idonee o incorporate nell'elettrodomestico.
-
Page 29: Istruzioni Importanti Per La Sicurezza
• Fino a quando la superficie è calda, non toccare la vetroresina con il corpo, gli indumenti o altri oggetti diversi dagli utensili di cucina adatti. • Non collocare oggetti metallici, ad es. coltelli, forchette, cucchiai e coperchi, sulla superficie del piano cottura perché potrebbero riscaldarsi.4 •... - Page 30 delle pentole per lo spegnimento delle zone di cottura quando la pentola viene rimossa. • Non consentire ai bambini di giocare con l'elettrodomestico né di sedersi o arrampicarsi sull'elettrodomestico. • Non riporre oggetti che potrebbero attirare i bambini nei pensili sopra l'elettrodomestico. Se i bambini si arrampicano sul piano cottura, potrebbero subire gravi lesioni.
- Page 31 • Questo apparecchio è destinato ad essere utilizzato esclusivamente in ambiente domestico! L'uso commerciale di qualsiasi tipo non è coperto dalla garanzia del produttore! • AVVERTENZA: l'elettrodomestico e i componenti accessibili diventano molto caldi durante l'uso. Tenere lontani i bambini. •...
-
Page 32: Panoramica Del Prodotto
Panoramica del prodotto Vista superiore 1. Zona 2300 W, con incremento della potenza fino a 3000 W 2. Zona 1200 W, con incremento della potenza fino a 1500 W 3. Zona 1800 W, con incremento della potenza fino a 2100 W 4. - Page 33 Cenni sulla cottura a induzione La cottura a induzione è una tecnologia di cottura sicura, avanzata, efficiente ed economica. La cottura avviene tramite vibrazioni elettromagnetiche che generano calore nella pentola in maniera diretta e non indiretta, tramite il riscaldamento della superficie in vetro. Il vetro diventa caldo solo perché...
- Page 34 Scelta degli utensili da cucina • Adoperare solo utensili da cucina idonei per la cottura a induzione. Controllare il simbolo della cottura a induzione sull'imballo o sul fondo della pentola. • È possibile accertarsi che l'utensile di cucina sia idoneo effettuando una prova magnetica.
- Page 35 • Adoperare pentole il cui diametro dell'area ferromagnetica (base della pentola) rientri nell'intervallo di dimensioni indicato nella tabella seguente. (Tabella 1) - Se si utilizzano pentole più piccole, le prestazioni potrebbero essere inferiori. - Se si utilizza una pentola con un diametro inferiore a quello indicato nella tabella riportata sopra, la pentola potrebbe non essere rilevata.
- Page 36 Uso del piano cottura a induzione Per avviare la cottura • Dopo l'accensione, viene emesso un segnale acustico, tutti gli indicatori si accendono per 1 secondo per poi spegnersi, indicando che il piano cottura è in modalità di attesa. 1. Toccare il comando di accensione e spegnimento .
- Page 37 4. Attenzione alle superfici calde "H" indica che la zona di cottura è calda al tatto. L'indicazione scompare quando la superficie si è raffreddata a una temperatura sicura. Se occorre scaldare altre pentole, per risparmiare energia è possibile utilizzare il piano cottura ancora caldo. Uso della gestione della potenza È...
- Page 38 Uso della funzione Boost Attivazione della funzione Boost 1. Selezionare la zona con funzione boost (zona anteriore sinistra). Nota: L'impostazione della potenza della zona ponte funziona come qualsiasi altra zona normale. 2. Toccare il tasto booster quando il display lampeggia, l'indicazione del livello di potenza mostra "P".
-
Page 39: Blocco Dei Comandi
Blocco dei comandi • I comandi possono essere bloccati per impedire utilizzi indesiderati (ad es. i bambini potrebbero accendere accidentalmente le zone di cottura). • Quando sono bloccati, sono disabilitati tutti i comandi tranne quello di accensione/spegnimento. Per bloccare i comandi Tocca il comando di blocco dei tasti per 2 secondi. -
Page 40: Spegnimento Automatico
Spegnimento automatico La funzione di sicurezza del piano di cottura è lo spegnimento automatico. Esso ha luogo ogni qualvolta si dimentica di spegnere una zona di cottura. I tempi di spegnimento preimpostati sono indicati nella tabella seguente: Livello di potenza Timer di funzionamento predefinito (ore) Utilizzo del timer... - Page 41 3. Impostare il tempo toccando il comando a cursore del timer (ad es. 5). 4. Toccare nuovamente il controllo del timer, il numero "1" lampeggerà. 5. Impostare il tempo toccando il controllo a cursore (ad es. 9). In questo momento il tempo impostato è...
- Page 42 5. Impostare il tempo toccando il controllo a cursore (ad es. 9). In questo momento il tempo impostato è di 95 minuti. 6. Quando il tempo è impostato, il conto alla rovescia comincia immediatamente. Il display visualizza il tempo residuo. NOTA: nell'angolo inferiore destro dell'indicazione del livello di potenza compare un punto rosso che indica che la zona è...
- Page 43 Linee guida per la cottura Le fritture richiedono attenzione, in quanto l'olio e il grasso si riscaldano rapidamente, specialmente se si utilizza la funzione Boost. A temperature estremamente elevate, l'olio e il grasso prendono fuoco automaticamente, con il rischio di provocare gravi incendi. Suggerimenti per la cottura •...
- Page 44 5. Rosolare le verdure. Quando sono calde ma ancora crespe, abbassare la temperatura della zona di cottura, collocare nuovamente la carne nella padella e aggiungere il sugo. 6. Mescolare delicatamente gli ingredienti affinché siano ben caldi. 7. Servire immediatamente. Impostazioni della temperatura Impostazione della temperatura •...
-
Page 45: Cura E Pulizia
Cura e pulizia Cosa? Come? Importante! • Sporcizia quotidiana sul 1. Spegnere il piano cottura. Quando si spegne il piano cottura, le superfici calde non sono più vetro (impronte, segni, 2. Pulire il vetro ancora macchie lasciate dagli indicate, per cui la zona di cottura caldo (ma non bollente) alimenti o fuoriuscite potrebbe essere ancora calda. - Page 46 Suggerimenti e istruzioni utili Problema Possibili cause Rimedi Il piano di cottura non Assenza di corrente elettrica. Controllare se il piano cottura può essere acceso. è collegato a una fonte di alimentazione funzionante. Controllare se si è verificato un blackout in casa o in zona. Se il problema non si risolve dopo tutti questi controlli, chiamare un tecnico qualificato.
-
Page 47: Specifiche Tecniche
Le indicazioni precedenti sono fornite per valutare e comprendere il significato di guasti comuni. Per evitare pericoli e danni al piano cottura a induzione, non smontarlo. Specifiche tecniche LM 64 IND Piano a induzione Zone di cottura 4 zone Tensione di alimentazione... -
Page 48: Installazione
Modello n. L (mm) W (mm) H (mm) D (mm) A (mm) B (mm) X (mm) LM 64 IND Min 50 Accertarsi sempre che il piano cottura sia adeguatamente ventilato e che i fori di ingresso e uscita dell'aria non siano ostruiti. Accertarsi che il piano cottura funzioni perfettamente. - Page 49 A (mm) B (mm) C (mm) Min 50 Min 20 Ingresso dell'aria Uscita dell'aria 5 mm Controlli da effettuare prima dell'installazione del piano cottura • Il top di cucina deve essere dritto e a livello, senza membri strutturali che interferiscono con i requisiti di spazio. •...
- Page 50 Piano cottura Piano cottura Staffa Staffa Precauzioni • Il piano cottura deve essere installato da personale o tecnici qualificati. Il produttore può fornire tecnici professionisti. Non effettuare l'operazione da soli. • Il piano di cottura non deve essere montato su apparecchiature di raffreddamento, lavastoviglie e asciugatrici a tamburo.
- Page 51 L-N: 220-240 V~ L1-L2: 380-415 V~ • Se il cavo è danneggiato o deve essere sostituito, l'operazione deve essere effettuata da un tecnico post-vendita utilizzando utensili appropriati in modo da evitare incidenti. • Se l'elettrodomestico è collegato direttamente alla rete elettrica, è necessario installare un interruttore onnipolare con una distanza minima di 3 mm tra i contatti.
Need help?
Do you have a question about the LM 64 IND and is the answer not in the manual?
Questions and answers