Table of Contents
Advertisement
Advertisement
Table of Contents

Related Manuals for SATO SA408


Summary of Contents for SATO SA408
- Page 1 SA408 ’ ANUAL...
-
Page 2: Table Of Contents
Printing Media Calibration & Configuration ....30 Steps to Start Media Calibration & Configuration ... 30 Sample of Printer Configuration Label ....31 Resetting Printer to Factory Defaults ......32 Printer Controls and Indicators ........33 SA408 - User’s Manual... - Page 3 Cleaning Direction ..........48 6. Product Specification ..........49 General Specification ..........49 Fonts, Barcodes, and Graphics Specification ..... 51 Interface Specification ..........52 USB Interface ............52 Serial Interface ............53 Parallel (Centronics) Interface ........ 54 SA408 - User’s Manual...
-
Page 4: Introduction
SATO HOLDINGS CORPORATION reserves the right to correct any such errors and disclaims any resulting liability. In no event shall SATO HOLDINGS CORPORATION or anyone else involved in the creation, production, or delivery of the accompanying product (including hardware and software) be liable for any SA408 - User’s Manual... - Page 5 SATO HOLDINGS CORPORATION has been advised of the possibility of such damages.
-
Page 6: Getting Started
Congratulations on choosing SA408 printer, made by SATO HOLDINGS CORPORATION, a leader in the world-wide barcode industry. SA408 is ideally designed to easily bring more efficiency for your business. This manual will help you get to know your new printer and provide sufficient information needed. -
Page 7: Package Contents
Package Contents DVD (Documentation & Software) Power Cord Media Hanger & Media Shields Printer Power Supply USB cable Ribbon Core Adaptors 1” ID Core for Ribbon SA408 - User’s Manual... -
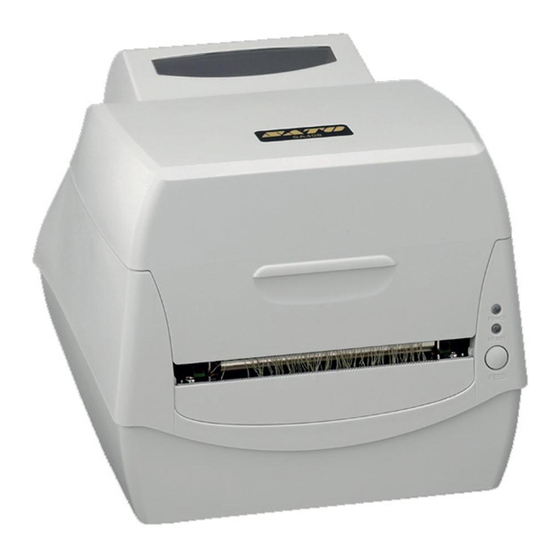
Page 8: Printer Overview
Printer Overview Front View: Top Cover Power LED Ready LED Feed Button SA408 - User’s Manual... -
Page 9: Rear View
Rear View: Power Switch RS232 Serial Parallel Port Power Jack SA408 - User’s Manual... -
Page 10: Interior View I
Interior View I Media Shields Ribbon Pick-up Holder Media Hanger Module Release Latch PUSH SA408 - User’s Manual... -
Page 11: Interior View Ii
Interior View II Top Cover Ribbon Supply Holder Media Shaft Print Head Transmissive Sensor Media Guides Platen Roller Power LED Reflective sensor Ready LED Front Cover Feed Button Head-Open Sensor SA408 - User’s Manual... -
Page 12: Attaching Power
4. Plug the other end of the power cord into an appropriate grounded AC electrical outlet. Warning: Do not operate the printer and power supply in an area where they might get wet. Power Jack Power Cord Power Connector Power Supply SA408 - User’s Manual... -
Page 13: Loading Media
When loading media, it must be placed onto the media hangers. Placing Media Roll 1. Open Top Cover of the printer. Top Cover SA408 - User’s Manual... - Page 14 2. Put the Media Hanger through media supply roll, and then centrally align with the two Media Shields to closely lean against the media supply roll. Media Hanger Media Shield 3. Locate the media supply roll into the Media Compartment of printer. Media Compartment SA408 - User’s Manual...
- Page 15 4. Push the Release Latch to open the printer module. PUSH Module Release Latch 5. Pull a short length of media till it reaches the Platen Roll of printer. Platen Roller SA408 - User’s Manual...
- Page 16 Make sure media stays under the Media Shaft and centrally under both of the Media Guides. Media Shaft Media Guides 7. Close the printer module and then press firmly at the both sides to properly latch until you hear a click. SA408 - User’s Manual...
- Page 17 8. Press the FEED button to feed labels out of the printer. FEED Button 9. To tear media, pull the media edge against the Tear Bar as in the direction below: Tear Direction Tear Bar SA408 - User’s Manual...
-
Page 18: Media Sensor Type Setting
Multi-Column Label Setting by Software/ Driver To index labels with multiple columns, please select media types to Multi-Column Labels via Seagull Driver. Software setting steps: Seagull Driver – Media Types – Multi-Column Labels Sample of labels with multiple columns: SA408 - User’s Manual... -
Page 19: Multi-Column Label Setting Manually
Reflective Sensor Force Mode manually. SA408 provides two modes of media sensor type settings to set manually, with no need to connect PC and to select by software: Mode A. To always detect multi-column labels, force SA408 printers to enter Reflective Sensor Force Mode. - Page 20 Step 1. PUSH Module Release Latch SA408 - User’s Manual...
- Page 21 Step 2. FEED Button SA408 - User’s Manual...
- Page 22 Release Feed button immediately. 3. In about 3 seconds, Ready LED will be flashing again. Close the printer module and then press firmly at the both sides to properly latch it until you hear a click. SA408 - User’s Manual...
- Page 23 ※ Printer transfers between the two modes as described above. ※ Before printing, to double-check current sensor setting, please conduct media calibration and print a self-test/ configuration label. Refer to the sample self-test pages below: Reflective Sensor Transmissive Sensor Force Mode Mode (See-Through Sensor) SA408 - User’s Manual...
-
Page 24: Loading Ribbon
For direct thermal printing, do not load ribbon in the printer. Preparing Ribbon Find the two Ribbon Core Adaptors in printer package and fix them into new ribbon rolls from the left to the right. Ribbon Core Adaptor Placing Ribbon Rolls SA408 - User’s Manual... - Page 25 1. Open Top Cover of the printer. Top Cover 2. Push the Release Latch to open the printer module. PUSH Module Release Latch 3. Lift up the printer module to check the Ribbon Supply Holder. SA408 - User’s Manual...
- Page 26 Ribbon Supply Holder SA408 - User’s Manual...
- Page 27 Ribbon Supply hub, and then into the right. Ribbon Supply Holder Note: The Ribbon Supply Holder accepts the coated side of ribbon to be wound ink-side IN or wound ink-side OUT. SA408 - User’s Manual...
- Page 28 5. Install the other ribbon roll and rotate it until the notches align and lock into the left side of Ribbon Pick-up hub, and then the right. Ribbon Pick-up Holder Note: The Ribbon Pick-up Holder accepts the coated side of ribbon to be wound ink-side OUT only. SA408 - User’s Manual...
- Page 29 6. Close the printer module and then press firmly at the both sides to properly latch it until you hear a click. 7. Rotate Thumb Wheel of Ribbon Pick-up Holder to remove slack and ribbon wrinkle, and to align the ribbon on the spindles. Thumb Wheel SA408 - User’s Manual...
-
Page 30: Printer Operations
4. Media Calibration will be performed while the printer automatically feeds the label stock for a certain length; then the printer motor suspends for one second and then prints out configuration/ self-test labels. Release the FEED button as soon as printer starts to print. SA408 - User’s Manual... -
Page 31: Sample Of Printer Configuration Label
Sample of Printer Configuration Label SA408 - User’s Manual... -
Page 32: Resetting Printer To Factory Defaults
Printer will delete those print tasks received but not yet printed. Note: The printer factory default settings are stored in printer’s flash; these settings remain stored, without being erased even the printer power is disconnected. SA408 - User’s Manual... -
Page 33: Printer Controls And Indicators
Printer Controls and Indicators Power Switch Power LED Ready LED Feed Button The following table explains printer controls and indicators’ functions to help understanding LED indications and printer status: SA408 - User’s Manual... - Page 34 READY indicator will blink when printing is Ready LED paused. It will start blinking while “Media Out”, “Media Gap Not Found” or “Ribbon Out” has been detected. It will blink as soon as the printer module is opened. Note: SA408 - User’s Manual...
- Page 35 Feed Button Press and hold while switching on the power to conduct media calibration and print out a configuration profile. To resume printing after “Media Out “or “Ribbon Out “ errors have been resolved. SA408 - User’s Manual...
-
Page 36: Troubleshooting By Led Indicators Diagnosis
If a continuous label roll index label gaps is in use, set Check the label sensor “continuous media” printing in driver settings or commands. Media out Install a new label roll Paper jam Recover the jam SA408 - User’s Manual... - Page 37 Cutter has failed, or Check the cutter or Only applicable there is paper jam recover paper jam. when cutter inside the cutter. mode to cutter mode. Other possible Contact the reseller for hardware errors. further service. SA408 - User’s Manual...
- Page 38 Printer is in Press FEED button to resume printing. PAUSE status Printer is receiving data As soon as all the data has been received, Ready LED will stay solid green and automatically resume normal operation. SA408 - User’s Manual...
-
Page 39: Miscellaneous
Windows system and the label printer has been selected. Vertical streaks in the printout usually indicate a dirty or faulty print head. (Refer to the following examples.) Clean the print head. If the problem persists, replace the print head. SA408 - User’s Manual... -
Page 40: Recovery
Refer to the next chapter and clean the related spare parts. Recovery After correcting problems, simply press the panel button or restart the printer to continue your print jobs. Make sure the LEDs are not blinking and remember to resend your files. SA408 - User’s Manual... -
Page 41: Communications
4. Communications Interfaces and Requirements SATO SA408 printers come with a nine-pin Electronics Industries Association (EIA) RS-232 serial data interface, a USB interface, Parallel. A variety of interface options are suitable for versatile applications: SA408: Parallel, USB, and Serial interfaces Note: 1. -
Page 42: Parallel Interface Requirements
To minimize electrical noise pickup in the cable: 1. Keep data cables as short as possible. (6 ft or 1.83m recommended) 2. Do not tightly bundle the data cables with power cords. 3. Do not tie the data cables to power wire conduits. SA408 - User’s Manual... -
Page 43: Communicating With The Printer
1. Turn off the printer. Plug the power cable into the power socket on the wall, and then connect the other end of the cable to printer's power socket. Connect the USB cable to the USB port on the printer and on the PC. SA408 - User’s Manual... - Page 44 “Install a driver for a Plug and Play printer”: Then click “Next.” 6. Enter Printer name (i.e. SA408) and select "do not share this printer”, and click "Next" 7. Check all the data on the showing screen, if it is correct, click "Finish".
-
Page 45: Installing A Printer Driver (For Other Interfaces Except Usb)
DVD drive of your computer. The DVD will bring out the following prompt. Click “Go”: 3. Under SA408 product selection prompt, choose Seagull Driver version and then start installation: Instead of the flash prompt above, another way to install Seagull driver is to run the DriverWizard utility from the Installation Directory where the Seagull driver files are located. - Page 46 11. Check all the data on the showing screen, if it is correct, click "Finish". 12. After the related files have been copied to your system, click "Finish". 13. After driver installation is complete, click "Close". The driver should now be installed. SA408 - User’s Manual...
-
Page 47: Caring For Your Printer
It’s strongly recommended to wear hand gloves during cleaning progress. Do not touch print head surface by bare hands or with any hard equipment. Water or spit should be kept away in case of corrosion on heating elements. SA408 - User’s Manual... -
Page 48: Cleaning Direction
Do not wipe back and forth, to avoid dust or dirt on cleaning cotton would be attached onto print head again. Special Caution: Warranty of print heads will be void if print head serial number is removed, altered, defected, or made illegible, under every circumstance. SA408 - User’s Manual... -
Page 49: Product Specification
Media Type ticket in thermal paper or plain paper and fabric label Max Width:4.33”(110mm) Min Width:1”(25.4mm) Thickness:0.0025”~0.01”(0.0635~0.254mm) Max roll capacity(OD):5”(127mm) Core size:1”(25.4mm) / Max roll Media capacity(OD):4.5”(114.3mm) Core size:0.5”(12.7mm) (optional) / Max roll capacity(OD):4.72”(120mm) Core size:1.5”(38.1mm) (optional) SA408 - User’s Manual... - Page 50 L 273mm x W 225mm x H 186mm Weight 2.1kg Universal Switching Power Supply Power Source Input: 100~240V,1.8A, 50-60Hz, Output: 24VDC, 2.4A Operation Temperature: 40F~100F (4C~38C), Operation 10% ~ 90% non-condensing, Environment Storage Temperature: -4F~122F (-20C~50C) Optional Items Media Stacker, Cutter, RTC Card SA408 - User’s Manual...
-
Page 51: Fonts, Barcodes, And Graphics Specification
Interleaved 2 of 5 with human readable check 1D Barcodes digit、Code 93、Code 39 with check sum digit、 MSI、EAN-8、Codabar、Code 11、EAN-13、 Plessey、GS1 Data bar (RSS) 、Industrial 2 of 5、 Standard 2 of 5、Logmars MaxiCode、PDF417、Data Matrix (ECC 200 2D Barcodes only) 、QR code、Composite Codes SA408 - User’s Manual... -
Page 52: Interface Specification
USB Interface Connector Terminal Pin Assignment Signal Description VBUS Differential data signaling pair - Differential data signaling pair + Ground USB series “B” Receptacle Interface SA408 - User’s Manual... -
Page 53: Serial Interface
Output. Pin 9 is reserved for KDU (keyboard device unit) Note : Pin 9 are reserved for KDU (keyboard device unit), therefore do not connect these pins if you are using a general host like a PC. SA408 - User’s Manual... -
Page 54: Parallel (Centronics) Interface
PCs via different ports. However as no port contention is made for this printer, if both PCs transmit data at the same time the data may become damaged in the receiving buffer. SA408 - User’s Manual... - Page 55 …… 3 TX …… 3 TX RX 3 RX 2 GND 7 …… 5 GND GND 5 …… 5 GND pin 4 pin 4 pin 5 pin 6 pin 6 pin 7 pin 20 pin 8 SA408 - User’s Manual...
- Page 56 Handshaking: XON/XOFF as well as CTS/RTS (hardware flow control). If you run an application with the bundled printer driver under Windows and use the serial port, you should check the above parameters and set the flow control to "Xon/Xoff "or "hardware". SA408 - User’s Manual...
Need help?
Do you have a question about the SA408 and is the answer not in the manual?
Questions and answers