Advertisement
Quick Links
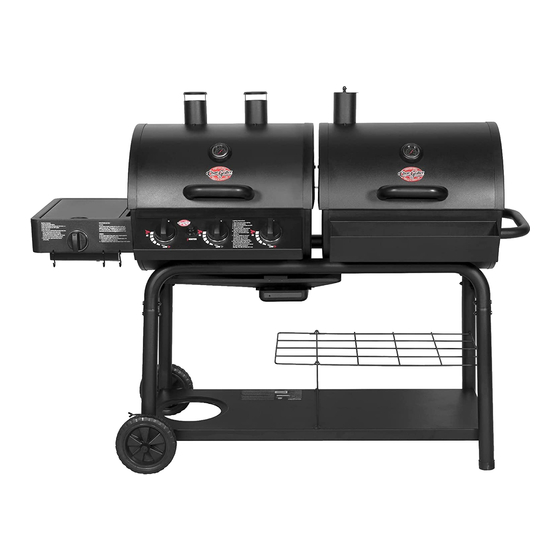
OWNER'S MANUAL
Duo™
Model #5050
Keep your receipt with this manual for
Warranty.
CUSTOMER SERVICE
1-912-638-4724
Service@CharGriller.com
Contents of this manual are Trademarked and Copyrighted by Char-Griller | A&J Manufacturing.
Using the information contained in this manual without consent of Char-Griller and/or A&J
Manufacturing is strictly prohibited.
OM_5050_ED_ F.5
Advertisement

Subscribe to Our Youtube Channel
Related Manuals for Char-Griller Duo 5050


Summary of Contents for Char-Griller Duo 5050
- Page 1 Keep your receipt with this manual for Warranty. CUSTOMER SERVICE 1-912-638-4724 Service@CharGriller.com Contents of this manual are Trademarked and Copyrighted by Char-Griller | A&J Manufacturing. Using the information contained in this manual without consent of Char-Griller and/or A&J Manufacturing is strictly prohibited. OM_5050_ED_ F.5...
- Page 2 TABLE OF CONTENTS Safety Warnings & Warranty....... A-1 Assembly Instructions ........B-1 Product Usage ..........C-1 Recipes .............. D-1 Accessories ............E-1 If you smell gas: 1. Do not store or use gasoline or other 1. Shut off gas to the appliance. fl...
- Page 3 IMPORTANT SAFETY WARNINGS A propane gas cylinder is required for operation. This gas grill is not intended for commercial use. SAVE THESE INSTRUCTIONS FOR FUTURE REFERENCE. IF YOU ARE ASSEMBLING THIS UNIT FOR SOMEONE ELSE, GIVE THIS MANUAL TO HIM OR HER TO SAVE FOR FUTURE REFERENCE.
- Page 4 Read the following instructions carefully and be sure your barbecue is properly assembled, installed and maintained. Failure to follow these instructions may result in serious bodily injury and/or property damage. If you have any questions concerning assembly or operation, consult your dealer or LP gas company.
- Page 5 • Note that parts sealed by manufacturer or its agent must not be altered. • When assembling the grill, position the connection fl exible tube so that it is protected against twisting. • Stay away from any source of ignition when changing gas container. •...
- Page 6 • The use of alcohol, prescription or non-prescription drugs may impair the operator’s ability to properly assemble or safely operate the grill. • Always open grill lid slowly and carefully as heat and steam trapped within the grill can burn you severely.
- Page 7 • When opening lid, make sure it is pushed all the way back so it rests against the lid support brack- ets. Use extreme caution as hood could fall back to a closed position and cause bodily injury. • Close lid and all dampers to help suffocate fl ame. •...
- Page 8 Customer Service at 1-912-638-4724. Registration provides important protections: 1. In the extremely unlikely event of a product recall Char-Griller can easily contact you and rectify the issue. 2. If a warrantied part is broken or missing we can send you the needed parts promptly.
- Page 9 SURFACE RUST IS NOT CONSIDERED A MANUFACTURING OR MATERIALS DEFECT Char-Griller grills are made of steel and if exposed to the elements rust will occur naturally. Please refer to the section entitled, “Usage” to review how to care for your grill properly.
- Page 10 This Page Intentionally Left Blank...
- Page 11 Assembly Instructions...
- Page 12 ITEM PART NAME GAS GRILL HOOD CHARCOAL GRILL HOOD GAS GRILL BODY CHARCOAL GRILL BODY THERMOMETER HOOD HANDLE WARMING RACK BURNER (short wire) BURNER (long wire) BASE FLARE-UP SHIELD LONG LEG SHORT LEG BEZEL LEG CROSS BAR COOKING GRATE WHEEL LEG BRACE AXLE WIRE SHELF...
- Page 13 Assembly: Requires 2 people. Get another person to help. Tools Needed: Pliers, Phillips Head Screwdriver and a 7/16” Nut Driver. NOTE: Do Not tighten any bolts unless instructed to do so. Tightening too soon may prohibit parts from fitting together. All Hex Nuts should be on the inside of the grill unless stated otherwise. Un- pack all contents in a well cleared and padded area.
- Page 14 Step 1: Assemble the Leg Cross Bar, Short Leg, Long Leg, and Leg Braces then secure them with four 2 1/4” Hex Bolts, four Flat Washers, four Lock Washers, and four Hex Nuts. Orient the Leg so that the holes on the Legs and Leg Cross Bar are pointing in the direction of the Leg Braces Side, see Below.
- Page 15 Holes on Leg Cross Bars Correct Orientation Top View of Assembly Step 3: Place Bottom Shelf between the four legs and secure it to the legs with four Lock Washers and four 1/2” Hex Bolts. The Hex Bolt should goes on the top hole on the Bottom Shelf Base.
- Page 16 Step 4: Install one Flat Washer, Cotter Pin, and Hub Cap onto the Axle then slide the Axle through the Wheels, Legs, and Bottom Shelf as shown below. Finish by attaching 2nd Washer, Cotter Pin and Hub Cap. Wheels Hub Cap Flat Washer Flat Washer Cotter Pin...
- Page 17 Step 6: Attach the Grill Bodies to the previous assembly cart using four Lock Washers, four Flat Washers, and four 1/2” Hex Bolts per Grill Body from the inside of the Grill Bodies. The Gas Grill Body should be on the Wheel side see below. NOTE: The orientation of the Grill Body should be as shown Below.
- Page 18 Step 7: Install the Catch Pan onto the bottom of the Gas Grill Body by sliding the Catch Pan underneath the Grill Body bottom. Making sure that the Brackets on the Catch Pan rest on top of Slider Brackets. Slid the Catch Pan all the way till you can hang the Catch Pan side bracket onto the Stopper Bracket.
- Page 19 Step 9: Install the Burners into the Gas Grill Body by inserting the IGNITER WIRES and Burn- ers through the open holes at the front of the Grill Body from inside of the Grill Body, see figure 9A. (NOTE: IGNITER MUST BE ON BOTTOM SIDE OF BURNER). The BURNER with the longer wire goes on the right side of the GRILL BODY.
- Page 20 Step 10: Connect the Igniter Wires to the receptors on the Electronic Igniter underneath the Control Panel. Any Wire can goes into any of the three receptors on the Electronic Igniter. Electronic Igniter Control Panel Igniter Wires Step 11: Install the Condiment Basket to the Charcoal Grill Body using four Lock Washers and four 1/2”...
- Page 21 Step 12: Install the Damper Circle to the side of the Charcoal Grill Body using one 1/2” Bolt, two Flat Washers, one Lock Washer, and one Hex Nut see below. Flat Washers Hex Nut Lock Washer Damper Circle Hex Bolt Step 13: Attach the Side Handle to the side of the Charcoal Grill Body using two 1/2”...
- Page 22 Step 14: Attach the Hood Handles to the Gas Grill Hood and Charcoal Grill Hood with two Lock Washers and two Wing Nuts per handle. Then attach the Thermometer and Bezels to the Grill Hoods. The Thermometer goes through the Bezel then the Grill Hood and secure with a Wing Nuts.
- Page 23 Step 16: Attach the Grill Hoods to the Grill Bodies using Shoulder Bolts, Clevis Hinge, and Hinge Pins. First Place the Gas Grill Hood on the Gas Grill Body in the closed position and screw the left side hinge with a Shoulder Bolt. Place the Charcoal Grill Hood in the closed position and screw the right side hinge with a Shoulder Bolt.
- Page 24 Step 17: To install the Warming Racks first attach the eight 1 1/2” Hex Bolts and eight Hex Nuts onto the Grill Bodies and Grill Hoods. Then Position the Warming Racks onto the Hex Bolts and Secure them with eight more Hex Nuts, one on each bolt. Hex bolts Hex Nuts Hex Nuts...
- Page 25 Step 18: Set the Pot Stand in place over the Side Burner. Next place the three Flare-Up Shields in place over the Main Burner Tubes then hang Ash Pan/Fire Grate Hangers on the hanger tabs on the side of the Charcoal Grill Body. Pot Stand Fire Grate Hangers...
- Page 26 Step 20: Slide one Grease Tray into place on the guide rails underneath the Side Burner Body and the other Grease Tray underneath the Catch Pan. Side Burner Body Grease Trays Catch Pan Step 21: Insert and screw in the Wing Bolt into the hole on the side of the Bottom Shelf. And insert the Utensils Hooks into the holes on the front of Side Burner Body.
- Page 27 Step 22: Unscrew the Igniter Push Button and insert a “AA” battery into the hole, making sure that the negative side of the battery going in first. Then screw back the Igniter Push But- ton. Igniter Push Button “AA” Battery Step 23: Tighten all NUTS and BOLTS.
- Page 28 Fully Assembled Caution: Use only the regulator provided! If a replacement is necessary, please call our customer service department, 912- 638-4724. Do NOT use replacement parts that are not intended for this grill. Hint: The paper label that is affixed to the hood is more easily removed when the hood is warm.
- Page 29 OPERATING INSTRUCTIONS Setting Up Set grill up on solid, fl at surface with adequate wind shelter. Keep grill at least 0.5m from nearest wall. Protect LP cylinder from direct sunlight and keep away from heat sources (max. 122° F ). Do not move grill while hot, and do not leave unattended during operation.
- Page 30 Connecting the Gas Cylinder to the Grill This appliance is only suitable for use with low-pressure butane or propane gas or LPG mixtures, fi tted with the appropriate low-pressure regulator via a fl exible hose. The hose should be secured to the regu- lator and the appliance with hose clips.
- Page 31 Lighting Instructions Always open hood while igniting grill. If grill does not light, always wait 5 minutes for gas to clear before relighting. Failure to do either may result in an explosive fl are-up, which can cause serious bodily injury or death. Once lit, but before cooking on grill for fi rst time, let grill sit for 15 minutes with hood closed.
- Page 32 Lighting Burner with a Match 1. Push in and rotate knob to HIGH position 2. Place match in match holder installed on side of grill housing. Once lit, place fl ame through cooking grates near burner ports, as shown. Burner should light immediately.
- Page 33 Cylinders must be stored outdoors in an upright position and out of the reach of children. The cylinder must never be stored where temperatures can reach over 121° F. Do not store the cylinder near fl ames, pilot lights or other sources of ignition. DO NOT SMOKE NEAR A GAS CYLINDER. Again, this appliance is designed for use outdoors, away from any fl...
- Page 34 CLEANING AND CARE CAUTION: All cleaning and maintenance should be done while grill is completely cool and with gas cylinder valve completely closed. DO NOT clean any grill part in a self-cleaning oven. The extreme heat will damage the fi nish. Recommended Cleaning Materials •...
- Page 35 • Ashes left in bottom of CHARCOAL GRILL for too long hold moisture and may cause rust if not cleaned out. • GRILL is made of steel and cast iron, which WILL rust, especially without proper care. • Do not use self-starting charcoal, as it gives off an unnatural fl avor. Burn lighter fl uid off completely before cooking.
- Page 36 GAS GRILL TROUBLESHOOTING Problem Possible Cause Prevention/Cure Burner will not light with Obstruction of gas fl ow Clean burner tubes AND match. Check for bent or kinked hose Disengagement of burner to Re-engage burner and valve valve Insects in venturi (burner Clean venturi insert) Burner ports clogged or...
- Page 37 GAS GRILL TROUBLESHOOTING Problem Possible Cause Prevention/Cure Low gas pressure Change propane tank Excess fl ow valve tripped Flare-Up Grease build-up Clean grill Excessive fat in meat Tri8m fat before grilling Excessive cooking tempera- Lower temperature accord- ture inglyExcessive cooking Tem- perature Persistent grease fi...
- Page 38 This Page Intentionally Left Blank...
- Page 39 GRILLING RECIPES Know Your Cuts of Meat...
- Page 40 Direct Heat • Direct Heat is a high heat method used to cook foods that take less than 25 minutes to cook. Typically, this means foods that are relatively small or thin such as steaks, chops, boneless chicken breasts, fish fillets, hamburgers, etc. •...
- Page 41 • Grill for 20 minutes. Sear with lid open and fire grate in high (hot) position for 1 minute on each side before lowering grate and closing lid. • To SMOKE, place birds in center of GRID with fire in both ends of FIRE BOX. KABOBS: •...
- Page 42 SHRIMP (Peeled) & CRAYFISH: • Place on skewers. • Coat with melted butter and garlic salt. • Grill 4 minutes on each side or until pink. Cocktail sauce optional. BAKED POTATOES: • Rub with butter and wrap in foil and cook on grill with lid down for 50 minutes. •...
- Page 43 Pan not included. Disposable bread pan is recommended. SMOKE BY COOKING SLOWLY (See chart above). 1. Place water/drip pan on left side of fire grate. 2. Place hot coals on right side (damper end) of fire grate. The charcoal basket accessory helps confine coals to one side.
- Page 44 • Baste with ham glaze 3 or 4 times during last 30 minutes of cooking time. • Garnish with pineapple rings about 15 minutes before end of cooking time. SMOKED HOT DOGS STUFFED: • Slit hot dogs lengthwise, within 1/4 inch of each end. •...
- Page 45 • Add shrimp and/ or crayfish and smoke 45 minutes. SMOKED VEGETABLES: • Turnips, potatoes, carrots, okra, mushrooms, peeled onions, zucchini, squash, etc. • Put in pan and cover with water and cook for several hours while cooking the meat. Or place vegetables on grill and smoke for 50 minutes, either wrapped in foil or not.
- Page 46 mixture is very smooth. • Stir in 1/4 cup bottle gravy coloring (Kitchen Bouquet and Gravy Master) and 2 teaspoons Beau Monde seasoning (or substitute 1 teaspoon MSG and 1 teaspoon seasoned salt). • Allow meat to stand in marinade at room temperature for 2 hours or refrigerate up to 24 hours in a covered dish.
- Page 47 ACCESSORIES Cover Custom Fit Warming Rack Weather Resistant Increase Grill Area Protects Grill Finish Keeps Food Warm Cover Accommodates Side Shelf or Side Fire Box Side Fire Box Turn your charcoal grill into an au- thentic Texas-Style Offset Smoker in minutes! Rotisserie Charcoal Basket...
- Page 48 For pricing or to order accessories visit: www.CharGriller.com CALL: 912-638-4724 P.O. Box 30864 Sea Island, GA 31561 912-638-4724 www.CharGriller.com Service@CharGriller.com...
Need help?
Do you have a question about the Duo 5050 and is the answer not in the manual?
Questions and answers