Table of Contents
Advertisement
Quick Links
Advertisement
Table of Contents

Related Manuals for Rational iCombi Classic Series


Summary of Contents for Rational iCombi Classic Series
- Page 1 ® iCombi Classic Original instructions for use...
-
Page 3: Table Of Contents
Table of contents 1 Introduction ......................................... Product liability ......................................Target audience......................................Intended use........................................Using these instructions for use................................1.4.1 Explanation of symbols..................................1.4.2 Explanation of pictograms................................1.4.3 Explanation of warnings.................................. 1.4.4 Illustrations......................................1.4.5 Technical changes....................................2 General safety information..................................Safety information for units with gas line connections........................Personal protective equipment ................................ - Page 4 Accessing modes ......................................30 cooking parameter ....................................... 30 Additional functions..................................... 32 Steam ..........................................33 8.4.1 Cooking cabinet climate and temperature range........................33 8.4.2 Cooking with steam ..................................34 Combi mode ........................................34 8.5.1 Cooking cabinet climate and temperature range........................34 8.5.2 Cooking in Combi Steam mode ..............................
- Page 5 13.2 Querying unit data ....................................... 59 13.3 Problem resolution ...................................... 59 13.3.1 Error messages heating steam generator ..........................60 13.3.2 Error messages for gas units................................60 13.3.3 Error messages heating hot air ..............................61 13.3.4 Error messages humidity ................................61 13.3.5 Error messages CleanJet.................................
-
Page 6: Introduction
Do not use this unit outdoors. This unit must not be used for continuous mass industrial food production. All other usages of this cooking system are considered improper and dangerous. RATIONAL AG assumes no liability for consequences of improper use. -
Page 7: Explanation Of Warnings
1 | Introduction 1.4.3 Explanation of warnings The following warnings are used to advise you of potentially dangerous situations and how to avoid them. DANGER The word DANGER indicates a situation that will result in severe injuries or death. WARNING The word WARNING indicates a situation that could result in severe injuries or death. -
Page 8: General Safety Information
Do not use the cooking system if it is damaged in general, or if the connection cable is damaged. Damaged cooking systems are unsafe and could cause burns or other injuries. Do not use the unit if the glass on the cooking cabinet door is damaged. Contact your RATIONAL Service Partner and have the cooking cabinet door glass replaced. -
Page 9: Safety Information For Units With Gas Line Connections
2 | General safety information If there is food in the cooking cabinet that has already been brought up to serving temperature, do not load cold food into the cooking cabinet. Always use the manufacturer's cooking climate specifications when heating packaged food to serving temperature. -
Page 10: Working With The Unit
Initial start-up When you start your unit for the first time, it will have already been properly installed by a RATIONAL Service Partner, The self-test will have been completed, so the unit will be ready for use. Information related to installation is available in the installation manual included in delivery. -
Page 11: Maximum Load Capacities
3 | Working with the unit Maximum load capacities NOTE Damage to the unit due to overloading Exceeding the maximum load capacity may damage the unit. 1. Never load the unit past the maximum capacity specified here. Model Max. load capacity [lb] Max. -
Page 12: Loading The Unit Using The Mobile Oven Rack Or Mobile Plate Rack
3 | Working with the unit NOTE Protruding accessories Always make sure that accessories are pushed all the way into the cooking system. Otherwise, the internal glass pane may break when the cooking cabinet door is closed. 1. Open the cooking cabinet door. >... -
Page 13: Loading Combi-Duos Using The Mobile Oven Rack Or Mobile Plate Rack
3 | Working with the unit CAUTION Transport carts and mobile oven racks can move during loading or unloading Failing to activate the locking brakes before loading or unloading transport carts and mobile oven racks can result in them moving and injuring you. 1. - Page 14 3 | Working with the unit CAUTION Transport carts and mobile oven racks can move during loading or unloading Failing to activate the locking brakes before loading or unloading transport carts and mobile oven racks can result in them moving and injuring you. 1.
-
Page 15: Inserting Core Temperature Probes
3 | Working with the unit > The transport trolley lock is released. 14. Take the transport trolley away from the unit to its storage location. 15. Close the cooking cabinet doors. Make sure that the cooking cabinet doors are fully closed. Inserting core temperature probes This section describes how to work with the core temperature probe, as well as how to work with the optional, externally attachable core temperature probe. - Page 16 3 | Working with the unit Meat, e.g., steak Whole chicken Small products, e.g., stew meat Fish fillets Whole fish Vegetables, e.g., potatoes Meat, e.g., steak 1. Insert the core temperature probe into the food at an angle, so that the tip of the core temperature probe is in the thickest part of the product.
-
Page 17: Using The Hand Shower
3 | Working with the unit Make sure that the tip of the core temperature probe is not poking through the abdominal cavity of the chicken. Do not insert the core temperature probe into the thigh. Fish fillets 1. Insert the core temperature probe into the food at an angle, so that the tip of the core temperature probe is in the thickest part of the product. - Page 18 3 | Working with the unit The hand shower has two spray modes: spray (A) and jet (B). CAUTION The hand shower water and the hand shower itself may reach temperatures exceeding 140°F. Grasping heated parts or coming into contact with hot water may cause scalding injuries. 1.
-
Page 19: Removing Hinging Racks
3 | Working with the unit Removing hinging racks 1. Hold the hinging rack in the middle of the top trays. 2. Press the hinging rack upwards (A). 3. Tilt the left hinging rack in the cooking cabinet (B). 4. Take the hinging rack off the hinges and remove it from the cooking cabinet. 3.10 Integrated fat drain If your unit is equipped with an optional integrated fat drain, the dripping fast is collected in the cooking cabinet... -
Page 20: Sous-Vide Cooking
4 | Sous-vide cooking Sous-vide cooking In sous-vide cooking, food is prepared, seasoned, marinated and/or seared before being placed into a vacuum bag and cooked at a low temperature. The method results in very flavorful food which retains its natural color, vitamins and minerals, and the gentle cooking process minimizes cooking losses. -
Page 21: Finishing
5 | Finishing Finishing Finishing allows you to separate food production and service, giving you more flexibility to spend time on important things like planning, menu design, or creative plating. Finishing minimizes loss of quality caused by long holding periods, so your food always comes out tasting great. You can Finish exactly as much food as you currently need, so you can respond easily to changing guest numbers. - Page 22 5 | Finishing 2. Press this button: 3. Turn the central selection knob to set the cooking cabinet humidity level you want. 4. Press the central selection knob to confirm your selection. > The cooking parameter selector will automatically jump to cooking temperature 5.
-
Page 23: The Icombi Classic
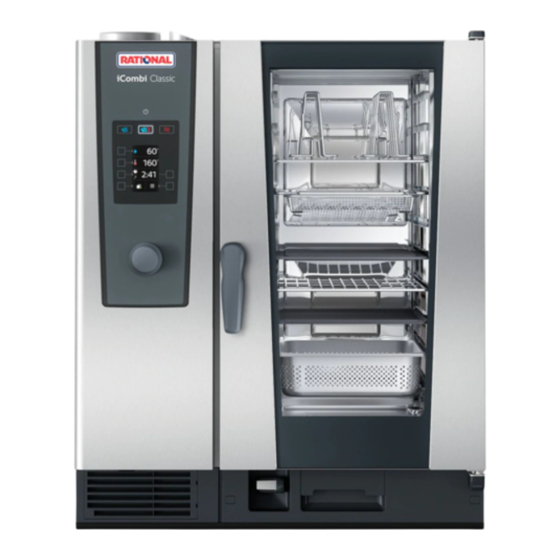
6 | The iCombi Classic The iCombi Classic Cooking cabinet Control panel Display Cooking cabinet door Central selection knob Door handle Hand shower USB port care drawer Air filter Type 10 half size Type 6 half size Type 6 full size Type 10 full size Original instructions for use 23 / 76... -
Page 24: Programming Mode
7 | Programming mode Programming mode Programming mode allows you to create and save your own custom cooking programs. You can save up to 100 custom programs. Each program can include up to 12 individual cooking steps. For you this means it is easy to use, no checking, no monitoring. -
Page 25: Creating A New Program
7 | Programming mode Program Steps Settings Step 2 Cooking cabinet temperature: 285°F Cooking cabinet humidity: 60% Fan speed: 4 Core temperature: 160°F Step 3 Operation mode: Hot air Cooking cabinet temperature: 285°F Cooking cabinet humidity: 60% Fan speed: 4 Cooking time: 1 minute Plate Finishing Step 1... - Page 26 7 | Programming mode 4. Use the central dial to enter the program name. You can use any combination of upper- and lower-case letters or numbers. To switch between keyboard options, press this button: ABC 5. To correct your entry, press this button: 6.
-
Page 27: Starting A Program
7 | Programming mode 7. To program another cooking step, press this button: > The buttons for the operating modes will begin blinking. 8. Choose an operating mode and finish programming the cooking step. Adding another cooking step 1. Press this button: >... -
Page 28: Deleting A Program
7 | Programming mode 3. Turn the central selection knob and choose a program. 4. Press this button: 5. Press this button: 6. To rename a cooking path, make your changes and then press this button to confirm the edit: >... -
Page 29: Uploading And Downloading Programs
7 | Programming mode 3. Rotate the central selection knob until the program is in the spot you want it. 4. Press the central selection knob to confirm your selection. Uploading and downloading programs You can download programs you have created on one cooking system and transfer them to another iCombi Classic. -
Page 30: Preparing Food
8 | Preparing food Preparing food Accessing modes Operating modes Cooking cabinet humidity Cooking cabinet temperature cooking time core temperature Menu Additional functions The following operating modes are available to you: – Steam [} 34] – Combi mode [} 35] – Hot air [} 36] The following cooking parameters [} 30] are available to you: –... - Page 31 8 | Preparing food 3. Press the central selection knob to confirm your selection. Cooking cabinet temperature Use this cooking parameter to adjust the cooking cabinet temperature. Whenever the heating element is activated in order to achieve the set cooking cabinet temperature, this symbol will be displayed: ...
-
Page 32: Additional Functions
8 | Preparing food Additional functions Preheating This additional function preheats the cooking cabinet to create a heat buffer. This is how to set the temperature you want the unit to preheat to. 1. Press this button: 2. Press this button: 3. -
Page 33: Steam
8 | Preparing food losses. You can set the differential anywhere between 50°F and 104°F. The smaller the difference between the cooking cabinet temperature and the core temperature, the more slowly and gently the food will cook. The greater the difference between the cooking cabinet temperature and the core temperature, the quicker the food will cook. Either a target temperature or a desired cooking time can be set. -
Page 34: Cooking With Steam
8 | Preparing food 8.4.2 Cooking with steam 1. Press this button: 2. Press this button: 3. The icon is set as the default for the boiling temperature and symbolizes it visually. 4. Turn the selection dial to set the cooking cabinet temperature you want. 5. -
Page 35: Cooking In Combi Steam Mode
8 | Preparing food 8.5.2 Cooking in Combi Steam mode 1. Press this button: 2. Press this button: 3. Turn the central selection knob to set the cooking cabinet humidity level you want. 4. Press the central selection knob to confirm your selection. >... -
Page 36: Cooking With Hot Air
8 | Preparing food Cooking cabinet climate cooking method Cooking cabinet humidity Cooking cabinet temperature Browning Glazing If the cooking cabinet temperature remains above 500°F for 30 minutes, it will automatically be reduced to 500°F if you do not work with the unit during that time. Taking action within those 30 minutes (opening the cooking cabinet door, for example) will reset the timer - the cooking cabinet temperature will be kept above 500°F for another 30 minutes. -
Page 37: Settings
9 | Settings Settings Accessing settings 1. On the home screen, press this button: 2. Press this button: You can change the following settings: Setting the temperature unit [} 37] Set date and time [} 38] 1. To call up additional settings, press this button: You can change the following settings: Switching the keyboard [} 39] 1. -
Page 38: Set Date And Time
9 | Settings 1. On the home screen, press this button: 2. Press this button: 3. Press the button and choose °C or °F. Set date and time You can change the following settings: Date in format DDMMYYYY Time in format HH:MM Real-time format in 12-hour or 24-hour format 1. -
Page 39: Switching The Keyboard
9 | Settings Changing the date 1. Press this button: > The DD will begin blinking. 2. Turn the central selection knob to adjust the day. 3. Press the central selection knob to confirm your selection. 4. Repeat the process to set the month and year. Changing the time 1. -
Page 40: Flushing The Hand Shower
9 | Settings 1. On the home screen, press this button: 2. Press this button: 3. Press this button: twice. 4. Press this button: 5. Turn the central dial to select a sound profile. 6. Press the central selection knob to confirm your selection. Setting buzzer volume 1. -
Page 41: Kitchen Management
10 | Kitchen management Kitchen management 10.1 Hygiene management 10.1.1 Recorded HACCP data The following HACCP data is recorded for each batch: Batch number Cooking system model Serial number Software and help version Date and time cleaning program Rinse hand shower Cooking cabinet temperature Target core temperature Measured core temperature... -
Page 42: Connecting Units To A Network
10 | Kitchen management 4. Press this button: HACCP >> Your HACCP data will be downloaded as a .txt file. After downloading the data, you can open it in a word processing program or a spreadsheet program. 10.2 Connecting units to a network General: Your iCombi Classic can be connected to a network. - Page 43 10 | Kitchen management The DHCP number, IP address, subnet mask, gateway, and DNS are displayed here. The MAC address is shown here as well. For example, the network connection can be assigned in a company environment using the unique identifier of the network adapter of the iCombi Classic (MAC address)..
- Page 44 10 | Kitchen management The current connection status and the most recent network connection will be displayed. = not connected = connected Searching for or changing networks Use the search option to view and select previously saved networks or find new networks. 44 / 76 Original instructions for use...
- Page 45 10 | Kitchen management To establish a connection, select a network and confirm by pressing Enter the WiFi password. Confirming input or canceling: Original instructions for use 45 / 76...
- Page 46 10 | Kitchen management Use the selection dial to select letters, numbers, and special characters. Press the dial to confirm your selection. Press to confirm your input. Press to cancel your selection. Connecting to the ConnectedCooking cloud: Your iCombi Classic can be registered on ConnectedCooking using an individual activation code. The activation code is generated by the cooking system;...
-
Page 47: Establish Wlan Connection
10 | Kitchen management Press the button to generate an activation code. INFO:If no activation code is displayed, press again to generate a new one. It may take a few seconds for the code to appear. After that, you can use the code to connect your cooking system to ConnectedCooking. Once the cooking system has been connected, it will be displayed in ConnectedCooking. -
Page 48: Connecting The Network Cable
10 | Kitchen management 2. Press this button: Network 3. To activate the function, press this button: ON 4. Press this button: WiFi > A list of all available wireless networks is shown. Wireless networks will be shown in descending order of signal strength. - Page 49 10 | Kitchen management 4. Screw on the protective cover. Original instructions for use 49 / 76...
-
Page 50: Automatic Cleaning
11 | Automatic cleaning Automatic cleaning Your iCombi Classic is equipped with an automatic cleaning system. Choose a cleaning program, insert the displayed number of Active Green tabs and care tabs, and your unit will clean itself. At the same time, the integrated care system keeps the steam generator free of scale. -
Page 51: Starting Automatic Cleaning
11 | Automatic cleaning cleaning program Description Care product required strong Suitable for removing heavy Active Green cleaner tabs soiling or significant limescale Care tabs buildup that has occurred during cooking paths involving grilling or frying. Rinse without tabs Used to rinse the cooking cabinet –... - Page 52 11 | Automatic cleaning WARNING! Danger of chemical burns! Wear mouth protection and chemical-resistant gloves to protect yourself reliably when working with Active Green cleaner tabs and care tabs. Unwrap the indicated number of Active Green cleaner tabs and place them into the drain sieve in the cooking cabinet. 9.
-
Page 53: Canceling Automatic Cleaning
Green cleaner tabs, use fewer tabs the next time you run automatic cleaning. If foam continues to build up, please contact your RATIONAL Service Partner. You can use the LED lighting to illuminate the cooking cabinet during cleaning. To activate lighting, press this button: 11.4... - Page 54 11 | Automatic cleaning 2. Open the cooking cabinet door. WARNING! Risk of chemical burns! Wear close-fitting protective goggles and chemical-resistant gloves to protect yourself reliably when working with Active Green cleaner tabs. Remove the Active Green cleaner tabs from the cooking cabinet and dispose of them. 4.
-
Page 55: Care
12 | Care Care WARNING Accumulated grease or food residue in the cooking cabinet Failure to clean the cooking cabinet sufficiently could result in food residue or accumulated grease creating a fire hazard. 1. Clean the unit daily. 2. If a fire breaks out, leave the cooking cabinet door closed in order to cut off the fire’s oxygen supply. Switch the unit off. -
Page 56: Cleaning The Cooking Cabinet Door
12 | Care Undiluted alcohol, methanol, or solutions such as acetone, benzene, toluene, or xylene Oven cleaner or grill cleaner Pot scrubber with steel wool Steel wool High-pressure cleaning jets Sharp or pointed tools 12.4 Cleaning the cooking cabinet door Cooking cabinet door gasket Glass panel lock LED covers... -
Page 57: Cleaning The Hand Shower
1. Open the cooking cabinet door. 2. To clean the drip pan and the discharge spout, pour 1-2 quarts of warm water into the drip pan daily. 3. Use cleaning products recommended by RATIONAL and a soft cloth. 12.7 Cleaning the air filter... -
Page 58: Cleaning Accessories
12 | Care 1. Insert a screwdriver into the notches on the air filter cover (A). 2. Remove the cover on the air filter. 3. Pull out the air filter (B). 4. Clean the air filter in the dishwasher and then allow it to dry completely. >... -
Page 59: Inspiration And Help
Telephone help ® ChefLine Whenever you have application or recipe questions, we’d be happy to provide assistance through our ChefLine. We offer quick, straightforward advice from one chef to another, 365 days a year. Just call the RATIONAL ® ® ChefLine . -
Page 60: Error Messages Heating Steam Generator
Error messages for gas units If your unit is equipped with a gas connection, the following additional error messages may occur. Please contact your RATIONAL Service Partner [} 59] regarding all error messages. Always have the serial number of your unit ready. -
Page 61: Error Messages Heating Hot Air
13 | Inspiration and help Error report Cause Cooking possible Gas burner failed close gas Close the shut-off mechanism of the gas supply line. Service 33.3 The gas burner is malfunctioning. Gas burner failed close gas Close the shut-off mechanism of the gas supply line. -
Page 62: Error Messages Cleanjet
13 | Inspiration and help Error report Cause Cooking possible Humidity control failed Service 42.2 The water supply is malfunctioning. Solenoid valve failed Service 43.2 The internal water supply is not closing. Only hot air mode is available. Solenoid valve failed 13.3.5 Error messages CleanJet Error report... -
Page 63: Notification Centre
13 | Inspiration and help Steam generator too cold Hot air The minimum steam generator Only hot air mode is available. possible temperature has not been reached. Initialise timer The CPU’s real time clock is not initialized. Set the date and time. Battery low The battery is defective. -
Page 64: Error Messages When Operating The Ultravent
Error messages when operating the UltraVent The following error messages may occur when operating your unit with an UltraVent. Please contact your RATIONAL Service Partner [} 59] regarding all error messages. Always have the serial number of your unit ready. Error message... -
Page 65: Maintenance
14 | Maintenance Maintenance You can perform the following maintenance yourself: Replacing air filters [} 65] Replacing the cooking cabinet door seal [} 66] 14.1 Replacing air filters NOTE Do not use sharp objects Do not use sharp objects such as knives to open the air filter cover, as this could damage the filter holder. NOTE Spraying water may penetrate into the unit if the air filter is not inserted correctly Correct attachment of the air filter is the only way of protecting the unit from water spraying in any direction. -
Page 66: Replacing The Cooking Cabinet Door Seal
14 | Maintenance 14.2 Replacing the cooking cabinet door seal Open the cooking cabinet door. 2. Pull the cooking cabinet door gasket out from the groove and dispose of it. 3. Moisten the retaining lips of the new gasket with soapy water. 4. -
Page 67: Transport
15 | Transport Transport 15.1 Emptying the steam generator You will need to drain the steam generator before transporting your cooking system. 1. Disconnect the cooking system from the water supply. 2. On the home screen, press this button: 3. Press this button: 4. - Page 68 15 | Transport CAUTION Units may tip over when transported over thresholds or non-level surfaces Pushing units across thresholds or along non-level surfaces can result in the unit tipping over and injuring you. 1. Exercise caution when moving units across thresholds or on non-level surfaces. CAUTION Units and Combi-Duos on castors can tip over when being transported or moved If your unit or Combi-Duo is on castors or a stand with castors, failing to release the locking brake before...
-
Page 69: Decommissioning And Disposal
16 | Decommissioning and disposal Decommissioning and disposal 16.1 Decommissioning If you want to take your unit out of operation, please contact your RATIONAL Service Partner. 16.2 Disposal Old cooking systems contain recyclable materials. Dispose of old cooking systems in an environmentally safe way, using appropriate collection systems. -
Page 70: Technical Data
17 | Technical data Technical data Please also note the technical information on the identification plate, which is to the left of the control panel. 17.1 Units with electrical connections Value Weight (without packaging) Model 6-half size Weight (without packaging) Model 6-full size Weight (without packaging) Model 10-half size Weight (without packaging) Model 10-full size Protection class... -
Page 71: Units With Gas Connections
17 | Technical data Directive 2011/65/EU on the restriction of the use of certain hazardous substances in electrical and electronic equipment, including 2015/863/EU This unit conforms to the following European standards: EN 60335-1:2012 + A11:2014 + A13:2017 EN 60335-2-42:2002 + A1:2008 + A11:2012 EN 61000-3-2:2014;... -
Page 72: Regulatory Information
18 | Regulatory Information Regulatory Information Canada This device complies with Industry Canada license-exempt RSS standard(s). Operation is subject to the following two conditions: (1) this device may not cause interference, and (2) this device must accept any interference, including interference that may cause undesired operation of the device. -
Page 73: Directory Of Keywords
Directory of keywords Air filter Gas smell 9 Cleaning 58 Hand shower 18 Care Spray 18 Accessories 58 Care products Suitable cleaners 55 Maintenance Unsuitable cleaners 55 Replace gasket 66 Cleaning Replacing air filters 65 Air filter 58 Cooking cabinet door 56 Cooking cabinet door gasket 56... - Page 76 RATIONAL AG Siegfried-Meister-Straße 1 86899 Landsberg am Lech Tel. +49 (0)8191 3270 Fax +49 (0)8191 21735 info@rational-online.com rational-online.com...
Need help?
Do you have a question about the iCombi Classic Series and is the answer not in the manual?
Questions and answers