
Related Manuals for AZ-Delivery CNC Shield V3


Summary of Contents for AZ-Delivery CNC Shield V3
- Page 1 Welcome! Thank you for purchasing our AZ-Delivery CNC Shield V3. On the following pages, you will be introduced to how to use and set up this handy device. Have fun!
- Page 2 Areas of application Education and teaching: Use in schools, universities and training institutions to teach the basics of electronics, programming and embedded systems. Research and development: Use in research and development projects to create prototypes and experiments in the fields of electronics and computer science. Prototype development: Use in the development and testing of new electronic circuits and devices.
- Page 3 consult a doctor. Caution: Keep the product out of the reach of children and pets to avoid accidental contact and swallowing of small parts. Note: Store the product in a safe, closed container when not in use. Attention: Avoid contact of the product with food and drinks.
-
Page 4: Table Of Contents
Table of Contents Introduction....................3 Specifications....................4 Features......................5 The pinout.....................6 Extra pins....................7 CNC Shield V3....................8 Stepper driver modules.................9 Component assembly..................10 Jumper Settings...................11 End - Stop configuration................14 Current Limit adjustment for Stepper driver..........15 (Reference voltage).................15 Stepper motors....................16 How to set-up Arduino IDE................17 Library for Arduino IDE................21... -
Page 5: Introduction
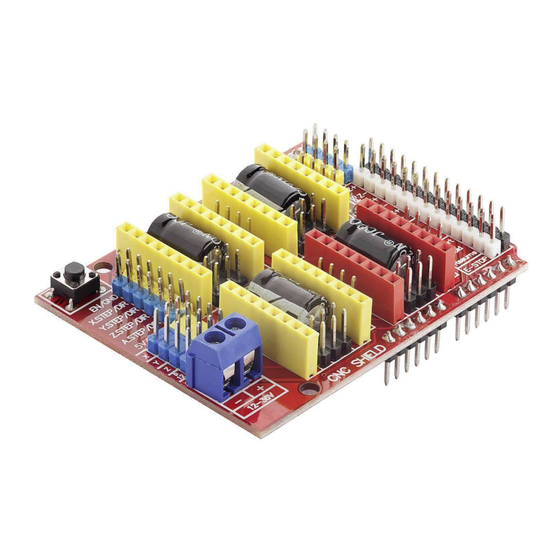
Introduction The CNC Shield V3.0 Bundle consists of CNC Shield for Atmega328p and 4 A4988 stepper motor driver modules. The CNC Shield V3.0 can be used as drive expansion board for stepper motor drivers. There are 4 slots on the board for stepper motor driver modules, and each stepper motor needs only two I/O ports. -
Page 6: Specifications
Specifications Minimum operating voltage Maximum operating voltage Continuous Current per phase Maximum current per phase Current limit adjustment Analog trim pot Micro-step resolutions Full, 1/2, 1/4, 1/8, 1/16, and 1/32 steps Connectors Screw terminal and molex connectors Logic operating voltage range 3.3V, 5V Operating temperature 0 to 40°C... -
Page 7: Features
Features • Atmega328p CNC Shield Version 3 • GRBL compatible. (Open source firmware that runs on an Atmega328p that turns G-Code commands into stepper signals (link) • 4-Axis support (X, Y, Z , A - Can duplicate X, Y, Z or do a full 4th axis with custom firmware using pins D12 and D13) •... -
Page 8: The Pinout
The pinout CNC Shield V3.0 has Atmega328p compatible pins. The pinout is shown on the following image: WARNING: Beware the orientation of driver boards. Wrong orientation will destroy the driver module. - 6 -... -
Page 9: Extra Pins
Extra pins Limit switch pins have been doubled up so that each axis has a “Top/+” • and “Bottom/-”. This makes it easier to install two limit switches for each axis. (For use with a normally open switch) E-Stop – These pins can be connected to an emergency stop switch. •... -
Page 10: Cnc Shield V3
CNC Shield V3 The CNC Shield is designed to take advantage of the demand for a low cost controller solution for DIY CNC machines. It was designed to be 100% compatible with GRBL, Open-source, G-code interpreter, and fit onto the popular Atmega328p. -
Page 11: Stepper Driver Modules
Stepper driver modules Stepper driver modules in this bundle are based on A4988 driver chips. The A4988 is a complete micro-stepping motor driver with built-in translator for easy operation. It is designed to operate bipolar stepper motors in full-step, half-step, quarter-step, eighth-step, and sixteenth-step modes, with an output drive capacity of up to 35V and ±2A. -
Page 12: Component Assembly
Component assembly 1. Insert the CNC Shield into the Atmega328p making sure the correct pins of the CNC Shield are inserted into correct Atmega328p headers. 2. Micro stepper settings may be setup for wanted application and place the jumpers as required. 3. -
Page 13: Jumper Settings
Jumper Settings Jumpers are used to configure the 4th Axis, micro stepping configuration. - 11 -... - Page 14 The micro stepping can be configured for each axis. In the table below High indicates that a jumper is inserted and Low indicates that no jumper is inserted. The following table are jumper settings configuration for A4988 stepper driver: Microstep resolution Full step High Half step...
- Page 15 Using two jumpers the 4th axis can be configured to clone the X or Y or Z axis. It can also run as an individual axis by using Digital Pin 12 for stepping signal and Digital Pin 13 as direction signal. Clone X-Axis to the 4th stepper driver (Marked as A) Clone Y-Axis to the 4th stepper driver (Marked as A) Clone Z-Axis to the 4th stepper driver (Marked as A)
-
Page 16: End - Stop Configuration
End - Stop configuration By default, GRBL is configured to trigger an alert, if an end-stop goes low (Gets grounded). End-stop switch is standard always open switch. These pins are used for EMERGENCY BUTTON connection. - 14 -... -
Page 17: Current Limit Adjustment For Stepper Driver
Current Limit adjustment for Stepper driver (Reference voltage) The way to set the current limit by measuring the voltage on the “ref” pin and to calculate the resulting current limit (the current sense resistors are 0.100Ω). The current limit relates to the reference voltage as follows: Current Limit = VREF ×... -
Page 18: Stepper Motors
Stepper motors When the stepper drivers are enabled they will make funny vibrating noises. This is normal. For more details have a look at this wiki page. The stepper drivers will get warm and need cooling if they are going to be used for long periods. -
Page 19: How To Set-Up Arduino Ide
How to set-up Arduino IDE If the Arduino IDE is not installed, follow the link and download the installation file for the operating system of choice. The Arduino IDE version used for this eBook is 1.8.13. For Windows users, double click on the downloaded .exe file and follow the instructions in the installation window. - Page 20 For Linux users, download a file with the extension .tar.xz, which has to be extracted. When it is extracted, go to the extracted directory and open the terminal in that directory. Two .sh scripts have to be executed, the first called arduino-linux-setup.sh and the second called install.sh.
- Page 21 Almost all operating systems come with a text editor preinstalled (for example, Windows comes with Notepad, Linux Ubuntu comes with Gedit, Linux Raspbian comes with Leafpad, etc.). All of these text editors are perfectly fine for the purpose of the eBook. Next thing is to check, if your PC can detect an Atmega328p board.
- Page 22 If the Arduino IDE is used on Windows, port names are as follows: For Linux users, for example port name is /dev/ttyUSBx, where x represents integer number between 0 and 9. - 20 -...
-
Page 23: Library For Arduino Ide
Library for Arduino IDE To use the CNC Shield Bundle with Atmega328p it is recommended to download an external library. The library that is used in this eBook is called the GRBL, that can be downloaded on the following link. When the .zip file is downloaded, open Arduino IDE and go to: Sketch >... - Page 24 Internet. If you are looking for the high quality microelectronics and accessories, AZ-Delivery Vertriebs GmbH is the right company to get them from. You will be provided with numerous application examples, full installation guides, eBooks, libraries and assistance from our technical experts.
Need help?
Do you have a question about the CNC Shield V3 and is the answer not in the manual?
Questions and answers