
Subscribe to Our Youtube Channel
Related Manuals for LEXIBOOK RP010BB


Summary of Contents for LEXIBOOK RP010BB
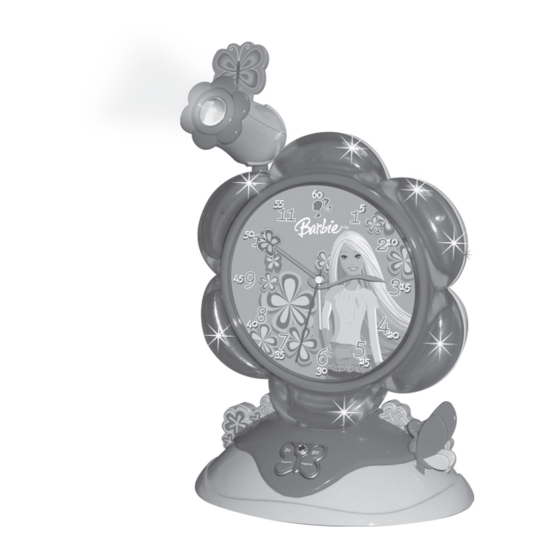
- Page 1 BARBIE ANALOGUE PROJECTOR CLOCK RÉVEIL PROJECTEUR BARBIE OWNER’S MANUAL GUIDE D’UTILISATION RPB010BB RP010BB.indd 1 18/10/07 19:22:55...
-
Page 2: Mise En Garde
(même les amplificateurs). 6. Ne tentez pas d’outrepasser la mesure de sécurité de la fiche polarisée ou de la prise de terre. Une fiche polarisée possède deux broches, dont l’une est plus large que l’autre. Une fiche avec prise de terre possède deux broches plates et une troisième broche ronde pour la prise de terre. -
Page 3: Sources D'alimentation
10. Confiez tout appel de service à un centre de service autorisé. Vous aurez besoin de placer un appel de service si l’appareil a été endommagé de quelque façon que ce soit, par exemple, si la fiche d’alimentation est endommagée, si du liquide a été échappé ou si des objets sont tombés dans le boîtier, si celui-ci a été... -
Page 4: Fonction Veilleuse
FONCTION PROJECTEUR 1. Insérez la cartouche Barbie de votre choix dans le projecteur. 2. Appuyez sur le bouton On en forme d’aile de papillon situé sur la face avant de l’horloge pour allumer le Projecteur. 3. Ajustez l’angle de projection et le bouton de mise au point jusqu’à ce que l’image apparaisse nettement sur le mur ou le plafond. -
Page 5: Garantie
GARANTIE Ce produit est couvert par notre garantie de deux ans. Pour toute mise en œuvre de la garantie ou de service après-vente, vous devez vous adresser à votre revendeur muni de votre preuve d’achat. Notre garantie couvre les vices de matériel ou de montage imputables au constructeur à l’exclusion de toute détérioration provenant du non-respect de la notice d’utilisation ou de toute intervention intempestive... - Page 6 A grounding-type plug has two blades and a third grounding prong. The wide blade or the third prong are provided for your safety. If the provided plug does not fit into your outlet, consult an electrician for replacement of the obsolete outlet. This product should be operated only from the type of power source indicated on the marking label.
-
Page 7: Power Sources
11. This unit should not be exposed to dripping or splashing water and no object filled with liquids such as vases should be placed on the unit. Never push objects of any kind into this unit through any openings. 12. Use only with the cart, stand, tripod, bracket or table specified by the manufacturer, or sold with the apparatus. -
Page 8: Projector Function
2. Press the butterfly-shaped On button located on the front of the clock to switch on the projector. 3. Adjust the angle of the projector and rotate the focus knob to rotate the projection to the right angle. 4. Press the butterfly-shaped Off button to switch off the projector. -
Page 9: Warranty
NOTE: Please keep this instruction manual, it contains important information. This product is covered by our two-year warranty. To make use of the warranty or the after-sales service, please contact your retailer and supply proof of purchase. Our warranty covers material or installation-related defects... -
Page 10: Instrucciones De Seguridad
(incluyendo amplificadores) que generen calor. 9. No anule la función de seguridad del enchufe polarizado o de tipo con toma de tierra. Un enchufe polarizado tiene dos conectores planos, uno más ancho que el otro. Un enchufe con toma de tierra tiene dos conectores más una tercera borna para tierra. -
Page 11: Fuentes De Alimentación
caído. - Page 12 10. Rueda de puesta en hora - Para ajustar la hora, gire la rueda de ajuste de la hora hasta que las manecillas se sitúen en la hora correcta.
- Page 13 ¡Los aparatos eléctricos desechados son reciclables y no deben ser eliminados en la basura doméstica! Por ello pedimos que nos ayude a contribuir activamente en el ahorro de recursos y en la protección del medio ambiente entregando este aparato en los centros de colección (si existen).
- Page 14 9. Não tente fazer pressão numa ficha polarizada ou de ligação à terra. Uma ficha polarizada tem dois dentes, um mais largo do que o outro. Uma ficha de ligação à terra tem dois dentes e um terceiro dente de ligação à terra. O terceiro dente mais largo serve para sua segurança. Se a ficha fornecida não couber na sua tomada, consulte um electricista para substituir a tomada obsoleta.
-
Page 15: Fontes De Alimentação
à chuva ou humidade e caso o desempenho da unidade tenha mudado ou diminuído. -
Page 16: Localização Dos Controlos
9. Botão de acerto do despertador - Para acertar o alarme, rode o botão do alarme até que a mão vermelha pequena indique as horas correctas. 10. Botão de acerto das horas - Para acertar as horas, rode o botão de acerto das horas até que as mãos apresentem as horas correctas. - Page 17 Este produto está coberto pela nossa garantia de dois anos. Para qualquer reclamação de garantia ou serviço após venda, é favor contactar o seu fornecedor local com a sua prova de compra. A nossa garantia cobre todos os defeitos de fabrico ou de montagem imputáveis ao fabricante mas não cobre a deterioração pelo não respeito do Manual de Instruções ou mau manuseamento do produto (tal...
-
Page 18: Precauzioni Di Sicurezza
Una spina di messa a terra presenta due lame ed un dente di messa a terra. La lama ampia o il terzo dente sono forniti per la vostra sicurezza. Nel caso in cui la spina fornita non si adattasse alla vostra presa, rivolgersi ad un elettricista per la sostituzione della presa vecchia. -
Page 19: Fonti Di Alimentazione
Non buttare le batterie nel fuoco. Rimuovere le batterie se non si usa il gioco per molto tempo. Sostituire le batterie quando il suono diventa debole o il gioco non funziona. -
Page 20: Posizione Dei Comandi
2. Premere il pulsante On a forma di farfalla posizionato sulla parte anteriore dell’orologio per accendere il proiettore. 3. Regolare l’angolo del proiettore e ruotare la rotella della messa a fuoco per ruotare la posizione all’angolo corretto. 4. Premere il pulsante Off a forma di farfalla per spegnere il proiettore. -
Page 21: Garanzia
Gli apparecchi elettrici vecchi sono materiali pregiati, non rientrano nei normali rifiuti domestici! Preghiamo quindi i gentili clienti di contribuire alla salvaguardia dell’ambiente e delle risorse e di consegnare il presente apparecchio ai centri di raccolta competenti, qualora siano presenti sul territorio. - Page 22 7. Blockieren Sie die Belüftungsöffnungen nicht. Nehmen Sie die Installation entsprechend der Herstelleranweisungen vor. 8. Stellen Sie das Gerät nicht in der Nähe von Wärmequellen, wie Radiatoren, Heizkörpern, Öfen und ähnlichen Produkten auf (darunter Verstärker), die Wärme abstrahlen könnten. 9. Beschädigen Sie die Sicherheitsvorrichtung des geerdeten Stecker bitte nicht. Bei einem geerdeten Erdungsstecker ist ein Stecker breiter als der andere.
- Page 23 Kerbe aus und schieben Sie die Stifte des Steckers vollständig in die Steckdose. 1. Öffnen Sie die Batteriefachabdeckung auf der Rückseite der Uhr mit einem Schraubendreher. 2. Legen Sie eine LR6/AA Batterie (nicht enthalten) ein und achten Sie dabei auf die Markierungen für die korrekte Polarität im Batteriefach.
- Page 24 Einstellen der Weckzeit solange, bis die kleine rote Hand die gewünschte Zeit anzeigt. 10. Drehknopf zum Einstellen der Zeit - Um die Uhrzeit zu stellen, drehen Sie das Drehrad zum Einstellen der Uhrzeit solange, bis die Hand die gewünschte Zeit anzeigt.
-
Page 25: Garantie
GARANTIE Die Garantiezeit für dieses Gerät beläuft sich auf 2 Jahre. Um die Garantie oder den Kundendienst in Anspruch zu nehmen, setzen Sie sich bitte mit Ihrem Händler oder Lieferanten in Verbindung oder senden Sie das Gerät an die unten angegebene Adresse ein. Fügen Sie Ihren Kaufbeleg bei. Unsere Garantie bezieht sich auf Material- und Verarbeitungsfehler des Herstellers, nicht jedoch auf Ver- schleiß, Nichteinhaltung der Anleitungen, unautorisierte Arbeiten am Gerät und dessen Bestandteilen... - Page 26 7. Blockieren Sie die Belüftungsöffnungen nicht. Nehmen Sie die Installation entsprechend der Herstelleranweisungen vor. 8. Stellen Sie das Gerät nicht in der Nähe von Wärmequellen, wie Radiatoren, Heizkörpern, Öfen und ähnlichen Produkten auf (darunter Verstärker), die Wärme abstrahlen könnten. 9. Beschädigen Sie die Sicherheitsvorrichtung des geerdeten Stecker bitte nicht. Bei einem geerdeten Erdungsstecker ist ein Stecker breiter als der andere.
- Page 27 De Barbie Projectiewekker werkt met een gelijkstroomadapter voor de projector en met een 1 X LR6/ AA-batterij (niet inbegrepen) voor de klok. OPGEPAST: plaats de contactpin in het contact en duw de pin volledig in het contact om een elektrische schok te voorkomen.
- Page 28 1. Stop een Barbieprojectie in de projector. 2. Druk op de vlinderknop “Aan” op de voorzijde van de klok om de projector aan te schakelen. 3. Pas de hoek van de projector aan en draai de focusknop om de projectie in de goede hoek te zetten.
- Page 29 Niet langer bruikbare electrische apparaten kunnen gerecycleerd worden en mogen niet weggegooid worden met het gewone huisvuil! Gelieve actief de bescherming van bronnen te ondersteunen en deel te nemen in de bescherming van het milieu door dit toestel terug te zenden naar een verzamelcentrum (indien aanwezig).
Need help?
Do you have a question about the RP010BB and is the answer not in the manual?
Questions and answers