
Related Manuals for Molecular Devices QPix 400 Series


Summary of Contents for Molecular Devices QPix 400 Series
- Page 1 QPix 450 or QPix 460 Microbial Colony Picking System User Guide 5031498 N June 2024...
- Page 2 For research use only. Not for use in diagnostic procedures. The trademarks mentioned herein are the property of Molecular Devices, LLC or their respective owners. These trademarks may not be used in any type of promotion or advertising without the prior written permission of Molecular Devices, LLC.
-
Page 3: Table Of Contents
Contents Safety Information Warnings, Cautions, Notes, and Tips Symbols on the Instrument Before Operating the Instrument Electrical Safety Ultraviolet (UV) Light Safety Magnet Safety External or Implanted Medical Device Safety Chemical and Biological Safety Moving Parts Safety Heat and Burn Safety Cleaning and Maintenance Chapter 1: Introduction Functionality of the QPix 450 or 460 System... - Page 4 QPix 450 or QPix 460 Colony Picking System User Guide Setting Up Stacker Lanes for Static Holder Usage Chapter 5: Sanitizing the Instrument Interior Running Sanitise Processes Running UV Sanitise Processes Creating and Editing Sanitise Profiles Chapter 6: Picking Processes Creating and Editing Picking Processes Running Picking Processes Chapter 7: Blue-White Picking Processes...
- Page 5 Chapter 15: Rearraying Processes Creating and Editing Rearraying Processes Running Rearraying Processes Chapter 16: Gridding Processes Creating and Editing Gridding Processes Running Gridding Processes Chapter 17: Data Viewer Processes Finding Data in the Database Displaying the Settings for Routines Working With Tags Adding Annotations to Routines, Receptacles, and Locations Exporting Data and Settings Working With Plate Properties...
- Page 6 QPix 450 or QPix 460 Colony Picking System User Guide Appendix A: Replacement Parts and Optional Extras Appendix B: Technical Specifications Appendix C: System Diagrams and Dimensions Electromagnetic Compatibility 5031498 N...
-
Page 7: Safety Information
When warnings and cautions are displayed in this guide, be careful to follow the specific safety information related to them. The following user-attention statements can be displayed in the text of Molecular Devices user documentation. Each statement implies a particular amount of observation or recommended... -
Page 8: Symbols On The Instrument
For products under the requirement of the WEEE directive, contact your dealer or local Molecular Devices office for the procedures to facilitate the proper collection, treatment, recovery, recycling, and safe disposal of the device. -
Page 9: Before Operating The Instrument
Electrical Safety To prevent electrically related injuries and property damage, inspect all electrical equipment before use and immediately report all electrical deficiencies. Contact Molecular Devices Technical Support to service equipment that requires the removal of covers or panels. WARNING! HIGH VOLTAGE. -
Page 10: Magnet Safety
QPix 450 or QPix 460 Colony Picking System User Guide Magnet Safety Persons with external or implanted medical devices need to evaluate the risks related to these devices before entering an area where the instrument is in use. Keep magnetic storage devices or strips, such as hard drives and credit cards, away from the instrument. -
Page 11: Moving Parts Safety
Safety Information Moving Parts Safety To prevent injury due to moving parts, observe the following: Never try to exchange labware, reagents, or tools while the instrument is operating. Never try to physically restrict the moving components of the instrument. Keep the interior of the instrument clear to prevent obstruction of the movement. The motors use high-powered magnets. -
Page 12: Cleaning And Maintenance
Unplug the instrument if there is a fluid spill in the instrument and contact Technical Support. Perform only the maintenance tasks described in this guide. Contact a Molecular Devices service engineer to inspect and perform a preventive maintenance service on the instrument each year. -
Page 13: Chapter 1: Introduction
Functionality of the QPix 450 or 460 System The QPix 450 or 460 system is part of the QPix 400 series. The QPix 450 or 460 system offers a range of features to accommodate various requirements for picking of microbial colonies including multiple imaging modes, organism-specific pins, agar height sensor, and specific algorithms to detect variable biological samples. - Page 14 The fluorescent imaging system lets you add fluorescent intensity parameters in the selection criteria. WARNING! If the instrument is used in a manner not specified by Molecular Devices, the protection provided by the equipment might be impaired. Filters The QPix 450 or 460 system supports the following filter options:...
-
Page 15: Chapter 2: Qpix 450 Or 460 System Instrument Overview
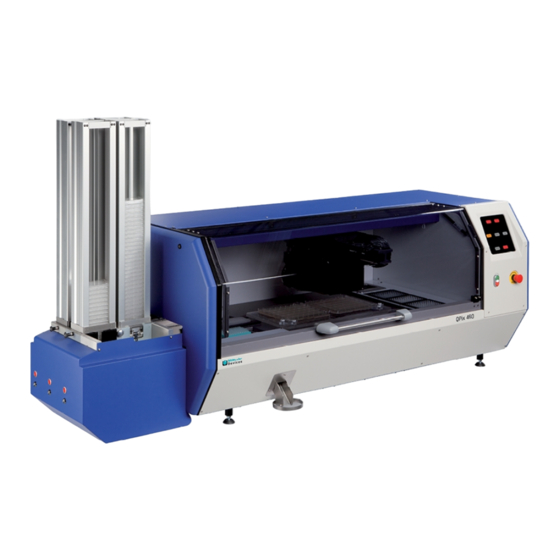
Chapter 2: QPix 450 or 460 System Instrument Overview The QPix 450 Microbial Colony Picking System or QPix 460 Microbial Colony Picking System is constructed within a welded steel framework. Before you operate the instrument or perform maintenance operations, make sure you are familiar with the safety information in this guide. -
Page 16: Front Panel Controls And Display
QPix 450 or QPix 460 Colony Picking System User Guide Front Panel Controls and Display Front Panel Controls and Display Item Description 1 Backlit indicator panel 2 START button 3 STOP button 4 Emergency Stop button 5 Power status 6 Instrument (robot) status 7 ... -
Page 17: Stackers Overview
Chapter 2: QPix 450 or 460 System Instrument Overview Stackers Overview A stacker lane and cassettes allow the instrument to run processes with multiple plates. You can have up to three stacker lanes built into the system. Stacker cassettes are tall metal cases designed to hold multiple plates and lid pairs. - Page 18 QPix 450 or QPix 460 Colony Picking System User Guide Two types of stacker cassettes are available: Standard Cassettes: Identified by a silver base, used for standard and shallow plates in standard lanes. Deep Cassettes: Identified by a blue base, used for deep-well plates in deep lanes. The stacker lanes are configured for either standard or deep plates and lid pairs.
-
Page 19: Instrument Connections
Chapter 2: QPix 450 or 460 System Instrument Overview Instrument Connections The power, data, and compressed air connections are on the right side of the instrument. Connection Ports and Fuses Item Description 1 Power Inlet: Instrument Mains 2 Power Outlets: Computer and Monitor 3 ... -
Page 20: Compressed Air Supply
QPix 450 or QPix 460 Colony Picking System User Guide Compressed Air Supply Compressed air is required for the picking movement of the picking pins. It is also used to operate the stackers. Laboratories with built-in compressed air systems can connect directly to the filter-regulator inlet on the side of the QPix instrument. -
Page 21: Computer System Requirements
Chapter 2: QPix 450 or 460 System Instrument Overview Computer System Requirements The QPix Microbial Colony Picking System Software version 2.7.3 and higher requires the following computer specifications: Minimum Computer System Requirements Item Description Operating System Windows 11 Windows 10, 64-bit Windows 7, 32-bit Memory 8 GB RAM Data Connection... - Page 22 QPix 450 or QPix 460 Colony Picking System User Guide 5031498 N...
-
Page 23: Chapter 3: Qpix Microbial Colony Picking System Software Overview
Chapter 3: QPix Microbial Colony Picking System Software Overview The QPix® Microbial Colony Picking System Software controls the QPix 450 Microbial Colony Picking System or QPix 460 Microbial Colony Picking System. To start the software, from the computer desktop, double-click the QPix Microbial Colony Picking System Software icon. -
Page 24: Menu Options
QPix 450 or QPix 460 Colony Picking System User Guide Menu Options The menu options on the Navigation page depend on the view and selections on the page. File Menu Open Process: Displays the Open dialog where you select and open a saved process file. Save Process: Saves the settings for the current process. -
Page 25: New Process Options
Chapter 3: QPix Microbial Colony Picking System Software Overview New Process Options The New Process tab on the Navigation page provides options to create and manage processes and system maintenance. The processes depend on the system licenses. Gridding Processes Gridding: Deposits liquid samples from one or more source plates to one or more destination surfaces using either agar filled QTrays or filters. - Page 26 QPix 450 or QPix 460 Colony Picking System User Guide Rearraying Processes Rearraying: Re-deposits liquid samples between one or more source and destination plates to consolidate selected wells into plates in an ordered fashion. See Rearraying Processes on page 193. Data Viewer Processes Data Viewer: Allows you to search and view a process or routine that was previously run on the instrument.
-
Page 27: Integrating Qpix Microbial Colony Picking System Software With Qpix Insights Software
Chapter 3: QPix Microbial Colony Picking System Software Overview Integrating QPix Microbial Colony Picking System Software With QPix Insights Software When you use the QPix Microbial Colony Picking System Software with the QPix® Insights Software, you must configure the QPix Microbial Colony Picking System Software to integrate the two software applications. - Page 28 QPix 450 or QPix 460 Colony Picking System User Guide 5. Click Add to display the Create Verb dialog. 6. Click the Verb Type drop-down and select Genetix.Fusion.Modules.QPixSeries.QPixOutputVerb. 7. In the Name field, enter QPixOutput. Note: QPixOutput is case sensitive. 8.
-
Page 29: Chapter 4: Starting And Setting Up The Instrument
Chapter 4: Starting and Setting Up the Instrument The QPix 450 Microbial Colony Picking System or QPix 460 Microbial Colony Picking System must be located in a well-ventilated area. The instrument is installed by approved personnel with the software pre-installed on the system computer. See Technical Specifications on page 243. - Page 30 QPix 450 or QPix 460 Colony Picking System User Guide Every time you use the instrument, the three axes sequentially run through their Initialize drives routine. This allows the drives to find their respective home positions. The system must complete this routine without interference to ensure that there is no damage to the instrument or its auxiliary equipment.
-
Page 31: Preparing To Run Processes
Chapter 4: Starting and Setting Up the Instrument Preparing to Run Processes You should do regular and thorough cleaning and maintenance of the QPix 450 or 460 instrument to ensure that it functions correctly. See Maintenance on page 219. Before you run a process: 1. -
Page 32: Changing The Head
QPix 450 or QPix 460 Colony Picking System User Guide Changing the Head The head is housed in an actuator system that permits easy exchange and set-up of the head. Although it is possible to manually move the actuator assembly, you should use the software to safely move the actuator into position to remove or install the head. - Page 33 Chapter 4: Starting and Setting Up the Instrument Removing the Head To remove the head: 1. Unscrew and remove the thumbscrew and washer on the left that secures the head to the actuator assembly. 2. Grab the handle on the right and slide the head out of the actuator. 3.
-
Page 34: Setting Up Stacker Cassettes
QPix 450 or QPix 460 Colony Picking System User Guide Setting Up Stacker Cassettes There are two removable stacking cassettes per stacker lane, a source cassette for the stack of unprocessed source plate and lid pairs, and a destination cassette to collect the stack of processed plate and lid pairs. - Page 35 Chapter 4: Starting and Setting Up the Instrument 3. Lift the stacker cassette up and off the source cassette base and set it on a secure surface low enough to allow you to load it with a stack of prepared plates and lid pairs. 4.
- Page 36 QPix 450 or QPix 460 Colony Picking System User Guide 5. Verify and adjust the stack alignment in the cassette by running your fingers up the front and the back of the stack. The stack should feel smooth and appear level. Check Stack Alignment 6.
- Page 37 Chapter 4: Starting and Setting Up the Instrument 9. Lock the source stacker cassette onto the base by turning clockwise the silver cassette locking knob on the source stacker base. Note: If you have more than one stacker lane, the single silver source locking knob locks all the source cassettes simultaneously.
- Page 38 QPix 450 or QPix 460 Colony Picking System User Guide 3. Lock the destination cassette. To lock, pull out, twist, and push in the black locking knob at the back of the lane. Destination Cassette Lock Knob in Locked Position After Installing Destination Cassette 4.
- Page 39 Chapter 4: Starting and Setting Up the Instrument Loading the Source Stacker Cassette Using the X3533 Tool Use the X3533 Stacking and Unstacking Tool to safely load plates into a stacker cassette. To load plates into a source stacker cassette using the X3533 tool: 1.
- Page 40 QPix 450 or QPix 460 Colony Picking System User Guide 3. Remove one of the support pins from the jig. 4. With one hand securing the top of the stack, slide the cassette up to the nearest support pin hole that lets the cassette enclose the stack without going too far over. Put the pin in the hole, and let the cassette rest on the pin.
- Page 41 Chapter 4: Starting and Setting Up the Instrument 7. Using two hands, carefully lift the loaded cassette off the X3533 jig and place the cassette on a stable, level surface. Lifting the Cassette off the Jig 8. Verify and adjust the stack alignment in the cassette by running your fingers up the front and the back of the stack.
-
Page 42: Finishing Stacker Cassette Usage
QPix 450 or QPix 460 Colony Picking System User Guide Finishing Stacker Cassette Usage At the end of a process, remove the destination stacker cassette from the instrument. Unload the stacker while it is off the instrument. When the instrument is not in use, keep the empty cassettes on the stacker bases rather than elsewhere off the instrument. - Page 43 Chapter 4: Starting and Setting Up the Instrument 3. Using two hands, lift a short stack of plate and lid pairs out of the top of the cassette and set them aside. To complete the removal, you might need to support and reorient the stack on the top of the cassette while you reposition your hands.
- Page 44 QPix 450 or QPix 460 Colony Picking System User Guide 3. Carefully lift the filled destination cassette off the destination cassette base and place it over the X3533 jig. Make sure that the bottom plate fits securely on the recessed platform edges, and that the cassette rests on the support pin.
- Page 45 Chapter 4: Starting and Setting Up the Instrument 5. Hold the cassette and remove the support pin. Hold Cassette and Move Support Pin 6. Slide the cassette down the jig to the next hole exposing a short stack. Unload Unenclosed Plate and Lid Pairs 7.
-
Page 46: Setting Up Stacker Lanes For Static Holder Usage
QPix 450 or QPix 460 Colony Picking System User Guide Setting Up Stacker Lanes for Static Holder Usage Selecting the Use Static Holder checkbox during the Stackers, Destination Stackers, or Head/Stackers step of the routine set up to bypass using the high-throughput automatic stacker lanes for the Picking, Rearraying, Replicating, Gridding, and Plating (QPix 460 only) processes. - Page 47 Chapter 4: Starting and Setting Up the Instrument Static Holder and Deep Lane Adapters Specifications Image Part Numbers Description Plate Type Use Lane Type X9150 Static Holder Any skirted Standard and plate Deep X9151 Non-Skirted PCR Plate Deep Lane Adapter Non-skirted Deep (Static Holder also required for use)
- Page 48 QPix 450 or QPix 460 Colony Picking System User Guide For example: When you run a process that specifies Use Static Holder, a prompt step displays when you need to manually load the static holder and plate at the end of the stacker lane in the routine. For example: 5031498 N...
- Page 49 Chapter 4: Starting and Setting Up the Instrument Setting up a Standard Stacker Lane for Static Holder Usage To manually load the static holder at the end of the stacker lane in the routine set up: 1. Place the static holder with the locking mechanism in the back onto the stacker lane. 2.
- Page 50 QPix 450 or QPix 460 Colony Picking System User Guide 5. Turn the locking mechanism handle away from you to lock the holder in place at the process deck end of the lane. 6. Verify that the holder is locked in place before you continue to run the process. CAUTION! The static holder cannot slide when locked properly.
-
Page 51: Chapter 5: Sanitizing The Instrument Interior
Running Sanitise Processes The Sanitise process cleans and sanitizes the picking pins on the installed picking head. Before running a Sanitise process, Molecular Devices recommends that you manually clean the instrument interior. To run a Sanitise process: 1. -
Page 52: Running Uv Sanitise Processes
QPix 450 or QPix 460 Colony Picking System User Guide Running UV Sanitise Processes The UV Sanitise process uses ultra-violet light to sanitize the instrument interior. Before you run a UV Sanitise process, you should manually clean the instrument interior. To run the UV Sanitise process: 1. -
Page 53: Creating And Editing Sanitise Profiles
Chapter 5: Sanitizing the Instrument Interior Creating and Editing Sanitise Profiles The QPix 450/460Microbial Colony Picking System provides a default Sanitise profile. You should edit the default profile to suit your needs. Sanitise profiles consist of two types of wash cycles: Multi Stage and Single Stage. Wash cycles can contain one or more wash-bath steps. - Page 54 QPix 450 or QPix 460 Colony Picking System User Guide Creating Sanitise Profiles Use the Manage Sanitise Profiles page to create, edit, or delete Sanitise profiles. To create a new Sanitise profile: 1. On the Navigation page under Utility Processes, double-click Manage Sanitise Profiles to display the Manage Sanitise Profiles page.
- Page 55 Chapter 5: Sanitizing the Instrument Interior Editing Sanitise Profiles To edit a Sanitise profile: 1. On the Navigation page under Utility Processes, double-click Manage Sanitise Profiles to display the Manage Sanitise Profiles page. 2. In the Profiles table, select the profile to edit. If the profile is a Single Stage profile, the Stages list displays First and Main Wash Cycle.
- Page 56 QPix 450 or QPix 460 Colony Picking System User Guide 3. In the Stages list, select the wash stage to edit and click Edit. 4. In the Steps area: Click Add to add a new wash-bath step to the end of the list. Select a step and click Remove to delete a wash-bath step.
-
Page 57: Chapter 6: Picking Processes
Depending on the features of your system, you can use either white light or fluorescence imaging for the picking processes. If you have a white light only system and want to add fluorescence capability, contact your Molecular Devices representative. See Obtaining Support on page 233. -
Page 58: Creating And Editing Picking Processes
QPix 450 or QPix 460 Colony Picking System User Guide Creating and Editing Picking Processes The procedures to create and edit standard or regional picking processes are very similar. The regional picking process has more options to define the regions for picking. If this is the first picking process, you must edit or create a Sanitise profile to use with the picking process. - Page 59 Chapter 6: Picking Processes Importing and Exporting Picking Routines The Select Routine list displays the routines that match the type of routine you are creating. For example, a white light and fluorescent imaging routine is not included in the Select Routine list if you are creating a White Light only routine.
- Page 60 QPix 450 or QPix 460 Colony Picking System User Guide Using a Barcode Reader Note: You should always use barcodes for accurate data tracking. To use a barcode reader: 1. Select the Use Barcode Reader checkbox to scan source and destination receptacles for barcodes.
- Page 61 Chapter 6: Picking Processes Random Identifiers To have the software generate random identifiers: 1. Clear the Use Barcode Reader checkbox. 2. Select the Generate Random Barcodes checkbox to have the software generate random barcodes with the prefix Auto for the source receptacles. No other parameters are required for this option.
- Page 62 To set destination plate options: 1. Click the Select Destination Microplate drop-don and select the plate type to inoculate with the picked colonies. Contact Molecular Devices to add a new plate type to the list. See Obtaining Support on page 233.
- Page 63 Chapter 6: Picking Processes 6. Under Destination Microplate Template, click Edit to define the wells to dip or skip. You can skip wells you use as blank or control wells. This template is used for all the destination plates during the picking routine. To skip a well, click the well.
- Page 64 QPix 450 or QPix 460 Colony Picking System User Guide Selecting the Head and Sanitizing Options Use the Head and Sanitise page to select the head and sanitizing options. To select the head and sanitizing options: 1. Click the Picking Head drop-down and select the head to use for the picking routine. 2.
- Page 65 Chapter 6: Picking Processes 6. Select the Limit Max. Number of Features Per Position checkbox. In the Max. Number of Features Per Position field, enter the maximum number of colonies to pick from a single QTray or Petri dish. Note: Setting a limit for the maximum number of colonies on the Source page prevents selecting a maximum number on the Feature Selection page when you run the picking routine.
- Page 66 QPix 450 or QPix 460 Colony Picking System User Guide Changing the Picking Head The Change Head page reminds you which picking to load, based on the Setting Summary routine you configure, and allows you to change the head. The head is housed in an actuator system that permits easy exchange and set-up of the head. Although it is possible to manually move the actuator assembly, you should use the software to safely move the actuator into position to remove or install the head.
-
Page 67: Running Picking Processes
Chapter 6: Picking Processes Running Picking Processes After you configure the picking routine, you can run the process on the instrument. Note: Before you run a picking process, it is important that you do the cleaning and set up procedures. See Preparing to Run Processes on page Some steps that are included in these procedures might not be available, depending on the features included with the instrument and license. - Page 68 QPix 450 or QPix 460 Colony Picking System User Guide To adjust the test image: 1. Click the Receptacle drop-down and select the number of the receptacle to view and then select the frame to view in the receptacle image below the list. The frame is in red. 2.
- Page 69 Chapter 6: Picking Processes 6. Select the Use Auto Thresholding checkbox to have the software automatically detect the colonies in the image. Clear the Use Auto Thresholding checkbox to manually detect the colonies. Drag the slider until the colonies are detected and the background is not. 7.
- Page 70 QPix 450 or QPix 460 Colony Picking System User Guide 11. Select the Display tab. 12. Click the Display drop-down: Select Image Only to display the detected colonies in white with yellow rings and a gray background. The yellow ring shows the colony detection. Select Image and Overlay to display the detected colonies in green with yellow rings and a gray background.
- Page 71 Chapter 6: Picking Processes 16. Adjust the Agar Depth. In the Agar Depth field, enter the depth that the picking head descends into the source agar. The Agar Height field displays the height, or thickness, of the detected agar within the source tray.
- Page 72 QPix 450 or QPix 460 Colony Picking System User Guide To adjust the test image: 1. Click the Receptacle drop-down and select the number of the receptacle to view and then click the frame to view in the receptacle image below the list. The frame is in red. 2.
- Page 73 Chapter 6: Picking Processes On the Feature Selection page, pickable objects display in yellow and unpickable object display in red outline. A colony can be considered unpickable if it is too close to the edge of the receptacle or it does not match the selection criteria. To view the details of a colony, hold the cursor over that colony to display the properties of that colony.
- Page 74 QPix 450 or QPix 460 Colony Picking System User Guide To change the selection of the system-chosen pickable objects that display in the image map, click to override the system-chosen and unchosen objects, and then click the objects in the image map to change.
- Page 75 Chapter 6: Picking Processes To undo all selections, click to display the Remove User Selections dialog. Click Yes. If you run a routine for white light and fluorescent imaging, two tabs are available. The White Light tab displays the image taken with white light. The other tab is labeled with the fluorescent filter pair and displays the image taken with fluorescent light.
- Page 76 QPix 450 or QPix 460 Colony Picking System User Guide 3. For a fluorescent image, adjust the Intensity Measure as shown in the histogram. This option is available only for instruments with a fluorescence imaging module. Mean Intensity: The average fluorescence of the detected colony (the fluorescence of all the pixels within the colony perimeter divided by the number of pixels within the colony perimeter).
- Page 77 Chapter 6: Picking Processes 9. Select the Shade Features checkbox to give the detected colonies some shading for clearer visualization. 10. Select the Display Proximity Indicators checkbox to display connecting red lines between a detected colony and its closest neighbor. 11.
- Page 78 QPix 450 or QPix 460 Colony Picking System User Guide 18. When the Finished Picking Current Batch dialog displays, select an option for how to continue, then click OK. Viewing the Picking Progress While the picking routine runs, the Picking Progress page displays a summary of the routine. Start Time: The time the picking of the colonies began.
- Page 79 Chapter 6: Picking Processes Continuing or Ending the Picking Routine After all the colonies are picked from the source receptacles and delivered to the destination plates, the Finished Picking Current Batch dialog displays. If there are no more source receptacles to pick, click Finish Picking and then click OK. To continue picking more source receptacles: 1.
- Page 80 QPix 450 or QPix 460 Colony Picking System User Guide Changing the Picking Head The Change Head page reminds you which picking to load, based on the Setting Summary routine you configure, and allows you to change the head. The head is housed in an actuator system that permits easy exchange and set-up of the head. Although it is possible to manually move the actuator assembly, you should use the software to safely move the actuator into position to remove or install the head.
-
Page 81: Chapter 7: Blue-White Picking Processes
Chapter 7: Blue-White Picking Processes The QPix 450 Microbial Colony Picking System or QPix 460 Microbial Colony Picking System can pick colonies from receptacles using either standard picking or regional picking. You can set up control wells for the destination plates before you run a picking process. On the Navigation page under Picking Processes, select Blue-White Picking to pick blue or white colonies from receptacles. - Page 82 QPix 450 or QPix 460 Colony Picking System User Guide Selecting Blue-White Picking Routines Use the Routines dialog to select a Blue-White picking routine. To select a Blue-White picking routine: 1. Select New Routine to create a new routine. 2. Select Run Existing Routine, then click the Select Routine drop-down and select an existing routine to run or to edit.
- Page 83 Chapter 7: Blue-White Picking Processes Exporting Routines To export a routine: 1. Click Export. 2. Navigate to the location that you want to save the .xml file. 3. You can change the name of the file. 4. Click Export to save the routine in .xml format. Selecting Barcode Options When you create or edit a routine for white light only, the Barcodes page displays.
- Page 84 QPix 450 or QPix 460 Colony Picking System User Guide Random Identifiers To have the software generate random identifiers: 1. Clear the Use Barcode Reader checkbox. 2. Select the Generate Random Barcodes checkbox to have the software generate random barcodes with the prefix Auto for the source receptacles. No other parameters are required for this option.
- Page 85 Chapter 7: Blue-White Picking Processes Setting Destination Plate Options Use the Destination Options page to set destination plate options. To set destination plate options: 1. Click the Select Destination Microplate drop-down and select the plate type to inoculate with the picked colonies. 2.
- Page 86 QPix 450 or QPix 460 Colony Picking System User Guide Selecting the Destination Stackers Use the Destination Stackers dialog to select the destination stackers. To select the destination stackers: 1. Click the rectangle that represents the stacker to use for the routine. The stacker rectangle changes from gray to red.
- Page 87 Chapter 7: Blue-White Picking Processes Setting Source Receptacle Options Use the Source page to set source receptacle options. To set source receptacle options: 1. Click the Holder drop-down and select the type of holder for the source receptacles on the instrument deck.
- Page 88 QPix 450 or QPix 460 Colony Picking System User Guide Changing the Picking Head The Change Head page reminds you which picking head to load, based on the Setting Summary routine you configure, and provides an opportunity to change the head. The head is housed in an actuator system that permits easy exchange and set-up of the head.
-
Page 89: Running Blue-White Picking Processes
Chapter 7: Blue-White Picking Processes Running Blue-White Picking Processes After you configure the blue-white picking routine, you can run the process on the instrument. Note: Before you run a picking process, it is important that you do the cleaning and set up procedures. - Page 90 QPix 450 or QPix 460 Colony Picking System User Guide To adjust the test image: 1. Click the Receptacle drop-down and select the number of the receptacle to view and then select the frame to view in the receptacle image below the list. The frame is in red. 2.
- Page 91 Chapter 7: Blue-White Picking Processes 6. To use Auto Select, click either Blue or White. Click the button as many times as required to intensify the target colonies. Generally, two or three clicks achieve the optimal value. Click Reset to restore the previous intensity settings. 7.
- Page 92 QPix 450 or QPix 460 Colony Picking System User Guide Selecting Blue-White Colonies for Picking After you adjust and refine test images, the system captures and processes a higher-resolution image using the test-image adjustments and then displays the Feature Selection page. On the Feature Selection page, pickable objects show in yellow and unpickable object show in red outline.
- Page 93 Chapter 7: Blue-White Picking Processes Click Export Image to save the image in .bmp, .jpg, or .png format. To select a smaller region of interest (ROI) in the image, draw a polygon around the region. To draw a polygon, click the Draw Polygon icon and then click the image to define the corners of the polygon.
- Page 94 QPix 450 or QPix 460 Colony Picking System User Guide When you click as an override, the yellow-marked pickable objects change to blue and become unpickable. To undo the selection, right-click over the image map and select Pick Item. The object changes to green and becomes pickable.
- Page 95 Chapter 7: Blue-White Picking Processes To select the colonies for picking: 1. From the list in the upper-right area, select the barcode or identifier of the receptacle to view. 2. Refine the colony Selection criteria. Compactness: Sets the level of irregularity for picking colonies. The value is a ratio of the perimeter divided by the area of the colony, so that irregular shaped colonies are closer to 0 and colonies that are more of a perfect circle are closer to 1.
- Page 96 QPix 450 or QPix 460 Colony Picking System User Guide 4. Change the pickable property of individual objects. To define an object as pickable, right-click the object and select Pick Item to display the object in green. To define an object as unpickable, right-click the object and select Discard Item to display the object in blue.
- Page 97 Chapter 7: Blue-White Picking Processes 15. On the Load Plates page, follow the instructions to verify that the plates are set up correctly. 16. Make sure that the instrument door is closed. 17. Click Next to start the picking process. 18.
- Page 98 QPix 450 or QPix 460 Colony Picking System User Guide Viewing the Picking Progress While the picking routine runs, the Picking Progress page displays a summary of the routine. Start Time: The time that the picking of the colonies began. Source Barcode: The barcode or identifier of the source receptacle being picked from.
- Page 99 Chapter 7: Blue-White Picking Processes Viewing the Picking Summary After picking routines complete, the Picking Summary page displays the number of source colonies picked, the number of destination plates used, and missing source receptacles. Click Export to save this information in .csv format. Click Details to view details of all activities related to the source and destination receptacles.
- Page 100 QPix 450 or QPix 460 Colony Picking System User Guide 5031498 N...
-
Page 101: Chapter 8: Zone Of Inhibition Detection Picking Processes
Chapter 8: Zone of Inhibition Detection Picking Processes The QPix 450 Microbial Colony Picking System or QPix 460 Microbial Colony Picking System can pick colonies from receptacles using either standard picking or regional picking. You can set up control wells for the destination plates before you run a picking process. From the Navigation page under Picking Processes, select Zone of Inhibition Detection Picking to pick colonies with detectable zones of inhibition from receptacles using the standard process. - Page 102 QPix 450 or QPix 460 Colony Picking System User Guide Selecting Zone of Inhibition Detection Picking Routines Use the Routines dialog to select a Zone of Inhibition Detection picking routine. To select a Zone of Inhibition Detection picking routine: 1. Select New Routine to create a new routine. 2.
- Page 103 Chapter 8: Zone of Inhibition Detection Picking Processes Exporting Routines To export a routine: 1. Click Export. 2. Navigate to the location that you want to save the .xml file. 3. You can change the name of the file. 4. Click Export to save the routine in .xml format. Selecting Barcode Options When you create or edit a White Light only routine, the Barcodes page displays.
- Page 104 QPix 450 or QPix 460 Colony Picking System User Guide Random Identifiers To have the software generate random identifiers: 1. Clear the Use Barcode Reader checkbox. 2. Select the Generate Random Barcodes checkbox to have the software generate random barcodes with the prefix Auto for the source receptacles. No other parameters are required for this option.
- Page 105 Chapter 8: Zone of Inhibition Detection Picking Processes Setting Destination Plate Options Use the Destination Options page to set destination plate options. To set destination plate options: 1. Click the Select Destination Microplate drop-down and select the plate type to inoculate with the picked colonies.
- Page 106 QPix 450 or QPix 460 Colony Picking System User Guide Selecting the Destination Stackers Use the Destination Stackers page to select the destination stackers. To select the destination stackers: 1. Click the rectangle that represents the stacker to use for the routine. The stacker rectangle changes from gray to red.
- Page 107 Chapter 8: Zone of Inhibition Detection Picking Processes Setting Source Receptacle Options Use the Source page to set the source receptacle options. To set the source receptacle options: 1. Click the Holder drop-down and select the type of holder to hold the source receptacles on the instrument deck.
- Page 108 QPix 450 or QPix 460 Colony Picking System User Guide Changing the Picking Head The Change Head page reminds you which picking head must be loaded, based on the Setting Summary routine you configure, and provides you an opportunity to change the head. The head is housed in an actuator system that permits easy exchange and set-up of the head.
-
Page 109: Running Zone Of Inhibition Detection Picking Processes
Chapter 8: Zone of Inhibition Detection Picking Processes Running Zone of Inhibition Detection Picking Processes After you configure a Zone of Inhibition Detection picking routine, you can run the process on the instrument. Note: Before you run a picking process, it is important that you do the cleaning and set up procedures. - Page 110 QPix 450 or QPix 460 Colony Picking System User Guide To adjust the test image: 1. Click the Receptacle drop-down and select the number of the receptacle to view and then select the frame to view in the receptacle image below the list. The frame is in red. 2.
- Page 111 Chapter 8: Zone of Inhibition Detection Picking Processes Selecting Zone of Inhibition Detection Colonies for Picking After you adjust and refine test images, the system captures and processes a higher-resolution image using the test-image adjustments and then displays the Feature Selection page. On the Feature Selection page, pickable objects show in yellow and unpickable object show in red.
- Page 112 QPix 450 or QPix 460 Colony Picking System User Guide Click View Feature Gallery to display all found colonies in a gallery. The first time the gallery opens, a message displays while the gallery thumbnails generate. This displays on the first opening for each run.
- Page 113 Chapter 8: Zone of Inhibition Detection Picking Processes To undo all your user selections, click to display the Remove User Selections dialog. Click Yes. To select the colonies for picking: 1. From the list in the upper-right area, select the barcode or identifier of the receptacle to view.
- Page 114 QPix 450 or QPix 460 Colony Picking System User Guide 3. Change the pickable property of individual objects. To define an object as pickable, right-click the object and select Pick Item to display the object in green. To define an object as unpickable, right-click the object and select Discard Item to display the object in blue.
- Page 115 Chapter 8: Zone of Inhibition Detection Picking Processes Viewing the Picking Progress While the picking routine runs, the Picking Progress page displays a summary of the routine. Start Time: The time that the picking of the colonies began. Source Barcode: The barcode or identifier of the source receptacle being picked from. Pin: The picking pin being used for the current picking operation.
- Page 116 QPix 450 or QPix 460 Colony Picking System User Guide 5031498 N...
-
Page 117: Chapter 9: Regional Picking Processes
Depending on the features of your system, you can use either white light or fluorescence imaging for the regional picking processes. If you have a white light only system and would like to add fluorescence capability, contact your Molecular Devices representative or technical support. See Obtaining Support on page 233. - Page 118 QPix 450 or QPix 460 Colony Picking System User Guide Selecting Regional Picking Routines Use the Routines dialog to select a Regional Picking routine. To select a Regional Picking routine: 1. Select New Routine to create a new routine. 2. Select Run Existing Routine, then click the Select Routine drop-down and select an existing routine to run or to edit.
- Page 119 Chapter 9: Regional Picking Processes Exporting Routines To export a routine: 1. Click Export. 2. Navigate to the location that you want to save the .xml file. 3. You can change the name of the file. 4. Click Export to save the routine in .xml format. Selecting Barcode Options and Filter Pairs for Fluorescent Imaging When you create or edit a routine for white light only, the Barcodes page displays.
- Page 120 QPix 450 or QPix 460 Colony Picking System User Guide Defining Unique Identifiers Without Barcodes To define unique identifiers without barcodes: Clear the Use Barcode Reader checkbox to define unique identifiers for source receptacles without scanning for barcodes. Random Identifiers To have the software generate random identifiers: 1.
- Page 121 Chapter 9: Regional Picking Processes Setting Destination Plate Options Use the Destination Plates page to set the destination plate options. To set the destination plate options: 1. Click the Select Destination Microplate drop-down and select the plate type to inoculate with the picked colonies.
- Page 122 Holder list, in which case the Receptacle option is preset and cannot be changed. If the type of source receptacle that you need is not listed, contact Molecular Devices to add a new source receptacle type. See Obtaining Support on page 233.
- Page 123 Chapter 9: Regional Picking Processes 3. Select the Deposit Strategy. Select Fill All Microplates to fill every selected well of a destination plate before starting a new destination plate. Select New Microplate for Each Position to start a new destination plate whenever the instrument starts picking from a different source QTray or Petri dish.
- Page 124 QPix 450 or QPix 460 Colony Picking System User Guide Selecting the Head and Sanitizing Options Use the Head and Sanitise page to select the head and sanitizing options. To select the head and sanitizing options: 1. Click the Picking Head drop-down and select the head for the picking routine. 2.
- Page 125 Chapter 9: Regional Picking Processes Changing the Picking Head The Change Head page reminds you which picking head must be loaded, based on the Setting Summary routine you configure, and allows you to change the head. The head is housed in an actuator system that permits easy exchange and set-up of the head. Although it is possible to manually move the actuator assembly, you should use the software to safely move the actuator into position to remove or install the head.
-
Page 126: Running Regional Picking Processes
QPix 450 or QPix 460 Colony Picking System User Guide Running Regional Picking Processes After you configure a regional picking routine, you can run the process on the instrument. If you have not configured the regional picking routine to run, you must create a new regional picking routine or edit a routine. - Page 127 Chapter 9: Regional Picking Processes To adjust the test image: 1. Click the Receptacle drop-down and select the number of the receptacle to view and then select the region to view in the receptacle image below the list. The region is in red. 2.
- Page 128 QPix 450 or QPix 460 Colony Picking System User Guide 11. Click the Display drop-down: Select Image Only to display the detected colonies in white with yellow rings and a gray background. Select Image and Overlay to display the detected colonies in green with yellow rings and a gray background.
- Page 129 Chapter 9: Regional Picking Processes Adjusting the Fluorescent Test Image If you run a routine for white light and fluorescent imaging, the Fluorescent Test Image page displays after you make adjustments for the white light test image. This option is available only for instruments with a fluorescence imaging module.
- Page 130 QPix 450 or QPix 460 Colony Picking System User Guide Selecting Colonies for Regional Picking After you adjust and refine test images, the system captures and processes a higher-resolution image using the test-image adjustments and then displays the Feature Selection page. On the Feature Selection page, pickable objects display in yellow and unpickable object display in red.
- Page 131 Chapter 9: Regional Picking Processes To change the selection of the system-chosen pickable objects that display in the image map, click to override the system-chosen and unchosen objects, and then click the objects in the image map to change. When you click as an override, the yellow-marked pickable objects change to blue and become unpickable.
- Page 132 QPix 450 or QPix 460 Colony Picking System User Guide To undo all selections, click to display the Remove User Selections dialog. Click Yes. If you run a routine for white light and fluorescent imaging, two tabs are available. The White Light tab displays the image taken with white light. The other tab is labeled with the fluorescent filter pair and displays the image taken with fluorescent light.
- Page 133 Chapter 9: Regional Picking Processes 3. For a fluorescent image, adjust the Intensity Measure as shown in the histogram. This option is available only for instruments with a fluorescence imaging module. Mean Intensity: The average fluorescence of the detected colony (the fluorescence of all the pixels within the colony perimeter divided by the number of pixels within the colony perimeter).
- Page 134 QPix 450 or QPix 460 Colony Picking System User Guide 10. Select the Display Numbers per Region checkbox to display the number of pickable colonies for each region on the receptacle image. If you do not place a limit on the number of colonies to pick for each region, all the numbers display in green.
- Page 135 Chapter 9: Regional Picking Processes Continuing or Ending the Regional Picking Routine After all colonies are picked from the source receptacles and delivered to the destination plates, the Finished Picking Current Batch dialog displays. If there are no more source receptacles to pick, click Finish Picking and then click OK. To continue picking more source receptacles: 1.
- Page 136 QPix 450 or QPix 460 Colony Picking System User Guide 5031498 N...
-
Page 137: Chapter 10: Blue-White Regional Picking Processes
Chapter 10: Blue-White Regional Picking Processes The QPix 450 Microbial Colony Picking System or QPix 460 Microbial Colony Picking System can pick colonies from receptacles using either standard picking or regional picking. You can set up control wells for the destination plates before you run a picking process. On the Navigation page under Picking Processes, select Blue-White Regional Picking to pick blue or white colonies from receptacles using the regional process. - Page 138 QPix 450 or QPix 460 Colony Picking System User Guide Opening the Blue-White Regional Picking Page To open the Blue-White Picking page: 1. On the Navigation page under Picking Processes, double-click the Blue-White Regional Picking icon to display the Blue-White Picking page. 2.
- Page 139 Chapter 10: Blue-White Regional Picking Processes Importing and Exporting Blue-White Regional Picking Routines The Select Routine list displays the routines that match the type of routine you are creating. For example, a white light and fluorescent imaging routine is not included in the Select Routine list if you are creating a White Light only routine.
- Page 140 QPix 450 or QPix 460 Colony Picking System User Guide 3. Use the Validation Barcode list to define the barcodes for source receptacles. If the scanned barcode on a source receptacle cannot be found in the list, a message displays. To manually enter the barcodes, enter each barcode in the field below the list and then click Insert.
- Page 141 Chapter 10: Blue-White Regional Picking Processes Generating an Identifier List Tip: The Preview area shows examples of the first and last generated identifiers. To generate a barcode identifier list: 1. In the Prefix field, enter text to describe the identifier. 2.
- Page 142 Holder list, in which case the Receptacle option is preset and cannot be changed. If the type of source receptacle that you need is not listed, contact Molecular Devices to add a new source receptacle type to the list. See Obtaining Support on page 233.
- Page 143 Chapter 10: Blue-White Regional Picking Processes Setting Regional Picking Source and Destination Options Use the Destination/Source Options page to set picking source and destination options. To set regional picking source and destination options: 1. Select the Limit Max. Number of Features Per Region checkbox and then in the Number of Features Per Region field, enter the maximum number of colonies to pick from a single source receptacle.
- Page 144 QPix 450 or QPix 460 Colony Picking System User Guide Selecting the Head and Sanitizing Options Use the Head and Sanitise page to select the head and sanitizing options. To select the head and sanitizing options: 1. Click the Picking Head drop-down and select the head to use for the picking routine. 2.
- Page 145 Chapter 10: Blue-White Regional Picking Processes Changing the Picking Head The Change Head page reminds you which picking head must be loaded, based on the Setting Summary routine you configure, and allows you to change the head. The head is housed in an actuator system that permits easy exchange and set-up of the head. Although it is possible to manually move the actuator assembly, you should use the software to safely move the actuator into position to remove or install the head.
-
Page 146: Running Blue-White Regional Picking Processes
QPix 450 or QPix 460 Colony Picking System User Guide Running Blue-White Regional Picking Processes After you configure a regional picking routine, you can run the process on the instrument. Note: Before you run a regional picking process, it is important that you do the cleaning and set up procedures in Preparing to Run Processes on page Some steps that are included in these procedures might not be available, depending on the... - Page 147 Chapter 10: Blue-White Regional Picking Processes To adjust the test image: 1. Click the Receptacle drop-down and select the number of the receptacle to view and then click the frame to view in the receptacle image below the list. The frame is in red. 2.
- Page 148 QPix 450 or QPix 460 Colony Picking System User Guide 9. In the Intensity Range table, select the Low Threshold value and the High Threshold value. To select the Low intensity value, move the red slider line left to the lowest value, and Ctrl+Click.
- Page 149 Chapter 10: Blue-White Regional Picking Processes Selecting Blue-White Colonies for Regional Picking After you adjust and refine test images, the system captures and processes a higher-resolution image using the test-image adjustments and then displays the Feature Selection page. On the Feature Selection page, pickable objects show in yellow and unpickable object show in red.
- Page 150 QPix 450 or QPix 460 Colony Picking System User Guide To change the selection of the system-chosen pickable objects that display in the image map, click to override the system-chosen and unchosen objects, and then click the objects in the image map to change.
- Page 151 Chapter 10: Blue-White Regional Picking Processes To undo all selections, click to display the Remove User Selections dialog. Click Yes. To select the colonies for picking: 1. From the list in the upper-right area, select the barcode or identifier of the receptacle to view.
- Page 152 QPix 450 or QPix 460 Colony Picking System User Guide 3. In the Limit Colonies field, enter the maximum number of colonies to pick from each receptacle. Note: If you previously set a limit for the maximum number of colonies on the Source page, the Limit Colonies option is not available on the Feature Selection page.
- Page 153 Chapter 10: Blue-White Regional Picking Processes Viewing the Regional Picking Progress While the regional picking routine is running, the Regional Picking Progress page displays a summary of the routine. Start Time: The time that the picking of the colonies began. Source Barcode: The barcode or identifier of the source receptacle.
- Page 154 QPix 450 or QPix 460 Colony Picking System User Guide Viewing the Regional Picking Summary After regional picking routines complete, the Regional Picking Summary page displays the number of source colonies picked, the number of destination plates used, and missing source receptacles.
-
Page 155: Chapter 11: Control Plate Creation Processes
Chapter 11: Control Plate Creation Processes The QPix 450 Microbial Colony Picking System or QPix 460 Microbial Colony Picking System can pick colonies from receptacles using either standard picking or regional picking. You can set up control wells for the destination plates before you run a picking process. On the Navigation page under Picking Processes, double-click Control Plate Creation to create a batch of plates that contain control samples. - Page 156 QPix 450 or QPix 460 Colony Picking System User Guide Selecting Control Plate Creation Routines Use the Routines dialog to select a Control Plate Creation routine: To select a Control Plate Creation routine: 1. Select New Routine to create a new routine. 2.
- Page 157 Chapter 11: Control Plate Creation Processes Exporting Routines To export a routine: 1. Click Export. 2. Navigate to the location that you want to save the .xml file. 3. You can change the name of the file. 4. Click Export to save the routine in .xml format. Selecting Barcode Options Note: You should always use barcodes for accurate data tracking.
- Page 158 QPix 450 or QPix 460 Colony Picking System User Guide Selecting the Destination Stackers Use the Destination Stackers page to select the destination stackers. To select the destination stackers: 1. Click the rectangle that represents the stacker to use for the routine. The stacker rectangle changes from yellow to red.
- Page 159 Chapter 11: Control Plate Creation Processes Defining the Control Wells Use the Control Plate page to define the control wells. To define the control wells: 1. Click a source receptacle on the left. 2. In the destination plate on the right, click the well or wells to place the control colonies from the receptacle.
- Page 160 QPix 450 or QPix 460 Colony Picking System User Guide Changing the Picking Head The Change Head page reminds you which picking head to load, based on the Setting Summary routine you configure, and provides an opportunity to change the head. The head is housed in an actuator system that permits easy exchange and set-up of the head.
-
Page 161: Running Control Plate Creation Processes
Chapter 11: Control Plate Creation Processes Running Control Plate Creation Processes After you configure control plate creation routine, you can run the process on the instrument. Note: Before you run a picking process, it is important that you do the cleaning and set up procedures in Preparing to Run Processes on page Some steps that are included in these procedures might not be available, depending on the... - Page 162 QPix 450 or QPix 460 Colony Picking System User Guide To adjust the test image: 1. Click the Receptacle drop-down and select the number of the receptacle to view and then click the frame to view in the receptacle image below the list. The frame is in red. 2.
- Page 163 Chapter 11: Control Plate Creation Processes 12. Select the method for viewing the detected colonies in the image. Click Image Only to display the detected colonies in white with yellow rings and a gray background. Click Image and Overlay to display the detected colonies in green with yellow rings and a gray background.
- Page 164 QPix 450 or QPix 460 Colony Picking System User Guide Note: During image processing, each object with no yellow ring in the test image is excluded from becoming a pickable object. Drag the Zoom slider below the image to get a closer look at the image and drag the Contrast slider to change the contrast between the objects and the background.
- Page 165 Chapter 11: Control Plate Creation Processes 5. Select the Feature Counts tab to view the number of found features in a source receptacle. The barcode or identifier for the source receptacle displays, along with the number of found colonies and the number of colonies to pick as determined by the selection criteria. To save the data in .csv format, right-click and select Export.
- Page 166 QPix 450 or QPix 460 Colony Picking System User Guide Continuing or Ending the Control Plate Creation Routine After the colonies are picked from the source receptacles and delivered to the destination plates, the Finished Picking Current Batch dialog displays. If there are no more source receptacles to pick, click Finish Picking and then click OK.
-
Page 167: Chapter 12: Manage Regional Tray Processes
Chapter 12: Manage Regional Tray Processes The QPix 450 Microbial Colony Picking System or QPix 460 Microbial Colony Picking System can pick colonies from receptacles using either standard picking or regional picking. You can set up control wells for the destination plates before running a picking process. On the Navigation page under Picking Processes, double-click Manage Regional Trays to add, modify, or remove new regional tray source definitions to the regional picking source type database, which you can select for use in the regional picking process. - Page 168 QPix 450 or QPix 460 Colony Picking System User Guide 4. Select the Defined Tray tab to see a visual representation of the parameters. 5. After you enter the tray dimensions and confirm the new tray is ready to save, click Create Regional Tray.
-
Page 169: Modifying Regional Trays
Chapter 12: Manage Regional Tray Processes Modifying Regional Trays Use the Manage Regional Trays page to edit or remove a regional tray. To modify a regional tray: 1. On the Navigation page under Picking Processes, double-click the Manage Regional Trays icon to display the New Plate Definition page. - Page 170 QPix 450 or QPix 460 Colony Picking System User Guide 5031498 N...
-
Page 171: Chapter 13: Plating Processes
Chapter 13: Plating Processes The QPix 460 Microbial Colony Picking System uses the plating process to aspirate liquid samples from source plates and then to dispense the liquid on the surface of agar in a 48- region divided QTray. The plating head spreads the sample from the source plate in defined patterns across the agar within each region of the destination receptacle. - Page 172 QPix 450 or QPix 460 Colony Picking System User Guide Selecting Plating Routines Use the Routines dialog to select a plating routine. To select a plating routine: 1. Select New Routine to create a new routine. 2. Select Run Existing Routine, then click the Select Routine drop-down and select an existing routine to run or to edit.
- Page 173 Chapter 13: Plating Processes Selecting Barcode Options You can scan source and destination receptacles for barcodes or define unique identifiers for source receptacles without scanning for barcodes. Using a Barcode Reader Note: You should always use barcodes for accurate data tracking. To use a barcode reader: 1.
- Page 174 QPix 450 or QPix 460 Colony Picking System User Guide Manually Create Identifiers To manually create an identifier list: 3. Clear the Use Barcode Reader checkbox. 4. Clear the Generate Random Barcodes checkbox. 5. Either: In the text field below the list, enter an identifier and click Insert. Click Import and then select the file from which to import the identifiers to import identifiers for the source receptacles from a text or .csv file.
- Page 175 Chapter 13: Plating Processes Setting Source and Destination Options Use the Source and Destination Options page to select source and destination options. To select source and destination options: 1. In the Source Microplate Options section, in the Select Microplate field, select the plate type for the source.
- Page 176 QPix 450 or QPix 460 Colony Picking System User Guide Selecting the Sanitise Options Use the Sanitise page to select the Sanitise options. To select the Sanitise options: 1. Click the Sanitise Profile drop-down and select the Sanitise profile to use for the plating routine.
-
Page 177: Running Plating Processes
Chapter 13: Plating Processes Running Plating Processes After you configure a plating routine, you can run the process on the instrument. Some steps that are included in these procedures might not be available, depending on the features included with the instrument and license. To run a plating routine: 1. -
Page 178: Creating And Editing Plating Patterns
QPix 450 or QPix 460 Colony Picking System User Guide Viewing the Plating Summary After plating routine completes, the Plating Process page displays the number of source wells from which samples were transferred to the destination receptacle. Click Details to view details of activities related to the source and destination receptacles. Click Export to save the detailed information in .csv format. -
Page 179: Calibrating Aspirated And Dispensed Liquid Volumes
Chapter 13: Plating Processes 4. In the grid, define a new path or edit the path. To start a new path, click the grid to set the starting point and then continue clicking the grid to define the path. A red line extends between each click point to indicate the path. To move a click point in a path, right-click the point and drag it to a new position on the grid. - Page 180 QPix 450 or QPix 460 Colony Picking System User Guide Setting Source and Destination Plate Options Use the Microplate Selection page to set source and destination plate options. To set source and destination plate options: 1. Click the Source Microplate drop-down and select the plate type for the source. 2.
- Page 181 Chapter 13: Plating Processes Viewing and Confirming the Calibration The Plating Progress page displays a summary of the routine. Start Time: The time the calibration process began. Source Plate No: The number of the source plate from which the liquid is being aspirated. Source Barcode: The barcode or identifier of the source plate that is being aspirated.
- Page 182 QPix 450 or QPix 460 Colony Picking System User Guide 5031498 N...
-
Page 183: Chapter 14: Replication Processes
Chapter 14: Replication Processes The QPix 450 Microbial Colony Picking System or QPix 460 Microbial Colony Picking System is capable of replicating colonies between plates. The following options are available on the Navigation page under Replication Processes: Library Replication replicates between plates that have the same number of wells. Library Compression replicates from 96-well plates to 384-well plates, compressing the samples. - Page 184 QPix 450 or QPix 460 Colony Picking System User Guide Selecting Replication Routines Use the Routines dialog to select a Replication routine: To select a Replication routine: 1. Select New Routine to create a new routine. 2. Select Run Existing Routine, then click the Select Routine drop-down and select an existing routine to run or to edit.
- Page 185 Chapter 14: Replication Processes Selecting Barcode Options You can scan source and destination plates for barcodes or define unique identifiers for source plates without scanning for barcodes. Using a Barcode Reader Note: You should always use barcodes for accurate data tracking. To use a barcode: 1.
- Page 186 QPix 450 or QPix 460 Colony Picking System User Guide Manually Create Identifiers To manually create an identifier list: 3. Clear the Use Barcode Reader checkbox. 4. Clear the Generate Random Barcodes checkbox. 5. Either: In the text field below the list, enter an identifier and click Insert. Click Import and then select the file from which to import the identifiers to import identifiers for the source receptacles from a text or .csv file.
- Page 187 Chapter 14: Replication Processes Selecting the Plate and Sanitizing Options Use the Microplates and Sanitise page to select the plate and sanitize options. To select the plate and sanitize options: 1. Click the Source Microplate drop-down and select the source plate type to hold the colonies to replicate.
- Page 188 QPix 450 or QPix 460 Colony Picking System User Guide Selecting the Head and Stacker Options Use the Head and Stackers page to select the head and stacker options. To select the head and stacker options: 1. Click the Select Head drop-down and select the head for the replication routine. 2.
- Page 189 Chapter 14: Replication Processes Changing the Picking Head Use the Change Head page to view which picking head you must load, based on the Setting Summary routine you configure, and allows you to change the head. The head is housed in an actuator system that permits easy exchange and set-up of the head. Although it is possible to manually move the actuator assembly, you should use the software to safely move the actuator into position to remove or install the head.
-
Page 190: Running Replication Processes
QPix 450 or QPix 460 Colony Picking System User Guide Running Replication Processes After you configure the replication routine, you can run the process on the instrument. To run a replication routine: 1. Open the Library Replication, Library Compression, or Library Expansion page. 2. - Page 191 Chapter 14: Replication Processes Viewing the Replicating Summary After the replication routine completes, the Replicating Process page displays the number of source wells that were replicated, how many destination plates were used, and how many source plates were missing. Click Details to view details of all activities related to the source and destination plates. Click Export to save the detailed information in .csv format.
- Page 192 QPix 450 or QPix 460 Colony Picking System User Guide 5031498 N...
-
Page 193: Chapter 15: Rearraying Processes
Chapter 15: Rearraying Processes The QPix 450 Microbial Colony Picking System or QPix 460 Microbial Colony Picking System is capable of rearraying, or redepositing, colonies between one or more source and destination plates. Use the rearraying process to organize, or cherry-pick, your picked source colonies into destination subsets of a more specific and orderly layout. - Page 194 QPix 450 or QPix 460 Colony Picking System User Guide Selecting Barcode Options You can scan source and destination plates for barcodes. Using a Barcode Reader Note: You should always use barcodes for accurate data tracking. To use a barcode reader: 1.
- Page 195 Chapter 15: Rearraying Processes 3. Select a barcode or identifier in the Source Microplate list, and then click Insert to open an image of the plate from which to define the wells to dip or skip for the rearraying routine. To dip a well, click the well.
- Page 196 QPix 450 or QPix 460 Colony Picking System User Guide 4. Under Destination Microplate Template, click Edit to define the wells to dip or skip. You can skip wells that you want to use as blank or control wells. This template is used for all the destination plates during the rearraying routine.
- Page 197 Chapter 15: Rearraying Processes Viewing the Settings Summary The Settings Summary page displays a summary of the rearraying routine settings. Review the summary details to make sure that the settings and options are configured correctly for the rearraying routine. To make changes, click Back until you return to the page where the changes can be made.
-
Page 198: Running Rearraying Processes
QPix 450 or QPix 460 Colony Picking System User Guide Running Rearraying Processes After you configure the rearraying routine, you can run the process on the instrument. Note: Before you run a rearraying process, it is important that you do the cleaning and set up procedures in Preparing to Run Processes on page Some steps that are included in these procedures might not be available, depending on the... - Page 199 Chapter 15: Rearraying Processes Viewing the Rearraying Progress While the rearraying routine is running, the Rearraying Progress page displays a summary of the routine. Start Time: The time the rearraying process began. Source Plate No: The number of the source plate that is being rearrayed. Source Barcode: The barcode or identifier of the source plate that is being rearrayed.
- Page 200 QPix 450 or QPix 460 Colony Picking System User Guide 5031498 N...
-
Page 201: Chapter 16: Gridding Processes
Chapter 16: Gridding Processes The QPix 450 Microbial Colony Picking System or QPix 460 Microbial Colony Picking System uses the gridding process to collect liquid samples from one or more source plates and then to deposit the liquid on the surface of one or more filters or on the surface of the agar in one or more QTrays. - Page 202 QPix 450 or QPix 460 Colony Picking System User Guide Selecting Barcode Options You can scan source and destination receptacles for barcodes or define unique identifiers for receptacles without scanning for barcodes. Using a Barcode Reader Note: You should always use barcodes for accurate data tracking. To use a barcode: 1.
- Page 203 Chapter 16: Gridding Processes Manually Create Identifiers To manually create an identifier list: 3. Clear the Use Barcode Reader checkbox. 4. Clear the Generate Random Barcodes checkbox. 5. Either: In the text field below the list, enter an identifier and click Insert. Click Import and then select the file from which to import the identifiers to import identifiers for the source receptacles from a text or .csv file.
- Page 204 QPix 450 or QPix 460 Colony Picking System User Guide Selecting the Head and Sanitizing Options Use the Head and Sanitise page to select the head and sanitize options. To select the head and sanitize options: 1. Click the Gridding Head drop-down and select the head to use for the gridding routine. 2.
- Page 205 Chapter 16: Gridding Processes Creating Filter Design Layouts Use the Filter Design page to define the Spot Pattern to stamp on the destination surface in the Field Pattern. The Spot Pattern determines the pattern and the number of times that a pin is stamped on the destination surface.
- Page 206 QPix 450 or QPix 460 Colony Picking System User Guide Defining the Filter Design Layout Use the Filter Design page to define the filter design layout. To define the filter design layout: 1. Click the Reuse drop-down and select a filter design layout. If there are no filter designs in the Reuse list, or if the existing designs do not meet your needs, skip to step 4.
- Page 207 Chapter 16: Gridding Processes 11. Edit the Spot Pattern. To change the assigned number for a spot, select the existing number in the spot and then enter a new number. The spot pattern must have a logical numerical sequence, such as 1,2,3,4 or 1,2,2,4. If you create an illogical sequence, such as 1,3,4,3 or 1,4,1,2, a message Can’t Calculate displays in red text, the No Sequence button displays in red, and the Spot Pattern Status message appears to describe the error.
- Page 208 QPix 450 or QPix 460 Colony Picking System User Guide Selecting Stamping and Inking Options Use the Substrate page to select the stamping and inking options. To select the stamping and inking options: 1. In the Stamps Per Spot field, enter a number from 1 to 5 for the number of times to stamp the pins in each spot.
- Page 209 Chapter 16: Gridding Processes Changing the Picking Head The Change Head page reminds you which picking head to load, based on the Setting Summary routine you configure and allows you to change the head. The head is housed in an actuator system that permits easy exchange and set-up of the head. Although it is possible to manually move the actuator assembly, you should use the software to safely move the actuator into position to remove or install the head.
-
Page 210: Running Gridding Processes
QPix 450 or QPix 460 Colony Picking System User Guide Running Gridding Processes After you configure the gridding routine, you can run the process on the instrument. Note: Before you run a gridding process, it is important that you do the cleaning and set up procedures in Preparing to Run Processes on page Some steps that are included in these procedures might not be available, depending on the... - Page 211 Chapter 16: Gridding Processes Viewing the Gridding Progress While the gridding routine runs, the Gridding Progress page displays a summary of the routine. Start Time: The time the gridding process began. Source Plate No: The number of the source plate from which the sample is being taken. Source Barcode: The barcode or identifier of the source plate from which the sample is being taken.
- Page 212 QPix 450 or QPix 460 Colony Picking System User Guide 5031498 N...
-
Page 213: Chapter 17: Data Viewer Processes
Chapter 17: Data Viewer Processes The database stores information about the routines run on the QPix 450 Microbial Colony Picking System or QPix 460 Microbial Colony Picking System. You can view the data details and manage the database with Data Viewer processes. Finding Data in the Database Use the Data Viewer page to find data in the database. -
Page 214: Displaying The Settings For Routines
QPix 450 or QPix 460 Colony Picking System User Guide Displaying the Settings for Routines To display the settings for routines: 1. Find the routine for which you want to display the settings. 2. Double-click the routine to display details. 3. -
Page 215: Adding Annotations To Routines, Receptacles, And Locations
Chapter 17: Data Viewer Processes Adding Annotations to Routines, Receptacles, and Locations Use the Add Annotations dialog to add annotations to routines, receptacles, and locations. To add annotations to routines, receptacles, and locations: 1. Find and select the routine, receptacle, or location to which you want to add an annotation. Finding Data in the Database on page 213. -
Page 216: Exporting Data And Settings
QPix 450 or QPix 460 Colony Picking System User Guide Exporting Data and Settings To export data and settings: 1. Find and select the routine from which you want to export the data or the settings. 2. On the left select the type of export. Click Export Data to export the data from the routine in .csv format. -
Page 217: Viewing Receptacle Location Maps
Chapter 17: Data Viewer Processes Viewing Receptacle Location Maps To view a map of receptacle locations: 1. Find and select the plate well to view the location map. 2. On the left, click Show Locations Map to display the Add Property dialog. 3. - Page 218 QPix 450 or QPix 460 Colony Picking System User Guide 5031498 N...
-
Page 219: Chapter 18: Maintenance
Chapter 18: Maintenance Perform only the maintenance tasks described in this guide. Contact a Molecular Devices service engineer to inspect and perform a preventive maintenance service on the instrument each year. See Obtaining Support on page 233. Before you operate the instrument or perform maintenance operations, make sure you are familiar with the safety information in this guide. -
Page 220: Cleaning The Instrument
For efficient decontamination of pathogenic micro-organisms, wipe all non-removable parts within the instrument with a cloth using 70% ethanol. CAUTION! Molecular Devices recommends that you spray ethanol on a cloth for cleaning the instrument. Autoclaving is not compatible with anodized parts. Do not use the ethanol on acrylic parts. - Page 221 Chapter 18: Maintenance CAUTION! Molecular Devices recommends that you spray ethanol on a cloth for cleaning the instrument. Autoclaving is not compatible with anodized parts. Do not use the ethanol on acrylic parts. Use water and then turn on the UV lamp.
- Page 222 QPix 450 or QPix 460 Colony Picking System User Guide Sonicating the Pins and Springs You should sonicate the pins weekly. Before you sonicate the pins, remove the pins from the head and sonicate the pins and springs only. Removing the Pins from the Head To remove the pins from the head: 1.
- Page 223 Chapter 18: Maintenance 4. Remove the picking head retaining plate to expose the pins. 5. Carefully pull the pins and springs up to remove them from their head mounting holes. Note: A gridding head does not contain springs. 6. Separate the springs from the pins, as applicable. 7.
-
Page 224: Testing The Stackers
QPix 450 or QPix 460 Colony Picking System User Guide 5. Verify that the screws are all flush with the retaining plate. 6. Install the head on the actuator. See Changing the Head on page 7. Test the fit in the actuator to be sure the fit is correct. Any raised screw heads can foul the actuator when sliding the head into place, preventing the head from being fitted. -
Page 225: Testing The Pins
Chapter 18: Maintenance Testing the Pins This test checks that the pins on an installed head are obstruction-free and can move freely. 1. On the Navigation page under Utility Processes, double-click the Instrument Utilities icon to display the Instrument Utilities page. 2. -
Page 226: Aligning The Camera
QPix 450 or QPix 460 Colony Picking System User Guide Aligning the Camera To ensure accurate picking, you must calibrate and align the camera to get pin-to-spot precision, relating the image pixel coordinates with the instrument x and y coordinates. Do this process whenever the head is returned to the actuator or if the actuator is hit during a maintenance operation, as this can have a negative effect on picking precision. - Page 227 Chapter 18: Maintenance 8. Click Goto Pos to enable the position screen controls and move the pin head over the source tray. 9. Under Head Position > Lateral, the red and green arrows move the pin head according to the millimeter distance increments you specify in the Move Size field. 10.
-
Page 228: Replacing Fuses
If these checks fail to remedy the loss of power, replace the fuses. You can obtain replacement fuses from Molecular Devices. Fuses must be replaced with the correct type and rating as specified in Technical Specifications on page 243. -
Page 229: Draining The Compressor
Chapter 18: Maintenance To replace a fuse: WARNING! HIGH VOLTAGE Power off the instrument and disconnect the power cord before you do maintenance procedures that require removal of a panel or cover or disassembly of an interior instrument component. 1. Switch the power switch on the front of the instrument to the off position. 2. -
Page 230: Moving The Instrument
QPix 450 or QPix 460 Colony Picking System User Guide 3. Slowly open the valve by turning the lever on the Drain Valve to the right about a quarter of the way open until you hear the sound of high pressure blowing air. 4. -
Page 231: Adding A New User To The Sql Server Database
Chapter 18: Maintenance Adding a New User to the SQL Server Database If a new user cannot log on to the QPix® 450/460 Microbial Colony Picking System, add the user to the SQL database. Note: This procedure requires a user with administrator privileges. To add a new user to the SQL Server database: 1. -
Page 232: Resetting The Path To The Sql Server
QPix 450 or QPix 460 Colony Picking System User Guide Resetting the Path to the SQL Server If you rename the computer, you must reset the path to the SQL Server. The new computer is included in the path to the SQL Server, but the software continues to look for the original path that contains the original computer name. -
Page 233: Obtaining Support
Our Support website—support.moleculardevices.com/—describes the support options offered by Molecular Devices, including service plans and professional services. It also has a link to the Molecular Devices Knowledge Base, which contains documentation, technical notes, software upgrades, safety data sheets, and other resources. - Page 234 QPix 450 or QPix 460 Colony Picking System User Guide 5031498 N...
-
Page 235: Chapter 19: Troubleshooting
Chapter 19: Troubleshooting This section describes some common problems that can occur and possible solutions. Generally, crash recovery involves some form of the following procedure: 1. An error is identified in the software or the instrument stops. 2. If the error condition is caused by a receptacle or other item, then remove the item from the instrument. - Page 236 QPix 450 or QPix 460 Colony Picking System User Guide The pins bend when inoculating in plate wells. Make sure that the plate is aligned correctly towards both arrows in the plate holder. Make sure that the correct plate, head, and spacer blocks are installed. Poor picking results.
-
Page 237: Troubleshooting Barcodes
Add more white space at beginning or end. Restrict numbers to a maximum of six (6) digits. Verify that the codes meet the requirements. See Using Barcodes on page If detection is still a problem, contact Molecular Devices Technical Support. See Obtaining Support on page 233. -
Page 238: Fluorescence Problems And Possible Solutions
QPix 450 or QPix 460 Colony Picking System User Guide Depending on the failure, after the stacker lane resets, before you continue, you might have to remove: Unprocessed plates and lids from the source and destination cassettes. Broken plates and lids from the source cassette. If the stacker failure continues, contact Technical Support. - Page 239 Appendix A: Replacement Parts and Optional Extras For an up-to-date list of replacement parts and optional extras, see the following web pages: www.moleculardevices.com/products/clone-screening/accessories-consumables/qpix- pins-and-heads#Orderingoptions www.moleculardevices.com/products/accessories-consumables www.moleculardevices.com/products/biologics/culture-media-reagents QPix 450 or 460 System Microbial Colony Picking System Replacement Parts Part Number Description SL9400-A06 QPix®...
- Page 240 QPix 450 or QPix 460 Colony Picking System User Guide Gridding Heads Part Number Description X4225 Gridding head for bacteria and phage, 96-pin for 96-well and 384-well plates, tip diameter 0.4 mm X4226 Gridding head for DNA macroarrays, 96-pin for 96-well and 384-well plates, tip diameter 0.25 mm X4227 Gridding head for protein macroarrays, 96-pin for 96-well and 384-well plates, tip...
- Page 241 Appendix A: Replacement Parts and Optional Extras Gridding Pin Part Number Description X4241 Gridding pins for DNA macroarrays, tip diameter 0.25 mm X4242 Gridding pins for protein macroarrays, tip diameter 0.15 mm X4243 Gridding pins for yeast and streptomyces, tip diameter 1 mm Re-Arraying Pins Part Number Description X4311...
- Page 242 QPix 450 or QPix 460 Colony Picking System User Guide 5031498 N...
- Page 243 Appendix B: Technical Specifications The following tables list the technical specifications of the QPix 450 or 460 Microbial Colony Picking System. If you are using the optional air compressor, see the documentation that comes with the compressor for more details. Technical Specifications Item Description Environment...
- Page 244 QPix 450 or QPix 460 Colony Picking System User Guide Technical Specifications (continued) Item Description Compressor air requirements support.moleculardevices.com/s/article/ClonePix2-CloneSelect- Imagers-Qpix-Series-House-air Clean, oil-free with sub-micron filtration Minimum operating pressure 6 bar (~90 psi) Minimum operating volume 80 L/min Optional air compressor Item Description Compressor unit...
- Page 245 Appendix C: System Diagrams and Dimensions Front View of the QPix 450 Microbial Colony Picking System or QPix 460 Microbial Colony Picking System with Dimensions Item Description 1 Height of instrument with stacker cassettes: 122 cm (48.0 in.) 2 Height of instrument without stacker cassettes: 75 cm (30 in.) 3 ...
- Page 246 QPix 450 or QPix 460 Colony Picking System User Guide Side View of the QPix 450 Microbial Colony Picking System or QPix 460 Microbial Colony Picking System with Dimensions Item Description 1 Height of instrument with stacker cassettes: 122 cm (48.0 in.) 2 Height of instrument without stacker cassettes: 75 cm (30 in.) ...
- Page 247 Appendix C: System Diagrams and Dimensions Electromagnetic Compatibility Regulatory for Canada (ICES/NMB-001:2020) This ISM device complies with Canadian ICES-001. Cet appareil ISM est confomre à la norme NMB-001 du Canada. ISM Equipment Classification (Group 1, Class A) This equipment is designated as scientific equipment for laboratory use that intentionally generate and/or use conductively coupled radio-frequency energy for internal functioning, and are suitable for use in all establishments, other than domestic and those directly connected to a low voltage power supply network which supply buildings used for domestic purposes.
- Page 248 QPix 450 or QPix 460 Colony Picking System User Guide 5031498 N...
- Page 249 The trademarks used herein are the property of Molecular Devices, LLC or their respective owners. ©2024 Molecular Devices, LLC. Specifications subject to change without notice. Patents: www.moleculardevices.com/patents All rights reserved. FOR RESEARCH USE ONLY. NOT FOR USE IN DIAGNOSTIC PROCEDURES...
Need help?
Do you have a question about the QPix 400 Series and is the answer not in the manual?
Questions and answers