Advertisement
THULI TABLES
Sport Owner's Manual
Table of Contents
Introduction / Opening the Table . . . . . . . . 2
Identification of Table Parts . . . . . . . . . . 3 - 5
Table Set-Up . . . . . . . . . . . . . . . . . . . . . . . 6 - 7
Table Operation . . . . . . . . . . . . . . . . . . . . 8 - 9
o ff ic e@t h u l ita b l es . co m
y o u t u b e. c o m / th u l it ab l e s
fa c eb o o k. c o m /t h u l it ab l e s
Table Fold-Down . . . . . . . . . . . . . . . . . . . . 10
Accessories / Flexion Distraction . . . . . . 11
Care & Maintenance . . . . . . . . . . . . . . . . 12
Warranty . . . . . . . . . . . . . . . . . . . . . . . . . . 13
1-800-458-4854
www.thulitables.com
Videos & Manuals
Advertisement
Table of Contents

Summary of Contents for Thuli Tables Sport
-
Page 1: Table Of Contents
/ th u l it ab l e s fa c eb o o k. c o m /t h u l it ab l e s Sport Owner’s Manual Videos & Manuals Table of Contents Introduction / Opening the Table . -
Page 2: Introduction / Opening The Table
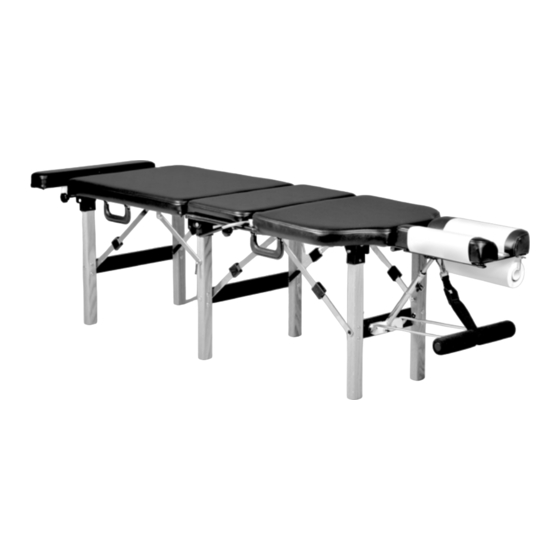
Introduction & Opening the Table Thank you for your purchase of a Sport portable table. We are pleased to provide you with an adjusting table that is extremely durable and skillfully designed. It has been thoroughly inspected and tested right down to the smallest detail before leaving our shop. -
Page 3: Identification Of Table Parts
Identification of Table Parts Ankle Rest Extension (optional) Pelvic Drop (optional) Paper Tear-Off Bar Paper Hold-Down Wire Ankle Rest Locking Knob (optional) Paper Hanger Brace Lock Folding Leg Brace Mid-Leg Brace Prone Arm Rest (adjustable) Flexion / Extension Pelvic Cocking Lever Piston &... - Page 4 Identification of Parts Folding Leg Brace Pelvic Drop Flexion / Extension Prone Arm Rest (optional) Piston Cushion Protector Remote Piston Headpiece Control Head Paper Headpiece Hinge Paper Hold-Down Wire Pelvic Tension Control Rod (optional) Front Leg Mid-Leg Folding Leg Brace Brace Lock Pelvic Cocking Lever (optional)
- Page 5 Identification of Parts Cushion Ankle Rest Extension Protector (optional) Headpiece Paper Hanger Table Closing Hook Mid-Leg Brace Ankle Rest Housing (optional) Ankle Rest Locking Knob (optional)
- Page 6 Table Set-Up Ankle Rest OPENING THE TABLE Locking Knob 1. Lay the table onto its contoured thoracic section. (optional) 2. If your table has an ankle rest extension, loosen the locking knob and pull out the ankle rest. 3. Release the eye hook from the black metal bracket located between the headpiece cushions.
- Page 7 Table Set-Up HEADPIECE & FRONT LEG SET-UP Snap Tabs Snap 3. Lower the headpiece to the floor by 1. Release the snap from the headpiece. 2. Raise the headpiece and the front pinching together the two tabs in the legs simutaneously by grasping the center of the piston or by operating legs with one hand and the headpiece the remote control (optional feature).
- Page 8 Table Operation SET THE TABLE UPRIGHT 1. Remove the headpiece paper. 2. Remove the paper hanger from underneath the table, and insert it into the eye hooks on the side of the headpiece. 3. Set the table upright. HEADPIECE PAPER Hold-down wire 1.
- Page 9 Table Operation PRONE ARM REST It is recommended that the patient’s wrists rest on the cushioned portion of the arm rest with their hands relaxed. Advise the patient not to apply weight on the prone arm rest when getting off of the table. The prone arm rest is adjustable in height. Lock RAISING THE PRONE ARM REST LOWERING THE PRONE ARM REST...
- Page 10 Table Fold-Down FOLD THE TABLE IN THE REVERSE ORDER OF SET-UP 1. Remove the headpiece paper and hanger. 9. Wood Legs: Loosen the prone arm rest strap 2. Lay the table onto its cushions. and clip the snap onto the hold-down wire (photo). 3.
-
Page 11: Accessories / Flexion Distraction
FLEXION DISTRACTION DEVICE Add Flexion Distraction to your Sport at anytime with this ingenious, mechanical device. Simply fold the table's back legs into their storage position and attach the FD Device in seconds. Quickly dissasembles for portability. -
Page 12: Care & Maintenance
Bleach: Dilute 4 tsp bleach in 1 quart of water in a spray bottle. Spray on vinyl, leave for 1-2 minutes and rinse with water. Hydrogen Peroxide (3%): Available in spray bottle. Use undiluted and leave on for 5 minutes and rinse well with water. REPLACEMENT VINYL: In the event of wear or damage, pre-sewn replacement vinyl is available from Thuli Tables. -
Page 13: Warranty
Warranty Our tables are designed and built to high standards. We are proud to offer a limited lifetime warranty against manufacturing defects, with the exception of the headpiece piston, which is covered by a one year warranty. This warranty is valid to the original owner if the table has not been altered in any way. It does not cover issues caused by normal wear &... - Page 16 Junior Portable Sport Portable 300 Stationary Tour Portable 500 Stationary Elevation Tables Treatment Tables Portable Drops THULI TABLES...


Need help?
Do you have a question about the Sport and is the answer not in the manual?
Questions and answers