Advertisement
Quick Links
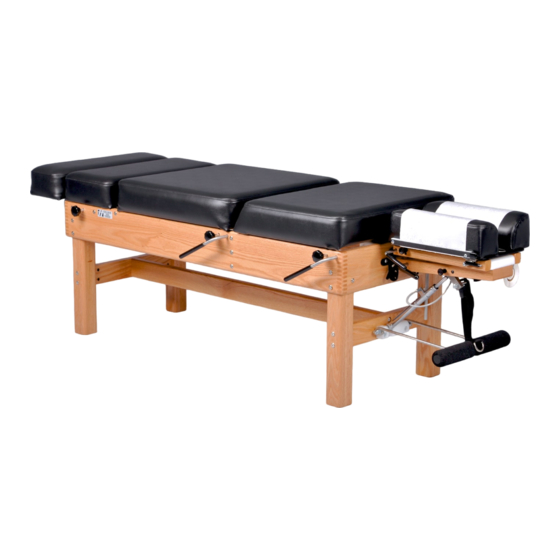
THULI TABLES
300 Stationary Owner's Manual
Table of Contents
Introduction . . . . . . . . . . . . . . . . . . . . . . . . . 2
Identification of Parts . . . . . . . . . . . . . . . 3 - 4
Table Assembly . . . . . . . . . . . . . . . . . . . . . . 5
Headpiece Attachment & Operation . . . 6 - 10
Table Operation . . . . . . . . . . . . . . . . . . 11 - 12
office@ thulita b les.co m
youtube.com/thulit ables
facebook.com/thu litab les
Abdominal Swing-Away . . . . . . . . . . . . . . 13
Accessories . . . . . . . . . . . . . . . . . . . . . . . . 14
Care & Maintenance . . . . . . . . . . . . . . 15 - 16
Warranty . . . . . . . . . . . . . . . . . . . . . . . . . . . 17
Overview of Products . . . . . . . . . . . . . . Back
800-458-4854
www.thulitables.com
Advertisement

Related Manuals for Thuli Tables 300 Stationary


Summary of Contents for Thuli Tables 300 Stationary
-
Page 1: Table Of Contents
THULI TABLES youtube.com/thulit ables facebook.com/thu litab les 300 Stationary Owner’s Manual Table of Contents Introduction ......2 Abdominal Swing-Away . -
Page 2: Introduction
Introduction Thank you for your purchase of a 300 Stationary table. We are pleased to provide you with an aesthically beautiful chiropractic adjusting table that is versatile and precisely engineered. It has been thoroughly inspected and tested right down to the smallest detail before leaving our shop. -
Page 3: Identification Of Parts
Identification of Table Parts Ankle Rest Fixed Section Extension Pelvic Section Thoracic Section Headpiece Ankle Rest Extension Locking Knob Stretcher Pelvic Cocking Lever & Tension Control Knob Thoracic Cocking Piston Lever & Tension Control Knob Prone Arm Rest Crossbrace... - Page 4 Identification of Headpiece Parts Tension Control Knob (back side) Paper Tear-Off Bar Paper Hold-Down Wire Straight Drop / Forward Pivot Block Motion Knob Cocking Lever Slide Block T-Bar Paper Hanger Remote Control Lever Piston Head Piston Pin Prone Arm Rest Buckle Headpiece Mounting Locking Link Bracket...
- Page 5 Table Assembly Your table is easy to assemble. For protection during shipping, the headpiece, ankle rest extension and legs are packaged separately from the table. We have included two different wrenches to assist you in the assembly process. ANKLE REST ATTACHMENT 1.
-
Page 6: Headpiece Attachment & Operation
Headpiece Attachment LATERAL FLEXION Proceed to the next step if your PISTON / PRONE ARM REST ATTACHMENT headpiece does not have Lateral Flexion. 1. Attach the piston/prone arm rest to the crossbrace of the front 1. With the 9/16” wrench provided, attach the headpiece to the leg set using the fasteners provided, matching up the colored dots. - Page 7 Headpiece Attachment & Headpiece Paper REMOTE CONTROL ATTACHMENT PISTON ATTACHMENT 1. Swing the flexion/extension piston down toward the Install the remote control into the bottom of the slide block. off-centered slot in the base block. Insert the cable into the narrow slot and tilt the remote control 2.
- Page 8 Headpiece Operation LATERAL FLEXION (optional) FLEXION / EXTENSION LATERAL FLEXION LEVER To flex the headpiece laterally, turn the The position of the lateral flexion lever Flex and extend the headpiece by lateral flexion lever in a counterclockwise can be changed. With the lateral flexion grasping the front end of the headpiece and operating the remote control lever.
- Page 9 Headpiece Operation VERTICAL ELEVATION 1. Raise the back end of the headpiece 2. Raise the front end of the headpiece 3. With practice, steps 1 and 2 can be by lifting the red grip of the cocking by operating the remote control lever. combined to vertically raise the lever (without operating the lever).
- Page 10 Headpiece Operation HEADPIECE CUSHIONS: ADJUSTABLE WIDTH The headpiece cushions are easily adjustable in width at the front end for individualized patient comfort. Firmly pull up on the front end of each headpiece cushion and move in (one or two notches) or out (one or two notches) to desired position. Secure cushions by engaging locating pins into notches provided.
- Page 11 Table Operation Pelvic Drop Thoracic Drop PELVIC DROP THORACIC DROP Position the patient’s anterior superior iliac spine (ASIS) at Position the patient sufficiently forward with their arms out- the juncture of the pelvic and thoracic sections. stretched and wrists resting on the prone arm rest. This will insure that the skin on the back of the patient’s arms will not be pinched between the thoracic section and the table frame when using the drop.
- Page 12 Table Operation THORACIC INCLINE CERVICAL PALPATION & ADJUSTING ANTERIOR THORACIC ADJUSTING Uses of the thoracic incline include anterior thoracic adjusting, The thoracic section can be raised to a 20 degree angle. Lift the cervical palpation and diversified cervical adjusting. This thoracic section, swing the slant bar down and allow the rubber feature allows the practitioner to remain in a comfortable, tips to rest on top of the front legs (the right arm of the slant bar...
-
Page 13: Abdominal Swing-Away
Table Operation: Abdominal Swing-Away (optional feature) ABDOMINAL SWING-AWAY Activate the lever on either side of the table while depressing The abdominal swing-away section offers prone the abdominal section. This can be done before the patient lays comfort to pregnant patients or to those of us with on the table or while the patient is on the table. -
Page 14: Accessories
Accessories 14 14 COMFORT PILLOW The Velcro on the Comfort underside of the pillow Pillow secures it to the base, allowing for width adjustability. Pillow Base The base of the Comfort Pillow inserts into place between the The Comfort Pillow offers Rotate the Comfort Pillow 180 headpiece cushions. -
Page 15: Care & Maintenance
Care & Maintenance DROP MECHANISMS: CLEANING & LUBRICATION Periodic lubrication of the drop mechanisms will ensure smooth, crisp drops. Apply 3-IN-ONE oil every month or 500 adjustments. If the drops have not been lubricated on a regular basis, first apply WD-40 to clean the plungers from dust & debris. See below. CERVICAL DROP THORACIC &... - Page 16 3. Water Rinse: It is important to follow cleaning with a thorough, clear water rinse to minimize premature deterioration of the vinyl from extended exposure to chemicals. REPLACEMENT VINYL: In the event of wear or damage, pre-sewn replacement vinyl is available from Thuli Tables.
-
Page 17: Warranty
Warranty Our tables are designed and built to high standards and we are proud to offer a limited lifetime warranty against manufacturing defects. This warranty is valid to the original owner and only if the table has not been altered in any way. It does not cover issues caused by normal wear and tear, which naturally and inevitably occur as a result of normal use over time, or damage caused by accidents, improper use and negligence. - Page 19 Junior Portable Tour Portable Sport Portable 300 Stationary 500 Stationary Elevation Tables Lumbo-Pelvic Drop 800.458.4854 608.935.9300 Portable www.thulitables.com Extremity Drop Headpiece office@thulitables.com Speeder Board youtube.com/thulitables facebook.com/thulitables Portable Drops...
Need help?
Do you have a question about the 300 Stationary and is the answer not in the manual?
Questions and answers