Advertisement
Quick Links
GENERAL INSTALLATION INFORMATION
REU-V26 FFU / REU-V26 FFUC
You must install this appliance in accordance with these Instructions and all
regulatory requirements which exist in your area. Applicable publications
may include:
•
NZS 5261 - Gas Installations
•
AS/NZS3500 - National Plumbing and Drainage
•
AS/NZS3000 - Wiring Rules
•
Building Codes of New Zealand
THIS APPLIANCE IS DESIGNED FOR INDOOR INSTALLATION. IT MAY
BE
INSTALLED
OUTDOORS
REQUIREMENTS OF NZS 5261 PART 13.5 ARE SATISFIED.
IT MUST BE MOUNTED ON A VERTICAL WALL OR STRUCTURE WITH
THE WATER AND GAS CONNECTIONS ON THE UNDERSIDE POINTING
TOWARDS THE GROUND.
IT MUST BE INSTALLED WITH THE RINNAI INFINITY FLUEING SYSTEM.
NON RINNAI FLUEING SYSTEMS MUST NOT BE USED.
THIS APPLIANCE MUST NOT BE USED AS A DOMESTIC SPA OR
SWIMMING POOL HEATER.
APPLIANCE LOCATION
The appliance should be placed as close as practicable to the most
frequently used hot water outlet point or points to minimise the delay
time for hot water delivery. For installations where the distance between
the unit and hot water outlet points is considerable, the appliance can
also be fitted in a 'flow and return system ' which minimises the waiting
time for hot water delivery. Alternatively, appliances can be strategically
placed to service outlet points with minimal delay time. Contact Rinnai
New Zealand for further information.
The appliance must also be located so that the flue terminal exits the
building at a suitable point. The maximum length of the flue is 9 metres
with a maximum of three 90° bends. Both a horizontal (wall) or vertical
(roof) terminal are available. For detailed information regarding the Flue
refer to the 'Flue Installation Instructions for Infinity Internal Water
Heaters' supplied with the flue terminal or contact Rinnai.
The appliance must be in an accessible location. Sufficient clearances
shall allow access to, and removal of, all serviceable components. The
appliance should not be mounted higher than 3.5 metres from the
ground or floor level unless the customer can arrange permanent and
safe access or can arrange another means of access, for example, by
means of scissor or boom lifts.
AC230V, 10A earthed power point must be provided adjacent to the
appliance. It must be clear of the gas and water connections to the
appliance, flue and water pressure relief valve. The power cord of the
appliance is 1500 mm long.
If a horizontal (wall) terminal is used, the location must be in accordance
with the clearances shown in Figure 3 of NZS 5261 which is reproduced
right side. Ensure that the flue terminal cannot be touched (particularly
by children). A flue guard is available to prevent direct contact with the
terminal. The flue must be clear of obstructions and shrubbery.
If a vertical (roof) terminal is used, the requirements of NZS 5261 apply.
Clearances must be in accordance with the diagram shown in fig 1
bottom right.
It is the installer's responsibility to ensure that the current requirements
of NZS 5261 are met.
PIPE SIZING
This appliance can use up to 199 MJ/h of gas. If the gas pipe sizing is
insufficient the customer will not get the full performance benefit. Gas
pipe sizing must consider the gas input to this appliance as well as all
the other gas appliances in the premises. The gas meter and regulator
must be specified for this gas rate. An approved sizing chart such as the
one in NZS 5261 should be used.
Water pipe sizing and layout should be performed in accordance with
AS/NZS3500. All hot water pipe work should be insulated to optimise
performance and energy efficiency.
IN
AN
ENCLOSURE
IF
openable
window
n
f
I
c
THE
T = Flue terminal
I = Mechanical air inlet
Ref.
a
Below eaves, balconies and other projections:
•
Appliances up to 50 MJ/h input
•
Appliances over 50 MJ/h input
b
From the ground, above a balcony or other surface †
c
From a return wall or external corner †
d
From a gas meter (M) (see 4.7.11 for vent terminal location of
regulator)
e
From an electricity meter or fuse box (P)
f
From a drain pipe or soil pipe
g
Horizontally from any building structure = or obstruction facing a
terminal
h
From any other flue terminal, cowl, or combustion air intake †*
j
Horizontally from an openable window, door, non-mechanical air inlet, or any other opening
into a building with the exception of sub-floor ventilation:
•
Appliances up to 150 MJ/h input
•
Appliances over 150 MJ/h input up to 200 MJ/h input
•
Appliances over 200 MJ/h input
•
All fan-assisted flue appliances, in the direction of discharge
k
From a mechanical air inlet, including a spa blower
n
Vertically below an openable window, non-mechanical air inlet, or any other opening into a
building with the exception of sub-floor ventilation:
•
Space heaters up to 50 MJ/h input
•
Other appliances up to 50 MJ/h input
•
Appliances over 50 MJ/h input and up to 150 MJ/h input
•
Appliances over 150 MJ/h input
†
- unless appliance is approved for closer installation
NOTES:
1 All distances are measured to the nearest part of the terminal.
2 Prohibited area below electricity meter or fuse box extends to ground level.
3 See Clause 13.12.3 for restrictions on a flue terminal under a covered area.
4 See Appendix F, Figures 2 and 3, for clearances required from a flue terminal to an LP Gas
cylinder. A flue terminal is considered to be a source of ignition.
5 For appliances not addressed above, approval shall be obtained from the Authority.
*Contact Rinnai for exemptions for the above clearances which may have
been granted since printing of this document.
Flue Terminal
140mm
500mm to the
end of flue
Air Intake
Bracket to
support flue
125mm
Over 1.5 m Condensate
Trap must be fitted
Vertical Adaptor
(purchased as
85 mm
part of flue system
REU-V2632FFU
adaptor supplied
with the appliance
1
j
h
T
j
j
e
e
h
h
P
door
k
T
g
k
See note 2
M = Gas meter
Shading indicates prohibited
areas for flue terminals
P = Electricity meter or fuse box
Item
Flue Terminal
Flue terminal section
1050 mm
1050mm
500mm to the
end of flue
Deck tight or lead
collar flushing
970 mm
lengths or
Bracket to
cut to size
support flue
Over 1.5 m
Condensate Trap
must be fitted
Vertical Adaptor
(purchased as part
180 mm
of flue system
REU-V2632FFU
adaptor supplied with
125 mm
the appliance
1.8 m
600 mm
to floor
Installation - V26 Internal
a
c
See note 3
d
g
d
M
b
T
Min. clearances
(mm)
Fan assisted
200
300
300
300
1000
500
75
500
300
300
300
500
1500
1000
150
500
1000
1500
Fig 3
140mm
Flue terminal
assembly
1050 mm
Air Intake
Deck tight or lead
collar flushing
125mm
970 mm lengths or
cut to size
85 mm
180 mm
125 mm
1.8 m
600 mm
to floor
Fig 1.
Advertisement

Subscribe to Our Youtube Channel
Related Manuals for Rinnai INFINITY HD26


Summary of Contents for Rinnai INFINITY HD26
- Page 1 Alternatively, appliances can be strategically Appliances over 150 MJ/h input up to 200 MJ/h input • placed to service outlet points with minimal delay time. Contact Rinnai Appliances over 200 MJ/h input • New Zealand for further information.
- Page 2 The unit will operate at lower supply pressures but the rated flow will not be achieved. Contact Rinnai for 'gravity fed' or 'low BATHFILL CONTROLLERS (MODELS MC-70-2A AND BC-70-2A) pressure' hot water installations.
-
Page 3: Water Heater And Controller Installation Configurations
Limiting Device (TLD), such as a Tempering Valve, may be required Fig 1, one for the cable and two for even if the appliance is set to 55°C or less. For these types of applications contact Rinnai. the securing screws. Ensure holes are drilled. Fit wall plugs if required. - Page 4 CONNECTING REMOTE CONTROL CABLES TESTING AND COMISSIONING Do not attempt to connect the remote control cable terminals to the Before final connection of the water heater purge gas, hot and cold appliance with the power on. RISK OF ELECTRICAL SHOCK ! water supply lines.
-
Page 5: Appendix 1. Mc-91-1A Controller Programming
Turn 'ON' the gas supply. Burner test point IF NO: You have 3 controllers or fewer, you will need to program the kitchen controller to enable selection of temperatures higher than 50°C. Turn 'ON' 230V power supply. fig. 2 STEP 1: If remote controllers are fitted, turn the unit 'ON' at the kitchen controller, select... - Page 6 WIRING DIAGRAM (refer page 7) REMOTE CONTROLLER DIMENSIONS MC-91-1A MC-70-2A BC-70-2A WATER HEATER DIMENSIONS (refer page 8) Installation - V26 Internal...
- Page 7 COMBUSTION FAN BY-PASS FLOW CONTROL DEVICE HIGH SETTING POT DIP SWITCH 1 HEAT EXCHANGER Flue length THERMISTOR Temperature control OUTGOING WATER Gas pressure THERMISTOR Gas type AIR TEMPERATURE THERMISTOR DIP SWITCH 2 MC-70-2A OR MC-91-2A BC-70-2A OR WATER FLOW MC-91-2A CONTROL DEVICE THERMAL FUSE MAIN SOLENOID VALVE...
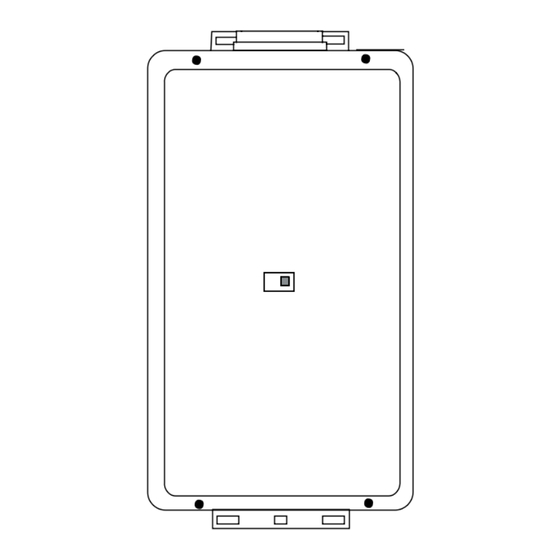
- Page 8 4. Dimensions cold water inlet: 20mm hot water outlet: 20mm gas inlet: 20mm Installation - V26 Internal...
Need help?
Do you have a question about the INFINITY HD26 and is the answer not in the manual?
Questions and answers