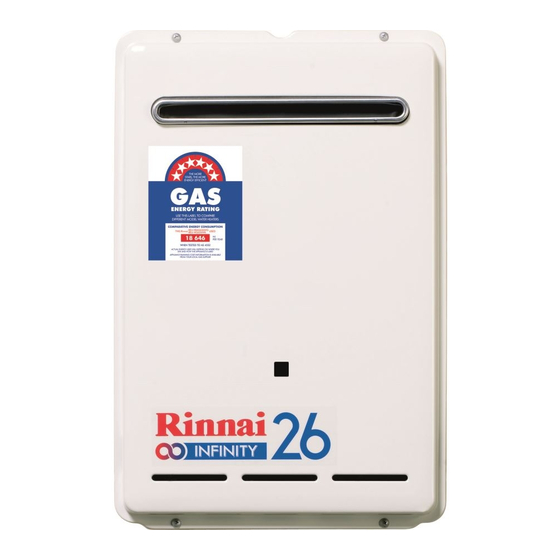
Rinnai INFINITY 32 Operation & Installation Manual

Rinnai INFINITY 32 Operation & Installation Manual

Continuous flow water heaters
Hide thumbs Also See for INFINITY 32:
Table of Contents

Advertisement

Operation / Installation
This appliance shall be installed in accordance with:
• Manufacturer's Installation Instructions
• Current AS/NZS 3000, AS/NZS 3500 & AS/NZS 5601
• Local Regulations and Municipal Building Codes including local OH&S requirements
This appliance must be installed, maintained and removed by an Authorised Person.
For continued safety of this appliance it must be installed operated and maintained
in accordance with the manufacturers instructions.
Manual
Rinnai continuous flow water heaters
To Suit Water Heater Models -
INFINITY 32
INFINITY 26
INFINITY 26 Plus
INFINITY 26i
INFINITY 20
INFINITY 16
INFINITY ENVIRO 32
INFINITY ENVIRO 26
B16
B20
B24
HD250e
HD200e
HD200i
REU-VR3237WG
REU-VR2626WG
REU-VRM2630WD
REU-VR2632FFUG
REU-VR2024WG
REU-VR1620WG
REU-KM3237WD
REU-KM2635WD
REU-VR1620WB
REU-VR2024WB
REU-VR2426WB
REU-VRM3237WC
REU-VRM2632WC
REU-VRM2632FFUC

Advertisement

Table of Contents
loading

Summary of Contents for Rinnai INFINITY 32

  • Page 1 Operation / Installation Manual Rinnai continuous flow water heaters To Suit Water Heater Models - INFINITY 32 REU-VR3237WG INFINITY 26 REU-VR2626WG INFINITY 26 Plus REU-VRM2630WD INFINITY 26i REU-VR2632FFUG INFINITY 20 REU-VR2024WG INFINITY 16 REU-VR1620WG INFINITY ENVIRO 32 REU-KM3237WD INFINITY ENVIRO 26...
  • Page 3: Table Of Contents

    SETTING THE SOUND OPTIONS ......................14 SETTING THE CLOCK ..........................15 ADJUSTING TEMPERATURE........................15 SMARTSTART® PRE-HEAT OPERATION ..............16 ABOUT THE SMARTSTART® PREHEAT SYSTEM ................. 16 TROUBLESHOOTING....................17 INSTALLATION MANUAL ..................20 ACCESSORIES ......................36 PRODUCT RECORDS .....................36 CONTACT INFORMATION ..................37 Rinnai Australia Operation Manual...
  • Page 4: Regulatory Information

    REGULATORY INFORMATION Your Rinnai Continuous Flow water heater has been certified by the Australian Gas Association. The A.G.A. Certification Number is shown on the data plate. This Appliance must be installed correctly by an authorised person. The installation of gas, water, and electricity must conform to local regulations.
  • Page 5: Features And Benefits

    Congratulations on purchasing the latest technology temperature controlled Rinnai continuous flow water heating system. • The Rinnai Continuous Flow water heater products NEVER RUN OUT of hot water. Whilst electricity, water and gas supplies are connected, hot water is available whenever hot water taps are open.
  • Page 6: Important Information

    IMPORTANT INFORMATION The range of Rinnai continuous flow water heaters referred to in this manual are incompatible with solar water heating systems. A dedicated range of solar NOTE compatible continuous flow water heaters is available from Rinnai. OFF! Always check water temperature carefully before At low water flows, the hot water unit may extinguish use.
  • Page 7 Controller will result default water heater causing the water to go cold. temperature of 50°C being selected. This is a Someone maybe in the middle of having a safety feature. shower or filling a bath. Rinnai Australia Operation Manual...
  • Page 8: Operation Without Controllers

    OPERATION WITHOUT CONTROLLERS Rinnai Continuous Flow water heater products do not use a pilot light. When installed and operated without water controllers, the opening of any hot water tap will automatically start the appliance. Once water is flowing through the appliance the burner will be ignited by electronic ignition.
  • Page 9: General Water Control Information

    GENERAL WATER CONTROL INFORMATION MAXIMUM DELIVERY TEMPERATURES Rinnai continuous flow water heaters are factory pre-set to various maximum delivery temperatures depending on model and their intended application. For the majority of applications, the factory pre- set temperature is appropriate. In the unlikely event this is not the case this setting can be increased or decreased by an authorised person such as a licensed plumber.
  • Page 10 Only ONE MC-100V water controller can be installed. Models Up to TWO BC-100V water controllers can be installed. The FOURTH water controllers in any installation MUST BE a MC-91Q. Rinnai Australia Operation Manual...
  • Page 11: Universal Water Controllers

    43°C. In addition, transfer of 'priority' between NOTE controllers is not possible. These are safety features. The 'beep' sound can be muted by pressing the 'Hot water temp' Up Down buttons simultaneously for more than 3 seconds. Rinnai Operation Manual...
  • Page 12: How To Use Two Or More Universal Water Controllers

    The ‘in use’ indicator will also go out. The burner will ignite again once the outgoing hot water temperature falls to that shown on the digital monitor (or the pre-set limit of the appliance). Rinnai Operation Manual...
  • Page 13: Deluxe Bathroom Water Controllers

    If more than one controller is fitted press the ‘Transfer’ button to transfer priority to the desired controller. Rinnai Australia Operation Manual...
  • Page 14: Setting The Sound Options

    These are safety features. CHECK WATER TEMPERATURE BEFORE USE. A parent or carer should always check the temperature before a child is placed CAUTION in contact with hot water, see page 5. Rinnai Australia Operation Manual...
  • Page 15: Operating The Shower Saver / Bath Fill Function

    The 'Shower Saver / Bath Fill' button will illuminate and a voice prompt and tone will sound. During 'Shower Saver / Bath Fill' operations the 'Bath' indicator will also be displayed in the Deluxe Kitchen water controller digital monitor (when fitted). Rinnai Australia Operation Manual...
  • Page 16: Using Multiple Water Controllers

    Universal and Deluxe water controllers can be combined and will function as described in other sections of the Water Heater Operation / Installation Manual. Refer to page 7 to confirm the maximum number and combination of controllers that can be fitted to your water heater model. Rinnai Australia Operation Manual...
  • Page 17: Deluxe Kitchen Water Controllers

    To return to normal mode press the 'Mode' button once, if no buttons are pressed for a period of approximately 10 seconds the controller will return to normal mode. Voice prompts only available when Deluxe Bathroom water controller(s) are installed. NOTE Rinnai Australia Operation Manual...
  • Page 18: Setting The Clock

    These are safety features. CHECK WATER TEMPERATURE BEFORE USE. A parent or carer should always check the temperature before a child is placed CAUTION in contact with hot water, see page 5. Rinnai Australia Operation Manual...
  • Page 19: SmartstartĀ® Pre-Heat Operation

    BUTTON Preheat Function The “Preheat” function works in conjunction with various Rinnai water heater models and the separately installed and optional Rinnai “Smartstart®” module. When the “Preheat” function is activated and used in accordance with these instructions, water in the pipework connected between the water heater and the hot water outlets in your house is warmed before any outlets are opened.
  • Page 20: Troubleshooting

    In all cases, you may be able to clear the Error Code simply by turning the hot water tap OFF, then ON again. If this does not clear the Error Code, try pushing the On/Off button OFF, then ON again. If the Error Code still remains, contact Rinnai for advice.
  • Page 21 INTENTIONALLY BLANK PAGE Rinnai Australia Operation Manual...
  • Page 22 INTENTIONALLY BLANK PAGE Rinnai Australia Operation Manual...
  • Page 23: Installation Manual

    COMMON STACK DISCHARGE ......................29 TUNDISH DRAIN LINES ........................... 29 AREAS SUBJECT TO FREEZING ......................29 WATER CONTROLLER INSTALLATION..............30 RINNAI WATER CONTROLLERS ......................30 POSITIONING OF WATER CONTROLLERS ................... 30 WATER CONTROLLER CABLES ......................30 FITTING THE ‘UNIVERSAL’ WATER CONTROL (MC-91Q) ..............30 OPTIONAL PROGRAMMING FOR THE ‘UNIVERSAL’...
  • Page 24: General Installation Instructions

    For installations where the distance between the water heater and the outlets is considerable, a flow and return system or the Rinnai Smartstart® system can be used which minimise the waiting time for hot water delivery.
  • Page 25: Pipe Sizing

    ‘Maximum’ rated water supply pressures in Table 1 are exceeded. To achieve the rated flow, the ‘Minimum’ water supply pressures in Table 1 must be supplied. The water heaters will operate at lower pressures but will not achieve the rated flow. Contact Rinnai for ‘gravity fed’ or ‘low pressure’ installations.
  • Page 26: Service Connection Points

    AS/NZ 3500 a Temperature Limiting Device (TLD), such as a Tempering Valve may be required even if the appliance is set to 50º C or less. For these types of applications contact Rinnai. Water controller Water controller...
  • Page 27: Horizontal Flue Terminal Clearances

    For appliance s not addressed above acceptance should be obtained from the Technical Regulator. FIGURE 6.2 (in-part) MINIMUM CLEARANCES REQUIRED FOR BALANCED FLUE TERMINALS, FAN-ASSISTED FLUE TERMINALS, ROOM-SEALED APPLIANCE TERMINALS AND OPENINGS OF OUTDOOR APPLIANCES Extract from AS/NZS 5601 Rinnai Australia Installation Manual...
  • Page 28: Horizontal Obstructions

    This will avoid the appliance failing to operate under windy conditions. MULTIPLE INSTALLATIONS OF EXTERNAL MODELS Dimension ‘h’ above does not apply when multiple Rinnai external water heaters of the same model are installed on the same vertical face with flue terminals at the same height.
  • Page 29: Appliance And Water Controller Dimensions

    Condensate: Fitting Diameter Flue Spigot Centreline (from wall, FFU only) 95 ~ 135 * Please note that this measurement is to the left of the centre line. Dim' Description Width Height Depth Distance between mounting hole centres Rinnai Australia Installation Manual...
  • Page 30: Co-Axial Flueing For Internal Models

    CO-AXIAL FLUEING FOR INTERNAL MODELS Rinnai internal models described in this manual must use the Co-Axial Rinnai FFU flue components. The use of non Rinnai FFU flue components may result in a dangerous situation and violates regulations. The FFU flue system must be installed in accordance with the ‘FFU Flue Installation Manual’ which is provided with the FFU flue terminal components FFWALLTERM or FFROOFCOWL.
  • Page 31: Condensate Drain (Reu-Km' Models Only)

    For this reason copper tube and fittings MUST NOT be used as it will corrode. Instead, Rinnai recommend plastic pipes and fittings such as Unplasticised Polyvinyl Chloride (UPVC) or Polyethylene (PE) which is commonly used for irrigation piping.
  • Page 32: Interconnection Of Condensate Drain Lines

    300 mm in length. It shall discharge into a tundish through an air gap of not less than 75 mm and not more than 150 mm measured from the outlet of the drain pipe to the rim of the tundish. Rinnai Australia Installation Manual...
  • Page 33: Water Controller Installation

    Other manufacturers water controllers are NOT compatible with Rinnai water heaters. Water controllers MUST NOT be used with any Solar Boost water heater. NOTE Rinnai water controllers brought in from other countries are not compatible with Rinnai appliances sold in Australia. POSITIONING OF WATER CONTROLLERS Water controllers must be installed in shaded and clean locations.
  • Page 34: Optional Programming For The 'Universal' Water Controller (Mc-91Q)

    If the water controller in the kitchen is swapped with another controller (for example, the controller fitted in a bathroom), repeat STEP 1 for the controller moved from the kitchen to the bathroom. Then perform STEP 1 for the controller moved from bathroom to the kitchen. Rinnai Australia Installation Manual...
  • Page 35: Fitting The 'Deluxe Kitchen' Water Controller (Mc-100V)

    Fix the controller to the wall using the appropriate fixings as shown in Fig. 5, avoid over- tightening of fixings as this may cause damage. Once secured replace the face plate. Backing Seal Remove film to expose self-adhesive Fig. 3 Fig. 4 Fig. 5 Rinnai Australia Installation Manual...
  • Page 36: Connecting Communication Cables To The Water Heater

    ‘Ezi connect’ cable connector at the water heater. Extension cables are available from Rinnai. Alternatively, two core sheathed (double insulated) flex with minimum cross sectional area of 0.5mm² may be used. Cable lengths must not exceed 20 metres.
  • Page 37: Commissioning

    For all other models Rinnai continuous flow water heaters are factory pre-set to various maximum delivery temperatures depending on model and their intended application. For the majority of applications, the factory pre- set temperature is appropriate. In the unlikely event it is not this setting can be increased or decreased by the installer.
  • Page 38: Gas Pressure Setting

    A commissioning check list is provided on the appliance front cover to enable the installer to step through the correct commissioning procedure when installing a Rinnai Continuous Flow water heater. The check list can also assist the installer to identify potential installation errors that may prevent the appliance from operating correctly.
  • Page 39: Accessories

    Sideways Flue Diverter Designed to redirect flue products when the gas booster is installed on a balcony. Contact Rinnai for further information about our accessory range and model suitability details. PRODUCT RECORDS Please take a moment to record the following information below for your own records.

Table of Contents