Table of Contents
Advertisement
Quick Links
Advertisement
Table of Contents

Subscribe to Our Youtube Channel
Related Manuals for Fisher-Price POWER WHEELS Kawasaki ZX-7


Summary of Contents for Fisher-Price POWER WHEELS Kawasaki ZX-7
- Page 1 This Owner's Manual is provided and hosted by Appliance Factory Parts. FISHER PRICE 78410 Owner's Manual Shop genuine replacement parts for FISHER PRICE 78410 Find Your FISHER PRICE Ride On Parts - Select From 999 Models -------- Manual continues below --------...
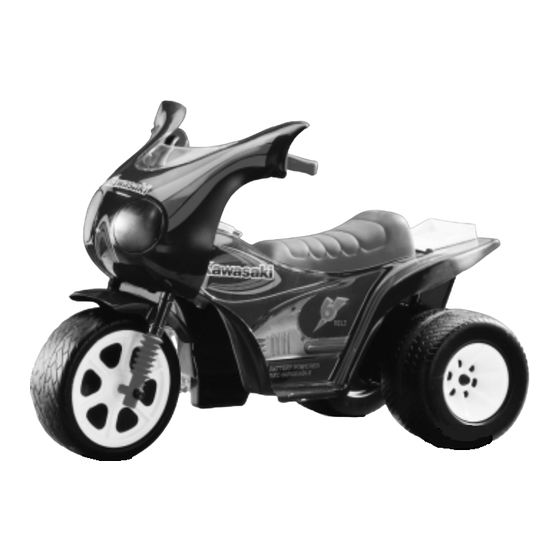
- Page 2 CAUTION ELECTRIC TOY: Not recommended for children under 1 years of age. As with all electric products, precautions should be observed during handling and use to prevent electric shock. Kawasaki ® ZX-7 Owner’s Manual with Assembly Instructions Please read this manual and save it with your original sale’s receipt. For Model 78410 Tools needed for assembly: Phillips Screwdriver, Slotted Screwdriver, Hammer, Safety Scissors.
- Page 3 Throughout this manual you will find important messages in the WARNING form of WARNINGS, CAUTIONS, and NOTES. WARNING – SIGNALS SOMETHING THAT COULD HURT YOUR CHILD OR YOU. The message explains the hazard and how you can avoid it. WARNING •...
- Page 4 NOTE – Is used to highlight CAUTION useful information. CAUTION – SIGNALS SOMETHING THAT COULD DAMAGE THE VEHICLE. The message explains the risk and how you can avoid it. CAUTION • Do not operate the vehicle for the first time until you have inserted the 25 amp fuse into the battery and charged the battery for at least 18 hours.
-
Page 5: Table Of Contents
Table of Contents Message to Parents ...............4 Important Information . -
Page 6: Important Information
Important Information • Carefully read this manual for important safety • To purchase a Power Wheels Type H battery, Power ® information and operating instructions before using Wheels 25 amp fuse or a Power Wheels Type H ® ® your vehicle. 6 volt charger, please contact: •... -
Page 7: Parts
Parts If you experience a problem with this product, or are missing a part, please call us at 1-800-348-0751, rather than return this product to the store. Please save all packaging material until assembly is complete to ensure that no parts are discarded. Small Parts Bag Dashboard 6 Volt Charger... - Page 8 Parts #8 x 1 " Screw – 4 Cap Nut – 3* Radio Knob – 2 Handlebar Plug – 2 #8 x " Screw Wheel Bushing – 2 #8 x " Screw – 4 Gas Cap 25 Amp Fuse –2* #6 x "...
-
Page 9: Parts Diagram
Parts Diagram ASSEMBLY A CHARGER ASSEMBLY A MOTOR/GEARBOX ASSEMBLY Kawasaki ® ZX-7 FOR MODEL 78410 6 VOLT... -
Page 10: Parts List
Parts List Note: The parts listed below are not all consumer assembled. Consumer assembled parts are shown on pages 6 and 7 and are highlighted in bold type below. Item Description Part No. Qty. Parts Not Shown #6 - 20 x 1" Screw for Battery 80008-0110 Swivel Bracket... -
Page 11: First-Time Battery Charging
First-Time Battery Charging We recommend that you begin charging your battery before beginning assembly of your vehicle. Your new battery must be charged for at least 18 hours before using your vehicle for the first time. WARNING • The battery must be handled by adults only. •... - Page 12 First-Time Battery Charging Fuse • Insert the 25 amp fuse into the battery. Charger • Squeeze the Lock-In connector tabs on the charger connector and plug it into the battery connector. Lock-In Connector Charger Tabs Connector Battery Connector • Plug the charger into a standard 120 volt wall outlet.
-
Page 13: Assembly
Assembly Do Not Omit Any Steps. Please set aside at least 30 minutes for assembly. WARNING • Children can be harmed by small parts, sharp edges and sharp points in the vehicle’s unassembled state, or by electrical items. Care should be taken in unpacking and assembly of the vehicle. - Page 14 Assembly Swivel Bracket #8 x " Screw – 2 Shown Actual Size Left Handlebar • Align the screw holes in the left side of the swivel bracket with the screw holes in the left handlebar. • Insert two #8 x "...
- Page 15 Assembly Dashboard #8 x 1 " Screw – 2 Shown Actual Size • Lay the vehicle body on its belly. • Fit the dashboard onto the top Swivel of the swivel bracket. Bracket • Align the screw holes in the dashboard and swivel bracket.
- Page 16 Assembly Windshield #6 x " Screw – 2 Shown Actual Size • Turn the fairing over. • Insert two #6 x " screws into the holes in the two long windshield tabs. • Tighten each screw with a Phillips screwdriver. Do not over-tighten. Fairing Long Windshield Tabs Fairing...
- Page 17 Assembly • Fit the fender onto the ends of the handlebars. • Slide the fender up the handle- bars to the fairing. Fender Handlebars Fairing • Fit one end of the front axle into a cap nut. Front Axle • Tap the front axle with a hammer to secure the cap nut on the front axle.
- Page 18 Assembly • Fit and hold an inner shock half to the inside of a handlebar. • Fit and hold an outer shock half Inner Shock Half to the outside of the same handlebar. • Make sure the top ends of the shock halves fit into the fender.
- Page 19 Assembly Hubcap • Fit and hold the hubcaps to each side of the front wheel. Front Wheel • Make sure the posts on the inside of the hubcaps fit into the inden- tations on the front wheel, so that the hubcaps lay flat against the wheel.
- Page 20 Assembly • Slide the front axle through the handlebar. Cap Nut • Fit the remaining cap nut on the end of the front axle. Front Axle • Support the front axle and tap the Handlebar cap nut with a hammer to secure it on the end of the front axle.
- Page 21 Assembly • Snap the gas cap into the vehicle Gas Cap body. Seat Tabs • Insert the tabs on the front of the seat into the vehicle body. • Lower the seat. Proper label application will help to keep the labels looking their best! •...
-
Page 22: Battery Installation
Battery Installation Important Note: Use only a Power Wheels ® Type H 6 volt battery with a Power Wheels ® 25 amp fuse installed. Use of any other battery or fuse will damage your vehicle. Make sure that you charge the battery for at least 18 hours before operating your vehicle for the first time. After first time use, charge the battery for at least 18 hours after each use. - Page 23 Battery Installation #8 x " Screw – 1 Shown Actual Size • Lower the battery retainer over the top of the battery. • Insert a #8 x " screw through the battery retainer and into the battery compartment. Motor Harness Connector •...
- Page 24 Battery Installation • Lower the seat. Note: Make sure the tabs on the lock fastener are aligned with the notches in the lock fastener opening. • Rotate the lock fastener turn using a slotted screwdriver to lock the battery compartment. •...
-
Page 25: Charging The Battery
Charging the Battery WARNING • The battery must be handled by adults only. • Never allow children to charge the battery. Battery charging must be done by adults only. A child could be injured by the electricity involved in charging the battery. •... - Page 26 Charging the Battery Important Note: The battery must be upright while charging. You do not have to remove the battery from the vehicle to charge it. • Rotate the lock fastener on the seat back turn using a slotted GOOD FUSE "BLOWN"...
-
Page 27: Battery Handling/Care/Disposal
Battery Handling/Care/Disposal WARNING CAUTION • Carefully read the Battery Care instructions • The battery must be handled by adults only. to obtain the best battery life. Failure to • Never permit a child to handle the battery. follow the Battery Care instructions may The battery is heavy and contains sulfuric damage your battery and will void your acid (electrolyte), and if dropped, could... -
Page 28: Rules For Safe Driving
Rules for Safe Driving WARNING CAUTION • To avoid damaging the motor and gears, • Adult supervision is required. Children do not overload the vehicle. do not have the judgement necessary to avoid many accidents. Be sure that - Never allow more than one child on the children operating this vehicle can do so vehicle at one time. - Page 29 Rules for Safe Driving • While driving across a steep slope, the vehicle 8. Do not operate the vehicle near flammable vapors may tilt and tip over. The wheels could lose (gasoline, paint thinner, acetone, liquid wax, etc.). traction causing the vehicle to slip. The vehicle’s electrical switches, like most electrical switches, emit an internal spark when first turned •While driving up a steep incline, the motor may...
-
Page 30: How To Operate Your Vehicle
How to Operate your Vehicle • Press down on the foot pedal to drive. • Lift your foot from the foot pedal to stop. Your Kawasaki ® ZX-7 has a patented, electronic braking system that automatically stops the vehicle when your child’s foot if lifted from the pedal. -
Page 31: Questions And Answers
Questions and Answers How often do I need to charge the battery? Charge the battery for a minimum of 18 hours after each use of the vehicle or whenever the vehicle begins to slow down. When the vehicle is not in regular use, charge the battery at least once a month until normal use is resumed. -
Page 32: Problems And Solutions Guide
Problems and Solutions Guide IMPORTANT! If you experience a problem with your vehicle, first check the Problems and Solutions Guide below. If you still experience a problem, please contact Power Wheels ® Consumer Affairs, toll-free at 1-800-348-0751 between 8 AM and 6 PM (EST) Monday through Friday. - Page 33 Problems and Solutions Guide Problem Possible Cause Solution Vehicle was running but Loose wire or loose connectors Check all wires and connectors. Make sure the battery suddenly stopped connector is tightly plugged into the motor harness connector. Wrong type or improperly installed fuse Make sure that the battery has a properly installed Power Wheels ®...
- Page 34 Problems and Solutions Guide Problem Possible Cause Solution Vehicle runs sluggishly Undercharged battery Charge the battery. A new battery should have been charged for at least 18 hours before using the vehicle for the first time. After first-time use, recharge the battery for at least 18 hours after each use.
- Page 35 Problems and Solutions Guide Problem Possible Cause Solution Sometimes the vehicle doesn’t Loose wire or connector Check all wires around the motor and all connectors to run, but other times it does make sure they are tight. Motor or electrical switch damage Contact your local Power Wheels ®...
-
Page 36: Statement Of Limited Warranty
Statement of Limited Warranty 90-day limited warranty for the Power under this warranty or implied by law or any indirect or consequential damages for breach of warranty. Wheels ® Ride-On Toy Vehicle Some states do not allow the exclusion or limitation so A 6-month battery warranty applying only this limitation may not apply to you. - Page 37 Authorized Service Centers COLORADO TALLAHASSEE - Prescott’s Ace Hardware, 4831 Kerry NEW ALBANY - Wells Hardware, Inc., 1011 Vincennes Forest Parkway, 32308, (904) 668-3389 Street, 47150, (812) 944-4523 COLORADO SPRINGS - Nelson Appliance Repair, Inc., TAMPA - Authorized Appliance Service Co., Dibbs Plaza, SOUTH BEND - Ray’s TV and Appliance, 60717 US 31 1220 E.
- Page 38 Authorized Service Centers MASSACHUSETTS MONTANA SCHENECTADY - Greene’s Service, 1877 State Street, 12304, (518) 370-5021 BOSTON (MEDFIELD) - Wills Hardware, 5 Janes Avenue, BILLINGS - Radio Equipment Company, SEA CLIFF, L.I. - Shabra Electronics, 400 Glen Cove 02052, (508) 359-4381 1120 16th Street West, 59104, (406) 256-9778 Avenue, 11579, (516) 671-2218 BOSTON (WALTHAM) - Suburban Appliance Service...
- Page 39 Authorized Service Centers OKLAHOMA TENNESSEE VIRGINIA OKLAHOMA CITY - Brand Service Center, CHATTANOOGA - Light Electric Co., 732 East 11th Street, HARRISONBURG (PENN LAIRD) - J.L. Maintenance & 538 N. Pennsylvania Avenue, 73107, (405) 235-0583 37403, (615) 267-9224 Repair, Inc., Route 1, Box 183, 22846, (703) 289-9844, (800) 296-9844 TULSA - H.L.
Need help?
Do you have a question about the POWER WHEELS Kawasaki ZX-7 and is the answer not in the manual?
Questions and answers