Table of Contents
Advertisement
Quick Links
AUDIO/VIDEO MULTI-CHANNEL
RECEIVER
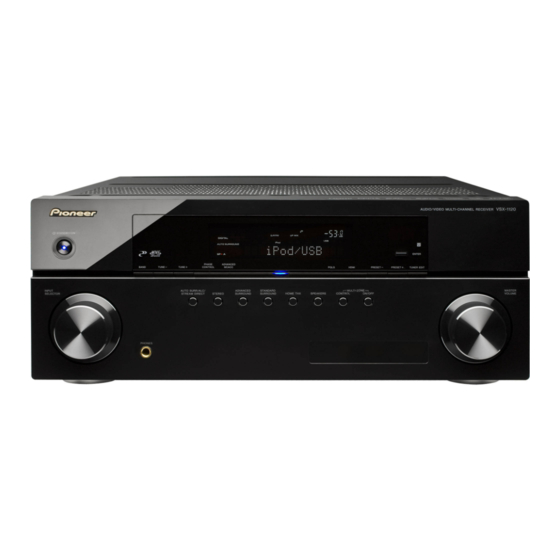
VSX-1120
Register your product at
http://www.pioneerelectronics.com (US)
http://www.pioneerelectronics.ca (Canada)
· Protect your new investment
The details of your purchase will be on file for reference in the event of an
insurance claim such as loss or theft.
· Receive free tips, updates and service bulletins on
your new product
· Improve product development
Your input helps us continue to design products that meet your needs.
· Receive a free Pioneer newsletter
Registered customers can opt in to receive a monthly newsletter.
Operating Instructions
-K
Advertisement
Table of Contents

Related Manuals for Pioneer VSX-1120-K


Summary of Contents for Pioneer VSX-1120-K
-
Page 1: Operating Instructions
(US) http://www.pioneerelectronics.ca (Canada) · Protect your new investment The details of your purchase will be on file for reference in the event of an insurance claim such as loss or theft. · Receive free tips, updates and service bulletins on your new product ·... -
Page 2: Operating Environment
Operating Environment moisture. Operating environment temperature and humidity: D3-4-2-1-3_A1_En +5 °C to +35 °C (+41 °F to +95 °F); less than 85 %RH WARNING (cooling vents not blocked) Do not install this unit in a poorly ventilated area, or in... - Page 3 NOTE: This equipment has been tested and found to comply with the limits for a Class B digital device, pursuant to Part 15 of the FCC Rules. These limits are designed to provide reasonable protection against harmful interference in a residential installation.
- Page 4 This product is for general household purposes. Any failure due to use for other than household purposes (such as long-term use for business purposes in a restaurant or use in a car or ship) and which requires repair will be charged for even during the warranty period.
-
Page 5: Table Of Contents
Installing the receiver ......10 output ........33 Loading the batteries . - Page 6 08 Using other functions menu ........78 Setting the Audio options .
- Page 7 Dolby........94 DTS ........94 Windows Media Audio 9 Professional .
- Page 8 Flow of settings on the receiver The unit is a full-fledged AV receiver equipped with an abundance of functions and terminals. It can be used easily after following the procedure below to make the connections and settings. The colors of the steps indicate the following:...
-
Page 9: Before You Start
• Remote control unit • iPhone/iPod playback • AAA size IEC R03 dry cell batteries (to confirm system Your iPhone or iPod can be connected to the receiver’s operation) x2 USB terminal to play the music/video files on the iPhone/ •... -
Page 10: Installing The Receiver
– on a color TV (the screen may distort) • Direct sunlight or fluorescent light is shining onto the – near a cassette deck (or close to a device that gives off remote sensor. a magnetic field). This may interfere with the sound. -
Page 11: Controls And Displays
The remote has been conveniently color-coded according for the receiver. to component control using the following system: • White – Receiver control, TV control • Blue – Other controls (See page 39, 40, 43, 44, 46 and 66.) RECEIVER MULTI SOURCE OPERATION ... -
Page 12: Front Panel
HDMI OUT – The HDMI button cannot be used with this receiver. 13 MUTE SIGNAL SEL – Use to select an input signal (page 51). Mutes the sound or restores the sound if it has been muted (adjusting the volume also restores the sound). -
Page 13: Display
XL/XR – Two channels other than the ones above AUTO lights when the receiver is set to select the input XC – Either one channel other than the ones above, the mono signal automatically (page 51). surround channel or matrix encode flag... - Page 14 Logic II / 2 Pro Logic IIx decoding (page 48). S.RTRV Neo:6 – When one of the Neo:6 modes of the receiver Lights when the Sound Retriever function is active is on, this lights to indicate Neo:6 processing (page 48).
-
Page 15: Connecting Your Equipment
Connecting your equipment Chapter 3: Connecting your equipment This receiver provides you with many connection possibilities, but it doesn’t have to be difficult. This chapter explains the kinds of components you can connect to make up your home theater system. Rear panel... -
Page 16: Determining The Speakers' Application
This plan replaces the left and right front height speakers shown in [A] with the left and right front wide speakers (FWL/FWR). Note 1 It is not possible to produce sound simultaneously from the front height or front wide speakers and the surround back speakers. -
Page 17: Other Speaker Connections
MCACC (speaker environment setting) procedure. • For the best stereo effect, place the front speakers 2 See Automatically conducting optimum sound tuning m to 3 m (6 ft. to 9 ft.) apart, at equal distance from (Auto MCACC) on page 35. the TV. -
Page 18: Connecting The Speakers
• Surround and surround back speakers should be • These speaker terminals carry HAZARDOUS LIVE positioned 60 cm to 90 cm (2 ft. to 3 ft.) higher than voltage. To prevent the risk of electric shock when your ears and tilted slightly downward. Make sure the connecting or disconnecting the speaker cables, speakers don’t face each other. -
Page 19: Installing Your Speaker System
At the very least, front left and right speakers only are necessary. Note that your main surround speakers should always be connected as a pair, but you can connect just one surround back speaker if you like (it must be connected to the left surround back terminal). -
Page 20: Bi-Amping Your Speakers
Bi-amping is when you connect the high frequency driver Bi-wiring your speakers and low frequency driver of your speakers to different Your speakers can also be bi-wired if they support bi- amplifiers for better crossover performance. Your amping. speakers must be bi-ampable to do this (having separate •... -
Page 21: Selecting The Speaker System
Note 1 • If the video signal does not appear on your TV, try adjusting the resolution settings on your component or display. Note that some components (such as video game units) have resolutions that may not be converted. In this case, try switching Digital Video Conversion (in Setting the Video options on page 57) OFF. -
Page 22: About Hdmi
1 • An HDMI connection can only be made with DVI-equipped components compatible with both DVI and High Bandwidth Digital Content Protection (HDCP). If you choose to connect to a DVI connector, you will need a separate adaptor (DVIHDMI) to do so. A DVI connection, however, does not support audio signals. -
Page 23: Connecting Your Tv And Playback Components
1 When the TV and receiver are connected by HDMI connections, if the TV supports the HDMI Audio Return Channel function, the sound of the TV is input to the receiver via the HDMI terminal, so there is no need to connect an audio cable. In this case, set TV Audio at HDMI Setup to... -
Page 24: Connecting Your Dvd Player With No Hdmi Output
1 When the TV and receiver are connected by HDMI connections, if the TV supports the HDMI Audio Return Channel function, the sound of the TV is input to the receiver via the HDMI terminal, so there is no need to connect an audio cable. In this case, set TV Audio at HDMI Setup to... -
Page 25: Connecting Your Tv With No Hdmi Input
This diagram shows connections of a TV (with no HDMI input) and DVD player (or other playback component) to the receiver. • With these connections, the picture is not output to the TV even if the DVD player is connected with an HDMI cable. Connect the DVD player’s video signals using a composite or component cord. -
Page 26: Connecting An Hdd/Dvd Recorder, Bd Recorder And Other Video Sources
This receiver has two sets of audio/video inputs and outputs suitable for connecting analog or digital video devices, including HDD/DVD recorders and BD recorders. When you set up the receiver you’ll need to tell the receiver which input you connected the recorder to (see also The Input Setup menu on page 37). -
Page 27: Connecting A Satellite/Cable Receiver Or Other Set-Top Box
Satellite and cable receivers, and terrestrial digital TV When you set up the receiver you’ll need to tell the tuners are all examples of so-called ‘set-top boxes’. receiver which input you connected the component to When you set up the receiver you’ll need to tell the... -
Page 28: About The Wma9 Pro Decoder
(see Speaker Setting on page 79) to LARGE. Note 1 • Windows Media and the Windows logo are trademarks or registered trademarks of Microsoft Corporation in the United States and/or other countries. • With WMA9 Pro, sound problems may occur depending on your computer system. Note that WMA9 Pro 96 kHz sources will be... -
Page 29: Connecting Am/Fm Antennas
FM UNBAL 75 ANTENNA AM LOOP FM UNBAL 75 To improve AM reception, connect a 5 m to 6 m (16 ft. to ANTENNA 20 ft.) length of vinyl-coated wire to the AM LOOP terminals without disconnecting the supplied AM loop antenna. -
Page 30: Multi-Zone Setup
FM U AUDIO IN RS-232C ANTENNA (OUTPUT 150 mA MAX) Router CONTROL EXTENSION LAN cable (sold separately) to LAN port Note 1 To listen to Internet radio stations, you must sign a contract with an ISP (Internet Service Provider) beforehand. -
Page 31: Connecting Optional Bluetooth® Adapter
MCACC SETUP MIC HDMI 5 LAN terminal ......Ethernet jack 10BASE-T/100BASE-TX Connecting Optional Bluetooth ®... -
Page 32: Connecting An Ipod
• It is also possible to connect using the cable included • Enter Internet radio station URLs (page 44). with the iPod, but in this case it is not possible to view • Switch the receiver into standby then connect your pictures via the receiver. -
Page 33: Connecting A Usb Device For Advanced Mcacc Output
CONTROL jacks instead of the IR OUT jack. Note 1 The various parameters and the reverb characteristics data used for display on the computer are not cleared when the power is turned off (see Output MCACC data on page 76). -
Page 34: Operating Other Pioneer Components With This Unit's Sensor
1 • If you want to control all your components using this receiver’s remote control, see Setting the remote to control other components on page 62. • If you have connected a remote control to the CONTROL IN jack (using a mini-plug cable), you won’t be able to control this unit using the remote sensor. -
Page 35: Basic Setup
Switch on the receiver and your TV. registered in some jurisdictions. All rights reserved. Make sure that the TV’s video input is set to this receiver (for example, if you connected this receiver to the VIDEO Switch on the receiver and your TV. - Page 36 EQ Professional menu in the Manual MCACC setup (page 71). 4 If you are planning on bi-amping your front speakers, or setting up a separate speaker system in another room, read through Speaker system...
-
Page 37: Problems When Using The Auto Mcacc Setup
Reverse Phase may be displayed even if the speakers are properly connected. 2 • Depending on the characteristics of your room, sometimes identical speakers with cone sizes of around 12 cm (5 inches) will end up with different size settings. You can correct the setting manually using the Manual speaker setup on page 78. -
Page 38: Input Function Default And Possible Settings
Select Rename to The dots () indicate possible assignments. do so, or Default to return to the system default. • Input Skip – When set to ON, that input is skipped Input Terminals Input when selecting the input using INPUT SELECT. (DVD... -
Page 39: Basic Playback
• When listening to a track on the iPod in the main zone, it is possible to control the sub zone, but not to listen to a different track in the sub zone from the one playing in the main zone. -
Page 40: Playing Back Audio Files Stored On An Ipod
1 • Note that characters that cannot be displayed on this receiver are displayed as #. • This feature is not available for photos on your iPod. To display photos, switch iPod operation to the iPod (see Switching the iPod controls below). -
Page 41: Playing Back Audio Files Stored On A Usb Memory Device
2 • Copyrighted audio files cannot be played back on this receiver. • DRM-protected audio files cannot be played back on this receiver. 3 Photo files cannot be played in the sub zone. 4 If the slideshow is left in the pause mode for five minutes, the list screen reappears. -
Page 42: About Playable File Formats
VBR/CBR Supported/Supported a.“MPEG Layer-3 audio decoding technology licensed from Fraunhofer IIS and Thomson multimedia.” b.Files encoded using Windows Media Codec 9 may be playable but some parts of the specification are not supported; specifically, Pro, Lossless, Voice. Photo files Category Extension .jpg... -
Page 43: Listening To The Radio
Press PRESET / to select the station preset you the radio station. want. For example, to tune to 106.00 (FM), press 1, 0, 6, 0, 0. • You can also use the number buttons on the remote If you make a mistake halfway through, press D.ACCESS control to recall the station preset. -
Page 44: Listening To Internet Radio Stations
Note 1 • To listen to Internet radio stations, you must have high-speed broadband Internet access. With a 56 K or ISDN modem, you may not enjoy the full benefits of Internet radio. • The port number varies depending on the Internet radio station. Check the firewall settings. -
Page 45: Listening To Satellite Radio
2 You can check the strength of reception in Using the SIRIUS Menu below. 3 It’s easiest if you have your TV switched on to take advantage of the GUI screens. You can, however, use just the front panel display to do... -
Page 46: Saving Channel Presets
The SIRIUS Menu provides additional SIRIUS Radio operation features. Note 1 You can reset the Channel presets and memory in Resetting the system on page 60. 2 You can reset the Channel Skip/Add, Parental Lock and Password settings in Resetting the system on page 60. -
Page 47: Wireless Music Play
5 The passcode may in some cases be referred to as PASSKEY or PIN code. 6 When the Bluetooth ADAPTER is not plugged into the ADAPTER PORT, NO ADAPTER will be displayed if ADAPTER PORT input is selected. 7 • Bluetooth wireless technology device should be compatible with AVRCP profile. -
Page 48: Listening To Your System
(surround back), especially suited to music sources Note 1 If the surround back speakers are not connected or V.SB is switched OFF (page 55), 2 Pro Logic IIx becomes 2 Pro Logic II (5.1 channel sound). 2 When listening to 2-channel sources in Dolby Pro Logic IIx Music mode, there are three further parameters you can adjust: C.WIDTH, DIMENSION and PANORAMA. -
Page 49: Using The Home Thx Modes
This mode can only be selected when Speaker System is set to Normal(SB/FH) • When listening sources in 2 Pro Logic IIz HEIGHT mode, you can also adjust the H.GAIN effect (see Setting the Audio options on page 55). This mode can only be selected when Speaker System is set to Normal(SB/FW) -
Page 50: Listening In Stereo
• F.S.SURR FOCUS – Use to provide a rich surround sound effect directed to the center of where the front left and right speakers sound projection area converges. Note 1 The SOUND RETRIEVER AIR listening mode can only selected when the ADAPTER PORT input. -
Page 51: Selecting Mcacc Presets
DTS-EXPRESS, DTS-HD Master Audio and SACD. • You may get digital noise when an LD, CD, DVD or BD player compatible with DTS is playing an analog signal. To prevent noise, make the proper digital connections (page 27) and set the signal input to DIGITAL. -
Page 52: Control With Hdmi Function
Select the ‘Control’ setting you want. Choose whether to set this unit’s Control with HDMI Making Control with HDMI function ON or OFF. You will need to set it to ON to use the Control with HDMI function. connections When using a component that does not support the You can use synchronized operation for a connected TV Control with HDMI function, set this to OFF. -
Page 53: Before Using Synchronization
Before using synchronization functions or the PQLS function only. However, Display Once you have finished all connections and settings, you Power Off will activate the settings set forth in step 7 below. must: • ALL – Enabled for all linked functions. -
Page 54: About Connections With A Product Of A Different Brand That Supports The Control With Hdmi Function
Linear PCM. Note 1 • If a listening mode other than AUTO SURROUND, ALC, DIRECT, PURE DIRECT or STEREO is selected while the PQLS effect is enabled, the PQLS effect is disabled. • When this receiver is connected by HDMI cable to a Pioneer player that is compatible with the PQLS function via HDMI connection and HDMI reauthentication is performed (the HDMI indicator blinks), the PQLS effect is enabled and the listening mode is set to AUTO SURROUND if a listening mode other than AUTO SURROUND, ALC, DIRECT, PURE DIRECT or STEREO is selected. -
Page 55: Using Other Functions
Adjusts the amount of treble. –6 to +6 (dB) Important TREBLE Default: 0 (dB) • Note that if a setting doesn’t appear in the AUDIO With the Sound Retriever S.RTRV PARAMETER menu, it is unavailable due to the (Sound function, DSP processing is used current source, settings and status of the receiver. - Page 56 • You can only use the Virtual Surround Back mode if the surround (Applicable right and left speakers) to 10 speakers are on and the SB setting is set to NO or if Front Bi-Amp only when Neo:6 or ZONE 2 is selected at Speaker System. It can also be used when...
-
Page 57: Setting The Video Options
PURE switch it OFF. signals are output at the HDMI b.• When set to a resolution with which the TV (monitor) is not 480p/576p OUT connector, select this compatible, no picture is output. Also, in some cases no picture will... -
Page 58: Switching The Speaker Terminals
4 • You won’t be able to switch the main zone off completely unless you’ve switched off the MULTI-ZONE control first. • If you don’t plan to use the MULTI-ZONE feature for a while, turn off the power in both the sub and main rooms so that this receiver is in... -
Page 59: Making An Audio Or A Video Recording
Use the remote control’s SIGNAL SEL button. Note 1 • The receiver’s volume, Audio parameters (the tone controls, for example), and surround effects have no effect on the recorded signal. • Some digital sources are copy-protected, and can only be recorded in analog. -
Page 60: Using The Web Control Function
Operate from the screen for the individual zone. Set MULTI-ZONE to OFF. • Even when the receiver is in the standby mode, it can • Disconnect the iPod and USB memory device from be turned on using the Web Control function. For the receiver beforehand. -
Page 61: Default System Settings
All Inputs Listening Mode AUTO (2 ch/multi ch) SURROUND Listening Mode (HP) STEREO See also Setting the Audio options on page 55 for other default DSP settings. MCACC MCACC Position Memory M1: MEMORY 1 Channel Level (M1 to M6) 0.0 dB Speaker Distance (M1 to M6) 10.00 ft... -
Page 62: Controlling The Rest Of Your System
Note To try out the remote control, switch the component on or • You can cancel or exit any of the steps by pressing off (into standby) by pressing SOURCE. If it doesn’t R.SETUP. seem to work, select the next code from the list (if there is one). -
Page 63: Programming Signals From Other Remote Controls
• If the LED flashes for five seconds, it means the memory is full. See Erasing all learnt settings that are in one input function on page 64 to erase a programmed button you’re not using to free up more memory (note that some signals may take more memory than others). -
Page 64: Erasing All Learnt Settings That Are In One Input Function
This could let you, for example, use the remote control to • “4” (off mode) – The backlight does not turn on even set up and listen to a CD on the receiver, and then use the when the light button is pressed. -
Page 65: Programming A Multi Operation Or A Shutdown Sequence
This is done automatically. Note 1 • Before Multi operation and System off will work correctly, you must setup the remote to work with your TV and other components (see Operating multiple receivers on page 62 for more on this). -
Page 66: Resetting The Remote Control Settings
ZONE 2 ZONE 3 LIGHT RECEIVER Note 1 When preset codes are set, all the signals learned in the input function buttons are cleared. This function is convenient when you want to reset some but not all of input function buttons. - Page 67 Controlling the rest of your system Button(s) TV (Monitor) BD/DVD HDD/DVR SAT/CATV SOURCE POWER ON/OFF POWER ON/OFF POWER ON/OFF POWER ON/OFF POWER ON/OFF POWER ON/OFF Number buttons numerics numerics numerics numerics numerics numerics KURO LINK CLEAR • (dot) •...
- Page 68 Controlling the rest of your system Button(s) TV (Projector) Button(s) CD/CD-R/SACD MD/DAT TAPE SOURCE SOURCE POWER ON/OFF POWER ON/OFF POWER ON/OFF POWER ON/OFF POWER ON MOVIE Number buttons numerics numerics numerics STANDARD • (dot) >10/CLEAR CLEAR CLEAR DYNAMIC...
-
Page 69: The Advanced Mcacc Menu
The acoustic depending on the type of source (for example, watching characteristics of the listening environment are movies from a sofa, or playing a video game close to the measured and the frequency response is calibrated TV). - Page 70 Setting the Audio options on page 55. 2 If you selected ALL or Keep SP System as your Auto MCACC menu, you can specify the MCACC preset where you want to save the SYMMETRY, ALL CH ADJ and FRONT ALIGN settings.
-
Page 71: Manual Mcacc Setup
Reverse Phase may be displayed even if the speakers are properly connected. 2 • Depending on the characteristics of your room, sometimes identical speakers with cone sizes of around 12 cm (5 inches) will end up with different size settings. You can correct the setting manually using the Manual speaker setup on page 78. -
Page 72: Fine Channel Level
Note 1 • If you can’t seem to achieve this by adjusting the distance setting, you may need to change the angle of your speakers very slightly. • For better audibility, the subwoofer emits a continuous test tone (oscillating pulses are heard from your other speakers). Note that it may be difficult to compare this tone with the other speakers in your setup (depending on the low frequency response of the reference speaker). -
Page 73: Acoustic Calibration Eq Adjust
• The OVER! indicator shows in the display if the frequency adjustment is too drastic and might distort. If this happens, bring the level down until OVER! disappears from the display. Note 1 Standing Wave control filter settings cannot be changed during playback of sources using the HDMI connection. - Page 74 (with the standing waves as such), we recommend using the Reverb Measurement function. 2 • The calibration corresponding to the currently selected MCACC preset will be used when EQ ON is selected. To use another MCACC preset, press MCACC to select the MCACC memory you want to store.
-
Page 75: Checking Mcacc Data
See Speaker Setting below for more channels that are not connected. on this. • Channel Level – Used to check the output level of the Standing Wave different speakers. See Channel Level below for more Use this to display the standing wave related adjustment on this. -
Page 76: Output Mcacc Data
Note 1 MCACC data and parameters are transferred from this receiver to a USB device and by connecting the USB device to a computer, the data is imported via the MCACC software in the computer. See Connecting a USB device for Advanced MCACC output on page 33 for more on this. -
Page 77: Copying Mcacc Preset Data
Completed! shows in the GUI screen to confirm the MCACC preset has been cleared, then you automatically return to the Data Management setup menu. Note 1 The settings made in Automatically conducting optimum sound tuning (Auto MCACC) on page 35 or Automatic MCACC (Expert) on page 69. -
Page 78: The System Setup And Other Setup Menus
Select the setting you want to adjust. • Manual SP Setup – Sets the type of connection used If you are doing this for the first time, you may want to for surround back terminals and the size, number adjust these settings in order: distance and overall balance of the connected •... -
Page 79: Speaker System Setting
3 If you select SMALL for the front speakers the subwoofer will automatically be fixed to YES. Also, the center, surround, surround back, front height and front wide speakers can’t be set to LARGE if the front speakers are set to SMALL. In this case, all bass frequencies are sent to the subwoofer. -
Page 80: Channel Level
• If the surround speakers are set to NO, the surround back speakers will automatically be set to NO. 2 If you have a subwoofer and like lots of bass, it may seem logical to select LARGE for your front speakers and PLUS for the subwoofer. This may not, however, yield the best bass results. -
Page 81: X-Curve
Note 1 Since the principal is the same, X-Curve isn’t applied when you’re using any of the Home THX or Pure direct modes. 2 In case you make changes to the network configuration without the DHCP server function, make the corresponding changes to the network... -
Page 82: Checking The Mac Address
If you are doing this for the first time, you may want to adjust these settings in order: Note 1 The IP address determined by the Auto IP function is 169.254.X.X. You cannot listen to an Internet radio station if the IP address is set for the Auto IP function. -
Page 83: Volume Setup
Select the Power ON Level setting you want. GUI screen; it has no influence on the video output. The volume can be set so that it is always set to the same level when the receiver’s power is turned on. -
Page 84: Additional Information
Normally the subwoofer is from the listening position (center of the adjustments). placed on the floor. Put it in a position at which it will not (We recommend using cords, etc., when adjusting the cancel out the bass sound output from the other layout.) Ideally all the speakers should be equidistant... -
Page 85: Positional Relationship Between Speakers And Monitor
Pioneer authorized independent service company to carry out repair work. Note • If the unit does not operate normally due to external effects such as static electricity disconnect the power plug from the outlet and insert again to return to normal operating conditions. -
Page 86: No Sound
Front: SMALL / Subwoofer: YES, or Front: LARGE / Subwoofer: PLUS (see Speaker Setting on page 79). • Check that the LFE channel is not set to OFF, or to a very quiet setting (see Setting the Audio options on page 55). -
Page 87: Other Audio Problems
Lower the volume when scanning. When playing a DTS format LD • Make sure that the input signal type is set to DIGITAL (see Choosing the input signal on page 51). there is audible noise on the soundtrack. -
Page 88: Adapter Port
LAN device or Bluetooth wireless technology apparatus) is near the unit. If connected or operated. such an object is near the unit, set the unit far from it. Or, stop using the object emitting the Sound from the Bluetooth electromagnetic waves. -
Page 89: Settings
Remedy The Auto MCACC Setup • The ambient noise level may be too high. Keep the noise level in the room as low as possible (see continually shows an error. also Problems when using the Auto MCACC Setup on page 37). If the noise level cannot be kept low enough, you will have to set up the surround sound manually (page 78). -
Page 90: Remote Control
• Try replacing the batteries in the remote control (see Loading the batteries on page 10). • Be sure to operate within 7 m (23 feet) and a 30º angle of the remote sensor on the front panel (see Operating range of remote control unit on page 10). -
Page 91: Hdmi
When Control with HDMI is • Even when Control with HDMI is set to ON, for Digital In assignment of HDMI 1 is not canceled, set to ON, the HDMI Input so in this case use the HDMI 1 input. -
Page 92: Important Information Regarding The Hdmi Connection
Additional information Important information regarding the HDMI connection There are cases where you may not be able to route HDMI signals through this receiver (this depends on the HDMI- equipped component you are connecting–check with the manufacturer for HDMI compatibility information). -
Page 93: Internet Radio
(page 42). Cannot detect USB keyboard. The USB keyboard is routed through a USB hub. This receiver is not compatible with USB hubs. Plug the keyboard directly into the receiver. A PS2 keyboard is routed through a PS2/USB PS2 keyboards cannot be used with this receiver, connector. -
Page 94: Sirius Radio Messages
• Press STANDBY/ON on the front panel to turn off the power, then turn the power back on. • If the power cannot be turned off, press and hold STANDBY/ON on the front panel for over 10 seconds. The power will turn off. -
Page 95: About Thx
In a home theatre, you use only two speakers located to the surround channel levels and frequency response. This enables users side of your head. -
Page 96: About Ipod
Apple Inc. This accurately places all game audio surround information, providing a full 360 degree playback environment. THX Select2 Games mode is unique as it gives you a smooth transition of audio in all About SIRIUS points of the surround field. -
Page 97: Auto Surround, Alc And Stream Direct With Different Input Signal Formats
Auto Surround, ALC and Stream Direct with different input signal formats The following charts show what you will hear with different input signal formats, depending on the Stream Direct mode (see Using Stream Direct on page 50) you have selected. -
Page 98: Preset Code List
You should have no problem controlling a component if you find the manufacturer in this list, but please note that there are cases where codes for the manufacturer in the list will not work for the model that you are using. There are also cases where only certain functions may be controllable after assigning the proper preset code. - Page 99 SSS 0004, 0008, 0104 Viewsonic 0058, 0107 Tatung 0003, 0108 If operations are not possible using the preset codes below, you may be able to conduct operations with the preset codes for the BD, DVR (BDR, HDR). Pioneer 2014, 2158...
- Page 100 Shogun 1002 1024, 1027, 1030, 1031 Instant Replay 1004 Singer 1004 Olympus 1004 Dish Network 1029 Sonic Blue 1026 JC Penney 1000, 1001, 1002, 1003, Optimus 1003 Dishpro 1029 Sony 1006, 1009, 1017, 1021 1004 Orion 1014, 1019 Durabrand 1018...
- Page 101 Amino 6077, 6078 General Instrument 6073, 6072, Shaw 6074 Noos 6040 Auna 6082 6122 Starcom 6122 Pace 6074, 6029, 6028, 6106, 6083 BCC 6072 Homecast 6024 Stargate 6122 Panasonic 6112, 6083 Bell & Howell 6122 i3 Micro 6077 Suddenlink 6074, 6029...
-
Page 102: Specifications
Center ........110 W... -
Page 103: Cleaning The Unit
Additional information Cleaning the unit Our philosophy • Use a polishing cloth or dry cloth to wipe off dust and Pioneer is dedicated to making your home theater dirt. listening experience as close as possible to the vision of the moviemakers and mastering engineers when they •... - Page 104 Additional information...
- Page 105 Additional information...
- Page 106 Additional information...
- Page 107 PUSA or POC, without charge to you for parts or actual repair work. Parts supplied under this warranty may be new or rebuilt at the option of PUSA or POC.
- Page 108 PIONEER ELECTRONICS AUSTRALIA PTY. LTD. 178-184 Boundary Road, Braeside, Victoria 3195, Australia, TEL: (03) 9586-6300 PIONEER ELECTRONICS DE MEXICO S.A. DE C.V. Blvd.Manuel Avila Camacho 138 10 piso Col.Lomas de Chapultepec, Mexico, D.F. 11000 TEL: 55-9178-4270 K002_B1_En Printed in <ARB7451-B>...
Need help?
Do you have a question about the VSX-1120-K and is the answer not in the manual?
Questions and answers
how do i connect the pioneer vsx-1120 to a PYLE 300w for them work at the same time