Table of Contents
Advertisement
Quick Links
Advertisement
Table of Contents

Subscribe to Our Youtube Channel
Related Manuals for Vittorazi Motors ATOM 80 2020


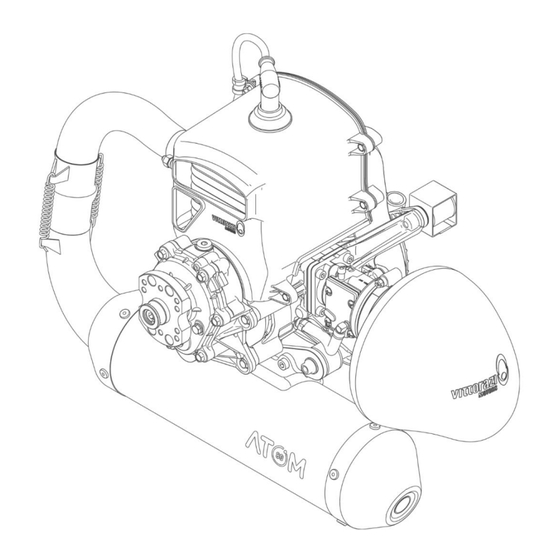
Summary of Contents for Vittorazi Motors ATOM 80 2020
- Page 1 ATOM 80 Maintenance manual release V1/2022 valid for MY20-MY22 versions...
- Page 2 Atom 80 - Maintenance manual - V1...
-
Page 3: Table Of Contents
Contents 1 Introduction 2 Be careful! Read it completely 3 Maintenance 3.1 Maintenance schedule 3.2 Spark plug 3.2.1 Spark plug disassembly 3.2.2 Spark plug maintenance 3.2.3 Spark plug assembly 3.3 Airbox 3.3.1 Airbox disassembly 3.3.2 Airbox maintenance 3.3.3 Airbox assembly 3.4 Carburettor 3.4.1 Carburettor disassembly 3.4.2 Carburettor maintenance... - Page 4 3.9 Pull starter system 3.9.1 Pull starter system disassembly 3.9.2 Pull starter system maintenance 3.9.3 Pull starter system assembly 3.10 Flywheel, coil 3.10.1 Flywheel, coil disassembly 3.10.2 Flywheel, coil maintenance 3.10.3 Flywheel, coil assembly 3.11 Transmission 3.11.1 Oil replacement 3.11.2 Transmission disassembly 3.11.3 Transmission maintenance 3.11.4 Transmission assembly 3.12 Piston, cylinder, head...
-
Page 5: Introduction
The professional manual includes: technical descriptions of the maintenance phase and reference values. All the components of Vittorazi Motors are checked and tested in a process of industrial quality control before the assembling. Then by sampling the complete motors are checked to assure the functionality of all the parts through a complete test of twenty minutes on the bench. - Page 6 Reading tips: Attention, danger, risk Any situation or condition which may result in a serious danger Recommendation, warning, important advice Atom 80 - Maintenance manual - V1...
-
Page 7: Be Careful! Read It Completely
• Vittorazi Motors and its distributors decline any direct or indirect responsibility related to this kind of activity. By using a new engine, the owner agrees that these terms and conditions have been accepted at the time of purchase of the product. - Page 8 • Always start the engine on a flat and clean surface, without stones or sand. During all phases in which the engine is kept running near the ground (such as heating, take off, landing) it is necessary to maintain a safe distance from the engine. A good safety distance is 100 meters in every direction.
-
Page 9: Maintenance
Any procedure of installation, maintenance and/or repair of the products must be carried out exclusively with the original Vittorazi Motors parts and tools specified by Vittorazi, in compliance with the specifications contained in the user, installation and/or maintenance manual of the products;... -
Page 10: Maintenance Schedule
3.1 Maintenance schedule Refer to the following maintenance indicated time schedule to fly in total safety. Work on the engine is only allowed to be carried out by experienced mechanic and authorized dealers. These are prescribed checks at certain interval times to avoid engine problems through preventative maintenance. - Page 11 Pre-flight checklist Screws and nuts (tightening) Carburation from spark plug colour Spark plug Spark plug connector Carburettor Carburettor membranes Airbox Snaplock Airbox Airbox sponge and sleeve Reed valve petals Pull starter system The table follows in the next page Atom 80 - Maintenance manual - V1...
- Page 12 Aluminium exhaust bushing with O-ring Exhaust manifold with springs Spherical joint Silencer Soundproofing material silencer Gaskets (cylinder, carburettor, reed valve, transmission) Piston Piston roller bearing Head and cylinder O-ring head Rubber mountings (engine, exhaust) Oil seal carter case The table follows in the next page Atom 80 - Maintenance manual - V1...
- Page 13 Crankshaft bearings Crankshaft Gearbox oil Transmission bearings Transmission oil seal and O-ring Centrifugal clutch Clutch bell Atom 80 - Maintenance manual - V1...
-
Page 14: Spark Plug
3.2 Spark plug Time limit Spark plug (M020) 25 h Components to replace Not required. Special tools Spark plug: 25 Nm. Values 3.2.1 Spark plug disassembly Disconnect the connector and unscrew the spark plug. 3.2.2 Spark plug maintenance Check the colour of the spark plug: see user manual. Use a feeler gauge to measure the distance between the spark plug electrodes. -
Page 15: Spark Plug Assembly
The new spark plug for the engine must be of the same type and rating as the one to be replaced (NGK BR9ES). Check the connector: if it is damaged or the connection to the spark plug is not stable, replace it. Check the ignition cable: there must be no cuts or cracks, otherwise replace the ignition coil (including ignition cable). -
Page 16: Airbox
3.3 Airbox Time limit Sleeve with filter (AT093a) 100 h or 1 year Components Snaplock (MP093d) 25 h to replace Not required. Special tools Clamp screw: 2,5 Nm. Values 3.3.1 Airbox disassembly Loosen the screw of the clamp securing the sleeve to the carburettor and remove the airbox. Atom 80 - Maintenance manual - V1... -
Page 17: Airbox Maintenance
Fold the sleeve inwards and remove it from the airbox. Remove the Snaplock. 3.3.2 Airbox maintenance Clean the sponge with specific filter chemicals. Clean the airbox cavity with compressed air. To obtain a good seal between the components, degrease the connector of the airbox (1) and the internal part of the sleeve (2) with a product suitable for cleaning rubber (the sleeve is made up of a mixture of NBR and PVC). - Page 18 Check the integrity of the airbox. Check the sleeve groove. Check the filter, in particular the bonding with the sleeve and the various parts of the sponge. Atom 80 - Maintenance manual - V1...
- Page 19 Check the Snaplock, in particular the central hole (the photo shows a comparison between a new component on the left and a worn one on the right). Connect the Snaplock to the pin on the motor to check that the engagement is stable. Check the Venturi: it must be firmly attached to the airbox and have no play in the seat.
-
Page 20: Airbox Assembly
3.3.3 Airbox assembly Insert the sleeve into the airbox. Insert the Snaplock. Connect the airbox sleeve to the carburettor and attach the Snaplock. The airbox sleeve (1) must be completely inserted into the airbox connector (2), the fixing clamp (3) correctly inserted on the seat and vertically aligned as in the figure. Tighten the fixing clamp by applying the torque shown in the figure. - Page 21 After installation, check that there is no relative movement between the rubber sleeve and the airbox connector. Atom 80 - Maintenance manual - V1...
-
Page 22: Carburettor
3.4 Carburettor Time limit O-ring (M091a). 100 h or 1 year Gaskets (ME088 version WB3A) * 100 h or 1 year [Gaskets (AT088 version WG8)] * Internal carburettor diaphragms and 100 h or 1 year Components gaskets. (M097 version WB3A) to replace [Internal carburettor diaphragms and gaskets. - Page 23 Remove the double wire hose clamp from the pulse line hose and disconnect the hose. Remove the 2 Allen screws M6x60 (1) (M5x70 with washers for WG8) from the airbox connector (2). Remove the connector of the airbox (2). Remove the O-ring (3). Remove the carburettor (4).
- Page 24 Disassemble the carburettor by removing the components shown in the figure. Remove the metering diaphragm (21) by sliding it sideways in the direction of the adjusting screws, without lifting it up, so as not to bend the metering lever (18). Atom 80 - Maintenance manual - V1...
-
Page 25: Carburettor Maintenance
Screws with captive washers fuel pump Lunette screws (x2) cover (x4) Fuel pump cover Metering lever spring Fuel pump gasket Metering lever Fuel pump diaphragm Metering lever screw Carburettor case Metering diaphragm gasket Lunette gasket Metering diaphragm Lunette diaphragm Metering diaphragm cover Lunette Metering diaphragm cover screws (x4) 3.4.2 Carburettor maintenance... -
Page 26: Carburettor Assembly
Check the pulse line hose: there must be no cracks or damaged areas, otherwise replace it. 3.4.3 Carburettor assembly Replace the diaphragms and gaskets (10, 11, 13, 14, 20, 21). Take care to select from the original Walbro spare parts kit the components identical to those to be replaced. For example, the photo shows two gaskets with a similar but not identical geometry, therefore not interchangeable. - Page 27 Connect the carburettor's fuel inlet pipe (highlighted in the figure) to a pressure switch via a tube. Set a pressure value lower than the values in the table and check that the needle of the metering lever does not allow air to escape. Carry out further tests by gradually increasing the pressure. WB3A 1,05-1,15 bar 1,10-1,20 bar...
- Page 28 Replace the gaskets (5) and the O-ring (3). Place the following components on the carburettor flange (7): gasket (5), spacer (6), gasket (5). Position the carburettor (4). Insert the O-ring (3) into the airbox connector (2), taking care not to pull it out of the housing. Insert the 2 Allen screws M6x60 (1) (M5x70 with washers for WG8) with threadlocker (recommended Loxeal 55-03/Loctite 243) in the connector of the Airbox (2), screw progressively, then tighten to 6 Nm.
- Page 29 Connect the vacuum hose to the carburettor and secure it with the two-wire clamp. Atom 80 - Maintenance manual - V1...
-
Page 30: Reed Valve
3.5 Reed valve Time limit Petals (AT082) 150 h Gaskets* (AT083) 100 h Components Loxeal 24-18/Loctite 222* to replace Not required. Special tools Screws M5x20: 8 Nm. Values *Always replace it when disassembled. 3.5.1 Reed valve disassembly Before disassembling the reed valve, remove the airbox (3.3 Airbox) and the carburettor (3.4 Carburettor). -
Page 31: Reed Valve Maintenance
Remove the 2 screws (6) from one side of the reed valve. Remove the stoppers (7) and petals (8). Carry out the same operations on the other side of the reed valve. 3.5.2 Reed valve maintenance Check the petals: they must be intact (the photo on the left shows new petals and the photo on the right shows a typical break on worn petals). - Page 32 Also check that the petals are not deformed: looking at the inside of the reed valve, the petals should close the opening perfectly (photo on the left). In the photo on the right, you can see deformed petals that remain slightly raised. If the previous checks are not passed or if routine maintenance is required, replace the petals.
-
Page 33: Reed Valve Assembly
3.5.3 Reed valve assembly Replace the gaskets (3) each time they are disassembled. Place the gasket (3) on the reed valve. Replace the petals (8) and position them against the bearing surface (9). Position the stoppers (7) and insert the 2 screws (6) with threadlocker (recommended Loxeal 55-03/Loctite 243). - Page 34 Place the reed valve (4) with the gaskets (3) on the crankcase (5). Insert the carburettor flange (2). Insert the 4 Allen screws M5x20 (1) into the carburettor flange (2), tighten progressively, with the torque shown in the figure. 8 Nm Atom 80 - Maintenance manual - V1...
-
Page 35: Gaskets
3.6 Gaskets Always replace the gaskets when removing components in contact with them or in the event of leakage. Also, if the motor is not used for a long period of time, check the condition of the gaskets. For gasket replacement see the following chapters: 3.4 Carburettor, 3.5 Reed valve, 3.7 Exhaust system, 3.11 Transmission, 3.12 Piston, cylinder, head. -
Page 36: Exhaust System
3.7 Exhaust system Time limit Exhaust bushing (AT172) 150 h O-rings (AT171, AT173). 150 h Self-locking nuts M6 (MP047a).* 150 h Exhaust manifold (AT180a). 200 h Springs (M139, MP140, MP141). 200 h Silencer soundproofing material 150 h Components (AT184). to replace Rivets (MP161).* 150 h Self-locking nuts M8 (M019).*... - Page 37 Remove the 2 self-locking nuts M6 and 2 springs from the exhaust studs. Remove the exhaust system. Atom 80 - Maintenance manual - V1...
- Page 38 Remove the 2 studs M6 and the bushing. Remove the 3 O-rings from the bushing. Apply FP Siliconpound 225 to the o-rings Remove the 2 safety cables around the springs of the coupling. Remove the 2 springs. Atom 80 - Maintenance manual - V1...
- Page 39 Drill the 10 rivets centrally using a drill with a 5 mm diameter bit. Before disassembling de silencer mark the position of the end caps with an erasable marker Do not drill too deep or you will damage the wire mesh inside the silencer. POSITION REFERENCE MARK...
- Page 40 Use a heat gun to heat the end caps (6, 9) in order to facilitate the release of the silicone. Remove the following components from the silencer housing (6): the end caps (1, 2-3), the sound- absorbing material (4) and the wire mesh (5). Atom 80 - Maintenance manual - V1...
-
Page 41: Exhaust System Maintenance
3.7.2 Exhaust system maintenance Remove silicone residue from inside the silencer. Thoroughly clean the bottoms and body of the silencer with a cloth and thinner. Check the integrity of the silencer body both internally and externally: there must be no cracks or damaged areas, otherwise replace it. -
Page 42: Exhaust System Assembly
3.7.3 Exhaust system assembly Put high-temperature silicone (HT Sil) on the inside edge of the end cap (2). Place the sound-absorbing material (4) on the end cap (2) then position them in the silencer body (6). Wet 5 rivets with high-temperature silicone (HT Sil) and fix them on the end cap (2). Put high-temperature silicone (HT Sil) on the inner end cap (3). - Page 43 Hook the 2 springs onto the joint. Run 2 cables around the springs of the joint (one cable for each spring), insert a clamp on the ends and tighten with pliers. Apply heat shrinkable hoses. Atom 80 - Maintenance manual - V1...
- Page 44 Replace the bushing and the 3 O-rings. Insert the 3 O-rings into the bushing. Insert the bushing, the 2 studs M6 and tighten with the torque shown in the figure. 10 Nm Connect the exhaust pipe. Atom 80 - Maintenance manual - V1...
- Page 45 Replace the 2 self-locking nuts M6. Insert the 2 springs, the 2 self-locking nuts M6 on the exhaust studs and tighten by hand. Replace the 2 self-locking nuts M8. Insert the 2 self-locking nuts M8 on the rubber mountings of the exhaust system and tighten with the torque shown in the figure.
-
Page 46: Rubber Mountings
3.8 Rubber mountings Time limit Engine rubber mountings (M021, M021f). 150 h or 1 year Components Exhaust system rubber mountings (M151c). 150 h or 1 year to replace Not required. Special tools No values Values 3.8.1 Rubber mountings disassembly When locking the rubber mountings during maintenance take care not to damage them. Before dismantling the rubber mountings, remove the exhaust system (3.7 Exhaust system). - Page 47 Remove the 4 rubber mountings from the motor mount. Remove the 2 rubber mountings of the exhaust system. Atom 80 - Maintenance manual - V1...
-
Page 48: Rubber Mountings Maintenance
3.8.2 Rubber mountings maintenance Check the integrity of the rubber mountings: there must be no cracks or detachment of material, otherwise they must be replaced. For routine maintenance, follow the table. 3.8.3 Rubber mountings assembly Replace the safety belts, the 2 rubber mountings of the engine mount as shown in figure. Insert the 4 rubber mountings of the motor bracket. - Page 49 Insert the 2 rubber mountings of the exhaust system. Atom 80 - Maintenance manual - V1...
-
Page 50: Pull Starter System
3.9 Pull starter system Time limit Rope (M043) 100 h Hooks spring (MP057) 100 h Hooks (MP055) 100 h Nanotech lubricant* 100 h Components HHS grease* 100 h to replace Loxeal 83-55/Loctite 270* 100 h Loxeal 24-18/Loctite 222* 100 h Not required. - Page 51 Allow the winding pulley to rotate so that the tension given by the recovery spring is lost. Remove the 4 rubber mountings (1) from the manual starter bracket (2). After removing the manual starter, the cup (3) mounted on the flywheel will be visible. Atom 80 - Maintenance manual - V1...
- Page 52 Remove the spring of the hooks (4), the 2 hooks (5), the washers (6) and the pulley (7) taking care to leave the recovery spring (8) in its place. Remove the rope by untying the knot and pulling it off the pulley Atom 80 - Maintenance manual - V1...
-
Page 53: Pull Starter System Maintenance
3.9.2 Pull starter system maintenance Check the rope: replace it if it shows signs of wear. For routine maintenance, follow the table. Check the spring of the hooks: if it shows signs of wear as in the picture, replace it. For routine maintenance, follow the table. - Page 54 Check that the return spring is intact and not deformed, particularly in the area shown in the photo, otherwise replace it. Insert the spring of the hooks on the central pin and turn it, if any blockage or jamming occurs the pin must be replaced.
-
Page 55: Pull Starter System Assembly
3.9.3 Pull starter system assembly If the washers are different, place the thinner ones first and then the thicker ones. Insert the washers (6), the 2 hooks (5) and the spring of the hooks (4). Position the pulley and the hooks according to the image below, check that the gap between spring and washers are is between 0.35 and 0.45 mm if not remove the washers and use washers with different thickness. - Page 56 Preload the pulley Turn the pulley until you find the origin of the spring tension Hold the pulley and wind 4 turns of rope counterclockwise. Turn the pulley 2 turns anticlockwise to get the correct preload of the recovery spring. Insert the rope into the rope guide.
- Page 57 Before final assembly of the manual starter on the engine, check that the hooks are in the closed position, otherwise they may be damaged. Atom 80 - Maintenance manual - V1...
- Page 58 Insert the 4 rubber mountings into the manual starter bracket (2). Insert the rope into the guide eyelet of the handle and tie a knot to prevent it from slipping out. Pull the handle and check that the pulley rotates smoothly without blocking. Atom 80 - Maintenance manual - V1...
-
Page 59: Flywheel, Coil
3.10 Flywheel, coil Time limit Flywheel (AT034) on condition Nut M10x1,25 (M037) 200 h Components Washer* (M036) 200 h to replace Loxeal 83-55/Loctite 270* 200 h Flywheel locking (ACC104) Flywheel puller (ACC103). Special tools Nut M10x1,25: 52 Nm. Ignition coil to flywheel distance: 0.3 mm Values *Always replace it when disassembled. - Page 60 Remove the 2 flange-head screws M4x12 (1), the nut M4 (2) and the stud M4 (3) from the front conveyor (4). Remove the 4 flange head screws M4x12 (5) from the rear conveyor (6). Remove the rear conveyor (6). Atom 80 - Maintenance manual - V1...
- Page 61 Unscrew the nut M10x1,25. Do not use a pneumatic impact screwdriver, otherwise the piston may be damaged. Remove the nut M10x1,25 with the washer. Screw the flywheel extractor into the starter cup. Atom 80 - Maintenance manual - V1...
- Page 62 Turn the central pin of the extractor until the flywheel is removed from the crankshaft. Remove the 2 Allen screws M5x20 (7) with washers (8) and the coil (9). Atom 80 - Maintenance manual - V1...
-
Page 63: Flywheel, Coil Maintenance
3.10.2 Flywheel, coil maintenance Check the integrity of the flywheel: there must be no cracks or damaged areas, otherwise replace COIL POSITION RESISTANCE IGNITION COIL HV.CABLE-EARTH 4,8 kOhm +/- 10%, (@25°C) IGNITION COIL FASTON-EARTH CONTNUITY OR CLOSE TO 1 OHM 3.10.3 Flywheel, coil assembly Screw the piston block into the spark plug hole. - Page 64 Atom 80 - Maintenance manual - V1...
- Page 65 Replace nut M10x1,25 and washer. Insert the nut M10x1,25 with washer and tighten with the torque shown in the figure. 52 Nm Insert the coil (9) and the 2 Allen screws M5x20 (7) with washers (8) without tightening. Place 0,3 mm shims between the coil and the flywheel. Tighten the coil screws by hand.
- Page 66 Position the rear conveyor (6) in its place. Insert the 4 flange-head screws M4x12 (5) on the rear conveyor (6) and tighten by hand. Insert the 2 flange head screws M4x12 (1) and nut M4 (2) on the front conveyor (4) and tighten. Insert the stud M4 (3) with threadlocker (Loxeal 83-55/Loctite 270 recommended) on the front conveyor (4) and tighten by hand.
-
Page 67: Transmission
3.11 Transmission Time limit Washers (AT151, AT162, AT162a, F160).* 50 h Transmission bearings (F139b, AT139, AT141). 200 h Oil seals (AT143, M006). 200 h O-rings (AT152, AT163, AT164). 200 h Components Centrifugal clutch (AT127). 200 h to replace Clutch bell (AT136). 200 h Transmission oil (AT160). -
Page 68: Oil Replacement
3.11.1 Oil replacement Place a container under the transmission to collect the oil. Hold the engine upright and remove the lower cap with the copper seal. Loosen the upper cap. Remove the upper cap with copper seal. Atom 80 - Maintenance manual - V1... - Page 69 Wait a few minutes for all the oil to drain. Replace the copper seal each time it is disassembled. Clean the lower cap, insert it with the copper seal and tighten with the torque shown in the figure. 10 Nm Remove the front screw with the copper seal.
- Page 70 Fill the transmission with the specific oil (Maconoil Supermoly 220 with 3,5 % Mos2). Vittorazi supplies 30 ml bottle (AT160) that is required to fill completely the transmission box. Fill the oil until is leaking from the front hole. Wait a few minutes for the oil to settle. Replace the copper seal each time it is disassembled.
-
Page 71: Transmission Disassembly
3.11.2 Transmission disassembly Remove the oil before disassembling the transmission. Remove the 4 flange head screws M6x25 (1) from the transmission (2). Remove the transmission (2). Remove the Seeger ring (4) and the Allen screw M8x20 (5) with washer (6) from the hub (3). Atom 80 - Maintenance manual - V1... - Page 72 Place the set screw M8x45 (7) (ACC122) into the position A. Atom 80 - Maintenance manual - V1...
- Page 73 Place the extractor (8) (ACC113) on the hub (3) and tighten the 3 screws M6 (9). Slightly heat the hub to a maximum of 100 °C. Turn the central pin (10) until the hub is removed. Atom 80 - Maintenance manual - V1...
- Page 74 Remove the key (11) from the propeller shaft (12) with pliers. Remove the 6 flange-head screws M5x20 (13). Place the 2 set screws M4x30 (14) (ACC111) into the position A and screw in alternately until the cover (15) is removed. Remove the O-ring (16) from the transmission.
- Page 75 Remove the bushing (17), the oil seal (18) and the O-ring (19). Remove the Seeger ring (20). Atom 80 - Maintenance manual - V1...
- Page 76 Clean the cover from oil residues. Heat the cover at the bearing seats at 120 °C. Remove the propeller shaft bearing (21) and the pinion bearing (22). To facilitate removal of the pinion bearing (22) use a bearing extractor for blind housings. Place the extractor (23) and columns (24) (tool ACC113) under the clutch bell (25).
- Page 77 Remove the pinion (26) using an awl (27). Remove the O-ring (28) from the pinion (26). Atom 80 - Maintenance manual - V1...
- Page 78 Remove the propeller shaft (12) using an extractor. Clean the transmission case from oil residues. Heat the transmission case at the bearing seats. Remove the pinion bearing (29) and the propeller shaft bearing (30). To facilitate removal of the propeller shaft bearing (30) use a bearing extractor for blind seats. Atom 80 - Maintenance manual - V1...
- Page 79 Remove the oil seal (31) and the Seeger ring (32). Screw the piston lock (33) into the spark plug hole. Atom 80 - Maintenance manual - V1...
- Page 80 Turn the clutch until the piston is in contact with the piston lock. Unscrew the nut M10x1,25 (34). Do not use a pneumatic impact screwdriver, otherwise the piston may be damaged. Remove the nut M10x1,25 (34) with the washer (35). Position the extractor (36) (tool ACC113) on the clutch (37) and tighten the 2 screws M4 (38).
-
Page 81: Transmission Maintenance
3.11.3 Transmission maintenance Clean components thoroughly with aluminium-specific degreasers. Check teeth: on the 2 gears. Replace them if they show signs of wear or damage. Check the clutch bell, in particular the inner surface in contact with the friction material must not show any scratches or different colouring due to overheating and there must be no cracks (e.g. - Page 82 Check the clutch: the friction material on the pads must not show any scoring or burn marks. Check the movement of the pads with a screwdriver as shown in the figure. If the above checks are not satisfied, replace the clutch. For routine maintenance, follow the table. Check the bushing of the transmission cover: the side surface must be smooth and free of signs of wear, otherwise (as in photo) it must be replaced.
- Page 83 Check the 4 bearing seats: there must be no polished areas. Also measure the diameter of the 4 seats, the table shows the factory settings. Dimension Factory settings at 20° C (mm) 34,969-34,985 27,978-27,991 34,969-34,985 34,978-34,991 Atom 80 - Maintenance manual - V1...
- Page 84 Measure the diameter of the 2 bearing seats, the table shows the factory settings. Dimension Factory settings at 20° C (mm) 16,995-17,005 16,995-17,005 Measure the diameter of the 2 bearing seats, the table shows the factory settings. Dimension Factory settings at 20° C (mm) 11,992-12,000 14,997-15,005...
-
Page 85: Transmission Assembly
3.11.4 Transmission assembly Position the clutch on the crankshaft, aligning the key with the clutch groove. Insert the nut M10x1,25 (34) with the washer (35) and tighten to 52 Nm. Atom 80 - Maintenance manual - V1... - Page 86 Heat the inner ring of the bearing (29) to 120 °C and fit it on the pinion (3). Fit the O-ring (28) on the pinion (26). Atom 80 - Maintenance manual - V1...
- Page 87 Heat the inner rings of the 2 bearings (21, 30) to 120 °C. Fit the 2 bearings (21, 30) on the propeller shaft (12). Insert the Seeger ring (32). Atom 80 - Maintenance manual - V1...
- Page 88 Heat the bearing seats to 120 °C and insert the pinion (26). Insert the propeller shaft (12). Atom 80 - Maintenance manual - V1...
- Page 89 Grease the oil seal (31) with FP Silicompound 225 and insert it into the gearbox with specific tool (40).(ACC123) Grease the central hole in the clutch bell (25) with FP Silicompound 225. Screw the clutch bell (25) onto the pinion (26). Atom 80 - Maintenance manual - V1...
- Page 90 Place the extractor (23) and columns (24) (tool ACC113) under the clutch bell (25). Clamp the tool in a vise. Screw the pinion (26) with a 10 mm wrench and tighten with the torque shown in the figure. 10 Nm Heat the inner bearing ring (22) and fit it on the pinion.
- Page 91 Insert the O-ring (19) on the propeller shaft. Insert the O-ring (16) between on the gearbox. Atom 80 - Maintenance manual - V1...
- Page 92 Insert the Seeger ring (20) into the transmission cover. Heat the cover at the bearing seats at 120 °C. Place the cover (15) on the gearbox checking the position of the O-ring (16). Atom 80 - Maintenance manual - V1...
- Page 93 Insert and pre-tighten alternately the 2 highlighted flanged head screws M5x20. Insert the remaining 4 flanged head screws M5x20 (13) into the cover (15). Pre-tighten progressively, then tighten in crosswise order to 6,5 Nm. Let the transmission cool down. Check that all screws are tightened correctly. Check the sliding of shaft on the bearings.
- Page 94 Replace the oil seal (18) each time it is disassembled. Grease the oil seal (18) with FP Silicompound 225 and place it on the transmission cover using the specific tool (41) (ACC123) to insert it. Insert the bushing (17) by positioning it with the countersink for the O-ring on the underside. Atom 80 - Maintenance manual - V1...
- Page 95 Correct bushing (17) orientation. Wrong bushing (17) orientation. Atom 80 - Maintenance manual - V1...
- Page 96 Insert the key (11) on the propeller shaft (12). Heat the hub to approx. 150 °C. Aligning the key with the hub groove. Atom 80 - Maintenance manual - V1...
- Page 97 Insert the hub (3) still warm at 150 °C onto the propeller shaft. Check that the hub (3) comes into contact with the bushing (17) to ensure a correct and secure coupling. Replace the washer (6) each time it is disassembled. Insert the screw M8x20 (5) with the washer (6) into the hub (3).
- Page 98 Insert the Seeger ring (4). Position the transmission in its housing. Insert the 4 flange-head screws M6x25 (1) and tighten with the torque shown in the figure. 10 Nm After assembly, fill the transmission with oil. Atom 80 - Maintenance manual - V1...
-
Page 99: Piston, Cylinder, Head
3.12 Piston, cylinder, head Time limit Self-locking nuts M6 (AT019) * 150 h O-ring head* (AT016) * 150 h Roller bearing (AT009). 150 h Piston / Piston ring / Pin / Circle clip 150 h Components (AT010, AT013, AT011). to replace Copper paste* Loxeal 83-55/Loctite 270*. - Page 100 Remove the 4 self-locking nuts M6 (5) with washers (6) from the engine head (7). Remove the head (7), the O-ring (8), the cylinder (9) and the gasket (10). Atom 80 - Maintenance manual - V1...
- Page 101 Close the inside of the crankcase with paper to prevent foreign bodies from accidentally falling into the engine. Remove the circle clip (11), the pin (12), the piston (13) and the roller bearing (14). Removal of the pin (12) can be facilitated by using a heat gun on the piston in the pin area. Remove the piston ring (15) and the circle clip (16) from the piston (13).
-
Page 102: Piston, Cylinder, Head Maintenance
3.12.2 Piston, cylinder, head maintenance Do not use abrasive tools and corrosive liquids that may damage the surface. Carefully remove gasket residues from the cylinder and the crankcase. Thoroughly clean the piston crown, the piston groove, the exhaust port on the cylinder and internal surface of head. - Page 103 The table shows the cylinder, the piston sizes and the factory nominal clearance for new components. Maximum clearance refers to worn components. Selection Cylinder ø* Piston ø* Factory nominal Maximum (mm) (mm) clearance* (mm) clearance* (mm) 47,580-47,590 47,535-47,545 47,590-47,600 47,545-47,555 0,035-0,055 0,13 47,600-47,610...
-
Page 104: Piston, Cylinder, Head Assembly
3.12.3 Piston, cylinder, head assembly Replace the same thickness with one or more gaskets (possible sizes: 0,2-0,3-0,5 mm). Insert the gasket (10). Oil the following components with the oil used for the mixture: the roller bearing (14), the pin (12), the piston ring (15) and the piston (13). - Page 105 Insert the piston ring (15) into the piston groove (13), paying attention to the position of the piston ring retainer. Insert the circle clip (16) on the piston (13) on the manual starter side respecting the position shown in the photo. Atom 80 - Maintenance manual - V1...
- Page 106 Atom 80 - Maintenance manual - V1...
- Page 107 The triangle on the top of the piston indicates the exhaust side. Insert the roller bearing (14), the piston (13), the pin (12) and the circle clip (11). Replace the O-ring (8) and the 4 self-locking nuts M6 (5) each time they are disassembled. Fit the O-ring (8) on the head (7).
- Page 108 Insert the cylinder (9). Add copper paste to the nuts. Place the head (7) on the cylinder (9) and the 4 self-locking nuts M6 (5) with washers (6). Tighten the nuts progressively, then cross-tighten to 10 Nm. Check the squish measurement on the pin axis: acceptable values range from 0,7 mm to 0,9 If the squish is out of tolerance, increase or decrease the thickness of the cylinder base gasket until the required result is obtained.
- Page 109 Position the front conveyor (4) in its place. Insert the 4 flange head screws M4x12 (1) and the nut M4 (2) on the front conveyor (4) and tighten. Insert the stud assembly (3) (composed of nut M4, clamp and stud M4) with threadlocker (Loxeal 83-55/Loctite 270 recommended) on the front conveyor (4) and tighten.
-
Page 110: Crankcase
3.13 Crankcase Time limit Crankshaft (AT001). on condition Bearings (F003). 150 h Oil seals (AT006) 150 h Components Three Bond 1215 silicone paste. to replace FP Silicompound 225. Oil seal pusher (transmission side) (ACC125) Oil seal pusher (flywheel side) (ACC126) Special tools Screws M5x40: 6,5 Nm. - Page 111 Atom 80 - Maintenance manual - V1...
- Page 112 Position the extractor (2) as shown in figure, tighten the 2 screws M6 (3) and turn the central pin (4) until the 2 case-half are separated. Atom 80 - Maintenance manual - V1...
- Page 113 Heat the transmission side crankcase to 120 °C. Remove the bearing (5) and the oil seal (6). Remove the crankshaft (7) using a press in the direction shown in the figure. Atom 80 - Maintenance manual - V1...
- Page 114 Heat the manual starter side crankcase to 120 °C. Remove the bearing (8) and the oil seal (9). Atom 80 - Maintenance manual - V1...
-
Page 115: Crankcase Maintenance
3.13.2 Crankcase maintenance Degrease the bearing seats and the profile of the case-half with specific products for aluminium. Check the case-half: check for integrity and abnormal marks. Check the 2 bearing seats: there must be no polished areas. Also measure the diameter of the 2 seats, the table shows the factory settings. - Page 116 Measure the diameter of the 2 bearing seats on the crankshaft, the table shows the factory settings. Dimension Factory settings at 20° C (mm) 20,003-20,006 20,003-20,006 Measure the clearance at the small end and big end of the connecting rod. Factory nominal clearance* (mm) Small end...
- Page 117 Measure the eccentricity of the crankshaft, the factory settings are shown in the figure. Check that the seat of the key is undamaged. If the above checks are not passed, replace the crankshaft. Atom 80 - Maintenance manual - V1...
-
Page 118: Crankcase Assembly
3.13.3 Crankcase assembly Bearings are not symmetrical: one of the two sides has an intermediate ring (10) which partially covers the balls. To ensure correct lubrication of the bearings, orient them as shown in the figure: the intermediate rings (10) are on the inner sides. Atom 80 - Maintenance manual - V1... - Page 119 Cover the bearing cage with a ring as shown in the figure and heat the inside of the bearing to 80 °C. Fit the 2 bearings (5, 8) on the crankshaft (7). Atom 80 - Maintenance manual - V1...
- Page 120 Heat the transmission side crankcase to 120 °C. Insert the crankshaft (7) with the bearings. Atom 80 - Maintenance manual - V1...
- Page 121 Heat the manual starter side crankcase to 120 °C. Carry out subsequent operations within a maximum of 5 minutes (application of silicone and closing of the crankcase). Carefully add silicone paste (Three Bond 1215) to the crankcase profile as shown in the figure. Height, width silicone profile: 2 mm x 2,5 mm.
- Page 122 Check that the 2 bushings are in their respective seats (highlighted in the figure). Close with the manual starter side crankcase still warm at 120 °C. Insert the 7 flange-head screws M5x40 (1) and tighten with the torque shown in the figure. 6,5 Nm Atom 80 - Maintenance manual - V1...
- Page 123 Clean the excess silicone from the crankcase perimeter with a cloth. Wait for the crankcase to cool down. Replace the 2 oil seals (6, 9) each time they are disassembled. Grease the oil seal (6) with FP Silicompound 225 and place it on the crankshaft using the specific tool (11) (ACC125) to insert it.
- Page 124 Check the tightening of screws. Insert oil into the 2 lubrication holes (highlighted in the figure). Check the sliding of crankshaft on the bearings. Atom 80 - Maintenance manual - V1...
-
Page 125: Tightening Values
3.14 Tightening values Lubricant/ Component Torque value Thread size sealant Engine carter 6,5 Nm M5x40 screws Cylinder studs 8 Nm Cylinder head nuts 10 Nm M6x1,0 Copper paste Spark plug 25 Nm M14x1,25 Exhaust studs 10 Nm Exhaust nuts hand tightening M6x1,0 Rubber mounting 18 Nm... - Page 126 Loxeal 83-55/ Plastic air-conveyor hand tightening stud Loctite 270 Carbon propeller 10-12 Nm screws Atom 80 - Maintenance manual - V1...
- Page 127 Atom 80 - Maintenance manual - V1...
- Page 128 Atom 80 - Maintenance manual - V1...
- Page 129 Atom 80 - Maintenance manual - V1...
Need help?
Do you have a question about the ATOM 80 2020 and is the answer not in the manual?
Questions and answers