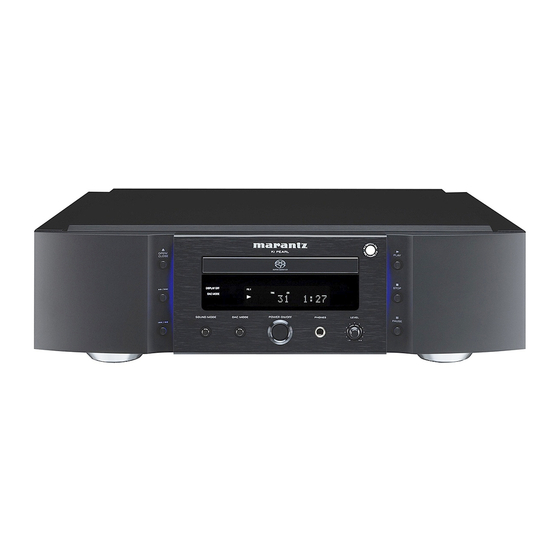
Marantz SA-KI PEARL User Manual
Super audio cd player
Hide thumbs
Also See for SA-KI PEARL:
- User manual (30 pages) ,
- Brochure & specs (28 pages) ,
- Catalog (20 pages)
Table of Contents
Advertisement
Advertisement
Table of Contents

Subscribe to Our Youtube Channel
Related Manuals for Marantz SA-KI PEARL


Summary of Contents for Marantz SA-KI PEARL
- Page 1 Model SA-KI-PEARL User Guide Super Audio CD player...
-
Page 2: Laser Safety
FICHE DANS LA BORNE CORRESPONDANTE DE LA PRISE ET POUSSER JUSQU’AU FOND. LASER SAFETY This unit employs a laser. Only a qualifi ed service person should remove the cover or attempt to service this device, due to possible eye injury. -
Page 3: Important Safety Instructions
11. Only use attachments/accessories specifi ed by the manufacturer. 12. Use only with the cart, stand, tripod, bracket, or table specifi ed by the manufacturer, or sold with the apparatus. When a cart is used, use caution when moving the cart/apparatus combination to avoid injury from tip-over. - Page 4 Your purchase receipt is your permanent record of a valuable purchase. UW KWITANTIE, KASSABON E.D. BEWAREN It should be kept in a safe place to be referred to as necessary for Uw kwitantie, kassabon e.d. vormen uw bewijs van aankoop van insurance purposes or when corresponding with Marantz.
- Page 5 - Make a space of about 0.1 meter around the unit. of milieuvoorschriften op die van kracht zijn in het land of de regio - No objects fi lled with liquids, such as vases, shall be placed on the waarin u zich bevindt.
- Page 6 électriques et électroniques Lorsque vous mettez cet appareil au rebut, respectez les lois ou réglementations en vigueur. Les piles ne doivent jamais être jetées ou incinérées, mais mises au rebut conformément aux lois en vigueur sur la mise au rebut des piles.
- Page 7 Please read these operating instructions carefully. We recommend that you read the entire user guide before you attempt to connect or operate the player. After you have reviewed the contents of this manual, we suggest that you make all system connections before you attempt to operate the unit.
-
Page 8: Table Of Contents
PLAYING TRACKS IN A SPECIFIC SEQUENCE (PROGRAM PLAY) ......18 TO CHECK THE PROGRAMMED TRACKS ..............19 SEARCHING YOUR FAVORITE TRACKS (AMS (AUTOMATIC MUSIC SCAN) PLAY) ..19 SWITCHING SOUND MODE (SUPER AUDIO CD) ............20 SETTING THE DIGITAL OUTPUT ..................21 USING AS A D/A CONVERTER (DAC MODE) .............. -
Page 9: Features
CLOSE PLAY STOP PAUSE This unit can play back the outstanding sound performance of • Headphone circuit component upgrade Super Audio CDs. This unit has the following major features. The unit comes with a fully discrete headphone output circuit and we've upgraded the circuits and components from the •... -
Page 10: Applicable Discs To The Unit
Not only does this disc contain both high sound quality stereo 1. Super Audio CD area and high sound quality multi-channel area** information, it also has a CD layer in the second layer, so it can be played on a CD player. Hybrid Super Audio CD Disc The Super Audio standard is based on Direct Stream Digital (DSD) technology. -
Page 11: Before Using
30 minutes, and then operate the player. • In an audio rack with little space at the top and bottom or other • This player may cause interference on a tuner or TV set. If location where the heat dissipation will be obstructed. -
Page 12: Usage Of Remote Controller
• Do not place any objects on top of the remote control unit. Doing so may cause one or more buttons to be held down which will cause the batteries to run down. -
Page 13: Names And Functions
Illumination lamp This lamp lights up when the display window lights up. w DAC MODE button The lamp can also be set so that it always remains off. (See DAC MODE indicator page 22) Use this button to use the unit as a D/A converter. -
Page 14: Remote Controller
NAMES AND FUNCTIONS v INPUT 5 / ∞ buttons REMOTE CONTROLLER These buttons are used to switch the input when using one of the supported Marantz amplifiers. However, this function may not work with some of the older models. ¤7 b ENTER button This button is used to confirm menu settings. -
Page 15: Rear Panel
¤6 DAC MODE button Press this button when setting the filter. (See page 22) Use this button to use the unit as a D/A converter. (See page ¤3 MENU (menu setting) button Use this button to set the Timer Play and the Start Sound ¤7 OPEN/CLOSE button... -
Page 16: Display
FIL 1 2 (filter 1, filter 2) indicator l CD indicator This indicates whether filter 1 or filter 2 is currently selected. This indicator indicates the type of disc on the disc tray (CD). s 1 (repeat) indicator ¡0 M FILE indicator This indicator lights up during repeat play of one track. -
Page 17: Basic Connections
To ensure that the components are connected properly, refer to the instruction manuals that come Plug the power cable into AC IN jack on the back panel. with the components to be connected. Before connecting the components, be absolutely sure to turn off their power. -
Page 18: Basic Operation
To play a single (8cm) CD, place the disc with the indentation at the center of the tray. Press 0 button. Caution: Do not close the disc tray by pressing it in with your hand, as this will damage it. -
Page 19: Playing Your Favorite Tracks Of A Disc
1, ¡ buttons on the remote control unit. The search speed changes in 4 steps: 1 → 2 → 3 → 4 → 1. Specify track number to play 4 is the fastest search speed. -
Page 20: Advanced Connections
You can enjoy digital recording when the player is connected to a CD recorder or other digital recording component. • After connecting, press the DIGITAL OUT button on the remote control while the CD is stopped and set the digital output for the audio CD signal from the DIGITAL AUDIO OUT terminal to ON. -
Page 21: Connecting The Digital Audio Input Terminal
When connected to devices equipped with digital outputs, of the connected equipment as a single audio system. such as CD transports or MD recorders, the unit can be used • When connecting equipment incorporating a remote sensor, as a D/A converter. -
Page 22: Timer Play
This unit can perform timer play by cooperating with your audio timer. Connect this unit’s power cord to the audio timer’s power socket and the timer’s power cord to power outlet. • For connection to audio timer and it’s operation, please refer to the instruction manual of your audio timer. -
Page 23: Application Operation
REPEATED DISC PLAY (REPEAT PLAY) TIME REPEAT Each time the REPEAT button on the remote control is pressed, Press the TIME button on the remote control. the repeat mode cycles in the following order. Each time TIME button is pressed, display will change in the following order. -
Page 24: Playing Tracks In A Random Sequence (Random Play)
Random Mode. Lights up • If the ¢ button on the main unit, or the ¢ button on the remote control are pressed during Random Play, the player jumps to the next track of the shuffled order. -
Page 25: To Check The Programmed Tracks
To Delete a Programmed Track If the AMS button is pressed while a track is stopped, the AMS Press CLEAR button in stop mode when program has indicator “AMS” lights up, and the first ten seconds of each track been made (When “PROG”... -
Page 26: Switching Sound Mode (Super Audio Cd)
Play or Random Play modes. ¶ When Start Sound Mode is switched to CD • At this time, if a Super Audio CD hybrid layer disk is inserted, the CD layer is read. • Sound Mode cannot be switched even if theSOUND MODE button on the remote control is pressed. -
Page 27: Setting The Digital Output
(DAC MODE) The settings can be made using the remote control. The settings are retained even if the power is turned off so that you can always hear tracks played the way you want. Use the same procedures to change the settings again. -
Page 28: Filter Selection
Faithfully reproduces Faithfully reproduces If the illumination lamp (blue) is lit, it is turned off and is all audio information all audio information. set off. To change the setting from off to on, hold down the... -
Page 29: Troubleshooting
TROUBLESHOOTING If you think that something is wrong with your player, first check the points listed below. Incorrect operations can sometimes be taken for trouble and malfunctions. If the trouble persists even after the following points have been checked, consult your dealer or nearest Marantz sales office or service center. -
Page 30: Others
Romeo). • Multi-session recording is not supported. • Multi-session recording is not supported. • For audio quality, a recording rate of 128 kbps or higher is • WMA files having DRM copy protection cannot be played. recommended. • Encode WMA files using applications that have received Microsoft Corporation certification. -
Page 31: Specifications & Dimensional Drawings
Power Consumption ............20W ¶ Cabinet, etc. Dimensions (Width × Height × Depth) ....440 × 127 × 419mm (17-3/8 × 5 × 16-1/2 ins.) Net weight ............14.5kg (32.0 lbs) Operating temperatures ........+5˚C ~ +35˚C Operating humidity ......5 ~ 90% (without dew) ¶... -
Page 32: Notes About The Discs
WMA/MP3 music data. However, some discs it. If such a disc is played on the CD player, you may find that may have problems such as unable to play, noise or sound you cannot remove it or that some other kind of malfunctioning distortion. - Page 33 • dilute some washing up liquid in water, in a ratio of one part detergent to six parts water. • dip a soft, lint free in the solution and wring the it is damp. • wipe the equipment with the damp cloth.
- Page 34 Memo...
- Page 35 You can find your nearest authorized distributor or dealer on our website. is a registered trademark. Printed in Japan 02/2009 541110237033M mzh-g...
Need help?
Do you have a question about the SA-KI PEARL and is the answer not in the manual?
Questions and answers