Marantz PM6004 Owner's Manual
User manual
Hide thumbs
Also See for PM6004:
- Owner's manual (23 pages) ,
- Product information (2 pages) ,
- Specification sheet (1 page)
Table of Contents
Advertisement
Quick Links
Download this manual
See also:
Owner's Manual
Advertisement
Table of Contents

Related Manuals for Marantz PM6004


Summary of Contents for Marantz PM6004
- Page 1 ESPAÑOL FRANÇAIS ENGLISH Integrated Ampli er PM6004 Owner’s Manual...
- Page 3 This product has been tested and found to comply with the limits for electric shock to persons. type plug has two blades and a third grounding prong. The wide blade or the a Class B digital device, pursuant to Part 15 of the FCC Rules. These third prong are provided for your safety.
- Page 4 • Do not place objects filled with liquids, such as • Veillez à respecter les lois en vigueur lorsque normativa para el cuidado del medio ambiente. • Une distance de plus de 12 po (0,3 m) est recommandée. vases, on the unit. vous jetez les piles usagées.
-
Page 5: Table Of Contents
ENGLISH Getting started Thank you for purchasing this marantz product. To ensure properoperation, please read this owner’s manual carefully before using the Accessories product. After reading the manual, be sure to keep it for future reference. Check that the following parts are supplied with the product. -
Page 6: Main Features
You can set a different remote control code for up to three amplifi ers and control them independently from one location. PHONO input terminal for connecting a turntable This unit is provided with a phono amplifi er so that you can directly connect a turntable and play records. (Only the MM cartridge can be used (vpage 7).) -
Page 7: Cautions On Handling
Set two R03/AAA batteries in the battery Approx. 16.4 ft / 5 m If this happens, let the unit sit for an hour or two with the power off compartment in the indicated direction. and wait until there is little difference in temperature before using the unit. -
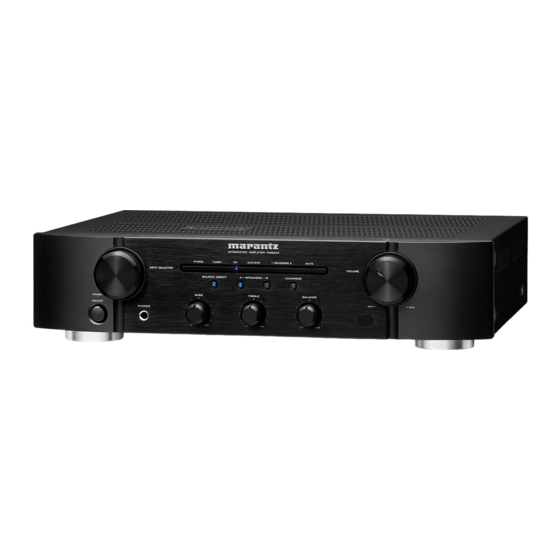
Page 8: Part Names And Functions
ENGLISH Part names and functions For buttons not explained here, see the page indicated in parentheses ( ). Rear panel Front panel q we r t y Power switch (ON/OFF) ······························· (8) SPEAKERS A/B switches/indicators ·········· (9) PHONO input connectors ···························· (7) Speaker system terminals (SPEAKER SYSTEMS) ······························ (6, 7) STANDBY indicator ······································... -
Page 9: Remote Control
• This unit’s function will be switched accordingly. CLEAR or input data 2 Operate the audio component. Save preset • See the table on the right for the buttons you can use. MEMO station number Direct frequency F.DIRECT • The remote control e Input selector buttons are used to select the... -
Page 10: Basic Connections
(DVD Audio player, Super Audio CD player, etc.) for use with regular speakers (or • Be sure to connect the left and right channels properly (left with amplifiers). -
Page 11: Speaker Connections
Connecting players Speaker connections A turntable with an MM type cartridge can be connected to this unit. To use an MC cartridge, please install a step-up transformer. • The same signal is output from the SPEAKERS A and B terminals. -
Page 12: Connecting The Power Cord
If you do, it could result in fi re or electric shock. NOTE Only use the AC outlet to plug in audio equipment. Do not use it as a power supply for hairdryers or anything other than audio equipment. -
Page 13: Starting Playback
The SOURCE DIRECT indicator lights. when using headphones. buttons of the remote control. • The input source you select is stored in memory even after you turn off power, and the same source is selected when power is turned Starting Recording... -
Page 14: Advanced Connections
REMOTE CONTROL IN terminal of the component to be connected. n Setting Set the remote control switch located on the rear panel of the connected audio component to “EXTERNAL” or “EXT.” to use this feature. • This setting will disable remote sensor reception of the connected audio component. -
Page 15: Advanced Operations
• When the unit is shipped from the factory, the main unit and remote • After you set the remote control code for this unit, the indicators on control are set to “AMP1”. -
Page 16: Setting Auto Standby Mode
ENGLISH Setting Auto standby mode With the Auto standby mode ON, this unit will automatically enter the Auto standby mode after about 30 continuous minutes of no output from the speakers or headphones. SOURCE DIRECT Press and hold <SOURCE DIRECT>... -
Page 17: Troubleshooting
1. Are the connections correct? 2. Is the unit being operated as described in the owner’s manual? 3. Are the other components operating properly? If this unit does not operate properly, check the items listed in the table below. If the problem persist there may be a malfunction. In that case, disconnect the power immediately and contact your retail outlet. Symptom... -
Page 18: Specifications
• Weight: 7.4 kg (16 lbs 5 oz) Remote control ···································· 3, 5, 10, 11 z For the purpose of improvement, the specifications and design are subject to change without notice. SOURCE DIRECT ············································· 4, 8 Speaker cables ················································· 6, 7 Speaker impedance ········································... - Page 19 Dimensions / Dimensions / Dimensions Unit: inch (mm) 17-21/64 (440) Weight / Poids / Peso 7.4 kg (16 lbs 5 oz)
- Page 20 D&M Holdings Inc. Printed in China 5411 10002 02AM...
Need help?
Do you have a question about the PM6004 and is the answer not in the manual?
Questions and answers