Table of Contents
Advertisement
Quick Links
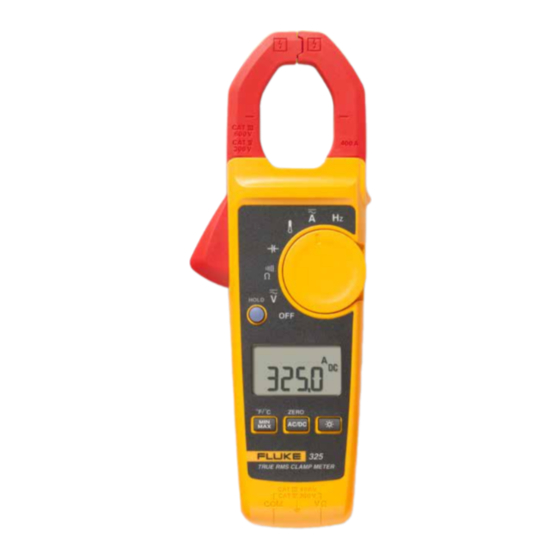
320 Series True-rms
Clamp Meters
Fluke rugged. Fluke precise. Fluke reliable.
The Fluke 323, 324 and 325 Clamp Meters are designed to
perform in the toughest environments and provide noise-free,
reliable results users can trust to confidently diagnose prob-
lems. True-rms measurements and optimized ergonomics make
the 320 Series Clamp Meters the best general troubleshooting
tools for commercial and residential electricians.
600 V
300 V
Technical Data
Measurement capability
• 400 A ac current
measurement (ac and dc
current; 325 only)
• 600 V ac and dc voltage
measurement
• True-rms ac voltage
and current for accurate
measurements on non-linear
signals
• Resistance measurement to
up to 40 kΩ with continuity
detection
• Temperature and capacitance
measurement (324 and 325
only)
• Frequency measurement
(325 only)
Features
• Slim, ergonomic design
• Large, easy to read backlight
display (324 and 325 only)
• CAT IV 300 V/CAT III 600 V
safety rating
• Hold button
• Two-year warranty
• Soft carrying case
Advertisement
Chapters
Table of Contents

Related Manuals for Fluke 320 Series


Summary of Contents for Fluke 320 Series
- Page 1 Fluke rugged. Fluke precise. Fluke reliable. Technical Data Measurement capability The Fluke 323, 324 and 325 Clamp Meters are designed to perform in the toughest environments and provide noise-free, • 400 A ac current reliable results users can trust to confidently diagnose prob- measurement (ac and dc current;...
- Page 2 Fax +1 (425) 446-5116 Web access: http://www.fluke.com ©2012 Fluke Corporation. Specifications subject to change without notice. Printed in U.S.A. 5/2012 4217271A_EN Modification of this document is not permitted without written permission from Fluke Corporation. 2 Fluke Corporation 320 Series True-rms Clamp Meters...
- Page 3 ©2012 Fluke Corporation. Specifications subject to change without notice. Printed in U.S.A. 6/2012 4230855A_EN Modification of this document is not permitted without written permission from Fluke Corporation.
- Page 4 40 kΩ with continuity to 4000 Ω with continuity • Resistance measurement up detection detection to 4000 Ω with continuity • Temperature and capacitance Fluke 320 Series Fluke 320 Series detection measurement Features: • Temperature and • Frequency measurement True-rms Clamp Meters True-rms Clamp Meters •...
- Page 5 323/324/325 Clamp Meter Users Manual PN 4045153 May 2012 © 2012 Fluke Corporation. All rights reserved. Printed in China. Specifications are subject to change without notice. All product names are trademarks of their respective companies.
- Page 6 LIMITED WARRANTY AND LIMITATION OF LIABILITY This Fluke product will be free from defects in material and workmanship for two years from the date of purchase. This warranty does not cover fuses, disposable batteries, or damage from accident, neglect, misuse, alteration, contamination, or abnormal conditions of operation or handling.
-
Page 7: Table Of Contents
Table of Contents Title Page Introduction ......................... 1 How to Contact Fluke ....................1 Safety Information ...................... 2 How to Clean the Product ..................9 Specifications ......................10 Electrical Specifications ..................10 Mechanical Specifications ..................12 Environmental Specifications ................. 12... - Page 8 323/324/325 Users Manual...
- Page 9 Introduction The Fluke 323/324/325 Clamp Meters (the Product) measure ac and dc voltage, ac current, resistance, and continuity. The 324 and 325 can also measure capacitance and contact temperature. The 325 can also measure dc current and frequency. Note that the 325 is shown in all of the illustrations.
- Page 10 • Japan: +81-3-3434-0181 • Singapore: +65-6799-5566 • Anywhere in the world: +1-425-446-5500 Or, visit Fluke's website at www.fluke.com. To register your product, visit http://register.fluke.com. To see, print, or download the latest manual supplement, visit http://us.fluke.com/usen/support/manuals. Safety Information Warning identifies conditions and procedures that are dangerous to the user. A...
- Page 11 Clamp Meter Safety Information To prevent possible electrical shock, fire, or personal injury: • Use only correct measurement category (CAT), voltage, and amperage rated probes, test leads, and adapters for the measurement. • Do not touch voltages > 30 V ac rms, 42 V ac peak, or 60 V dc. •...
- Page 12 323/324/325 Users Manual • Comply with local and national safety codes. Use personal protective equipment (approved rubber gloves, face protection, and flame- resistant clothes) to prevent shock and arc blast injury where hazardous live conductors are exposed. • Replace the batteries when the low battery indicator shows to prevent incorrect measurements.
- Page 13 Clamp Meter Safety Information • Connect the common test lead before the live test lead and remove the live test lead before the common test lead. • Remove all probes, test leads, and accessories before the battery door is opened. •...
- Page 14 323/324/325 Users Manual • Remove batteries to prevent battery leakage and damage to the Product if it is not used for an extended period. • Remove batteries to prevent battery leakage and damage to the Product if is to be stored above its operating temperature. WCaution To avoid possible damage to the Product or to equipment under test, use a thermocouple rated for the temperatures to be measured.
- Page 15 AC (Alternating Current) Earth ground Do not dispose of this product as unsorted municipal waste. Go to DC (Direct Current) Fluke’s website for recycling information. Conforms to European Union AC and DC Current directives. Risk of Danger. Important Double insulated information.
- Page 16 323/324/325 Users Manual Table 1. Symbols (cont.) Symbol Meaning Symbol Meaning Application around and removal Battery from HAZARDOUS LIVE conductors is permitted. CAT III equipment is designed to CAT IV equipment is designed protect against transients in to protect against transients equipment in fixed equipment from the primary supply level, CAT III...
-
Page 17: How To Clean The Product
Clamp Meter How to Clean the Product How to Clean the Product Regularly wipe the case with a damp cloth and weak detergent. Caution To prevent damage to the Product, do not use abrasives or solvents to clean the Product case. To clean the Product Jaw: Examine the jaw mating surface to make sure it is clean. -
Page 18: Specifications
323/324/325 Users Manual Specifications Electrical Specifications AC Current (Jaw) Range 323 ............. 400.0 A 324, 325 ..........(40.00, 400.0) A Resolution 323 ............. 0.1 A 324, 325 ..........(0.01, 0.1) A Accuracy ..........2.0 % ±5 digits (45 – 65 Hz) 2.5 % ±5 digits (65 –... - Page 19 Clamp Meter Specifications DC Voltage Range ............ 600.0 V Resolution ..........0.1 V Accuracy ..........1 % ± 5 digits Resistance Range 323, 324 ..........(400.0, 4000) Ω 325 ............. (400.0, 4000, 40000) Ω Resolution ..........(0.1, 1, 10) Ω Accuracy ..........
-
Page 20: Mechanical Specifications
323/324/325 Users Manual Resolution ..........0.1 Hz Accuracy ..........0.5 % ±4 digits Trigger Level ........... 5 to 10 Hz, ≥10 A 10 to 100 Hz, ≥5 A 100 to 500 Hz, ≥10 A Contact Temperature (324, 325) Range............-10.0 °C to 400.0 °C Resolution .......... - Page 21 Clamp Meter Specifications Operating Humidity ......... Non Condensing (≤10 °C) ≤90 % RH (at 10 °C to 30 °C) ≤75 % RH (at 30 °C to 40 °C) ≤45 % RH (at 40 °C to 50 °C) (Without Condensation) Operating Altitude ........2000 meters Storage Altitude ........
-
Page 22: The Meter
323/324/325 Users Manual The Meter gtq008.eps... - Page 23 Clamp Meter The Meter MAXMIN 324/325 gtq001.eps...
- Page 24 323/324/325 Users Manual 2:00 2:00 gtq002.eps...
- Page 25 Clamp Meter The Meter 600 V 600 V 300 V 300 V 323, 324 TRUE RMS CLAMP METER TRUE RMS CLAMP METER 600 V 300 V 600 V 300 V gtq003.eps...
- Page 26 323/324/325 Users Manual 323 V dc - 323 V ac - 324, 325 V dc & V ac - >30 V 300 V gtq004.eps...
- Page 27 Clamp Meter The Meter 600 V 600 V 300 V 300 V TRUE RMS CLAMP METER TRUE RMS CLAMP METER 600 V 600 V 300 V 300 V <70 324/325 <30 gtq005.eps...
- Page 28 323/324/325 Users Manual HOLD TRUE RMS CLAMP METER 600 V 300 V > 30 V 20 V AC/DC & ZERO ZERO ZERO ZERO 2 sec AC/DC AC/DC AC/DC gtq006.eps...
- Page 29 Clamp Meter The Meter 324, 325 TRUE RMS CLAMP METER 600 V 300 V gtq009.eps...
- Page 30 323/324/325 Users Manual gtq007.eps...
- Page 31 The compact and handy Fluke laser distance meters were designed for indoor and limited outdoor appli- cations. All three models are simple to operate, with the Fluke durability and quality you expect.
- Page 32 Eindhoven, The Netherlands climbing a ladder. For more information call: Keep it on the level. New inclination sensor on the Fluke 424D helps with leveling, In the U.S.A. (800) 443-5853 or height tracking, and measuring around obstacles. Fax (425) 446-5116 In Europe/M-East/Africa (31 40) 2 675 200 or Reduce estimating errors—let the meters do the math.
- Page 33 414D/419D/424D Laser Distance Meter Users Manual June 2012 © 2012 Fluke Corporation. All rights reserved. Specifications are subject to change without notice. All product names are trademarks of their respective companies.
- Page 34 Parts, product repairs, and services are warranted for 90 days. This warranty extends only to the original buyer or end-user customer of a Fluke authorized reseller, and does not apply to fuses, disposable batteries, or to any product which, in Fluke's opinion, has been misused, altered, neglected, contaminated, or damaged by accident or abnormal conditions of operation or handling.
- Page 35 Table of Contents Title Page Introduction ........................1 How to Contact Fluke ..................... 1 Safety Information ......................2 Electromagnetic Compatibility (EMC) ................ 3 FCC Statement (U.S.A Only) ..................3 Laser Classification ....................4 Integrated Distance Meter ..................4 Laser Class 2 Products ..................4 Features .........................
- Page 36 414D/419D/424D Users Manual Backlight (419D/424D) ....................12 Keypad Lock (419D/424D) ..................12 Compass (424D) ....................... 13 Compass Calibration ....................13 Automatic Calibration ................... 13 Manual Calibration ....................13 Magnetic Declination .................... 14 Clear ......................... 16 Measurements with a Tripod ..................16 Reference Point ......................
- Page 37 List of Tables Table Title Page Symbols ..........................2 Model Feature Comparison ....................5 Units of Measurement ......................11 Estimated Values of Magnetic Field ..................15 Message Codes ........................30...
- Page 38 414D/419D/424D Users Manual...
-
Page 39: Introduction
Laser Distance Meter How to Contact Fluke Introduction To contact Fluke, call one of the following telephone The Fluke 414D/419D/424D Laser Distance Meters numbers: (Meter or Product) are professional-grade laser distance meters. Use these Meters to quickly and accurately get •... -
Page 40: Safety Information
• Replace the batteries when the low battery Do not dispose of this product as unsorted indicator shows to prevent incorrect municipal waste. Go to Fluke's website for measurements. recycling information. • Do not use the Product around explosive gas. -
Page 41: Electromagnetic Compatibility (Emc)
Changes or modifications not expressly This equipment has been tested and found to comply with approved by Fluke for compliance could void the limits for a Class B digital device, pursuant to part 15 the user’s authority to operate the of the FCC Rules. -
Page 42: Laser Classification
414D/419D/424D Users Manual Laser Classification Laser Class 2 Products Do not stare into the laser beam or direct it towards other Integrated Distance Meter people unnecessarily. Eye protection is normally afforded The Meter produces a visible laser beam from the front of by aversion responses including the blink reflex. -
Page 43: Features
Laser Distance Meter Features Features Table 2 is a list of features for the Meter by model. Table 2. Model Feature Comparison Feature 414D 419D 424D Feature 414D 419D 424D • • Display Lines Timer • • Memory Display/Keypad Illumination •... -
Page 44: Before You Start
414D/419D/424D Users Manual Before You Start This section has basic information about the batteries and measurement reference point. It also describes the Meter keypad and display. Batteries Replace the batteries when blinks in the display. To install or replace the batteries: Remove battery compartment lid. -
Page 45: Multifunctional Endpiece
Laser Distance Meter Before You Start Multifunctional Endpiece The 419D and 424D Meters adapt to multiple measurement situations with the multifunctional endpiece, see Figure 3: • For measurements from an edge, fold out the endpiece (90 °) until it locks into place. See Figure 4. •... -
Page 46: Keypad
414D/419D/424D Users Manual Keypad Figure 6 shows the location of each function button on the keypad. 414D 419D 424D gwo05.eps Measure/Power On Clear/Off Area/Volume Triangle Plus (+)/Minus (-) Reference/Change Units Memory Compass Plus (+)/Scroll Up Area/Volume/Indirect Measurement (Pythagoras) Timer... -
Page 47: Display
Laser Distance Meter Before You Start Display Figure 7 shows the readout location on the display for each function. 414D 419D 424D gwo06.eps Battery Status Units of Measurement 2 Result Available Timer/Compass (424D only) Info ... -
Page 48: Button Functions
414D/419D/424D Users Manual Button Functions Function Buttons Push This section is about how to use the buttons and identifies when a function is model-dependent. When not identified, • 1x = Area all models include the function. • 2x = Volume On/Off •... -
Page 49: Units Of Measurement
Laser Distance Meter Button Functions Units of Measurement Push Push and hold (414D) or (419D/424D) for • 1x = Area 2 seconds to toggle between the units for distance • 2x = Volume measurements, see Table 3. •... -
Page 50: Timer (419D/424D)
Users Manual Timer (419D/424D) Beeper (419D/424D) Fluke recommends that you use a time-delay for the most Push at the same time for 2 seconds to turn on accurate measurements at long distances. This prevents and turn off the beeper. The display shows the status as ... -
Page 51: Compass (424D)
Laser Distance Meter Button Functions Compass (424D) Compass Calibration The compass feature lets you know the view or direction Automatic Calibration as you make measurements. This is useful indoors to set The compass sensor continuously collects and saves the building plans in the correct direction. It is also useful new calibration values in 60-second intervals. -
Page 52: Magnetic Declination
414D/419D/424D Users Manual Magnetic Declination The difference between the north geographic pole and the north magnetic pole is known as magnetic declination, 180° or more plainly, declination. The angle of declination is 180° different at different locations on the earth. The geographic and magnetic poles are aligned so declination is minimal. - Page 53 Laser Distance Meter Button Functions Table 4. Estimated Values of Magnetic Field Declination Declination Declination Country City in Degrees Country City in Degrees Country City in Degrees (+E | -W) (+E | -W) (+E | -W) Argentina Buenos Aires Greenland Godthab Spain Madrid...
-
Page 54: Clear
414D/419D/424D Users Manual Clear Push Push • 1x = Measure from front • 1x = Clear last value • 2x = Measure from tripod screw • 2x = Clear all • 3x = Measure from end •... -
Page 55: Measurements
Laser Distance Meter Measurements Measurements The Meter measures the distance to a target, the area bounded by two distances, or the volume in three Min. Max. measurements. This manual identifies when a feature is model-dependent. When not identified, all models include the feature. -
Page 56: Addition/Subtraction
414D/419D/424D Users Manual Addition/Subtraction Area The Meter adds and subtracts a value to a single To measure area: distance, area, and volume measurements. 414D 414D Push 1x. The symbol appears in the display. To add or subtract: Push to make the first measurement (for example, length). -
Page 57: Volume
Laser Distance Meter Measurements Volume 419D/424D 414D To measure volume: To measure volume: Push 2x. The symbol appears in the display. Push to make the first measurement (for Push 2x. The symbol shows in the display. example, length). -
Page 58: Tilt (424D Only)
414D/419D/424D Users Manual Tilt (424D only) Note The inclinometer senses tilts at 360 °. For tilt measurements, hold the Meter without a transverse tilt (±10 °). Smart Horizontal Mode (424D only) The Smart Horizontal mode (indirect horizontal distance) function lets you find a horizontal distance when the line-of-sight is blocked by an object or obstacle. -
Page 59: Leveling
Laser Distance Meter Measurements Push at the top target. Height Tracking stops Leveling and the display shows the vertical distance between The Leveling function continuously shows the angle of the the two measured targets. See Figure 12 for more Meter. -
Page 60: Tilt Sensor Calibration
414D/419D/424D Users Manual Turn the Meter horizontally 180 ° on the same flat Tilt Sensor Calibration horizontal surface. To calibrate the tilt sensor: Push Push at the same time for 2 seconds. The display shows the instructions for the The display shows ... -
Page 61: Stake Out Measurement (419D/424D)
Laser Distance Meter Measurements Stake Out Measurement (419D/424D) 419D (1 Value) A specific distance can be set in the Meter and used to To find stake out distances with 1 value: mark off defined measured lengths. An example of this ... - Page 62 414D/419D/424D Users Manual 424D (2 Values) Move the Meter slowly along the stake out line the displayed distance decreases. You can enter two different distances (a and b) into the Meter and use them to mark off measured lengths, for The arrows in the display indicate in which example, in the construction of wooden frames.
-
Page 63: Corner Angle Measurement (424D Only)
Laser Distance Meter Measurements Corner Angle Measurement (424D only) The Meter calculates the angles in a triangle with measurements from the three sides. As an example, use this function with a right-angle room corner. See Figure 15 for more information. To make corner angle measurements: ... -
Page 64: Indirect Measurement
414D/419D/424D Users Manual 414D Indirect Measurement To find a vertical distance with two measurements The Meter can calculate distances with Pythagoras’ (Pythagoras 1): theorem. With this function, you can find a distance with two auxiliary measurements, such as building height or ... - Page 65 Laser Distance Meter Measurements To find a total distance with three measurements (Pythagoras 2): Push shows on the display. Point the laser at the first target (1). See Figure 17. Push for the first distance (diagonal) measurement. Point the laser at the second target (2).
- Page 66 414D/419D/424D Users Manual Point the laser at the third (3) target. 419D/424D To find a distance with two measurements Push for the third distance measurement. (Pythagoras 1): The Meter shows the result in the summary line. The Push shows on the display.
-
Page 67: Memory (419D/424D)
Laser Distance Meter Memory (419D/424D) Make sure that the Meter is perpendicular to the wall. and the memory ID show on the display. Push to trigger the bottom target (3) Push for 2 seconds to use the value shown in measurement. -
Page 68: Message Codes
Hold the Meter without a transverse tilt. Calibration mistake Make sure that the device is on a horizontal and flat surface. Do the calibration procedure again. If the code continues, contact Fluke. Calculation error Do the measurement again. Temperature too high Let the Meter cool down. -
Page 69: Specifications
Laser Distance Meter Specifications Specifications 414D 419D 424D Distance Measurement Typical Measurement Tolerance ± 2.0 mm (± 0.08 in) ± 1.0 mm (± 0.04 in) Maximum Measurement Tolerance ± 3.0 mm (± 0.12 in) ± 2.0 mm (± 0.08 in) Range at target plate 50 m / 165 ft 80 m / 260 ft... - Page 70 414D/419D/424D Users Manual 414D 419D 424D General Laser class Laser type 635 nm, <1 mW Protection class IP40 IP54 Automatic laser off 90 seconds Automatic power off 180 seconds Battery life (2 x AAA) up to 3,000 measurements up to 5,000 measurements 1.5 V NEDA 24A/IEC LR03 11.6 cm x 5.3 cm x 3.3 cm 12.7 x 5.6 x 3.3 cm...
- Page 71 Laser Distance Meter Specifications 414D 419D 424D Maximum relative humidity 85 % at 20 °F to 120 °F (-7 °C to 50 °C) Safety IEC/EN 61010-1:2001 IEC/EN 60825-1:2007 (Class 2) EN 55022:2010 EN 61000-4-3:2010 EN 61000-4-8:2010 ° [1] Applies for 100 % target reflectivity (white painted wall), low background illumination, 25 °...
- Page 72 414D/419D/424D Users Manual...
Need help?
Do you have a question about the 320 Series and is the answer not in the manual?
Questions and answers