Sign In
Upload
Download
Table of Contents
Contents
Add to my manuals
Delete from my manuals
Share
URL of this page:
HTML Link:
Bookmark this page
Add
Manual will be automatically added to "My Manuals"
Print this page
×
Bookmark added
×
Added to my manuals
Manuals
Brands
Fluke Manuals
Data Loggers
961A
User manual
Fluke 961A User Manual
Temperature humidity logger
Hide thumbs
1
2
Table Of Contents
3
4
5
6
7
8
9
10
11
12
13
14
15
16
17
18
19
20
21
22
23
24
25
26
27
28
page
of
28
Go
/
28
Contents
Table of Contents
Bookmarks
Table of Contents
Table of Contents
Introduction
How to Contact Fluke
Safety Information
Product Familiarization
Standard Packaging
Model Comparison Table
Operation Features
Components and Controls
Screen
Screen
Basic Operation
Turn On/Off the Logger
Start/Stop Logging
View the Live Measurements
Connect to a PC
Use the Logger
Configure the Logger's Parameters
Factory Defaults
Start Logging
Mark Events (Optional)
Pause/Stop Logging
Download Data
Repeat Start
Flukelog Software
Download and Install the Flukelog Software
Maintenance
Clean the Case
Change the Battery
Product Disposal
Specifications
General Specifications
Detailed Specifications
Advertisement
Quick Links
Download this manual
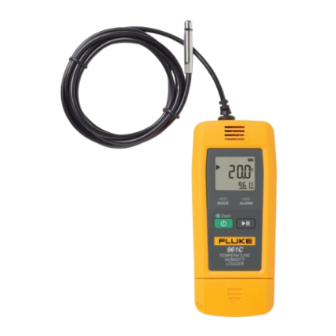
961A/961B/961C
Temperature Humidity Logger
Users Manual
April 2023 (English)
© 2023 Fluke Corporation. All rights reserved. Specifications are subject to change without notice.
All product names are trademarks of their respective companies.
Table of
Contents
Previous
Page
Next
Page
1
2
3
4
5
Advertisement
Table of Contents
Need help?
Do you have a question about the 961A and is the answer not in the manual?
Ask a question
Questions and answers
Related Manuals for Fluke 961A
Data Loggers Fluke 961B User Manual
Temperature humidity logger (28 pages)
Data Loggers Fluke 961C User Manual
Temperature humidity logger (28 pages)
Data Loggers Fluke 1734 User Manual
Energy logger (76 pages)
Fluke 1750, 1750-TF/NT C/W-4, 1750/NT, 1750/B/NT Manual
(article)
Data Loggers Fluke 1750 Operator's Manual
Three-phase power recorder (60 pages)
Data Loggers Fluke VIBXPERT II User Manual
Data collector & vibration analyzer (173 pages)
Data Loggers Fluke VIBXPERT 3 User Manual
Data collector & vibration analyzer (125 pages)
Data Loggers Fluke 1738 User Manual
Power logger (84 pages)
Data Loggers Fluke 2638A User Manual
Hydra series iii data acquisition unit (103 pages)
Data Loggers Fluke 1743-BASIC User Manual
Power quality logger (80 pages)
Data Loggers Fluke VR1710 User Manual
Voltage quality recorder (18 pages)
Data Loggers Fluke 1736/FPC User Manual
(84 pages)
Data Loggers Fluke Datapaq TP3 User Manual
For datapaq tracker systems with insight software (67 pages)
Data Loggers Fluke 434/PWR User Manual
Flukeview power quality analyzer software version 3.20 onwards (40 pages)
Data Loggers Fluke 1730/US User Manual
Energy (62 pages)
Data Loggers Fluke 2680A User Manual
Data acquisition system/data logging system (274 pages)
This manual is also suitable for:
961b
961c
Table of Contents
Print
Rename the bookmark
Delete bookmark?
Delete from my manuals?
Login
Sign In
OR
Sign in with Facebook
Sign in with Google
Upload manual
Upload from disk
Upload from URL


Need help?
Do you have a question about the 961A and is the answer not in the manual?
Questions and answers