Advertisement

Quick Links

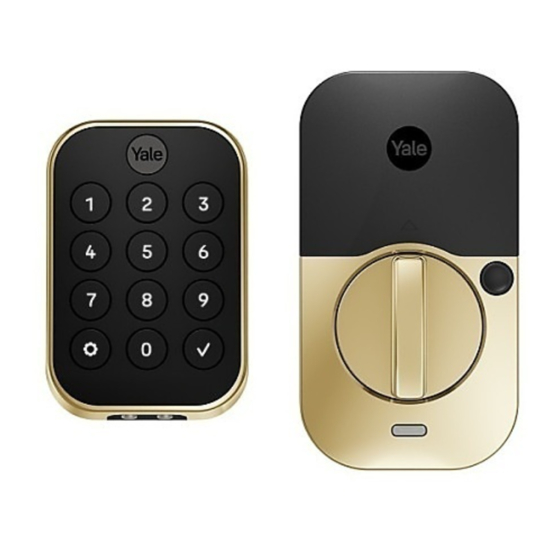
Yale Pro
Key-Free YRD634 / YRD654
Trusted Every Day
2
Install Your Lock
Follow the step-by-step Installation Guide in this manual (pages 8-19).
Set Up, Program, and Use Your Lock
Follow the instructions in this manual (page 21) or in the Quick Start
Guide to set up and program your lock. Create permanent entry codes,
issue entry codes for guests, operate your lock with your phone, and
more (pages 20-27).
All key-free locks should only be installed on homes with
more than one point of entry.
P/N YRD604-KF-ZW-0044 Rev A
ISL-2225-00-108

Advertisement

Table of Contents
loading
Need help?

Need help?

Do you have a question about the YRD634 and is the answer not in the manual?

Questions and answers

Summary of Contents for Yale YRD634

  • Page 1 Yale Pro  Key-Free YRD634 / YRD654 Install Your Lock Follow the step-by-step Installation Guide in this manual (pages 8-19). Set Up, Program, and Use Your Lock Follow the instructions in this manual (page 21) or in the Quick Start Guide to set up and program your lock.
  • Page 2 P/N YRD604-KF-ZW-0044 Rev A...
  • Page 3: Table Of Contents

    Lock Operations Troubleshooting Make or Adjust Holes Hardware Troubleshooting Install Deadbolt Latch Install Exterior Keypad Install Mounting Plate Attach Wire Cable to Interior Lock Install Interior Lock Test Thumbturn Install Yale Smart Module Install Batteries and Replace Cover P/N YRD604-KF-ZW-0044 Rev A...
  • Page 4: In The Box

    In the Box 1. Exterior Keypad Lock Hardware 2. Interior Lock 3. Strike Plate 4. Adjustable Deadbolt 5. Manual 6. Reset Pin 7. Mounting Plate 8. AA Batteries 9. Screws a. Strike Plate and Deadbolt Screws b. Teal Screw Set B c.
  • Page 5 Door Checker Part 1 See Reverse for Part 2 Measure Clearance Measure Door Thickness Measure Backset Greater than A B, C or D Equals E or F Less than B or Less than A Doesn’t equal E or F (Your door is not a match) (Your door is not a match) greater than D (Your door is not a match)
  • Page 6: Door Checker

    Door Checker Part 2 See Reverse for Part 1 Measure Face Bore Measure Edge Bore and Strike Pocket Equals G or H Equals I Door (Edge Bore) Frame (Strike Pocket) Less than G Less than I (Adjust diameter to G or H) (Adjust diameter to I) Greater than H Greater than I...
  • Page 7 Marking Template for 2-1/8” (54mm) Face Bore 1-3/4” (44.5mm) 2-3/4” (70mm) Center of Door Thickness Backset 2-1/8” (54mm) Face Bore Center of 1” (25mm) Edge Bore Centerline Center of 1” (25mm) Edge Bore Center of 2-1/8” (54mm) 1-3/8” (35mm) 2-3/8” (60mm) Face Bore Door Thickness Backset...
  • Page 8 Marking Template for 1-1/2” (38mm) Face Bore 1-3/4” (44.5mm) 2-3/4” (70mm) Door Thickness Backset Center of 1-1/2” (38mm) Center of Face Bore 1” (25mm) Edge Bore Centerline Center of 1” (25mm) Center of Edge Bore 1-1/2” (38mm) Face Bore 1-3/8” (35mm) 2-3/8”...
  • Page 9: Marking Templates

    Installation Guide Required Tools You Might Also Need 1. Phillips Head Screwdriver 2. Door Checker (tear off pages 5-6 of this manual) 3. Tape Measure 4. Drill 5. Marking Template (tear off pages 7-8 of this manual) 6. Pencil Door Checker Part 1 7.
  • Page 10: Remove Existing Deadbolt

    Remove Existing Deadbolt If you have a new door, please proceed to step 1b. If you have a deadbolt on your door, use the diagram to help you remove it. Frame Door Keep your old deadbolt until your new lock has been successfully installed. P/N YRD604-KF-ZW-0044 Rev A...
  • Page 11: Check Door Measurements

    Check Door Measurements If your door doesn’t have holes, please proceed to step 1c. Tear off the Door Checker (pages 5-6) and follow the guidelines on both sides to If you need to make adjustments, go to measure each aspect of your door and frame. There are some cases when existing step 1c and find the closest match to each holes cannot be adjusted to be compatible.
  • Page 12: Make Or Adjust Holes

    Make or Adjust Holes Skip this step if you have confirmed that the existing holes are compatible (step 1b). 1. Tear off the Marking Template (pages 7-8), and choose the 6. On the door frame, align the center of the strike plate with the preferred face bore diameter (2- 1/8”...
  • Page 13: Install Deadbolt Latch

    Install Deadbolt Latch 1. Correct deadbolt length is based on the backset. Refer to measurements Minimum strike pocket depth is 1”. E and F on the Door Checker (page 5) to verify backset. 2-3/8” Backset 2-3/4” Backset x 2 for Deadbolt Latch x 2 for Strike Plate (Out of box) (To adjust, twist neck by holding the body stable)
  • Page 14: Install Exterior Keypad

    Install Exterior Keypad 1. Refer to measurements G and H on the Door Checker (page 6) to measure face bore hole. If the hole is 1-1/2” (G), unscrew the two small screws and remove the adapter. Install your lock with the door open. Do not close your door until all the steps are completed.
  • Page 15: Install Mounting Plate

    Install Mounting Plate 1. Refer to measurements B, C, and D on the Door Checker (page 5) to select screws. x 2 Teal Screws (1-3/8” door thickness) x 2 Black Screws (1-3/8” - 1-3/4” door thickness) x 2 Silver Screws (1-3/4” - 2-1/4” door thickness) 2.
  • Page 16: Attach Wire Cable To Interior Lock

    Attach Wire Cable to Interior Lock 1. Remove battery cover by pulling it upwards off the body of the interior lock. 2. Make sure the side of the cable end with the ridges and the marked line faces outward. 3. Push cable into the designated slot until you hear a click. P/N YRD604-KF-ZW-0044 Rev A...
  • Page 17: Install Interior Lock

    Install Interior Lock 1. Make sure the tailpiece is in horizontal position. Use the thumbturn to adjust if needed. 2. Slide the tailpiece through the deadbolt latch slot. 3. Press the lock against the mounting plate, adjusting its position until it clicks into place and the bottom of the lock is held in place.
  • Page 18: Test Thumbturn

    Test Thumbturn If deadbolt latch does not lock or unlock with the thumbturn (from the inside): • Ensure that the deadbolt latch is centered in the face bore hole; • Ensure that the tailpiece is positioned horizontally and inserted through deadbolt latch slot (step 6, point 2).
  • Page 19: Install Yale Smart Module

    Install Yale Smart Module Insert Yale Smart Module into the designated slot at the top of the body of the lock. Batteries must not be installed when inserting or removing Yale Smart Module. P/N YRD604-KF-ZW-0044 Rev A...
  • Page 20: Install Batteries And Replace Cover

    Install Batteries and Replace Cover 1. Before installing batteries, make sure the deadbolt latch is unlocked. 2. Place ribbon behind batteries for easy battery removal. 3. Install 4 batteries. 4. Replace cover. P/N YRD604-KF-ZW-0044 Rev A...
  • Page 21: Using Your Lock

    Using Your Lock Exterior Keypad Interior Lock 1. Wake / One-Touch Locking To lock your door 2. Warnings / Menu Press 3. Submit Entry Code 4. 9-Volt Battery Backup (See page 33 for instructions To unlock your door for if batteries are drained) 5.
  • Page 22: Configuring Your Lock

    Configuring Your Lock 1. Press the small black button on the interior of the lock until the 1 and are illuminated on the keypad 2. Press the 1 followed by the . Enter the settings menu. Enter a 4-8 digit programming code, followed by the . Enter the settings menu.
  • Page 23: Led Alerts

    LED Alerts Exterior Keypad Alerts Interior Lock Alerts Gear flashes amber Low battery level 1 LED indicator flashes blue Low battery levels 1, 2, and 3 Gear flashes red Low battery level 2 LED indicator flashes red Locked state Gear flashes red, then stays red Low battery level 3 LED indicator flashes green Unlocked state...
  • Page 24: Resetting Your Lock To Factory Defaults

    Resetting Your Lock to Factory Defaults 1. Remove one battery. 2. Insert reset pin into the designated reset hole. 3. Press and hold the reset pin. 4. While holding the reset pin, reinsert battery. 5. Keep holding the reset pin for 5 more seconds. 6.
  • Page 25: Features

    Features · Entry codes are used to unlock your door. Entry Codes · 500 entry codes can be created or deleted from the Yale lock or your Z-Wave partner app. · Auto-Lock automatically locks the door for you. Auto-Lock · It can be set to lock on a timer for as short as 30 seconds, or as long as 30 minutes.
  • Page 26: Lock Operations Troubleshooting

    Lock Operations Troubleshooting · Press the Yale logo to activate the keypad. · Verify contact with the logo. Lock does not respond. · If keypad numbers are visible, check if they respond when pressed. · Check batteries are installed and oriented correctly in battery case. Replace batteries* if needed.
  • Page 27 · Make sure you are using different entry codes for different users. · Entry code must be entered while the keypad is active (tap on the Yale logo to wake it up and enter the entry code within 5 seconds).
  • Page 28: Hardware Troubleshooting

    Hardware Troubleshooting Deadbolt grinds and will not extend to lock when using an entry code but thumbturn · Lock was not handed properly. Find the setting called “Lock Handing” to fix this issue. locks and unlocks smoothly. Deadbolt is hitting the strike plate. ·...
  • Page 29 24/7 Support: 1-855-213-5841 • Support.ShopYaleHome.com Yale® and Yale Pro® 2 are registered trademarks of Masterlock LLC and its affiliates. Other products’ brand names may be trademarks or registered trademarks of their respective owners and are mentioned for reference purposes only. ©Copyright 2023. All rights reserved.

This manual is also suitable for:

Pro 2Yrd654

Table of Contents