Table of Contents

Subscribe to Our Youtube Channel
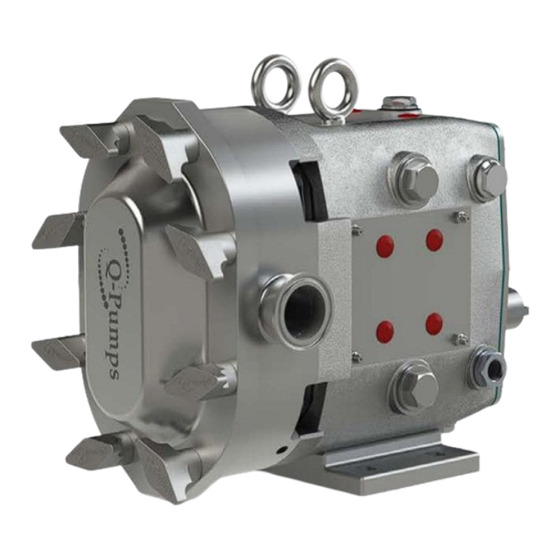
Related Manuals for Q-Pumps QP1 Series


Summary of Contents for Q-Pumps QP1 Series
- Page 1 QP1 Series Sanitary Positive Displacement Pumps Installation and Maintenance Manual Springer Pumps, LLC Websites: www.springerpumps.com Tel: 866-777-6060 Springer Parts® www.springerparts.com Fax: 866-777-6383 Int'l: +001 267 404 2910...
-
Page 2: Table Of Contents
Table of Contents Introduction ......................... 3 Introduction ........................ 3 Q-Pumps Warranty ....................3 General Information ....................3 Shipping Damage or Loss ..................3 Receiving/Safety ........................4 Pump Receiving ......................4 Safety ........................4 Pump Information ........................ 5 Pump Information ...................... 5 Label Information ....................... -
Page 3: Introduction
Email: sales@qpumps.com Q-Pumps Company Warranty Q-Pumps guarantees all of its manufactured products sold to be free from defects in material and craftsmanship for a period of one (1) year from the date of shipment. The warranty does not apply to products requiring repair or replacement due to what is deemed as normal wear and tear. -
Page 4: Receiving/Safety
Receiving/Safety Pump Receiving Q-Pumps covers all the pumps inlet and discharge ports prior to shipping, to ensure that foreign matter does not enter pump during shipment. If the protective covers are missing upon arrival, remove the pump cover and inspect to ensure it is free from contaminate before turning the shafts. -
Page 5: Pump Information
Pump Information Pump Information The design of the QP pump gear case allows for the shaft location to be universal in order to fit any system requirement. This can be seen in Figures 1 and 2: Figure 1: Shaft Mounts (Upper and Lower) Figure 2: Shaft Mounts (Right and Left) Table 1: Standard Operating Parameters Maximum... -
Page 6: Label Information
QP1 pump. An identification plate is applied at the factory to help track the life of the pump. The customer should be aware of the pump’s serial number and model number prior to contacting Q-Pumps with any concerns. These labels can be seen below in Figure 3: Querétaro, Qro. -
Page 7: Installation
WARNING: Guards must be installed to protect personnel from rotating parts and components. Failure to do so may result in injury. All complete base packages which consist of pump and drive units provided by Q-Pumps are sent with protective guards. -
Page 8: Piping And Connections
Installation Piping and Connections It is important to minimize forces imposed on the pump. This can be done by independently supporting the piping going to and from the pump. Excessive force applied to the pump can cause misalignment of internal parts which leads to the premature wear of rotors, bearings, and shafts. -
Page 9: Check/ Isolation/ Relief Valves
Installation Check/ Isolation/ Relief Valves Check valves should be used on the inlet side for any application when the product is lifted (Figure 8). This is to ensure a full inlet and is especially important with low-viscosity fluids. If the system has liquid under a vacuum, such as closed tank applications, it is important to have a check valve on the discharge side to prevent backflow during initial start-up (Figure 9). -
Page 10: Strainers And Gauges
Installation Strainers and Gauges To prevent foreign matter from entering pump, strainers and magnetic traps should be used. It is essential to service strainers and traps regularly to prevent restriction of flow. To determine the performance of the pump, install pressure and vacuum gauges on the inlet and discharge piping (Figure 11). -
Page 11: Pump Rotation
Installation Pump Rotation It is important to check the direction of rotation (both on drive unit and pump) prior to connecting the pump to the drive. This will ensure correct product flow at start-up (Figure 13 and Figure 14). Also check that the pump turns freely and is free of any foreign contaminate. Install the pump and check to make certain all guards are in place. -
Page 12: Maintenance
GRADE, NLGI Grade No. 2 220, 224 11 oz 20 oz *Replacement oil and grease is available from 320, 323 17 oz 44 oz Q-Pumps Page 12 Springer Pumps, LLC Websites: www.springerpumps.com Tel: 866-777-6060 Springer Parts® www.springerparts.com Fax: 866-777-6383 Int'l: +001 267 404 2910... -
Page 13: Preventive Maintenance/ Inspection
Maintenance Preventive Maintenance/ Inspection While performing standard maintenance or cleaning, check for signs of damage or extreme wear. A simple inspection may show signs of a problem long before it becomes serious. Detection of such problems can avoid costly repairs and reduce down time. Remove the cover and inspect the rotor tips to ensure that there is no metal-to-metal contact between the rotors. -
Page 14: Gear And Bearing Inspection
Maintenance Gear and Bearing Inspection While the fluid end is disassembled feel for gear backlash (play in between the gears) by rotating either shaft. Once turning has started the other shaft must engage (Figure 20). If gear backlash is present remove the gear casing cover (drain oil first, see page 21 for disassembly information) and check for wear around the gear teeth. -
Page 15: Annual Maintenance
Maintenance Annual Maintenance It is important to perform an annual maintenance check of the pump in addition to the preventative maintenance procedures listed on pages 13 and 14. Annual maintenance practices are as follows: Check the gear case bearings by measuring the shaft’s radial movement with a dial indicator (Figure 22, A). -
Page 16: Pump Disassembly
Figure 24: Removing Cover and Cover O-ring 3) Remove the rotor jam nuts using the wrench provided by Q-Pumps (Figure 25). Remove one at a time, by striking wrench with a soft mallet to break loose then turning counter clockwise. The nuts are made of a non-galling alloy to prevent from locking up on the shaft. -
Page 17: Seal Maintenance
(Figure 30). Remove the o-ring carriers from the back of the pump body and discard the o-rings (Figure 30). Remove the body o-rings using the tool provided by Q-Pumps (discard o-rings). Slide the shaft sleeves off the shafts and inspect for damage. Do not re-use sleeves that are damaged (sleeve surface grooved or scratched). -
Page 18: Single Mechanical Seal
Remove the body o-rings using the tool provided by Q-Pumps (discard o-rings). Remove the seal seats (rotating seals) from shafts and inspect for damage. -
Page 19: Double Mechanical Seal
Remove the body o-rings using the tool provided by Q-Pumps (discard o-rings). Remove the seal seats (rotating seals) from shafts and inspect for damage (previously described). If any of the seals are damaged, do not re-use them. - Page 20 Maintenance Seal Maintenance Double Mechanical Seal Continued Assembly: Clean both shaft ends and the body before assembling. Apply a light film of lubricant to NEW o-rings and insert them on the shafts (slot furthest from splines), into the body and on to the outer seals. Slide the seal seat onto shaft pushing against the shaft shoulder making sure to align the slot on the seal seat to the drive pin on the shaft (Figure 35).
-
Page 21: Gear Case Maintenance
(wood or plastic) to keep the shafts from turning while removing the lock nuts (Figure 38). Using a spanner wrench or the nut removal tool (available from Q-Pumps), remove the gear lock nuts. Slowly remove the gears from the shafts. Remove the gear keys and gear spacers from the shafts. - Page 22 Maintenance Gear Case Maintenance 3) To prevent damage to the shafts, wrap the splines and rotor nut threads with tape (Figure 39, A). Any damage to the splines or threads may require the shaft be replaced. Remove the cap screws holding the bearing retainers in place and slide both bearing retainers off the shaft (Figure 39, B).
-
Page 23: Assembly
Maintenance Gear Case Maintenance 6) Using a press and a V-block, remove the front and rear bearings along with the bearing spacer. To prevent damage to the shafts make sure that both ends are protected (Figure 42). Reference Table 5 for the required force (in tons) needed to press the bearings off the shafts. Rear Table 5: Force Required to Press Bearings Bearing... - Page 24 Maintenance Gear Case Maintenance 2) Single ball bearings are used for the rear bearing in models QP1 6, QP1 15, QP1 18, QP1 30, and QP1 34 and will require a light press to install. Tapered roller bearings are used for all other models and will be pressed on similar to the front bearings.
- Page 25 Maintenance Gear Case Maintenance 4) Set the gear case on a press with the fluid end side facing up. Place the required thickness of shim stock so it sits on the shoulder of the front shaft bore of gear case. Apply lubricant to the outside of the bearings.
- Page 26 Maintenance Gear Case Maintenance 6) Once the correct backface clearance is achieved, fill all bearings with grease through the fittings on the mounting pads until grease is noticeable around the bearing assemblies. The shafts should be rotated during this initial greasing to distribute the grease evenly. Apply a light film of lubricant to the inside and outside diameters of the oil seals and install them into the bearing retainers.
- Page 27 Maintenance Gear Case Maintenance 9) Install the lock washers on the shaft by aligning the tab inside the lock washer with the slot in the shaft (Figure 52, A). Lubricate the threads of the lock nuts and thread them on the shafts.
-
Page 28: Pump Assembly
Maintenance Pump Assembly Install Hold 1) Make sure all seal components are installed by following “Seal Down Bolts Maintenance” instruction provided on pages 17-20. Check to ensure all dowels are in place and that all parts including body, rotors and jam nuts are clean and free of foreign matter. Slowly slide the body over the gear case studs and shafts, ensuring the seals are kept in place and not damaged (Figure 55). -
Page 29: Pump Clearances
Measuring B Measuring C Depth Mic. Cutaway Figure 59: Critical Pump Clearances Table 8: Critical Pump Clearance Dimensions (Standard Rotors) Note: For non-standard rotors contact Q-Pumps (Backface Clearance) (Rotor to Body Clearance) (Front Face Clearance) QP1 Model Inch Inch Inch 6, 15, 18 .002... -
Page 30: Troubleshooting
Problems may occur over the life of the pump due to system variations, standard wear, or user error. The following table has information that may help identify and solve a problem. For additional technical assistance, please contact Q-Pumps with the pump’s serial number. - Page 31 Non-standard rotors (Hot clear- ance, Hot Chocolate clearance, Use appropriate rotors for product (contact Stainless) are being used on low Q-Pumps for additional support, if needed) Inadequate Flow, Pump is viscous fluids Noisy During Operation Increase speeds, replace rotors, or have the...
- Page 32 Noisy Operation (cavitation) Check inlet pressure requirements and adjust The inlet pressure available is less accordingly (contact Q-Pumps for additional then required support, if needed) Air leaks in the system Check for leaks and correct, if needed Noisy Operation...
-
Page 33: Reconditioning Program
These upgrades are standard to Q-Pumps positive displacement new and reconditioned pumps. Recondition pricing is cost sensitive at only 67% of a new pump. Contact your local distributor or the factory +52 (442) 218 4570 for more information. - Page 34 Notes Notes Page 34 Springer Pumps, LLC Websites: www.springerpumps.com Tel: 866-777-6060 Springer Parts® www.springerparts.com Fax: 866-777-6383 Int'l: +001 267 404 2910...
- Page 35 Phone: +52 (442) 218 4570 or +52 (442) 103 3100 Fax: +52 (442) 218 4577 Email: sales@qpumps.com Additional information on the QP series and other products that Q-Pumps offers can be seen at our website: www.qpumps.com Revision Date: May 2021 Springer Pumps, LLC Websites: www.springerpumps.com...
Need help?
Do you have a question about the QP1 Series and is the answer not in the manual?
Questions and answers