
Related Manuals for Q-Pumps QC Series


Summary of Contents for Q-Pumps QC Series
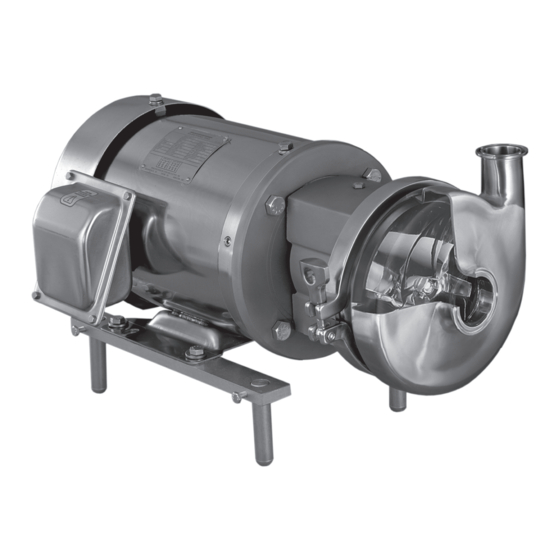
- Page 1 Maintenance service and installation manual Q C S e r i e s C e n t r i f u g a l P u m p QC-M02 w w w.qp um ps . c om su p p o r t@qp u mps.c o m...
-
Page 2: Table Of Contents
Operation and Maintenance Manual QC Series Centrifugal Pump Thank you for purchasing a Q-Pumps product! This manual contains installation, operation, cleaning and maintenance instructions for the QC, QC plus and IC plus series. It also includes a part list as well as a troubleshooting chart to assist in determining pump mal- function and practical advices for the maintenance and operation of the equipment. -
Page 3: About This Manual
The purchaser by acceptance of delivery assumes all liability for the consequences of use or misuse by it, its employees or third parties. Unless they are approved in advance, Q-Pumps does not assume any costs related to parts and / or service. -
Page 4: Safety
Indicates a potentially hazardous situation which, if not avoided, could result in death or serious injury. Safety labels are placed on every pump. DO NOT remove any labeling on any Q-Pumps pro- duct. Replace any label that is missing. QC-M02... -
Page 5: Installation
Before servicing pump, disconnect electrical power source. The QC series closed-coupled pumps are made up of two sections, power or drive section and the liquid end or pump section. The pump is mounted to the frame of the drive motor by means of an adapter, and is coupled to the motor shaft. -
Page 6: How To Install The Piping
Operation and Maintenance Manual QC Series Centrifugal Pump HOW TO INSTALL THE PIPING GENERAL This section provides some do’s and do not’s of piping which will aid in obtaining the maximum efficiency and service from your pump. Piping should be independently supported at both the suction inlet and discharge outlet. -
Page 7: Assembly Preliminaries
6. 3/8" diameter steel rod – to hold stub shaft plus, for QC plus models. 7. Torque Wrench Recently it has been added new series to the known QC series: the kit plus, QC plus series and IC plus series for every specific applications. There are some modifications in the assembly in each one of these series without altering the operation of the equipment. -
Page 8: Exploded Assembly
Operation and Maintenance Manual QC Series Centrifugal Pump QC-M02... -
Page 9: Part List
Operation and Maintenance Manual QC Series Centrifugal Pump PART LIST Water cooled balanced double seal type E External balanced seal type D Backplate “E” Backplate “D” Backplate pin Backplate pin Follower Carbon Machine screw Cup seal “D” O-ring O-ring carbon Lock washer Spring seal “D”... -
Page 10: Assembly
Operation and Maintenance Manual QC Series Centrifugal Pump BEGINNING THE ASSEMBLY It is highly recommended that you resort to the diagram on page 6 to verify the assemblies and subassemblies whose directions will follow. 1. LEG BRACKET ASSEMBLY Sets of leg-brackets are optional and can be used to vertically adjust the pump. The size of the brackets (209) and the legs (207) depend upon the NEMA or IEC of the motor. - Page 11 Operation and Maintenance Manual QC Series Centrifugal Pump The traction between shafts is achieved by friction. By tightening the drive collar bolt (s) (92A), the drive collar plus (92) and the stub shaft (6P or 6E) closes pressing the motor shaft. To have an optimum performance it is necessary to align the three groups of the assembly: 1.- The motor...
-
Page 12: Assembling And Installing The Mechanical Seal
Operation and Maintenance Manual QC Series Centrifugal Pump 4. ASSEMBLING AND INSTALLING THE MECHANICAL SEAL MECHANICAL SEALS. Among the QC, QC plus, and IC plus pump series there exist five types of mechanical seals. One of these, the “T21”, is used exclusively with our IC+ series, specifically in non-sanitary applications. - Page 13 IMPORTANT: It is necessary to disassemble some of the pump parts for cleaning and sterilizing. For those Q-Pumps products equipped with “D” seals, if a CIP (Clean-in-Place) instillation is used, disassemble is not necessary. Do not lubricate the seal with grease or oil, the faces of the seals are lubricated by the fluid that is being pumped.
- Page 14 Operation and Maintenance Manual QC Series Centrifugal Pump Please remember that the PTFE gaskets (80P) and (80R) are not interchangeable. The seal seat (80N) is made of a very strong material and therefore is very fragile. It is important to protect the faces of the stationary seal just as with the backplate, against bumps and scratches.
- Page 15 Operation and Maintenance Manual QC Series Centrifugal Pump The following instructions assume that the adapter is assembled and that the spacing between the impeller and backplate has been set. If not, we recommend you refer to that section of the assembly directions.
- Page 16 Operation and Maintenance Manual QC Series Centrifugal Pump IMPORTANT: When you mount the backplate onto the adapter, the seal may supply resistance. If this resistance is too much, check the seal assembly and be sure the drive tcollar has been located correctly.
-
Page 17: Kit Plus Assembly
Figure B. We can easily convert a QC series standard pump to a QC plus series pump with a Kit plus. The QC plus series is 100% sanitary and meets the sanitary regulations set by 3A. The QC plus series uses and improved design that mantains a tighter, more sturdy assembly. -
Page 18: Industrial T21 Seal Assembly -Ic+ Series
The IC plus series does not meet 3A sanitary regulations. An IC plus series pump is composed of the same parts as a standard QC series pump, but requires the plus Kit to set the stub shaft and install the impeller. It also uses an industrial internal seal –... -
Page 19: General Assembly Inspection
Operation and Maintenance Manual QC Series Centrifugal Pump 7. GENERAL ASSEMBLY INSPECTION WARNING Before inspecting your pump’s assembly, double-check that the electric supply is disconnected, and that there is no supply of pressure or fluid into the piping. Before continuing please check that all bolts/screws and set screws have been tightened. -
Page 20: Casing Assembly
Operation and Maintenance Manual QC Series Centrifugal Pump 9. CASING ASSEMBLY Once the impeller has been installed, the casing must be mounted. Place the casing gasket (90) onto the groove on the backplate (11, 11B, 11H or 11P), depending on the seal type. -
Page 21: Common Problems
QC Series Centrifugal Pump QUICK GUIDE FOR SOLVING COMMON PROBLEMS Q-Pumps products are relatively easy to maintain with the exception of the sanitary process. Just as with any other element of machining, problems may arise. This section offers a guide for identifying and correcting the majority of the pumping problems. For problems with you motor, contact the manufacturer directly for best assistance. - Page 22 Operation and Maintenance Manual Centrifugal pump QC Series Acceso “A” #103, Fraccionamiento Industrial Jurica, Querétaro, Qro., México. C.P. 76130 Call: +52 (442) 218 4570 / 218 7400 Fax: +52 (442) 218 4577 support@qpumps.com w w w.q p um p s .co m...
Need help?
Do you have a question about the QC Series and is the answer not in the manual?
Questions and answers