Safety Regulations Please read the safety regulations and operation guide carefully before operating. Please read all of the operational guide and safety regulations in this manual before operation . Improper operations without complying with this manual may cause damage to the device, influence on measurement result or cause personal injury to the user or a third party.
Page 35
Screen locking Voice Laser emission Bluetooth indication Reference point Battery level Data storage Angle Laser on Reference point Historical data Current data Unit PIC1 Main interface Parameters Options PIC2 Menu interface - 32 -...
Page 36
Application scenario Modes Current page PIC3 Mode selection interface Buttons Power on/ Measure/ Confirm Mode selection/ Menu/ Left button Right button/ Screen locking Camera auxiliary measuring Subtract/ Down Add/Up Power off/ Clear - 33 -...
Li-ion Charging Type-C charging Lithium Battery The built-in 3.7V 2000mAh battery is not removable. The instrument has its own charging circuit, with clear undervoltage and charging indication. When the battery is low, the battery symbol is blank and flashes. In this case, charge the battery in time. Plug in the USB cable to charge, a scrolling battery symbol will appear on the screen, and the battery symbol will stop rolling when the battery is fully charged.
Battery Maintenance When not used for a long time, please fully charge the product and recharge it every six months to avoid battery discharge damage. Power on In the shutdown state, long press key to enter the measuring mode. In on state, long press key to turn off...
Continuous Measurement This mode helps users to find a certain distance point without frequently pressing the button to get the required data. The operation is as follows: 1. In measurement mode, long press key to enter the continuous measurement mode. The screen will display the maximum value MAX and minimum value MIN, as well as the difference between the maximum and minimum values.
Area Measurement (Application scenario) Select mode, the screen displays , follow the prompts to complete the following operations. Press key to measure the length of the rectangle; Press key to measure the width of the rectangle; After the measurement is completed, the instrument automatically calculates the area.
Volume Measurement (Application scenario) Select mode, the screen displays , follow the prompts to complete the following operations. Press key to measure one side (length) of the cube; Press key to measure one side (width) of the cube; Press key to measure one side of the cube (height); In the actual measurement, the user does not have to measure in the order of length, width and height.
Page 42
The instrument automatically calculates the area of the wall = height x width 1; Press to measure the width of wall S2; The instrument calculates the total area of the wall automatically; Total area of the wall = height x (width 1+ width 2); By analogy, press key to measure the width of the wall n;...
Page 43
3. Short press key to switch the arrow, and continue to Menu adjust the arrow position to coincide with the target boundary; 4. After all arrows coincide with the target boundary, the target area is automatically calculated and displayed below; 5·...
Page 44
1. Get the height and horizontal distance of the right triangle (Angle&Height measurement) (Application scenario) Select mode, the screen displays , follow the prompts to complete the following operations. Press key to measure the hypotenuse and dip angle of the right triangle; After measuring the hypotenuse of a right triangle, the instrument calculates the height C and horizontal distance B of the right triangle based on the hypotenuse length and...
Page 45
3. Get the hypotenuse of a right triangle (Application scenario) Select mode, the screen displays , follow the prompts to complete the following operations. Press key to measure the leg B of the right triangle; Press key to measure the other leg C of the right triangle;...
Page 46
5. Triangle auxiliary line height measurement (Application scenario) Select mode, the screen displays , follow the prompts to complete the following operations. Press to measure one side A of the triangle; Press to measure the auxiliary line length B of the triangle;...
Page 47
Trapezium Area Measurement (Application scenario) Select mode, the screen displays , follow the prompts to complete the following operations. Press to measure the first side A of the rectangle; Press to measure the second side B of the rectangle and the angle α; The instrument automatically calculates the area of the trapezium after the measurement.
Slope Measurement (Application scenario) Select mode, the screen displays , follow the prompts to complete the following operations. Press to measure the first side A; Press to measure the second side B; The instrument will automatically calculate the height of slope C and the length of slope C after the measurement.
Page 49
Measurement of Distance between Any Two Points in Space (Azimuth Measurement) (Application scenario) Select mode, the instrument enters the calibration state, the screen displays: Please put the instrument at rest and wait for about 3s to complete the calibration, (if there is vibration during the period, the instrument cannot be calibrated), the user can short press key to exit the calibration.
Page 50
Staking-out Measurement (Application scenario) Select mode, the screen displays , follow the prompts to complete the following operations. 1. After entering the staking-out mode, adjust the size of a key (long press key to increase the adjustment range). After the adjustment is complete, press key and staking-out value a will be set.
Page 51
Function description: Starting point Target 1 Target 2 Target 3 a=1.000m b=2.000m a、and b are set by the user a、a and b can be equal/not equal Distance from target 2 to the starting point Indicates that the instrument moves back Actual distance 0.6m to reach target 2 1)...
Page 52
Level Bubble Measurement Select mode, the screen displays , follow the prompts to complete the following operations. The universal electronic level bubble simulates the actual level bubble function and measures the tilt angle relative to the horizontal and vertical positions. Vertical angle Horizontal angle Distance Addition...
Page 53
Step 3: Repeat Step 1, after the second measurement, the instrument will automatically sum. The auxiliary display area shows the first and second measurement data, and the main display area shows the sum of the two data. Step 4: Repeat step 1, after each measurement, the instrument will continue to sum, the auxiliary display area shows the last sum data and the last measurement data, the main display area shows the sum of the two data.
Page 54
Area Addition & Subtraction Figure 4 First measured area Figure 5 Second measured area Figure 6 Sum of area Step 1: Measure the first area (refer to area measurement), as shown in Figure 4; Step 2: Short press to clear the data of screen, and [+] will be displayed in the main display area;...
Page 55
Volume Addition & Subtraction Figure 7 First measured volume Figure 8 Second measured volume Figure 6 Sum of volume Step 1: Measure the first volume (refer to volume measurement), as shown in Figure 7; Step 2: Short press to clear the data of screen, and [+] will be displayed in the main display area;...
Page 56
Save Records After completing the measurement, the measurement results are automatically saved to the storage media. The maximum memory is 100 units, please refer to Menu Settings to view records. Camera Auxiliary Measuring In strong sunlight, the laser cannot be identified with the naked eye.
Page 57
Automatic Screen Rotation and Locking Horizontal display Vertical display Automatic screen rotation: The instrument can automatically rotate the screen content according to the current direction. It supports 360° rotation and displays in 4 directions. Screen locking: Long press key to lock/unlock the Menu current screen orientation.
Page 58
Menu option Option Parameter Front Middle Rear 1. Reference point benchmark benchmark benchmark 0.000m、0.00m、0.00ft、0.0in、1/32in、 2. Length unit 0’00” 3. Angle unit ° : Angle unit % : Slope unit 4. Sound Sound on Sound off 5. Bluetooth Bluetooth on Bluetooth off 6.
Page 59
The self-calibration function is mainly used to correct data. When the deviation occurs when the user measures the distance, the function can be used to correct the distance, the correction range: -0.009~0.009m. For example, if the user thinks that the value is larger by 2mm, the value can be adjusted to -0.002m to compensate 2mm;...
Page 60
Delete state is as follows: Three options: 1)Delete a single record 2)Delete all records 3)Back to view records The operation is as follows: Short press key to select the operation; Short press key to perform the operation; Short press to return to menu option; 12.
Page 61
The operation is as follows: Short press key to select the operation; Short press the key to perform the operation. If Yes is selected, the instrument will be restored to factory settings. If No is selected, the system returns; Short press to return to the menu option;...
Page 62
EXCEL data sheets. Download the software from the official website: www.sndway.com. The instrument provides open USB HID communication function for users to develop the instrument for the second time.
Page 63
2) After running the software, connect the instrument to the computer with a USB cable. If the connection is successful, "Connection OK" is displayed at the lower left end of the page. 3) Click button to control instrument measurement data or clear data; 4) If records are stored in the instrument, click export the records in the instrument.
Page 64
Error Message When ERR × information appears on the instrument, it indicates that the instrument may not be able to perform correct measurements. The following is a list of possible error messages and solutions. Error messages Meaning & Solutions Reflection signal is too weak, use the ERR 1 reflecting plate Reflection signal is too strong, test different...
Technology Specifications: ITEM SW-80GQ SW-120GQ SW-150GQ Working range 120m 150m Precision ±(2mm+d *1/10000)* Display screen 2.4'' IPS color screen Laser type & class 500-800nm ,class II <1mW √ Bluetooth √ Area volume/measurement √ Wall area measurement √ Pythagorean measurement √...
Battery 3.7V 2000mAh lithium battery Charging Specification DC5V 1A Type-C Type-C charging About 3h 5500 times of measures when camera mode is off; Battery life 3500 times of measures under camera mode Storage temperature -20℃~60℃ Working temperature 0℃~40℃ Storage humidity 20%~80%RH Dimension 128x60x29.5mm...
Page 67
Packing List Please check if the accessories are completed according to the below list. Item Unit Note 
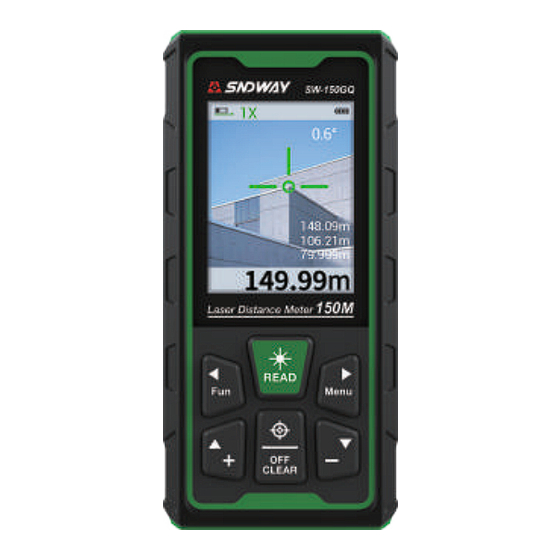
Laser distance meter Portable bag Hand strap Reflector User manual Gift box USB Type-C - 64 -...
Need help?
Do you have a question about the SW-80GQ and is the answer not in the manual?
Questions and answers