Table of Contents
Advertisement
Quick Links
Advertisement
Table of Contents

Subscribe to Our Youtube Channel
Related Manuals for SNDWAY SW-DR60


Summary of Contents for SNDWAY SW-DR60
- Page 1 Bilateral Laser Distance Meter...
- Page 2 Safety Regulations Please read the safety regulations and operation guide carefully before operating. Please read all of the operational guide and safety regulations in this manual before operation. Improper operations without complying with this manual may cause damage to the device, influence on measurement result or personal injury to the user or a third party.
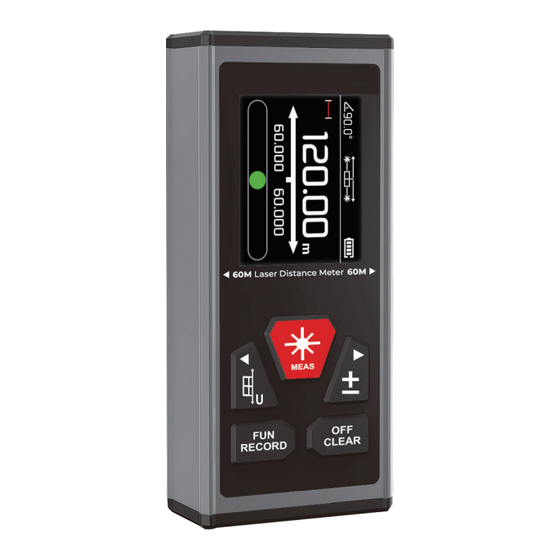
- Page 3 Screen/Keys Screen Screen lock indication Measuring mode Angle indication Laser indication Level bubble Measuring reference indication Auxiliary display area Battery level indication Unit Main display area Power-on Keys Unit/ Add/Subtract Measuring /Lock screen reference Power-off/ Clear Length/Area/ Volume/ Triangulation measuring mode - 2 -...
-
Page 4: Main Functions
Main Functions Turn on/off the Instrument In the off state, long press for 3 seconds to start the instrument, and the instrument enters the test mode. In the on state, long press for 3 seconds to turn off the instrument. If no operation is performed within 180 seconds, the instrument will shut down automatically. -
Page 5: Selection Of Measuring Mode
Setting of Measurement Reference Press to set the measurement reference. The default benchmark is bidirectional measurement. Left-forward datum Left-back datum Right-back datum Bidirectional measurement Selection of Measuring Mode Press to enter mode selection, and the screen will RECORD display as follows: Press to switch mode;... - Page 6 The instrument provides 9 optional modes: Height calculation by Length mode measuring angle Height calculation Area mode of right triangle Hypotenuse Volume mode calculation of right triangle Sum calculation of Wall area mode the triangle base sides Auxiliary height calculation of right triangle Screen Rotation and Lock The instrument supports automatic screen rotation.
- Page 7 Electronic Level Bubble The instrument is equipped with an electronic level bubble to measure the levelness of the plane. 0° Strong Magnetic Adsorption The back of the instrument is magnetic, so that the instrument can be adsorbed on the metal surface. A magnetic object can be fixed by the strong magnetism.
-
Page 8: Angle Measurement
Angle Measurement The instrument has built-in tilt sensor, which can measure the angle between the base and the two planes of the instrument in real time. 45° 45° 45° 45° Sound &Self-calibration Press and hold key and press key to start. When the screen lights up, release key immediately. - Page 9 After the sound setting, enter the front-end adjustment; Short press key to enter the back-end adjustment. After the back-end adjustment is complete, press key to enter the measurement interface. 3. Example of Self-calibration: Suppose the actual distance is 3.780m. Set the instrument to the left-back reference, if the measured value is 3.778m, 2mm less than the actual value, then adjust the front-end value to +0.002m.
- Page 10 minimum value. Press to exit the continuous measurement mode. Midpoint searching: set the reference to bidirectional reference, long press to start continuous measurement. Follow these tips to look for the middle point. Landscape screen: 1. If 【←】is displayed on the screen, please move to the left 2.
-
Page 11: Area Measurement
Area Measurement Press to measure the first side (length) Press to measure the second side (width) The auxiliary display area displays measured values of the length and width of the rectangle. In the measurement process, user can press to clear the measurement results and measure again. - Page 12 The instrument will calculate the total area of the wall automatically. Total Area = Height x (Width 1+ Width 2) By analogy, press to measure the width of the wall n; Total Area = Height x (Width 1+ Width 2+..+ Width n); In the measurement process, user can press clear the measurement results and measure again.
- Page 13 Figure 1 Screen Measure the height of right triangle (as shown in Figure 2) Press to measure the length of the hypotenuse (a) according to the screen prompt. Press to measure the length of the right angle (b). The instrument will automatically calculate the height (h) of the triangle after the second measurement.
- Page 14 The instrument will automatically calculate the hypotenuse (×) of the triangle after the second measurement. Measure the sum of triangle base (as shown in Figure 4) Press to measure the length of the hypotenuse (a) according to the screen prompt. Press to measure the length of the side (b).
- Page 15 In the Pythagorean measurement mode, the length of the right-angle side must be less than the hypotenuse, otherwise the instrument will give an error prompt. To ensure the accuracy of measurement, make sure to measure from the same starting point, and in the order of hypotenuse and right-angle side.
- Page 16 (Figure 1) (Figure 2) (Figure 3) Step 1: Measure the area once (Figure 1); Step 2: Press , "+" appears in the main display area of the screen, and the instrument enters the addition measurement mode. Then measure the area for the second time (Figure 2);...
- Page 17 Records After the measurement is completed, the instrument automatically stores the results. Long press to view records; Short press RECORD view the record forward or backward. Long press to clear all records. Charging If the instrument shows , it means the battery is low.
- Page 18 Prompt Information During usage, the following prompt information may be displayed in the main display area: Info Cause Solution Use the instrument within the Out of measuring range measurement range Measure the target point with Weak signal Err1 stronger reflectivity Measure the target point with Strong signal Err2...
-
Page 19: Specifications
Specifications Item SW-DR60 SW-DR100 60m(Unidirectional) 100m(Unidirectional) Maximum measuring distance 120m(Bidirectional) 200m(Bidirectional) Accuracy ±(2mm+D*1/10000)*(Unidirectional) Angle measuring range ±90˚ Continuous measurement Area/Volume measurement Wall area measurement Pythagorean measurement Angle and height measurement Length addition/subtraction measurement Max/Min value Electronic level bubble Automatic screen rotation... -
Page 20: Maintenance
Maintenance It is forbidden to store the instrument in a high temperature and humid environment for a long time. When the instrument is not used for a long time, please put the instrument in a cloth box and store it in a dry and cool place.
Need help?
Do you have a question about the SW-DR60 and is the answer not in the manual?
Questions and answers