
Related Manuals for Mercusys MR27BE


Summary of Contents for Mercusys MR27BE
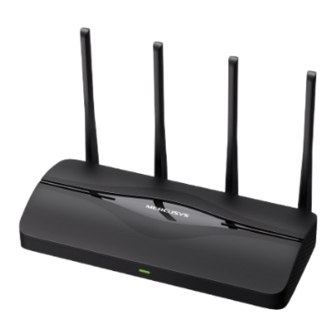
- Page 1 User Guide BE3600 Dual-Band Wi-Fi 7 Router MR27BE © 2024 MERCUSYS 1910080128 REV1.0.0...
- Page 2 5250 MHz -5350 MHz (23dBm) 5470 MHz -5725 MHz (30dBm) EU Declaration of Conformity Mercusys hereby declares that the device is in compliance with the essential requirements and other relevant provisions of directives 2014/53/EU, 2009/125/EC, 2011/65/EU and (EU)2015/863. The original EU declaration of conformity may be found at http://www.mercusys.com/en/ce.
- Page 3 UKCA Mark UK Declaration of Conformity Mercusys hereby declares that the device is in compliance with the essential requirements and other relevant provisions of the Radio Equipment Regulations 2017. The original UK Declaration of Conformity may be found at https://www.mercusys.com/support/ukca/ National restrictions Attention: This device may only be used indoors in Great Britain.
- Page 4 前述合法通信,指依電信管理法規定作業之無線電通信。 低功率射頻器材須忍受合法通信或工業、科學及醫療用電波輻射性電機設備之干擾。 應避免影響附近雷達系統之操作。 高增益指向性天線只得應用於固定式點對點系統。 安全諮詢及注意事項 Ǵ 請使用原裝電源供應器或只能按照本產品注明的電源類型使用本產品。 Ǵ 清潔本產品之前請先拔掉電源線。請勿使用液體、噴霧清潔劑或濕布進行清潔。 Ǵ 注意防潮,請勿將水或其他液體潑灑到本產品上。 Ǵ 插槽與開口供通風使用,以確保本產品的操作可靠並防止過熱,請勿堵塞或覆蓋開口。 Ǵ 請勿將本產品置放於靠近熱源的地方。除非有正常的通風,否則不可放在密閉位置中。 Ǵ 不要私自拆開機殼或自行維修,如產品有故障請與原廠或代理商聯繫。 限用物質含有情況標示聲明書 設備名稱:BE3600 Dual-Band Wi-Fi 7 Router 型號(型式):MR27BE Equipment name Type designation (Type) 限用物質及其化學符號 Restricted substances and its chemical symbols 單元 六價鉻 多溴聯苯 多溴二苯醚 鉛 汞 鎘 Unit H e x a v a l e n t...
- Page 5 備考 1. " 超出 0.1 wt %" 及 " 超出 0.01 wt %" 系指限用物質之百分比含量超出百分比 含量基準值。 備考 2. " ○ " 系指該項限用物質之百分比含量未超出百分比含量基準值。 備考 3. " − " 系指該項限用物質為排除項目。 Safety Information Ǵ Keep the device away from water, fire, humidity or hot environments. Ǵ Do not attempt to disassemble, repair, or modify the device. If you need service, please contact us.
- Page 6 Polarity of d.c. power connector For indoor use only Dangerous voltage Caution, risk of electric shock Energy efficiency Marking Protective earth Earth Frame or chassis Functional earthing Caution, hot surface Caution Operator’s manual Stand-by “ON”/”OFF” (push-push) Fuse Fuse is used in neutral N RECYCLING This product bears the selective sorting symbol for Waste electrical and electronic equipment (WEEE).
- Page 7 Disconnection, all power plugs Switch of mini-gap construction µ Switch of micro-gap construction (for US version) Switch of micro-gap / micro-disconnection construction (for other versions except US) ε Switch without contact gap (Semiconductor switching device)
-
Page 8: Table Of Contents
2. 3. 2. Method 2: Via MERCUSYS App ....... . . - Page 9 4. 5. 5. Wireless Schedule ............37 4.
- Page 10 4. 13. 9. Time ..............99 4.
-
Page 11: Conventions
Conventions The router, or MR27BE mentioned in this User Guide stands for BE3600 Dual-Band Wi-Fi 7 Router without any explanations. Parameters provided in the pictures are just references for setting up the product, which may differ from the actual situation. - Page 12 standardized EasyMesh technology but has not obtained the Wi-Fi EasyMeshTM certification. **Use of WPA3 requires clients to also support the corresponding feature. Actual network speed may be limited by the rate of the product's Ethernet WAN or LAN port, the rate supported by the network cable, internet service provider factors, and other environmental conditions.
-
Page 13: Introduction
Introduction 1. 1. Product Overview With up to 160 MHz channels, 4K-QAM, and MLO(Multi-Link Operation), MR27BE improves Wi-Fi speeds to 3.6 Gbps. Experience unlimited 8K streaming and lightning-fast downloadingConcurrently uses MU-MIMO and dual band to communicate with numerous devices. Wi-Fi 7 delivers unobstructed signals to your laptop, TV, and IoT devices when combined with the potent CPU. -
Page 14: Rear Panel
Chapter 1 Introduction 1. 2. 2. Rear Panel The following items are located on the rear panel (View from left to right). Item Description Press and hold this button for more than 5 seconds to reset the router. RESET/WPS Button Press for 1 second to use the WPS function. -
Page 15: Connect To The Internet
Chapter 2 Connect to the Internet Connect to the Internet 2. 1. Position Your Router • The product should not be located in a place where it will be exposed to moisture or excessive heat. • Place the router in a location where it can be connected to multiple devices as well as to a power source. -
Page 16: Set Up The Router
Chapter 2 Connect to the Internet router’s Internet port, then follow sub step 4) to complete the hardware connection. *Image may differ from actual product. INTERNET Power adapter Power adapter Router Modem 1 ) Turn off the modem, and remove the backup battery if it has one. 2 ) Connect the modem to the router’s WAN port with an Ethernet cable. - Page 17 3. Follow the Quick Setup to complete the setup. 4. To enjoy a more complete service from Mercusys (remote management, Mercusys DDNS, and more.), log in with your Mercusys ID to bind the cloud router. Note: If you don’t have an account, create one first.
-
Page 18: Method 2: Via Mercusys App
2. 3. 2. Method 2: Via MERCUSYS App 1. Scan the QR code to download the MERCUSYS app from the Apple App Store or Google Play. 2. Launch the app and log in with your Mercusys ID. Note: If you don’t have an account, create one first. - Page 19 Chapter 2 Connect to the Internet 3. Tap LET’S BEGIN and select Router. Follow app instructions to complete the setup. 4. Enjoy! Connect to the network and enjoy the internet.
-
Page 20: Log In To The Router
Follow the steps below to log in to your router. 1. Set up the TCP/IP Protocol in Obtain an IP address automatically mode on your computer. 2. Visit http://mwlogin.net, and log in with your Mercusys ID or the password you created. Note:... -
Page 21: Configure The Router In Wireless Router Mode
This chapter presents how to configure the various features of the router working as a wireless router. It contains the following sections: • Operation Mode • Quick Setup • Network • Mercusys ID • Wireless • NAT Forwarding • Parental Controls • QoS • Security •... -
Page 22: Quick Setup
Chapter 4 Configure the Router in Wireless Router Mode 4. 2. Quick Setup 1. Visit http://mwlogin.net, and log in with your Mercusys ID or the password you set for the router. 2. Go to Advanced > Quick Setup. 3. Follow the step-by-step instructions to complete the setup. - Page 23 Chapter 4 Configure the Router in Wireless Router Mode • Internet - This field displays the current settings of the internet, and you can configure them on the Advanced > Network > Internet page. • Status - Indicates whether the router has been connected to the internet. •...
-
Page 24: Internet
4. 3. 2. Internet 1. Visit http://mwlogin.net, and log in with your Mercusys ID or the password you set for the router. 2. Go to Advanced > Network > Internet. 3. Set up the internet connection and click SAVE. - Page 25 Chapter 4 Configure the Router in Wireless Router Mode address is available, enter it as well. • MTU Size - The normal MTU (Maximum Transmission Unit) value for most Ethernet networks is 1500 Bytes. It is not recommended that you change the default MTU size unless required by your ISP.
- Page 26 Chapter 4 Configure the Router in Wireless Router Mode • Username/Password - Enter the user name and password provided by your ISP. These fields are case-sensitive. • Secondary Connection - It’s available only for PPPoE connection. If your ISP provides an extra connection type, select Dynamic IP or Static IP to activate the secondary connection.
- Page 27 Chapter 4 Configure the Router in Wireless Router Mode address is available, enter it as well. • Connection Mode - Select an appropriate connection mode that determines how to connect to the internet. • Auto - In this mode, the internet connection reconnects automatically whenever it gets disconnected.
- Page 28 Chapter 4 Configure the Router in Wireless Router Mode L2TP If your ISP provides L2TP connection, please select L2TP. • Username/Password - Enter the username and password provided by your ISP. These fields are case-sensitive. • VPN Server IP/ Domain Name - Enter the VPN server’s IP address or domain name provided by your ISP.
- Page 29 Chapter 4 Configure the Router in Wireless Router Mode automatically after a specified inactivity period (Max Idle Time) and be re- established when you attempt to access the internet again. • Manual - In this mode, the internet connection is controlled manually by clicking the Connect/Disconnect button.
- Page 30 Chapter 4 Configure the Router in Wireless Router Mode PPTP If your ISP provides PPTP connection, please select PPTP. • Username/Password - Enter the username and password provided by your ISP. These fields are case-sensitive. • VPN Server IP/ Domain Name - Enter the VPN server’s IP address or domain name provided by your ISP.
-
Page 31: Mac Clone
4. 3. 3. MAC Clone 1. Visit http://mwlogin.net, and log in with your Mercusys ID or the password you set for the router. 2. Go to Advanced > Network > Internet and locate the MAC Clone section. -
Page 32: Nat
IP address to communicate with devices on the internet, which protects the local network by hiding IP addresses of the devices. 1. Visit http://mwlogin.net, and log in with your Mercusys ID or the password you set for the router. -
Page 33: Lan
Note: Enable Flow Controller may cause internet drop with some devices. 4. 3. 7. 1. Visit http://mwlogin.net, and log in with your Mercusys ID or the password you set for the router. 2. Go to Advanced > Network > LAN. - Page 34 Chapter 4 Configure the Router in Wireless Router Mode for the router. 2. Go to Advanced > Network > IPTV/VLAN. • If your ISP provides the networking service based on IGMP technology, e.g., British Telecom(BT) and Talk Talk in UK: 1 ) Tick the IGMP Proxy and IGMP Snooping checkbox, then select the IGMP Version, either V2 or V3, as required by your ISP.
-
Page 35: Dhcp Server
LAN IP addresses for specified client devices. • To specify the IP address that the router assigns: 1. Visit http://mwlogin.net, and log in with your Mercusys ID or the password you set for the router. -
Page 36: Dynamic Dns
MAC and IP address of the client device. • To check the DHCP client list: 1. Visit http://mwlogin.net, and log in with your Mercusys ID or the password you set for the router. 2. Go to Advanced > Network > DHCP Server and locate the DHCP Client List section. - Page 37 The Dynamic DNS client service provider will give you a password or key. 1. Visit http://mwlogin.net, and log in with your Mercusys ID or the password you set for the router. 2. Go to Advanced > Network > Dynamic DNS.
-
Page 38: Static Routing
Chapter 4 Configure the Router in Wireless Router Mode 4. 3. 11. Static Routing Static Routing is a form of routing that is configured manually by a network administrator or a user by adding entries into a routing table. The manually- configured routing information guides the router in forwarding data packets to the specific destination. - Page 39 1. Change the routers’ LAN IP addresses to two different IP addresses on the same subnet. Disable Router B’s DHCP function. 2. Visit http://mwlogin.net, and log in with your Mercusys ID or the password you set for Router A. 3. Go to Advanced > Network > Routing and locate the Static Routing section.
-
Page 40: Mercusys Id
4. 4. Mercusys ID 1. Visit http://mwlogin.net, and log in with your Mercusys ID or the password you set for the router. 2. Go to Advanced > Mercusys ID. 3. Log in with your Mercusys ID. You can manage the account information and bind more accounts to manage the network. -
Page 41: Wireless
Wireless 4. 5. 1. Wireless Settings 1. Visit http://mwlogin.net, and log in with your Mercusys ID or the password you set for the router. 2. Go to Advanced > Wireless > Wireless Settings. 3. Configure the wireless settings for the wireless network and click SAVE. - Page 42 Chapter 4 Configure the Router in Wireless Router Mode • TWT - Target Wake Time allows 802.11ax routers and clients to negotiate their periods to transmit and receive data packets. Clients only wake up at TWT sessions and remain in sleep mode for the rest of the time, which significantly extend their battery life.
-
Page 43: Mlo Network
1. Visit http://mwlogin.net, and log in with your Mercusys ID or the password you set for the router. 2. Go to Wireless or Advanced > Wireless > Wireless Settings, and locate the MLO... -
Page 44: Guest Network
• Create a Guest Network 1. Visit http://mwlogin.net, and log in with your Mercusys ID or the password you set for the router. 2. Go to Wireless or Advanced > Wireless > Guest Network. - Page 45 8. Click SAVE. Now you guests can access your guest network using the SSID and password you set! • Customize Guest Network Options 1. Visit http://mwlogin.net, and log in with your Mercusys ID or the password you set for the router. 2. Go to Advanced > Wireless > Guest Network. Locate the Guest Permissions section.
-
Page 46: Iot Network
1. Visit http://mwlogin.net, and log in with your Mercusys ID or the password you set for the router. 2. Go to Advanced > Wireless > IoT Network. -
Page 47: Wireless Schedule
The wireless function can be automatically off at a specific time when you do not need the wireless function. 1. Visit http://mwlogin.net, and log in with your Mercusys ID or the password you set for the router. 2. Go to Advanced > Wireless > Wireless Schedule. -
Page 48: Wps
The WPS function cannot be configured if the wireless function of the router is disabled. Please make sure the wireless function is enabled before configuration. 1. Visit http://mwlogin.net, and log in with your Mercusys ID or the password you set for the router. - Page 49 Chapter 4 Configure the Router in Wireless Router Mode 3. Follow one of the following methods to connect your client device to the router’s Wi-Fi network. Method 1: Using a PIN • Connects via the Client’s PIN 1. Keep the WPS Status as Enabled and select Client’s PIN. 2.
-
Page 50: Additional Settings
4. 5. 7. Additional Settings 1. Visit http://mwlogin.net, and log in with your Mercusys ID or the password you set for the router. 2. Go to Advanced > Wireless > Additional Settings. 3. Configure the advanced settings of your wireless network and click SAVE. - Page 51 Chapter 4 Configure the Router in Wireless Router Mode • WMM - WMM function can guarantee the packets with high-priority messages being transmitted preferentially. • AP Isolation - This function isolates all connected wireless stations so that wireless stations cannot access each other through WLAN. •...
-
Page 52: Nat Forwarding
LAN and realize some specific functions. The Mercusys router includes four forwarding rules. If two or more rules are set, the priority of implementation from high to low is Port Forwarding, Port Triggering, UPNP and DMZ. - Page 53 Home 1. Set your PC to a static IP address, for example 192.168.1.100. 2. Visit http://mwlogin.net, and log in with your Mercusys ID or the password you set for the router. 3. Go to Advanced > NAT Forwarding > Port Forwarding.
-
Page 54: Port Triggering
MSN Gaming Zone, Dialpad, Quick Time 4 players and more. Follow the steps below to configure the port triggering rules: 1. Visit http://mwlogin.net, and log in with your Mercusys ID or the password you set for the router. 2. Go to Advanced > NAT Forwarding > Port Triggering. -
Page 55: Upnp
Chapter 4 Configure the Router in Wireless Router Mode 5. Click SAVE. Note: • You can add multiple port triggering rules as needed. • The triggering ports can not be overlapped. • If the application you need is not listed in the Common Services list, please enter the parameters manually. You should verify the external ports the application uses first and enter them in External Ports field. -
Page 56: Dmz
Router If necessary, you can follow the steps to change the status of UPnP. 1. Visit http://mwlogin.net, and log in with your Mercusys ID or the password you set for the router. 2. Go to Advanced > NAT Forwarding > UPnP and toggle on or off according to your needs. -
Page 57: Parental Controls
How can I do that? 1. Assign a static IP address to your PC, for example 192.168.1.100. 2. Visit http://mwlogin.net, and log in with your Mercusys ID or the password you set for the router. 3. Go to Advanced > NAT Forwarding > DMZ and enable DMZ. - Page 58 2 hours every day and block internet access during bed time (10 PM to 7 AM) on weekdays. How can I do that? 1. Visit http://mwlogin.net, and log in with your Mercusys ID or the password you set for the router. 2. Go to Advanced > Parental Controls.
- Page 59 Chapter 4 Configure the Router in Wireless Router Mode 1 ) Enter the key word of the website that you want to block. Click if want to block multiple websites. 2 ) Click NEXT. 6. Set time restrictions on internet access. 1 ) Enable Time Limits on Monday to Friday and Saturday &...
-
Page 60: Qos
Ensure a fast connection of my computer while I play online games for the next 2 hours. How can I do that 1. Visit http://mwlogin.net, and log in with your Mercusys ID or the password you set for the router. 2. Go to Advanced > QoS. -
Page 61: Security
This function is enabled by default. 1. Visit http://mwlogin.net, and log in with your Mercusys ID or the password you set for the router. 2. Go to Advanced > Security > Firewall, and configure the parameters as you need. -
Page 62: Access Control
Block or allow specific client devices to access my network (via wired or wireless). How can I do that? 1. Visit http://mwlogin.net, and log in with your Mercusys ID or the password you set for the router. 2. Go to Advanced > Security > Access Control. - Page 63 Chapter 4 Configure the Router in Wireless Router Mode To allow specific device(s): 1 ) Select Allow List and click SAVE. 2 ) Add devices to the list. • Add connected devices Click Select From Device List and select the devices you want to be allowed. •...
-
Page 64: Ip & Mac Binding
Prevent ARP spoofing and ARP attacks. How can I do that? 1. Visit http://mwlogin.net, and log in with your Mercusys ID or the password you set for the router. 2. Go to Advanced > Security > IP & MAC Binding. -
Page 65: Alg
Chapter 4 Configure the Router in Wireless Router Mode To bind the connected device(s): Locate the ARP List section and enable Bind to bind the IP and MAC addresses of a specific device. To add a binding entry: 1 ) Click Add in the Binding List section. 2 ) Click VIEW CONNECTED DEVICES and select the device you want to bind. -
Page 66: Device Isolation
1. Visit http://mwlogin.net, and log in with your Mercusys ID or the password you set for the router. 2. Go to Advanced > Security > Device Isolation. -
Page 67: Vpn Server & Client
VPN client software on the remote device. Please follow the steps below to set up an OpenVPN connection. Step1. Set up OpenVPN Server on Your Router 1. Visit http://mwlogin.net, and log in with your Mercusys ID or the password you set... - Page 68 Chapter 4 Configure the Router in Wireless Router Mode for the router. Note: • Before you enable VPN Server, we recommend you configure Dynamic DNS Service (recommended) or assign a static IP address for router’s WAN port and synchronize your System Time with internet. •...
-
Page 69: Pptp Vpn
PPTP VPN connection. Step 1. Set up PPTP VPN Server on Your Router 1. Visit http://mwlogin.net, and log in with your Mercusys ID or the password you set for the router. 2. Go to Advanced > VPN Server > PPTP, and enable PPTP. - Page 70 Chapter 4 Configure the Router in Wireless Router Mode 3. In Client IP Address, enter the range of IP addresses (up to 10) that can be leased to the devices by the PPTP VPN server. 4. Set the PPTP connection permission according to your needs. •...
- Page 71 Chapter 4 Configure the Router in Wireless Router Mode Step 2. Configure PPTP VPN Connection on Your Remote Device The remote device can use the Windows built-in PPTP software or a third-party PPTP software to connect to PPTP Server. Here we use the Windows built-in PPTP software as an example.
- Page 72 Chapter 4 Configure the Router in Wireless Router Mode 4. Select Use my Internet connection (VPN). 5. Enter the internet IP address of the router (for example: 218.18.1.73) in the Internet address field. Click Next.
- Page 73 Chapter 4 Configure the Router in Wireless Router Mode 6. Enter the User name and Password you have set for the PPTP VPN server on your router, and click Connect. 7. The PPTP VPN connection is created and ready to use.
-
Page 74: L2Tp/Ipsec Vpn
Remote Devices Step 1. Set up L2TP/IPSec VPN Server on Your Router 1. Visit http://mwlogin.net, and log in with your Mercusys ID or the password you set for the router. 2. Go to Advanced > VPN Server > L2TP/IPSec, and enable L2TP/IPSec. - Page 75 Chapter 4 Configure the Router in Wireless Router Mode 3. In the Client IP Address field, enter the range of IP addresses (up to 10) that can be leased to the devices by the L2TP/IPSec VPN server. 4. Keep IPSec Encryption as Encrypted and create an IPSec Pre-Shared Key. 5.
- Page 76 Chapter 4 Configure the Router in Wireless Router Mode Step 2. Configure L2TP/IPSec VPN Connection on Your Remote Device The remote device can use the Windows or Mac OS built-in L2TP/IPSec software or a third-party L2TP/IPSec software to connect to L2TP/IPSec Server. Here we use the Windows built-in L2TP/IPSec software as an example.
- Page 77 Chapter 4 Configure the Router in Wireless Router Mode 4. Select Use my Internet connection (VPN). 5. Enter the internet IP address of the router (for example: 218.18.1.73) in the Internet address field, and select the checkbox Don’t connect now; just set it up so I can connect later.
- Page 78 Chapter 4 Configure the Router in Wireless Router Mode 6. Enter the Username and Password you have set for the L2TP/IPSec VPN server on your router, and click Connect. 7. Click Close when the VPN connection is ready to use...
- Page 79 Chapter 4 Configure the Router in Wireless Router Mode 8. Go to Network and Sharing Center and click Change adapter settings. 9. Find the VPN connection you created, then double-click it.
- Page 80 Chapter 4 Configure the Router in Wireless Router Mode 10. Enter the User name and Password you have set for the L2TP/IPSec VPN server on your router, and click Properties. 11. Switch to the Security tab, select Layer 2 Tunneling Protocol with IPsec (L2TP/ IPSec) and click Advanced settings.
-
Page 81: Wireguard Vpn
Chapter 4 Configure the Router in Wireless Router Mode 12. Select Use preshared key for authentication and enter the IPSec Pre-Shared Key you have set for the L2TP/IPSec VPN server on your router. Then click OK. Done! Click Connect to start VPN connection. 4. - Page 82 Step 1. Set up WireGuard VPN Server on Your Router 1. Visit http://mwlogin.net, and log in with your Mercusys ID or the password you set for the router. 2. Go to Advanced > VPN Server > WireGuard, and enable WireGuard.
- Page 83 Chapter 4 Configure the Router in Wireless Router Mode 2. Give a Username to this account. 3. View the Address of the virtual interface assigned to this account. Do NOT change it unless necessary. 4. Traffic sent from the WireGard VPN client to the allowed IPs (client) will be transmitted through the tunnel.
-
Page 84: Use Vpn Client To Access A Remote Vpn Server
App to scan the QR Code to connect to this server. • For other devices (e.g. Mercusys WireGuard VPN client), click EXPORT to save the WireGuard VPN configuration file which will be used by the remote device to access your router. - Page 85 Home Devices Router (VPN Client) VPN Servers 1. Visit http://mwlogin.net, and log in with your Mercusys ID or the password you set for the router. 2. Go to Advanced > VPN Client. Note: Firmware update may be required to support VPN Client.
- Page 86 Chapter 4 Configure the Router in Wireless Router Mode 3 ) Enter the VPN information provided by your VPN provider. • OpenVPN: Enter the VPN username and password if required by your VPN provider, otherwise simply leave them empty. Then import the configuration file provided by your VPN provider.
- Page 87 Chapter 4 Configure the Router in Wireless Router Mode • PPTP: Enter the VPN server address (for example: 218.18.1.73) and the VPN username and password provided by your VPN provider. • L2TP/IPSec VPN: Enter the VPN server address (for example: 218.18.1.73), VPN username and password, and IPSec pre-shared key provided by your VPN provider.
- Page 88 Chapter 4 Configure the Router in Wireless Router Mode 4 ) Save the settings. 5 ) In the server list, Enable the VPN server you need. 5. Add and manage the devices that will use the VPN function. 1 ) In the Device List section, click Add. 2 ) Choose and add the devices that will access the VPN server you have configured.
-
Page 89: Ipv6
This function allows you to set up an IPv6 internet connection using the information provided by your ISP (internet service provider). 1. Visit http://mwlogin.net, and log in with your Mercusys ID or the password you set for the router. 2. Go to Advanced > IPv6. - Page 90 Chapter 4 Configure the Router in Wireless Router Mode • Dynamic IP(SLAAC/DHCPv6): Click Advanced Settings to input further information if your ISP requires. Save the settings and click RENEW. • PPPoE: By default, the router uses the IPv4 account to connect to the IPv6 server. Click Advanced Settings to input further information if your ISP requires.
- Page 91 Chapter 4 Configure the Router in Wireless Router Mode • 6to4 Tunnel: An IPv4 internet connection type is a prerequisite for this connection type. Please manually set up your internet connection first. Click Advanced Settings to input further information if your ISP requires. Save the settings and click CONNECT.
-
Page 92: Set Up Ipv6 Firewall Rules
This feature is available only when you’ve set up an IPv6 connection. 1. Visit http://mwlogin.net, and log in with your Mercusys ID or the password you set for the router. 2. Go to Advanced > IPv6, and locate the Firewall Rules section. -
Page 93: Easymesh With Seamless Roaming
Note: Routers and range extenders must be compatible with EasyMesh. Firmware upgrades may be required. 4. 12. 1. Add a Router as a Satellite Device 1. Visit http://mwlogin.net, and log in with your Mercusys ID or the password you set... - Page 94 Chapter 4 Configure the Router in Wireless Router Mode for the router. 2. Go to Advanced > EasyMesh, and enable EasyMesh. 3. Click ADD SATELLITE DEVICES, select Mercusys Router, then click NEXT 4. Follow the page instructions to prepare your satellite router, then click DONE.
-
Page 95: Add A Range Extender As A Satellite Device
FINISH. Then you can check the mesh device on the router’s web page. 4. 12. 2. Add a Range Extender as a Satellite Device 1. Visit http://mwlogin.net, and log in with your Mercusys ID or the password you set for the router. -
Page 96: Manage Devices In The Easymesh Network
• To view mesh devices and connected clients in the network: 1. Visit http://mwlogin.net, and log in with your Mercusys ID or the password you set for the router. 2. Go to Network Map. 3. Click to view all mesh devices, and click to view all connected clients. - Page 97 • Back up your router’s configurations before firmware update. • Do NOT turn off the router during the firmware update. 1. Visit http://mwlogin.net, and log in with your Mercusys ID or the password you set for the router. 2. Go to Advanced > System > Firmware Update.
- Page 98 Chapter 4 Configure the Router in Wireless Router Mode • Local Update 1 ) Download the latest firmware file for the router from www.mercusys.com. 2 ) Click BROWSE to locate the downloaded firmware file, and click UPDATE. • EasyMesh Satellite Update EasyMesh Satellite Update allows you to remotely check and update the firmware of the satellite devices connected to this router via EasyMesh.
-
Page 99: Backup & Restore
1. Visit http://mwlogin.net, and log in with your Mercusys ID or the password you set for the router. -
Page 100: Change Password
• We strongly recommend you back up the current configuration settings before resetting the router. 4. 13. 3. Change Password 1. Visit http://mwlogin.net, and log in with your Mercusys ID or the password you set for the router. 2. Go to Advanced > System > Administration, and focus on the Change Password... -
Page 101: Password Recovery
This feature allows you to recover the login password you set for you router in case you forget it. 1. Visit http://mwlogin.net, and log in with your Mercusys ID or the password you set for the router. 2. Go to Advanced > System > Administration, and focus on the Password Recovery section. -
Page 102: Local Management
Password? on the login page and follow the instructions to set a new password. 4. 13. 5. Local Management 1. Visit http://mwlogin.net, and log in with your Mercusys ID or the password you set for the router. 2. Go to Advanced > System > Administration, and focus on the Local Management section. - Page 103 Chapter 4 Configure the Router in Wireless Router Mode • Allow specific devices to manage the router: 1. Select Specified Devices for Local Managers and click SAVE. 2. Click Add Device. 3. Click VIEW CONNECTED DEVICES and select the device to manage the router from the Connected Devices list, or enter the MAC address of the device manually.
-
Page 104: Remote Management
Chapter 4 Configure the Router in Wireless Router Mode 4. 13. 6. Remote Management 1. Visit http://mwlogin.net, and log in with your Mercusys ID or the password you set for the router. 2. Go to Advanced > System > Administration, and focus on the Remote Management section. -
Page 105: System Log
4. 13. 7. System Log 1. Visit http://mwlogin.net, and log in with your Mercusys ID or the password you set for the router. 2. Go to Advanced > System > System Log, and you can view the logs of the router. - Page 106 Chapter 4 Configure the Router in Wireless Router Mode 3. Click SAVE TO LOCAL to save the system logs to a local disk. 4. If you want to send the system log to your mailbox, click MAIL LOG and configure the mail settings.
-
Page 107: Diagnostics
Diagnostic is used to test the connectivity between the router and the host or other network devices. 1. Visit http://mwlogin.net, and log in with your Mercusys ID or the password you set for the router. 2. Go to Advanced > System > Diagnostics. - Page 108 Chapter 4 Configure the Router in Wireless Router Mode and measure the round-trip time. • Traceroute is used to display the route (path) your router has passed to reach the tested host, and measure transit delays of packets across an Internet Protocol network.
-
Page 109: Time
The router can automatically update the time from an NTP server via the internet. 1. Visit http://mwlogin.net, and log in with your Mercusys ID or the password you set for the router. 2. Go to Advanced > System > Time & Language. - Page 110 Chapter 4 Configure the Router in Wireless Router Mode 1. In the System Time section, select the way in which the router gets its time: Get from Internet, Get from Managing Device, Manually. 2. Select your local Time Zone. 3. Enter the address or domain of the NTP Server I or NTP Server II. 4.
-
Page 111: Language
4. 13. 10. Language This function allows you to set the language for the system. 1. Visit http://mwlogin.net, and log in with your Mercusys ID or the password you set for the router. 2. Go to Advanced > System > Time & Language. -
Page 112: Led Control
The LED of the router indicates its activities and status. You can enable the Night Mode feature to specify a time period during which the LED is off. 1. Visit http://mwlogin.net, and log in with your Mercusys ID or the password you set for the router. -
Page 113: Cwmp Settings
Server (ACS) to perform auto-configuration, provision, connection, and diagnostics to this device. You may configure this function under your ISP’s instructions. 1. Visit http://mwlogin.net, and log in with your Mercusys ID or the password you set for the router. 2. Go to Advanced > System > CWMP Settings. - Page 114 Chapter 4 Configure the Router in Wireless Router Mode • CWMP - Toggle on to enable the CWMP function. • Inform - Enable to send an inform message to the ACS periodically. • Inform Interval - Enter the time interval when the Inform message will be sent to the ACS.
- Page 115 Chapter 4 Configure the Router in Wireless Router Mode • ACS Username/Password - Enter the username/password to log in to the ACS server. • Interface used by TR-069 client - Select the interface to be used by the TR-069 client. •...
-
Page 116: Configure The Router In Access Point Mode
• LED Control 5. 1. Operation Mode 1. Visit http://mwlogin.net, and log in with your Mercusys ID or the password you set for the router. 2. Go to System > Operation Mode. 3. Select the working mode as needed and click SAVE. -
Page 117: Access Control
Block or allow specific client devices to access my network (via wired or wireless). How can I do that? 1. Visit http://mwlogin.net, and log in with your Mercusys ID or the password you set for the router. 2. Go to Advanced > Security > Access Control. - Page 118 Chapter 5 Configure the Router in Access Point Mode 2 ) Click Add and select devices you want to block. You can see the devices have been added to the list. To allow specific device(s): 1 ) Select Allow List and click SAVE. 2 ) Add devices to the list.
-
Page 119: Firmware Upgrade
5. 3. Firmware Upgrade Mercusys is dedicated to improving and richening the product features, giving users a better network experience. We will release the latest firmware at Mercusys official website www.mercusys.com. You can download the latest firmware file from the Support page of our website and upgrade the firmware to the latest version. - Page 120 • Back up your router’s configurations before firmware update. • Do NOT turn off the router during the firmware update. 1. Visit http://mwlogin.net, and log in with your Mercusys ID or the password you set for the router. 2. Go to System > Firmware Update.
-
Page 121: Backup & Restore
The configuration settings are stored as a configuration file in the router. You can backup the configuration file in your computer for future use and restore the router to the previous settings from the backup file when needed. 1. Visit http://mwlogin.net, and log in with your Mercusys ID or the password you set... - Page 122 Chapter 5 Configure the Router in Access Point Mode for the router. 2. Go to System > Backup & Restore. To backup configuration settings: Click BACK UP to save a copy of the current settings in your local computer. A “.bin“ file of the current settings will be stored in your computer.
-
Page 123: Administration
Administration 5. 5. 1. Change Password 1. Visit http://mwlogin.net, and log in with your Mercusys ID or the password you set for the router. 2. Go to System > Administration, and focus on the Change Password section. 3. Enter the old password, then a new password twice (both case-sensitive). Click SAVE. -
Page 124: Local Management
Password? on the login page and follow the instructions to set a new password. 5. 5. 3. Local Management 1. Visit http://mwlogin.net, and log in with your Mercusys ID or the password you set for the router. 2. Go to System > Administration, and focus on the Local Management section. - Page 125 Chapter 5 Configure the Router in Access Point Mode • Allow specific devices to manage the router: 1. Select Specified Devices for Local Managers and click SAVE. 2. Click Add Device. 3. Click VIEW CONNECTED DEVICES and select the device to manage the router from the Connected Devices list, or enter the MAC address of the device manually.
-
Page 126: System Log
Configure the Router in Access Point Mode 5. 6. System Log 1. Visit http://mwlogin.net, and log in with your Mercusys ID or the password you set for the router. 2. Go to System > System Log, and you can view the logs of the router. -
Page 127: Diagnostics
• Mail Time: Specify when the recipient will receive the system log. 5. 7. Diagnostics Diagnostic is used to test the connectivity between the router and the host or other network devices. 1. Visit http://mwlogin.net, and log in with your Mercusys ID or the password you set for the router. - Page 128 Chapter 5 Configure the Router in Access Point Mode 2. Go to System > Diagnostics. 3. Enter the information: 1 ) Choose Ping or Traceroute as the diagnostic tool to test the connectivity. • Ping is used to test the connectivity between the router and the tested host, and measure the round-trip time.
-
Page 129: Time
The router can automatically update the time from an NTP server via the internet. 1. Visit http://mwlogin.net, and log in with your Mercusys ID or the password you set for the router. 2. Go to System > Time & Language. -
Page 130: Language
5. 9. Language This function allows you to set the language for the system. 1. Visit http://mwlogin.net, and log in with your Mercusys ID or the password you set for the router. 2. Go to System > Time & Language. -
Page 131: Reboot
You can also reboot the router to clear cache and enhance running performance. 1. Visit http://mwlogin.net, and log in with your Mercusys ID or the password you set for the router. 2. Go to System > Reboot, and you can restart your router. - Page 132 Configure the Router in Access Point Mode Mode feature to specify a time period during which the LED is off. 1. Visit http://mwlogin.net, and log in with your Mercusys ID or the password you set for the router. 2. Go to System > LED Control.
-
Page 133: Faq
Q1. What should I do if I forget my wireless password? The default wireless password is printed on the bottom label of the router. If the password has been altered, please connect your computer to the router using an Ethernet cable and follow the steps below: 1. - Page 134 4 ) Click LAN settings and deselect the following three options, and click OK. 5 ) Go to Advanced > Restore advanced settings, and click OK.
- Page 135 • Use another web browser or computer to log in again. • Reset the router to factory default settings and try again. If the login still fails, please contact the technical support. Note: You’ll need to reconfigure the router to surf the internet once the router is reset. Q4.
- Page 136 Note: Mercusys routers use 192.168.1.1 as their default LAN IP address. It may conflict with the IP range of your existent ADSL modem/router. If so, the router is not able to communicate with your modem and cause you can’t access the Internet. To resolve this problem, we need to change the LAN IP address of the router to avoid such conflict, for example, 192.168.2.1.
- Page 137 • Restart the modem and the router. 1 ) Power off your modem and the router, and leave them off for 1 minute. 2 ) Power on your modem first, and wait about 2 minutes. 3 ) Power on the router, and wait another 1 or 2 minutes and check the internet access.
- Page 138 2 ) Exit the wireless configuration tool (the Mercusys Utility, for example). 3 ) Select and right click My Computer on Desktop, and select Manage to open Computer Management window.
- Page 139 2 ) If you cannot find the PIN or PIN failed, you may choose Connecting using a security key instead, and then type in the Wireless Password/Network Security Key. 3 ) If it continues to show note of Network Security Key Mismatch, it is suggested to confirm the wireless password of your wireless router.
Need help?
Do you have a question about the MR27BE and is the answer not in the manual?
Questions and answers