
Subscribe to Our Youtube Channel
Related Manuals for PicoQuant Prima


Summary of Contents for PicoQuant Prima
- Page 1 Prima 3-Color Picosecond Laser Pulsed, CW, and fast switched laser with variable operating wavelength User Manual Document version 1.0.1...
-
Page 3: Table Of Contents
5.2. Setting Operating Parameters with PQLaserDrv Graphical User Interface........15 5.2.1. Select Device........................16 5.2.2. Apply / Discard........................17 5.2.3. Soft Lock and Unlock of the Prima..................17 5.2.4. Multi Color Laser Control Panel..................17 5.2.5. Presets..........................20 5.2.6. “About...” button......................... 21 Trouble Shooting, Tips and Tricks......................22 6.1. - Page 4 PicoQuant GmbH Prima Manual 9.2. Trademarks............................ 28 Further Reading............................ 29 10.1. PicoQuant Bibliography........................ 29 10.2. Download of Technical Notes / Application Notes................29 Appendix............................... 30 11.1. Abbreviations..........................30 11.2. System Delivery Report....................... 30 Page 2...
-
Page 5: General Safety Information
PicoQuant GmbH Prima Manual 1. General safety information CAUTION! Before using this device, make sure that you have read and understood the con- tent of this user manual. Store this documentation in a safe and easily accessible place for future reference. -
Page 6: Electrical Safety Instructions
The Prima can be equipped with laser diodes that can emit visible, infrared, or UV light. Infrared or UV light is not visible to the eye! The Prima laser module can emit laser light of up to class 3b / IIIb. Please refer to the labels affixed to the laser for information on classification. -
Page 7: Laser Safety Labels
(highlighted by red boxes in Fig. 1). The label states the laser product classification, certification, power, and wavelength range relevant for the classification. Fig. 1: Laser warning label, laser aperture indicator label, and manual shutter as well as their location on the Prima laser module housing. -
Page 8: Remote Interlock Connector
1.5. Remote Interlock Connector A hardware lock as well as a remote interlock connector are part of the Prima 3-color pulsed laser. Removing the green interlock connector (LEMO plug) or breaking the interlock circuit will immediately deactivate the power supply of the laser. -
Page 9: Introduction
Prima is the perfect tool: Capable of covering most of your needs when it comes to daily lab tasks, such as lifetime or quantum yield measurements, photoluminescence, and fluorescence. -
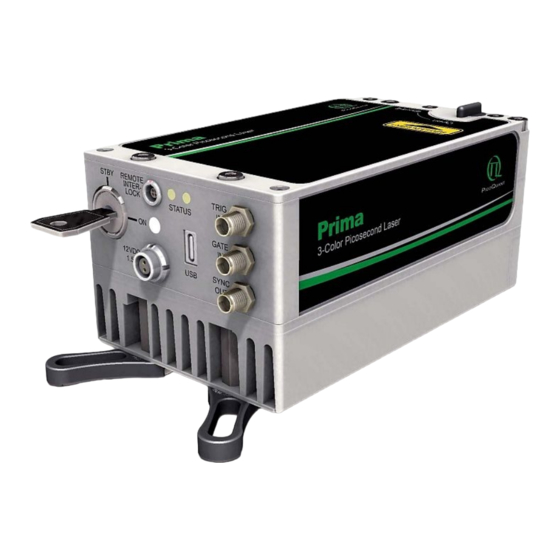
Page 10: Hardware Description
(right LED) Left LED (status indicator): When the Prima is powered on, this LED should light up and flash first in red, then yellow and finally green. After approximately 15 seconds, this indicator should permanently show green. -
Page 11: Laser Locking Behavior
The gating function affects the triggering mechanism. The gating input accepts TTL pulses and is effective if the Prima is being triggered either from the internal oscillator or from an external source. The gating function can perform transition between on and off states within nanoseconds. Presuming a precise timing, it can switch in between two laser pulses, even at high repetition rates. -
Page 12: Product Label
Product Label The product label (see Fig. 5) can be found on the side of the Prima module, next to the laser safety label . It shows all relevant information needed to identify the device, including product name, part number, serial number, manufacturing date as well as the PicoQuant logo with address, CE label, and waste regulation iden- tifier. -
Page 13: Installation
4.1. Unpacking and Preparations Your Prima is delivered with a series of cables, accessories, and software that need to be connected / installed before the device can be used. Start by unpacking the delivery box and check that all components listed in the table below are present. -
Page 14: Electrical Power And Signal Connections
Before installing and using the Prima, please make sure to have 1. a solid base onto which the Prima can be placed (e. g., an optical table) 2. a computer to install and run the operation software. The computer needs to have a free USB slot as well as a Windows 10 operating system. -
Page 15: Software Installation
PicoQuant laser driver software (see section 4.3) 4.3. Software Installation Once the Prima is in its dedicated place and the relevant cables have been inserted, connect the Prima to the host computer using the delivered USB C cable. NOTICE... - Page 16 PicoQuant GmbH Prima Manual Once the software is installed, the Prima can be turned on (see chapter 5.1). When the laser is powered on for the first time, Windows will detect a new device and install the necessary device drivers.
-
Page 17: Operation
Prima Manual 5. Operation This section describes detailed step by step operation procedures for powering the Prima on as well as on how to use the GUI for setting the different laser module settings (i.e. power intensity, trigger source, repeti - tion rate, fan control). -
Page 18: Select Device
Select Device The Select Device function is useful if more than one Prima (or any other USB laser device from Pico- Quant) are connected to the same host computer. It can also be used to restore the USB connection to the device should it be lost during operation for any reason. -
Page 19: Apply / Discard
Soft Lock and Unlock of the Prima The Prima can be locked (no laser light emission) not only with the hardware key switch on the control panel, but also via the GUI by clicking on the button labeled Laser Soft Lock / Laser Soft Unlock in the Main Con- troller panel on the left side of the software window. - Page 20 Narrow Pulse: this option enable the emission of picosecond laser pulses with narrow tempo- ral pulse widths of < 80 to < 170 ps depending on wavelength. Pulses from the Prima 3-color laser module can be triggered either internally or externally.
- Page 21 Trig. Level, where the threshold of the trigger signal can be set in V (see Fig. 11). CW: By choosing this option, the Prima will generate laser light as a continuous wave (CW). •...
-
Page 22: Presets
Oper. Mode. Intensity: The intensity of the Prima’s driving current can be set on a freely adjustable scale from 0 to • 100 %, with a step width of 0.1%. Please note that the optical output power does not corre- late linearly with the current intensity scale. -
Page 23: About
PicoQuant GmbH Prima Manual 5.2.6. “About...” button Extended information about the device, including hardware version, serial number, operating hours, software and firmware version etc. can be brought up by clicking on the button labeled About... For every support request its is recommend to save the entire information by clicking on the button labeled Copy Support Infos (see Fig. -
Page 24: Trouble Shooting, Tips And Tricks
PicoQuant GmbH Prima Manual 6. Trouble Shooting, Tips and Tricks 6.1. Power stability Please allow a start-up and warm-up time of about one minute between powering up the laser module and activating it through the laser key switch. This thermal equilibration time will ensure the ideal stability of the optical output power. -
Page 25: Technical Data / Specifications
PicoQuant GmbH Prima Manual 7. Technical Data / Specifications Optical output (valid only for Prima-450-515-640, Part No. 912001) Available wavelengths ......450, 515, and 640 nm Nominal max. pulsed power ....10 mW for each wavelength Pulse duration........< 120 ps for 450 nm; < 170 ps for 510 nm; < 120 ps for 635 nm Nominal cw power....... - Page 26 PicoQuant GmbH Prima Manual Interface PC interface......... USB 2.0 Connector..........USB-C Operating system........ Windows Retraction of Old Devices Waste electrical products must not be disposed of with household waste. This equipment should be taken to your local recycling center for safe treatment.
- Page 27 PicoQuant GmbH Prima Manual Dimensions of the Prima laser module (all values given in mm): Page 25...
-
Page 28: Support
PicoQuant GmbH Prima Manual 8. Support 8.1. Returning Products for Repair Should you encounter problems that require sending the device in for inspection / repair, please contact us first at: https://support.picoquant.com support@picoquant.com and request an RMA number before ship- ping the device. Please include the serial number of your device. Observe precautions against static dis- charge under all circumstances during handling, packaging and shipping. -
Page 29: Legal Terms
Prima Manual 9. Legal Terms 9.1. Copyright Copyright of this manual and on-line documentation belongs to PicoQuant GmbH. No parts of it may be reproduced, translated, or transferred to third parties without written permission of PicoQuant 9.2. Trademarks Other products and corporate names appearing in this manual may or may not be registered trademarks or subject to copyrights of their respective owners. -
Page 30: Further Reading
10.1. PicoQuant Bibliography PicoQuant maintains a database of publications mentioning PicoQuant devices. It can be found at our web - site https://www.picoquant.com/scientific/references. It is a valuable source if you would like to know which laboratories are using PicoQuant products or how broad the field of various applications is. -
Page 31: Appendix
PicoQuant GmbH Prima Manual 11. Appendix 11.1. Abbreviations British Naval Connector or Bayonet Nut Connector or Bayonet Neill Concelman CAMAC Corporations and Markets Advisory Committee FWHM Full Width at Half Maximum International Electrotechnical Commission Infra-red Instrument Response Function Light Emitting Diode... - Page 32 PicoQuant GmbH Prima Manual This page was intentionally left blank Page 30...
- Page 33 PicoQuant GmbH Prima Manual All information given here is reliable to our best knowledge. However, no responsibility is assumed for possible inaccuracies or omissions. Specifications and external appearances are subject to change without notice. PicoQuant GmbH P +49-(0)30-1208820-0 Rudower Chaussee 29 (IGZ)
Need help?
Do you have a question about the Prima and is the answer not in the manual?
Questions and answers