Table of Contents
Advertisement
Quick Links
Advertisement
Table of Contents

Subscribe to Our Youtube Channel
Related Manuals for TBB power Solar Mate SP600 Series


Summary of Contents for TBB power Solar Mate SP600 Series
- Page 2 SP600 Series User Manual...
- Page 3 SP600 Series User Manual WARNING: HIGH VOLTAGE INSIDE CAUTION: THE DC FUSE MUST HAVE BEEN TURNED OFF BEFORE SERVICING MADE IN CHINA...
- Page 4 SP600 Series User Manual Disclaimer Unless specially agreed in writing, TBB Renewable (Xiamen) Co., Ltd. Takes no warranty as to the accuracy, sufficiency of suitability of any technical or other information provided in this manual or other documentation. Assumes no responsibility or liability for loss or damage, whether direct, indirect, consequential or incidental, which might arise out of the use of such information.
-
Page 5: Table Of Contents
SP600 Series User Manual Contents General Safety Instruction ......................1 Safety Instruction ........................ 1 General Precaution ......................1 Precaution regarding Battery Operation ................1 Instruction ............................2 Brief Instruction ........................2 2.1.1 General Description ..................... 2 2.1.2 Naming Rules ......................3 Structure .......................... - Page 6 SP600 Series User Manual 5.4.2 Statistic Data ......................20 5.4.3 Current Error ......................20 5.4.4 History Record ......................21 5.4.5 System Info ........................ 21 Configuration Interface ...................... 22 5.5.1 General Operation Instruction ..................22 5.5.2 Parameter Settings ....................24 5.5.3 Para_System ......................
-
Page 7: General Safety Instruction
SP600 Series User Manual 1 General Safety Instruction 1.1 Safety Instruction As dangerous voltage and high temperature exist within the charge controller, only qualified and authorized maintenance personnel are permitted to open and repair it. This manual contains information concerning the installation and operation of the charge controller. All relevant parts of the manual should be read prior to commencing the installation. -
Page 8: Instruction
SP600 Series User Manual 2 Instruction 2.1 Brief Instruction 2.1.1 General Description SP600 series, a high-voltage and high power isolated MPPT solar charge controller (hereinafter referred to as SP600), is designed with 600V open-circuit PV input voltage and Maximum Power Point Tracking (MPPT) function. -
Page 9: Naming Rules
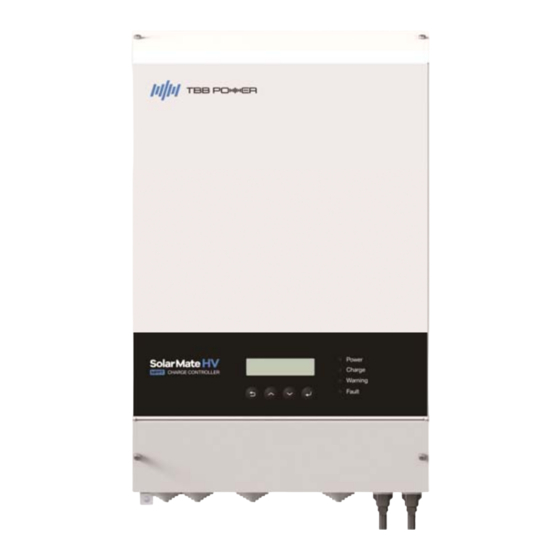
SP600 Series User Manual 2.1.2 Naming Rules Field Character Description SP series MPPT solar charge controller PV open circuit voltage 600V Maximum output current 120A 2.2 Structure 2.2.1 Front Figure 2-1 MPPT charge controller structure in front view... -
Page 10: Connection Terminal
SP600 Series User Manual 2.2.2 Connection Terminal Figure 2-2 Power connection terminals Table 2-3 Power connection terminal introduction Name Description Note BAT+ Battery Positive Input M8 bolt BAT- Battery Negative Input PV1+ PV Array 1 Positive Input PV1- PV Array 1 Negative Input MC4 terminal PV2+ PV Array 2 Positive Input... - Page 11 SP600 Series User Manual terminal of the second unit, and more units can be connected in this For parallel connection of SP600 series way. The Com In terminal of the first Com Out for system expansion SP600 can be connected to the inverter for a DC Couple PV application.
-
Page 12: Dimension
SP600 Series User Manual 2.2.3 Dimension Figure 2-4 Dimension of Solar Mate MPPT charge controller 2.3 Function 2.3.1 Maximum Power Point Tracking The output power of PV array is determined by the sun irradiation intensity and weather condition. The maximum power point varies a lot under different weather conditions. Maximum Power Point Tracking technology maximizes the harvest of PV energy for charging the battery. - Page 13 SP600 Series User Manual Absorption charging Float charging Battery Battery Battery Type voltage voltage Default Maximum (Default) (Default) Charge Rate Charge Rate GEL/OPzV 14.1V 13.7V 0.15C 0.25C 14.4V 13.5V 0.15C 0.25C Lead-Carbon 14.1V 13.5V 0.2C 0.5C 13.1V (48V Customized 13.3V (48V system) 0.3C 1.0C system)
-
Page 14: Input Pv Source Adaptability
SP600 Series User Manual 2.3.3 Input PV Source Adaptability If the input PV voltage is within the maximum voltage range (<600V) allowed by SP600, then the SP600 will not get damaged. It can communicate and display normally. If SP600 can start up with an input PV voltage higher than the starting voltage of 120V, then it should be able to perform charging normally within its MPPT voltage range (80~525V). -
Page 15: Pv Array Insulation Resistance Detection
SP600 Series User Manual 2.3.7 PV Array Insulation Resistance Detection SP600 is designed with built-in PV array insulation resistance detection (earth fault detection) function. The insulation resistance value is displayed in polling on the SP600 LCD screen, and is also sent to the inverter via RS485 at the same time. SP600 will automatically perform insulation resistance detection every time auxiliary power supply restarts and stabilizes. -
Page 16: Installation And Wiring
SP600 Series User Manual 3 Installation and Wiring 3.1 Pre-installation Inspection 3.1.1 Check Outer Packaging Check the outer packaging for damage before unpacking, and check if it is the correct model. If there is something wrong, please don’t open it and contact your dealer. ... -
Page 17: Installation Space Requirements
SP600 Series User Manual 3.2.2 Installation Space Requirements A good ventilation can guarantee the normal operation of equipment. Please always guarantee there is enough space around SP600 upon installation. > 100mm > 100mm > 100mm > 500mm > 300mm 3.3 Installation Step1: Find a flat solid wall surface. -
Page 18: Preparation Before Wiring
SP600 Series User Manual Figure 3-2 Illustration of installation Please double check the SP600 is securely installed. 3.4 Preparation Before Wiring 3.4.1 PV Array Preparation The PV array configuration for SP600 is recommended as follows: Max. PV voltage(total Voc @ lowest temperature) 525V Min. -
Page 19: Breaker Preparation
SP600 Series User Manual 3.4.2 Breaker Preparation An over current protection device such as DC fuse or DC circuit breaker needs to be installed on positive cable rated at 125% of the nominal rating. The withstand voltage of the DC circuit breaker on the battery side should be greater than 63V. ... - Page 20 SP600 Series User Manual and that the circuit breaker has been disconnected.) Step 5: Connect the MC4 terminal (! Pay attention to the positive and negative polarity of the PV array. Make sure that a PV array circuit breaker that meets the requirements of 3.4.2 has been installed between the SP600 and the PV array before performing the connection, and that the circuit breaker has been disconnected.) Step 6: After all wiring is completed, please fix the bottom cover back to the SP600 by screwing the...
-
Page 21: Configuration
SP600 Series User Manual 4 Configuration 4.1 Check Before Operation Please check before operation according to the following: 1. Solar Mate MPPT charge controller is installed correctly and firmly. 2. Reasonable cable layout to meet customer requirements. 3. Make sure the grounding is reliable. 4. -
Page 22: Setup Wizard
SP600 Series User Manual Power Charge Warning Fault Fault LED Indicator DOWN ENTER Operation Button Table 4-1 Operation Button Button Function Cancel the selection. Display the previous level of menu. Display the previous page. Increase the value of the selected item. ... - Page 23 SP600 Series User Manual enter the setup wizard to work normally. The user can also reset the Setup Wizard through the Parameter Set interface. Note: If you want to leave the default values unchanged during the setup process, simply press <Down>...
-
Page 24: Operation
SP600 Series User Manual Operation 5.1 Menu Introduction There is a main menu and three levels of submenus on the LCD screen showing all active parameters and alarms for you to configure all parameters of the SP600. -
Page 25: Initial Interface
In case of communication failure between LCD and SP600, there will be a alarm displayed as well. Logo Model Series TBB POWER Solar Mate HV 600-120 5.3 Main Menu The LCD main menu is a real-time information interface displaying data of the equipment. The default interval time is 5s, and the time can be set manually. -
Page 26: Running Data
SP600 Series User Manual 5.4.1 Running Data Select "Runnig Info" and press <Enter> button to view the operation information of Solar Mate HV. Press <Up> or <Down> button to scroll as shown in the figure below, in which BAT_SOC is displayed only when the battery type is lithium battery;... -
Page 27: History Record
SP600 Series User Manual through the pages. For detailed explanation of the error code, please refer to Chapter 6. The page will display as the following image shows when there is no fault: 5.4.4 History Record Enter this page, by pressing <UP> or <Down> button, user can review the history record including event and alarm. -
Page 28: Configuration Interface
SP600 Series User Manual 5.5 Configuration Interface 5.5.1 General Operation Instruction SP600 offers unlimited possibility for users to program the SP600 and system for different configurations, systems and applications. The configuration can be done by combination of four switches on the front panel or through TBB Link. The following chapters explain how to configure the parameters through the combination of switches. - Page 29 SP600 Series User Manual...
-
Page 30: Parameter Settings
SP600 Series User Manual 5.5.2 Parameter Settings A password is required for entering the parameter setting interface. The default is '1000' and it can be changed. This menu contains the following sub-menus for settings: >Parameter Set 5.5.3 Para_System Item Setting range Description System address SYS_Module_Addr... -
Page 31: Para_Battery
SP600 Series User Manual 5.5.5 Para_Battery Para_Battery Basic Set and Advanced Set The Para_Battery interface includes two submenus: Basic Set, Advanced Set Basic Set includes the following settings: Item Setting range Description Please refer to 2.3.2.1 for detail explanation. 0-GEL/ OPzV Battery type settings, see the 1-AGM 2.3.2.1 battery type table for... - Page 32 SP600 Series User Manual for the 12V battery, multiply by 2 for the 24V battery, or multiply by 4 for the 48V battery. Overvoltage warning threshold for a single battery (battery specification: 12V/each battery) Related setting: Make sure the value is higher than or equal to that of "...
-
Page 33: Change Password
SP600 Series User Manual warning. Default: 1-Enable Lower charging voltage Can be set when the battery is set to Lower_CHG_Volt 0~2.0V TBB LFP, to reduce the charging voltage Default: 0V Enable float charge Can be set when the battery is set to TBB LFP. -
Page 34: Trigger Command
SP600 Series User Manual 5.6.3 Trigger Command Fault Unlock Unlock the fault, and the SP600 can be restarted. 5.6.4 IRD Settings This setting interface is mainly for parameter setting of insulation resistance. The setting items are as follows : Insulation resistance detection threshold Setting range: 80kΩ-120kΩ... -
Page 35: Faq
SP600 Series User Manual 6 FAQ 6.1 Fault code 6.1.1 MPPT fault code Fault code Display Description Solution Check the connection of PV tracker 1 U_PV1_OV PV input 1 overvoltage and make sure the open circuit voltage does not exceed the limit Check the connection of PV tracker 2 U_PV2_OV PV input 2 overvoltage... -
Page 36: Bms Fault Code
SP600 Series User Manual at the output avoid the situation where the battery is uncharged as the PV has not been connected for a long time. Check whether input reversedly connected. If it occurs Sam_HD_Fault Hardware sampling fault repeatedly, please contact after-sales service for replacement or maintenance. -
Page 37: Bms Warning Code
SP600 Series User Manual limit repeatedly, please contact after-sales service for replacement or maintenance Check whether the length and cross-sectional area of the cable for the connection of the battery pack Battery connection OutBat_Connect_Abanormal output meets error at the output requirements, and whether the battery connection... - Page 38 SP600 Series User Manual Module_LT_Warn Module low temperature warning Discharge_HC_Warn Battery discharge overcurrent warning Charge_HC_Warn Battery charging overcurrent warning INT Comm Fail Internal communication fails among modules in parallel BMS_SOC_Low System low SOC warning Communication lost between display screen and lithium BMS_Offline battery...
-
Page 39: Specification
SP600 Series User Manual 7 Specification Model SP600-120 Charger Battery voltage (V) Maximum charge current (A) 7000W @ 57.6V total Maximum charge Power 5000W @ 57.6V per tracker Charge voltage 'absorption' (V) Default: 57.6 Charge voltage 'float' (V) Default: 55.2 Charger voltage range (V) 40-60 Battery types... - Page 40 SP600 Series User Manual...
Need help?
Do you have a question about the Solar Mate SP600 Series and is the answer not in the manual?
Questions and answers