Advertisement
Quick Links
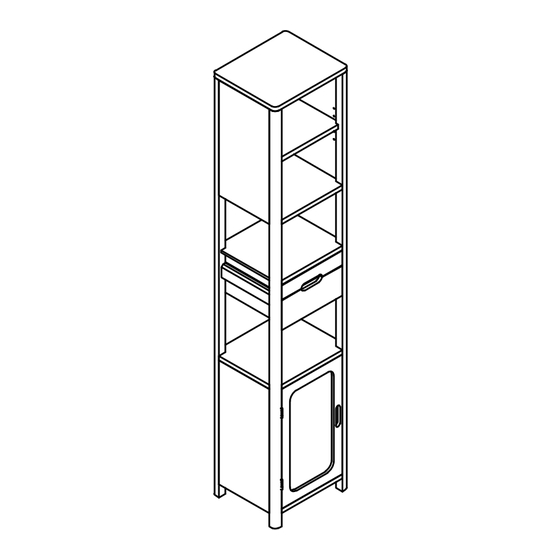
Assembly Instructions
Bathroom - Birch Tallboy
ROPO no:
PLEASE READ THESE INSTRUCTIONS VERY CAREFULLY BEFORE
PLEASE READ THESE INSTRUCTIONS VERY CAREFULLY BEFORE
YOU BEGIN,TO ENSURE THAT YOUR FUTON COMPANY PRODUCT
YOU BEGIN,TO ENSURE THAT YOUR FUTON COMPANY PRODUCT
WILL GIVE YOU MANY YEARS OF SATISFACTION
WILL GIVE YOU MANY YEARS OF SATISFACTION
Thank you for buying a Futon Company product.
We are constantly striving to improve everything we do, but occasionally mistakes
do occur. In the unlikely event that you find any part missing, please call your
nearest Futon Company store and we will arrange for the despatch of an immediate
replacement. Please keep all packaging until you have checked every part and
assembly of your Futon Company product is complete.
Version number: 1
Product code: ST BTH TALLBOY
a
a
Wooden Dowel x 6
d
d
Nut x 16
g
g
Cam x 8
j
Wall Leash x 1
m Hinge x 2
* Cross head and flat head Screwdriver also required for assembly
Date: 11/02/24
Fittings Checklist
Please count and check every component very carefully before you begin
c
c
b
b
Bolt x 16
e
e
Small Spanner x 1
i
h
Screw (4 x30) x 6
k
Felt Protector Pad x 4
n Magnet x 1
Pressure Plate x 16
f
f
Cam Bolt x 8
Screw (3 x 12) x 41
Shelf support x 8
l
O Plate x 1
Advertisement

Related Manuals for Futon Bathroom-Birch Tallboy


Summary of Contents for Futon Bathroom-Birch Tallboy
- Page 1 In the unlikely event that you find any part missing, please call your nearest Futon Company store and we will arrange for the despatch of an immediate replacement. Please keep all packaging until you have checked every part and assembly of your Futon Company product is complete.
-
Page 2: Parts Checklist
Parts Checklist Please count and check every component very carefully before you begin Right Side x 1 Left Side x 1 Top Panel x 1 Shelf x 2 Fixed Shelf x 2 Drawer Top x 1 Drawer x 1 Cabinet Top x 1 Back Board Large x 1 Back Board Small x 1 Drawer Back x1... - Page 3 How To Assemble Your Tallboy Please follow these instructions carefully Part 8 will be fixed in step 5.
- Page 4 How To Assemble Your Tallboy Please follow these instructions carefully...
-
Page 5: How To Use
1cm from the rear/top all correspondence with Futon Company. edge of the top of the unit. Thank you for choosing Futon Company.
Need help?
Do you have a question about the Bathroom-Birch Tallboy and is the answer not in the manual?
Questions and answers