
Related Manuals for Huawei SmartGuard-63A


Summary of Contents for Huawei SmartGuard-63A
- Page 1 SmartGuard-63A-(T0, AUT0) User Manual Issue Date 2024-05-06 HUAWEI DIGITAL POWER TECHNOLOGIES CO., LTD.
- Page 2 Notice The purchased products, services and features are stipulated by the contract made between Huawei Digital Power Technologies Co., Ltd. and the customer. All or part of the products, services and features described in this document may not be within the purchase scope or the usage scope. Unless otherwise specified in the contract, all statements, information, and recommendations in this document are provided "AS IS"...
-
Page 3: About This Document
About This Document About This Document Purpose This document describes the SmartGuard-63A-T0 and SmartGuard-63A-AUT0 in terms of safety precautions, product introduction, installation, electrical connections, power-on and commissioning, maintenance, and technical specifications. Read this document carefully before installing and using the SmartGuard. - Page 4 Change History Changes between document issues are cumulative. The latest document issue contains all the changes in earlier issues. Issue 01 (2024-05-06) This issue is the first official release. Issue 01 (2024-05-06) Copyright © Huawei Digital Power Technologies Co., Ltd.
-
Page 5: Table Of Contents
5.3 Opening the Maintenance Compartment........................43 5.4 Installing the Grid AC Output Power Cable......................... 45 5.5 Installing the Inverter AC Input Power Cable......................46 5.6 Installing the Backup Load Output Power Cable.......................49 Issue 01 (2024-05-06) Copyright © Huawei Digital Power Technologies Co., Ltd. - Page 6 F.1 Commissioning the Charger.............................. 96 F.2 Smart Switch Commissioning............................96 F.3 Generator Settings................................98 F.4 Forced Switching for the SmartGuard......................... 100 G Contact Information......................102 H Digital Power Customer Service..................104 Issue 01 (2024-05-06) Copyright © Huawei Digital Power Technologies Co., Ltd.
- Page 7 SmartGuard-63A-(T0, AUT0) User Manual Contents I Preconfigured Certificate Disclaimer................105 J Acronyms and Abbreviations.................... 106 Issue 01 (2024-05-06) Copyright © Huawei Digital Power Technologies Co., Ltd.
-
Page 8: Safety Information
● The equipment is operated beyond the conditions specified in this document. Issue 01 (2024-05-06) Copyright © Huawei Digital Power Technologies Co., Ltd. -
Page 9: Personal Safety
D ANGER During operations, use dedicated insulated tools to prevent electric shocks or short circuits. The dielectric withstanding voltage level must comply with local laws, regulations, standards, and specifications. Issue 01 (2024-05-06) Copyright © Huawei Digital Power Technologies Co., Ltd. - Page 10 Professionals: personnel who are familiar with the working principles and structure of the equipment, trained or experienced in equipment operations and are clear of the sources and degree of various potential hazards in equipment installation, operation, maintenance Issue 01 (2024-05-06) Copyright © Huawei Digital Power Technologies Co., Ltd.
-
Page 11: Electrical Safety
WARNING For the equipment that needs to be grounded, install the ground cable first when installing the equipment and remove the ground cable last when removing the equipment. Issue 01 (2024-05-06) Copyright © Huawei Digital Power Technologies Co., Ltd. - Page 12 If the equipment has multiple inputs, disconnect all the inputs before operating the equipment. ● Before maintaining a downstream electrical or power distribution device, turn off the output switch on the power supply equipment. Issue 01 (2024-05-06) Copyright © Huawei Digital Power Technologies Co., Ltd.
- Page 13 ● When routing cables, reserve at least 30 mm clearance between the cables and heat-generating components or areas. This prevents deterioration or damage to the cable insulation layer. Issue 01 (2024-05-06) Copyright © Huawei Digital Power Technologies Co., Ltd.
-
Page 14: Environment Requirements
Otherwise, its performance and safety will be compromised. ● The operating temperature range provided in the equipment's technical specifications refers to the ambient temperatures in equipment's installation environment. Issue 01 (2024-05-06) Copyright © Huawei Digital Power Technologies Co., Ltd. -
Page 15: Mechanical Safety
Do not use tools that have signs of scratches or fail to pass the inspection or whose inspection validity period has expired. Ensure that the tools are secure and not overloaded. Issue 01 (2024-05-06) Copyright © Huawei Digital Power Technologies Co., Ltd. - Page 16 Move a heavy object stably with balanced force at an even and low speed. Put down the object stably and slowly to prevent any collision or drop from scratching the surface of the equipment or damaging the components and cables. Issue 01 (2024-05-06) Copyright © Huawei Digital Power Technologies Co., Ltd.
- Page 17 If a single ladder is used, the recommended angle for the ladder against the floor is 75 degrees, as shown in the following figure. A square can be used to measure the angle. Issue 01 (2024-05-06) Copyright © Huawei Digital Power Technologies Co., Ltd.
- Page 18 Do not drag steel ropes and hoisting tools or bump the hoisted objects against hard objects during hoisting. ● Ensure that the angle between two hoisting ropes is no more than 90 degrees, as shown in the following figure. Issue 01 (2024-05-06) Copyright © Huawei Digital Power Technologies Co., Ltd.
- Page 19 To avoid short circuits or other risks, do not drill holes into buried pipes or cables. ● When drilling holes, protect the equipment from shavings. After drilling, clean up any shavings. Issue 01 (2024-05-06) Copyright © Huawei Digital Power Technologies Co., Ltd.
-
Page 20: Product Description
PV energy usage priorities for devices as required to make the best use of PV energy. 2.1 Model Number Description This document involves the following product models: ● SmartGuard-63A-T0 ● SmartGuard-63A-AUT0 Issue 01 (2024-05-06) Copyright © Huawei Digital Power Technologies Co., Ltd. -
Page 21: Networking
SmartGuard. However, if the rating is greater than 63 A, you can connect only some of the loads to the SmartGuard. Step 1 Residential load classification (dashed boxes indicate optional components) Issue 01 (2024-05-06) Copyright © Huawei Digital Power Technologies Co., Ltd. - Page 22 Step 2 Classification of loads connected to the SmartGuard (dashed boxes indicate optional components) (A) Load not connected to the (B) Backup load (C) Non-backup SmartGuard load (D) Power meter (E) AC power distribution box ----End Issue 01 (2024-05-06) Copyright © Huawei Digital Power Technologies Co., Ltd.
- Page 23 SmartGuard-63A-(T0, AUT0) User Manual 2 Product Description Residential Wiring Diagrams Figure 2-2 SmartGuard-63A-T0 residential wiring diagram (dashed lines indicate optional cable connections) NO TE The PEN cable with must be connected to the PE bar of the AC power distribution box.
- Page 24 Figure 2-5 Networking with some of loads connected to the SmartGuard (dashed boxes indicate optional components) (A) PV string (B) Smart PV Optimizer (C) DC switch Issue 01 (2024-05-06) Copyright © Huawei Digital Power Technologies Co., Ltd.
- Page 25 FE or WLAN port. For details about how to install the smart appliances, see Residential Smart PV Solution User Manual (EMMA). Issue 01 (2024-05-06) Copyright © Huawei Digital Power Technologies Co., Ltd.
- Page 26 Param SUN200 SUN200 SUN200 SUN200 SUN200 SUN200 eter 0-3KTL- 0-5KTL- 0-6KTL- 0-8KTL- 0-10KTL 0-12KTL Off- 3000 W 3300 W 3300 W 3300 W 3300 W 3300 W grid power Issue 01 (2024-05-06) Copyright © Huawei Digital Power Technologies Co., Ltd.
- Page 27 To ensure that loads can start and run properly, do not start the following typical devices at the same time. Issue 01 (2024-05-06) Copyright © Huawei Digital Power Technologies Co., Ltd.
- Page 28 Supported Earthing Systems The SmartGuard supports TN-S, TN-C-S, and TT systems. In the TT power grid, the N-to-PE voltage must be less than 30 V. Figure 2-7 Earthing systems Issue 01 (2024-05-06) Copyright © Huawei Digital Power Technologies Co., Ltd.
-
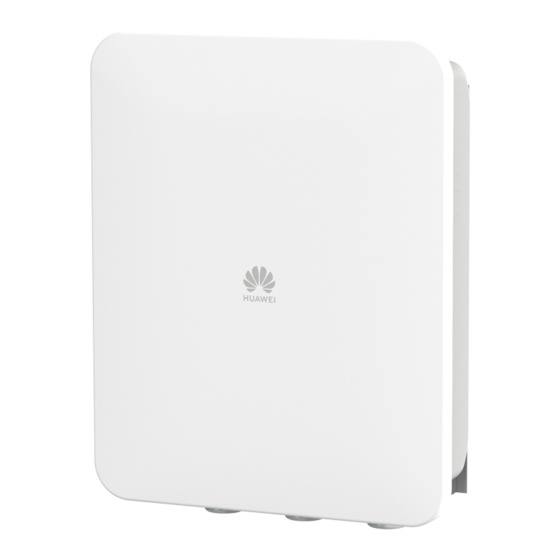
Page 29: Appearance
Note a: Before opening the maintenance compartment door, turn off the main circuit breaker on the grid side, shut down the inverter, and turn off the DC switches of the inverter and ESS. Issue 01 (2024-05-06) Copyright © Huawei Digital Power Technologies Co., Ltd. - Page 30 Note b: During deployment and normal use, do not operate the bypass switch. Ensure that the bypass switch is off. NO TE Note c: Dispose of the removed cushioning material according to waste sorting regulations. Issue 01 (2024-05-06) Copyright © Huawei Digital Power Technologies Co., Ltd.
-
Page 31: Working Principles
2.5 Working Modes ● The SmartGuard can work in three modes: on-grid, off-grid, and generator off-grid. ● Power supply priority: on-grid > off-grid > generator off-grid Figure 2-11 Working modes Issue 01 (2024-05-06) Copyright © Huawei Digital Power Technologies Co., Ltd. -
Page 32: Label Description
Table 2-9 Enclosure label description Label Name Description Electric Only authorized personnel can shock open the maintenance warning compartment cover. Refer to Reminds operators to read the documentati user manual of the SmartGuard. Issue 01 (2024-05-06) Copyright © Huawei Digital Power Technologies Co., Ltd. - Page 33 Do not touch the boards in the SmartGuard. QR code for Scan the QR code to connect to WLAN the WLAN of the SmartGuard. connection Grounding Indicates the position for connecting the PE cable. Issue 01 (2024-05-06) Copyright © Huawei Digital Power Technologies Co., Ltd.
- Page 34 SmartGuard-63A-(T0, AUT0) User Manual 2 Product Description Product Nameplate Figure 2-12 Nameplate (SmartGuard-63A-T0 as an example) (1) Trademark and (2) QR code for (3) Key technical model accessing product specifications documentation (4) Compliance symbols (5) Company name and country of origin NO TE The nameplate figure is for reference only.
-
Page 35: Storage Requirements
● If the SmartGuard has been stored for two years or longer, it must be checked and tested by professionals before use. Issue 01 (2024-05-06) Copyright © Huawei Digital Power Technologies Co., Ltd. -
Page 36: System Installation
Install the SmartGuard in a well-ventilated environment to ensure good heat dissipation. ● You are advised to install the SmartGuard in a sheltered area or install an awning over it. Issue 01 (2024-05-06) Copyright © Huawei Digital Power Technologies Co., Ltd. -
Page 37: Clearance Requirements
● Dimensions of mounting holes for the SmartGuard Figure 4-1 Mounting bracket dimensions ● Reserve sufficient clearances around the device for installation, door opening and closing, and heat dissipation. Issue 01 (2024-05-06) Copyright © Huawei Digital Power Technologies Co., Ltd. -
Page 38: Angle Requirements
Install the SmartGuard vertically or at a maximum back tilt of 15 degrees to facilitate heat dissipation. ● Do not install the SmartGuard at forward tilted, excessive backward tilted, side tilted, horizontal, or upside down positions. Figure 4-3 Installation angle Issue 01 (2024-05-06) Copyright © Huawei Digital Power Technologies Co., Ltd. -
Page 39: Preparing Tools
Table 4-3 Installation tools Hammer drill Flat-head Phillips insulated Insulated torque insulated torque torque socket wrench Drill bit: Ф8 mm, screwdriver screwdriver Ф6 mm Cable cutter Diagonal pliers Wire stripper Torque wrench Issue 01 (2024-05-06) Copyright © Huawei Digital Power Technologies Co., Ltd. -
Page 40: Pre-Installation Check
NO TICE You are advised to remove the packing materials within 24 hours before installing the product. Issue 01 (2024-05-06) Copyright © Huawei Digital Power Technologies Co., Ltd. -
Page 41: Moving The Smartguard
The service life of the installation parts shall be at least 10 years. Issue 01 (2024-05-06) Copyright © Huawei Digital Power Technologies Co., Ltd. - Page 42 Loosen the hexagonal bolts and flat washers of the lower two expansion bolts. Figure 4-5 Installing expansion bolts Step 3 Install the SmartGuard on the mounting bracket and tighten the nuts. Issue 01 (2024-05-06) Copyright © Huawei Digital Power Technologies Co., Ltd.
- Page 43 SmartGuard-63A-(T0, AUT0) User Manual 4 System Installation Figure 4-6 Installing the SmartGuard ----End Issue 01 (2024-05-06) Copyright © Huawei Digital Power Technologies Co., Ltd.
-
Page 44: Electrical Connections
● Operation personnel must wear proper PPE when connecting cables. ● Before connecting cables to ports, leave enough slack to reduce the tension on the cables and prevent poor cable connections. Issue 01 (2024-05-06) Copyright © Huawei Digital Power Technologies Co., Ltd. -
Page 45: Preparing Cables
If you do not want to use an FE network cable and Purchased antenna the signal quality is poor, you can install an external from Huawei antenna to enhance WLAN signals. Issue 01 (2024-05-06) Copyright © Huawei Digital Power Technologies Co., Ltd. - Page 46 In the grid+generator scenario, an ATS must be Prepared by installed. Select an ATS based on the requirements the customer of the SmartGuard. For details, see D ATS Parameter Requirements. Issue 01 (2024-05-06) Copyright © Huawei Digital Power Technologies Co., Ltd.
- Page 47 (INV2) – MB0 (12K–25K): 10–16 bonding point at the AC output port: five-core (L1, L2, L3, N, and PE) outdoor ● Cable outer diameter: 10– copper cable 32 mm Issue 01 (2024-05-06) Copyright © Huawei Digital Power Technologies Co., Ltd.
-
Page 48: Connecting A Pe Cable
16 mm custo Note a: The PEN of the SmartGuard-63A-T0 backup load port must be connected, but the PEN of the SmartGuard-63A-AUT0 backup load port does not need to be connected. NO TE ● The minimum cable cross-sectional area must meet local standards. - Page 49 ● Use a heat gun carefully to avoid heat damage to the equipment. Figure 5-2 Crimping an OT terminal (A) Core wire (B) Insulation layer (C) Heat shrink tubing (D) Hydraulic pliers (E) Heat gun Step 2 Connect the PE cable. Issue 01 (2024-05-06) Copyright © Huawei Digital Power Technologies Co., Ltd.
-
Page 50: Opening The Maintenance Compartment
● Do not leave unused screws in the maintenance compartment. Procedure Step 1 Unlock and open the maintenance compartment door using the delivered key, and remove the cushioning material. Issue 01 (2024-05-06) Copyright © Huawei Digital Power Technologies Co., Ltd. - Page 51 Step 2 Turn off the four switches shown in the figure. Step 3 Remove the screw from the maintenance compartment cover, and open the cover. Figure 5-5 Opening the maintenance compartment cover ----End Issue 01 (2024-05-06) Copyright © Huawei Digital Power Technologies Co., Ltd.
-
Page 52: Installing The Grid Ac Output Power Cable
. If cables with a cross-sectional area of less than 16 mm are used, select AC cord end terminals that meet the requirements. Figure 5-7 Crimping AC cord end terminals Step 3 Connect the grid AC output power cable. Issue 01 (2024-05-06) Copyright © Huawei Digital Power Technologies Co., Ltd. -
Page 53: Installing The Inverter Ac Input Power Cable
If the AC input power cable of the specifications recommended for an inverter is used and the AC switch current ratings for the SmartGuard and inverter do not match each other, install an AC switch that meets the inverter Issue 01 (2024-05-06) Copyright © Huawei Digital Power Technologies Co., Ltd. - Page 54 SUN5000-(8 INV2 32A 16 A KTL, 12KTL)- required ● 8KTL: 25 A MAP0 INV1 63A Required ● 10KTL– 12KTL: 32 INV2 32A required INV1 63A Required INV2 32A required Issue 01 (2024-05-06) Copyright © Huawei Digital Power Technologies Co., Ltd.
- Page 55 . If cables with a cross-sectional area of less than 16 mm are used, select AC cord end terminals that meet the requirements. Figure 5-10 Crimping AC cord end terminals Step 4 Connect the inverter AC input power cables. Issue 01 (2024-05-06) Copyright © Huawei Digital Power Technologies Co., Ltd.
-
Page 56: Installing The Backup Load Output Power Cable
An RCD must be installed for the backup load. During off-grid operation, the main circuit breaker does not provide protection. Electric leakage on the loads may result in electric shocks. Issue 01 (2024-05-06) Copyright © Huawei Digital Power Technologies Co., Ltd. - Page 57 . If cables with a cross-sectional area of less than 16 mm are used, select AC cord end terminals that meet the requirements. Figure 5-12 Crimping AC cord end terminals for the SmartGuard-63A-T0 Figure 5-13 Crimping AC cord end terminals for the SmartGuard-63A-AUT0 Step 2 Connect the output power cable to the backup load.
- Page 58 Supported Not supported Not supported Figure 5-14 Connecting the backup load output power cable of the SmartGuard-63A-T0 Figure 5-15 Connecting the backup load output power cable of the SmartGuard-63A-AUT0 Issue 01 (2024-05-06) Copyright © Huawei Digital Power Technologies Co., Ltd.
-
Page 59: Installing The Non-Backup Load Output Power Cable
. If cables with a cross-sectional area of less than 16 are used, select AC cord end terminals that meet the requirements. Figure 5-16 Crimping AC cord end terminals Step 2 Connect the non-backup load output power cable. Issue 01 (2024-05-06) Copyright © Huawei Digital Power Technologies Co., Ltd. -
Page 60: Installing The Smartguard Signal Cables
5.8 Installing the SmartGuard Signal Cables Precautions When laying out signal cables, separate them from power cables and keep them away from strong interference sources to prevent communication interruption. Issue 01 (2024-05-06) Copyright © Huawei Digital Power Technologies Co., Ltd. - Page 61 Connect to the generator control signal port. COM-6 CGND DO_DG_CGND Shield layer grounding Grounds the shield layer of a communications cable. Step 2 (Optional) Connect signal cables in parallel for MAP0 inverters. Issue 01 (2024-05-06) Copyright © Huawei Digital Power Technologies Co., Ltd.
-
Page 62: Installing The Smartguard Signal Cables (Emma)
FE or WLAN port. For details about how to install the smart appliances, see Residential Smart PV Solution User Manual (EMMA). Port Definitions FE port definitions Issue 01 (2024-05-06) Copyright © Huawei Digital Power Technologies Co., Ltd. - Page 63 Connects to the ATS port for the position feedback signal upon grid DI1– Digital input signal 1– connection. DI2+ Digital input signal 2+ Connect to the generator alarm signal port. DI2– Digital input signal 2– Issue 01 (2024-05-06) Copyright © Huawei Digital Power Technologies Co., Ltd.
- Page 64 Figure 5-23 Connecting the signal cable to the 14-pin terminal (A) Direct connection (B) Heat pump control (C) Power meter RS485 between the EMMA and through an external relay signal the heat pump Issue 01 (2024-05-06) Copyright © Huawei Digital Power Technologies Co., Ltd.
- Page 65 FE network cable and the signal quality is poor, you can install an external antenna to enhance WLAN signals. For details about how to set an external WLAN antenna, see 6.4.5 (Optional) Setting the External WLAN Antenna. Issue 01 (2024-05-06) Copyright © Huawei Digital Power Technologies Co., Ltd.
- Page 66 Step 4 Connect the EMMA signal cables. If an external antenna is required, attach it to the marked area in the upper left corner of the SmartGuard by magnet. Figure 5-26 Connecting EMMA signal cables (dashed boxes indicate optional components) ----End Issue 01 (2024-05-06) Copyright © Huawei Digital Power Technologies Co., Ltd.
-
Page 67: System Commissioning
Unused terminal Unused terminals and ports are locked by and port waterproof glands. Installation The installation space is proper, and the environment installation environment is clean and tidy. Issue 01 (2024-05-06) Copyright © Huawei Digital Power Technologies Co., Ltd. -
Page 68: Closing The Maintenance Compartment
Bypass switch: When the grid is available but the SmartGuard cannot supply power to loads due to exceptions, refer to 7.4 Operations on the Bypass Switch of the SmartGuard. Misoperations may cause electric shocks. Figure 6-2 Turning on the switches Issue 01 (2024-05-06) Copyright © Huawei Digital Power Technologies Co., Ltd. -
Page 69: System Power-On
If you choose power-on in off-grid mode, the charger cannot be detected during commissioning because it is not powered on. Issue 01 (2024-05-06) Copyright © Huawei Digital Power Technologies Co., Ltd. - Page 70 SmartGuard model for the inverter. For details, see Method 2: Setting the Off-Grid Mode and SmartGuard Model for the Inverter. Issue 01 (2024-05-06) Copyright © Huawei Digital Power Technologies Co., Ltd.
- Page 71 The system is powered on and running. Alarm indicator No alarm is raised. Blinking red The system raises a warning alarm. slowly (on for 1s and then off for Issue 01 (2024-05-06) Copyright © Huawei Digital Power Technologies Co., Ltd.
-
Page 72: Powering On Loads
Step 1 Check that the inverter, ESS, EMMA, and SmartGuard are working properly in on- grid mode. Step 2 (Optional) Turn off switches for high-power home appliances to avoid generator overload. Issue 01 (2024-05-06) Copyright © Huawei Digital Power Technologies Co., Ltd. -
Page 73: Device Commissioning
SOC is sufficient for the device commissioning. Step 4 After checking that the residential load circuit is not short-circuited, turn on the backup load and non-backup load switches. ----End 6.4 Device Commissioning Issue 01 (2024-05-06) Copyright © Huawei Digital Power Technologies Co., Ltd. -
Page 74: Deploying A New Plant
Tap Connection Test and wait until the test is complete. If the test fails, rectify the fault in a timely manner. Issue 01 (2024-05-06) Copyright © Huawei Digital Power Technologies Co., Ltd. -
Page 75: Commissioning Functions
Then, the wireless receiving apparatus receives the scheduling command and converts it into a DI signal. The EMMA controls the inverter to output the corresponding power. Issue 01 (2024-05-06) Copyright © Huawei Digital Power Technologies Co., Ltd. -
Page 76: Whole-House Power Backup Settings (Seamless Switchover)
Seamless Disabled ● When the grid fails, loads will be powered off for a short switchover (default) while during on/off-grid switching. ● The SmartGuard slowly switches to off-grid mode. Issue 01 (2024-05-06) Copyright © Huawei Digital Power Technologies Co., Ltd. - Page 77 Power Ratio Charge ESS ● Disabled After this function is enabled, the generator is allowed to with Generator (default) charge the ESS. ● Enabled Figure 6-4 Whole-house power backup settings Issue 01 (2024-05-06) Copyright © Huawei Digital Power Technologies Co., Ltd.
-
Page 78: Setting Off-Grid Mode For The Inverter
On the home screen, choose Set > Feature parameters and enable Off-grid mode. SmartGuard must be selected when the system is powered on for the first time in off-grid mode. Otherwise, the system will not work. Issue 01 (2024-05-06) Copyright © Huawei Digital Power Technologies Co., Ltd. -
Page 79: Optional) Setting The External Wlan Antenna
● No BackupBox 6.4.5 (Optional) Setting the External WLAN Antenna CA UTION An external WLAN antenna needs to be purchased from Huawei. To use the external WLAN antenna, set Selected antenna to External signal. Issue 01 (2024-05-06) Copyright © Huawei Digital Power Technologies Co., Ltd. -
Page 80: Generator Settings
Automatic You can set the battery SOC upper and lower thresholds. When the battery SOC reaches the specified upper or lower threshold, the generator automatically shuts down or starts. Issue 01 (2024-05-06) Copyright © Huawei Digital Power Technologies Co., Ltd. - Page 81 After the generator startup or shutdown command is Interval (min) delivered, if the generator fails to start or shut down when Status Detection Interval is reached, a generator startup or shutdown failure alarm is reported. Issue 01 (2024-05-06) Copyright © Huawei Digital Power Technologies Co., Ltd.
-
Page 82: On/Off-Grid Switching
(Owner). ----End Method 2: Off-Grid Operation Verification Step 1 Check that the indicator on the SmartGuard is steady orange when the SmartGuard is off-grid due to a grid failure. Issue 01 (2024-05-06) Copyright © Huawei Digital Power Technologies Co., Ltd. -
Page 83: Forced Switching
● If you tap Switch when the system is in off-grid mode, the system attempts to switch to the on-grid mode and automatically exits the forced switching mode. Issue 01 (2024-05-06) Copyright © Huawei Digital Power Technologies Co., Ltd. - Page 84 Check and try again. ● If switching to off-grid mode fails, the load power may be too high or the backup load may be abnormal. Check and try again. Issue 01 (2024-05-06) Copyright © Huawei Digital Power Technologies Co., Ltd.
-
Page 85: System Maintenance
Set the DC SWITCH of the inverter to OFF. (Optional) Install the locking screw for the DC SWITCH. (Optional) Turn off the DC switch between the inverter and PV strings. Step 3 Shut down the ESS. Issue 01 (2024-05-06) Copyright © Huawei Digital Power Technologies Co., Ltd. -
Page 86: Routine Maintenance
12 months after that especially whether the cable sheath that contacts a metal surface is damaged. ● Unused AC input ports, COM ports, and waterproof covers on the SmartGuard are locked. Issue 01 (2024-05-06) Copyright © Huawei Digital Power Technologies Co., Ltd. -
Page 87: Alarm Reference
Therefore, wait for at least 5 minutes and wear insulated gloves before working on the SmartGuard. Procedure Step 1 Check that the grid is available and the SmartGuard is abnormal and cannot supply power to loads. Issue 01 (2024-05-06) Copyright © Huawei Digital Power Technologies Co., Ltd. -
Page 88: Replacing The Smartguard
----End 7.5 Replacing the SmartGuard Precautions D ANGER ● Wear personal protective equipment and use dedicated insulated tools to avoid electric shocks or short circuits. Issue 01 (2024-05-06) Copyright © Huawei Digital Power Technologies Co., Ltd. - Page 89 Step 5 Install a new SmartGuard. For details, see 4 System Installation. Step 6 Perform electrical connections. For details, see 5 Electrical Connections. Step 7 Commission the SmartGuard. For details, see 6 System Commissioning. ----End Issue 01 (2024-05-06) Copyright © Huawei Digital Power Technologies Co., Ltd.
-
Page 90: Technical Specifications
● < 100 ms (M1, MB0) switchover) Home energy Available management system (EMMA) Remote generator Automatic or manual startup Generator DO port 1–100 mA, ≤ 24 V Bypass mode Manual Issue 01 (2024-05-06) Copyright © Huawei Digital Power Technologies Co., Ltd. - Page 91 ● Off-grid mode (M1 and MB0): When the ambient temperature ranges from –25°C to +40°C, the long-term steady-state current is not derated. Wireless Communication Specifications Item WLAN Frequency 2400–2483.5 MHz Protocol standard WLAN 802.11b/g/n Bandwidth ≤ 20 MHz Issue 01 (2024-05-06) Copyright © Huawei Digital Power Technologies Co., Ltd.
- Page 92 External WLAN Antenna Specifications Item WLAN Frequency 2400–2483.5 MHz Gain ≤ 4 dBi Port RP-SMA-J reverse-polarity male connector (with inner threads and inner holes) Mounting mode By magnet Cable length Issue 01 (2024-05-06) Copyright © Huawei Digital Power Technologies Co., Ltd.
- Page 93 Figure A-1 Method 1: before login (not connected to the Internet) Figure A-2 Method 2: after login (connected to the Internet) Step 2 Connect to the inverter WLAN, log in as Installer, and access the device commissioning screen. Issue 01 (2024-05-06) Copyright © Huawei Digital Power Technologies Co., Ltd.
-
Page 94: A Connecting To The Inverter On The App
WLAN, tap CONNECT. Otherwise, you cannot log in to the system. The actual UI and messages may vary with mobile phones. ----End Issue 01 (2024-05-06) Copyright © Huawei Digital Power Technologies Co., Ltd. -
Page 95: B Upgrading The Inverter
If the phone is not connected to a network, prepare the upgrade package before upgrading the inverter. Connect to the inverter, choose Maintenance > Upgrade on the home screen, and select the corresponding inverter version. Issue 01 (2024-05-06) Copyright © Huawei Digital Power Technologies Co., Ltd. - Page 96 Figure C-1 Method 1: before login (not connected to the Internet) Figure C-2 Method 2: after login (connected to the Internet) Step 2 Connect to the EMMA WLAN, log in as Installer, and access the device commissioning screen. Issue 01 (2024-05-06) Copyright © Huawei Digital Power Technologies Co., Ltd.
-
Page 97: C Connecting To The Emma On The App
WLAN, tap CONNECT. Otherwise, you cannot log in to the system. The actual UI and messages may vary with mobile phones. ----End Issue 01 (2024-05-06) Copyright © Huawei Digital Power Technologies Co., Ltd. -
Page 98: D Ats Parameter Requirements
Operating 380/400/415 V, 220/230/240 V The operating voltage range of the ATS may voltage affect the HVRT and undervoltage protection functions of the system. Issue 01 (2024-05-06) Copyright © Huawei Digital Power Technologies Co., Ltd. - Page 99 3. Enhanced insulation design is required connection is within ±100 ms. between the ATS signal port and the AC circuit. Issue 01 (2024-05-06) Copyright © Huawei Digital Power Technologies Co., Ltd.
- Page 100 SmartGuard-63A-(T0, AUT0) User Manual D ATS Parameter Requirements Figure D-1 Position feedback signal upon grid connection Issue 01 (2024-05-06) Copyright © Huawei Digital Power Technologies Co., Ltd.
-
Page 101: E Generator Parameter Requirements
24 V. SmartGuard may work abnormally. 4. Enhanced insulation design is required between the port on the generator side and the AC circuit of the generator. Issue 01 (2024-05-06) Copyright © Huawei Digital Power Technologies Co., Ltd. - Page 102 AC circuit of the signal is less than generator. or equal to 100 ohms. Figure E-1 Generator control signal Figure E-2 Generator alarm signal Issue 01 (2024-05-06) Copyright © Huawei Digital Power Technologies Co., Ltd.
-
Page 103: F Using Smart Appliances (Owner)
If functions related to PV power control, such as PV power preferred, are involved, you are advised to configure smart appliances with the rated power greater than 100 W. Issue 01 (2024-05-06) Copyright © Huawei Digital Power Technologies Co., Ltd. - Page 104 For example, if two smart circuit breakers (Shelly Pro 2PM) are installed in the living room, perform the following steps: When installing the smart circuit breakers, record their positions by taking photos and notes, and number them. Issue 01 (2024-05-06) Copyright © Huawei Digital Power Technologies Co., Ltd.
-
Page 105: Generator Settings
Log in to the FusionSolar app using an owner account. On the Home screen, choose PV+ESS Devices > Device > Generator, and set parameters in Generator Control and Parameter settings. Issue 01 (2024-05-06) Copyright © Huawei Digital Power Technologies Co., Ltd. - Page 106 Charge ● Disabled (default) After this function is enabled, the Battery with generator is allowed to charge the ESS. ● Enabled Generator Issue 01 (2024-05-06) Copyright © Huawei Digital Power Technologies Co., Ltd.
-
Page 107: Forced Switching For The Smartguard
● If you tap Switch when the system is in off-grid mode, the system attempts to switch to the on-grid mode and automatically exits the forced switching mode. Issue 01 (2024-05-06) Copyright © Huawei Digital Power Technologies Co., Ltd. - Page 108 SmartGuard-63A-(T0, AUT0) User Manual F Using Smart Appliances (Owner) Figure F-3 Forced switching Issue 01 (2024-05-06) Copyright © Huawei Digital Power Technologies Co., Ltd.
-
Page 109: G Contact Information
To ensure faster and better services, we kindly request your assistance in providing the following information: ● Model ● Serial number (SN) ● Software version ● Alarm ID or name ● Brief description of the fault symptom Issue 01 (2024-05-06) Copyright © Huawei Digital Power Technologies Co., Ltd. - Page 110 SmartGuard-63A-(T0, AUT0) User Manual G Contact Information NO TE EU Representative Information: Huawei Technologies Hungary Kft. Add.: HU-1133 Budapest, Váci út 116-118., 1. Building, 6. floor. Email: hungary.reception@huawei.com Issue 01 (2024-05-06) Copyright © Huawei Digital Power Technologies Co., Ltd.
-
Page 111: H Digital Power Customer Service
SmartGuard-63A-(T0, AUT0) User Manual H Digital Power Customer Service Digital Power Customer Service https://digitalpower.huawei.com/robotchat/ Issue 01 (2024-05-06) Copyright © Huawei Digital Power Technologies Co., Ltd. - Page 112 Preconfigured Huawei-issued certificates are used only in the deployment phase, for establishing initial security channels between devices and the customer's network. Huawei does not promise or guarantee the security of preconfigured certificates. The customer shall bear consequences of all security risks and security incidents arising from using preconfigured Huawei-issued certificates as service certificates.
- Page 113 SmartGuard-63A-(T0, AUT0) User Manual J Acronyms and Abbreviations Acronyms and Abbreviations alternating current application auto transfer switching communication digital input digital output Ethernet gigabit Ethernet Issue 01 (2024-05-06) Copyright © Huawei Digital Power Technologies Co., Ltd.
- Page 114 J Acronyms and Abbreviations local area network light-emitting diode normally closed normally open power over Ethernet protective earthing reset relative humidity state of charge state of health serial number wide area network Issue 01 (2024-05-06) Copyright © Huawei Digital Power Technologies Co., Ltd.
Need help?
Do you have a question about the SmartGuard-63A and is the answer not in the manual?
Questions and answers