Table of Contents
Advertisement
Quick Links
Advertisement
Table of Contents

Subscribe to Our Youtube Channel
Related Manuals for Visionix VX25


Summary of Contents for Visionix VX25
- Page 1 VX25 User Manual 8225-9900-01 – rev 01 – 26/02/2020...
-
Page 2: Table Of Contents
Equipment and Installation ...................... 11 3.1. List of equipment supplied ........................12 3.2. Equipment parts ............................. 13 VX25 space saving chart ............................. 13 Display ..................................14 3.3. Use of Us-radio remote controller ......................15 3.4. Use of EU-radio remote controller ......................16 3.5. - Page 3 How do I use the fixation points? ......................40 Call the simple fixation point ............................40 Call the child fixation point (Clown)..........................40 Call the light fixation point ............................40 Invert the background color (white/black) ......................... 40 VX25 User Manual...
- Page 4 The “change” button does not change the optotypes distribution ............43 6.4. The VX25 screen is black ........................43 6.5. Lines or dashes appear on the VX25 screen ..................43 Maintenance ........................... 44 7.1. Cleaning the VX25 casing ........................45 7.2.
-
Page 5: Introduction
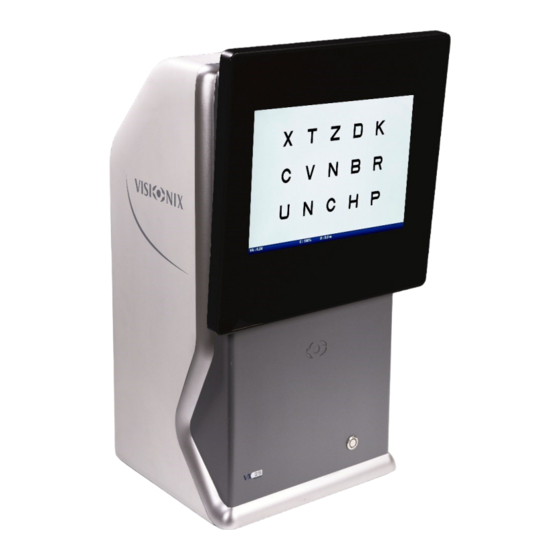
1. Introduction VX25 User Manual... - Page 6 The display unit includes a PC-type unit and a 7" high-resolution LCD screen. The VX25 is equipped with a large range of optotypes that can be presented with most existing scales. It can be customized to match the operating conditions.
-
Page 7: Safety
2. Safety VX25 User Manual... -
Page 8: General
To avoid risk of electric shock or bodily injury, do not handle the electrical plugs with wet hands. ▪ To avoid risk of electric shock or fire, make sure the VX25's power cord is not damaged before plugging it into an electrical outlet. ▪... -
Page 9: Precautions During Use
WARNING: Portable RF communications equipment (including peripherals such as antenna cables and external antennas) should be used no closer than 30 cm (12 inches) to any part of the VX25, including cables specified by the manufacturer. Otherwise, degradation of the performance of this equipment could result. -
Page 10: Symbols
2.5. Symbols Important: consult the User guide supplied with the equipment Manufacturer Manufacturing date Serial Number Compliance to Medical Device Directive 93/42/EEC Class 1 The equipment must be disposed of separately according to WEEE Directive. VX25 User Manual... -
Page 11: Equipment And Installation
3. Equipment and Installation VX25 User Manual... -
Page 12: List Of Equipment Supplied
3.1. List of equipment supplied The package you received should contain the following items: Power supply Sapce saving Chart Display Radio remote controller (cable and + Dungle usb transformer) + Batteries for remote controller Red/green frames Matching sheets for Child tests VX25 User Manual... -
Page 13: Equipment Parts
3.2. Equipment parts VX25 space saving chart Front and rear views 1 - LCD screen 2 - Power indicator / Power switch 3 - AUDIO ports 4 - Ethernet (RJ45) 5 - External USB (2x 2.0, 2x 3.0) 6 - VGA out... -
Page 14: Display
Display Information bar Visual acuity Contrast Usage distance is fixed and set to 5.00 VX25 User Manual... -
Page 15: Use Of Us-Radio Remote Controller
Call the Worth test Call the Shoeber test Call the different optotypes Call the Child test Call the Ishihara test FIX (call fixation targets) Call the Paskal3D test Call the media / didactic images / default test / informations VX25 User Manual... -
Page 16: Use Of Eu-Radio Remote Controller
Call the Worth test Call the Shoeber test Call the different optotypes Call the Child test Call the Ishihara test FIX (call fixation targets) Call the Paskal3D test Call the media / didactic images / default test / informations VX25 User Manual... -
Page 17: Usb-Dongle For Us/Eu Radio Remote Controller
➢ There is a USB dongle provided with every radio remote controller ➢ Plug this USB dongle on the back side of the space saving chart display ➢ The USB dongle is recognized by you chart display automatically ➢ Once it’s done, you can use your remote controller VX25 User Manual... -
Page 18: Installation Procedure
3.6. Installation procedure Positioning in the examination room ➢ Place the VX25 perpendicular to the axis of the patient's line of sight. ➢ The physical viewing distance for the patient is between 80 cm and 1 meter, the projection of the LCD screen is fixed at 5 Meters and can’t be changed. -
Page 19: Electrical Connection
“yes” button to confirm or the “no” one to cancel. You will hear four tone that indicates the unit is shutting down. ➢ When the screen is off, turn the unit off by pushing the ON / OFF button. VX25 User Manual... -
Page 20: Configuring The Vx25
4. Configuring the VX25 VX25 User Manual... -
Page 21: Menu
4.1. Menu Access ➢ Press the Menu button on the remote control. The following VX25 menu appears. Navigation To move from one menu function to anoher ➢ Use the up/down arrows. To select a function ➢ Press the “Yes” button. -
Page 22: Setting The Acuity Unit
4.3. Setting the usage distance ➢ Select "Distance" in the menu. ➢ As we have a fix optical projection on the VX25, the distance can’t be changed in the software and stays fixed at 5 meters. 4.4. Setting the mirror tilt ➢... -
Page 23: Setting Optotype Scales
Projector mode can be activated to have a unique distribution of the first line of optotype each time you press the last visual acuity touch pressed on the remote controller. This feaure is not available for child optotype test. ➢ Select "Proj. Mode" in the menu. ➢ Select the wanted mode. VX25 User Manual... -
Page 24: Duochrome Calibration
➢ Watch the vertical green lines (on the right) through the red filter to be used by the patient. ➢ Adjust the green intensity and green base (and possibly the background intensity) to obtain the best filtering. VX25 User Manual... -
Page 25: Setting The Language
Activating mirror mode inverts the display like if the patient see the characters in a mirror. ➢ Select "Mirror" in the menu. ➢ Select the required mode. 4.11. Setting the info footer ➢ Select "info footer" in the menu. ➢ Select the disable/enable to hide or not the info bar. VX25 User Manual... -
Page 26: Setting The Test Call Butons
➢ Press the Change button (the selection color changes). ➢ Move the test to the required position using the up/down arrows. ➢ Press the Change button (the selection color returns to normal). Available tests Letter Digit Landolt VX25 User Manual... - Page 27 Snellen Child Geometric sheridan ETDRS Clock Dot Chart Jackson Cross Ishihara Red/Green Balance Polarized Binocular balance Binocular balance on polarized red/green background Binocular balance on Stereoscopy Phoria polarized red/green background Mallet Fusion Worth VX25 User Manual...
- Page 28 MKH 05 Stereo test with triangle MKH 06 Reduced stereo test MKH 07 Stereo balance test MKH 08 Reduced Stereo with triangle balance test MKH 09 Differentiated stereo MKH 09b Test Differentiated MKH 12 Test Cowen Test Stereo test Amsler Movie VX25 User Manual...
-
Page 29: Setting The Standby Timeout
4.13. Setting the standby timeout This setting defines the inactivity period after which the VX25 will automatically switch to standby mode. ➢ Select "Standby" in the menu. ➢ Select the required delay. ➢ If no touch is pressed on the remote controller (or if no button is touch on a software that drive the chart display) before the selected time elapsed, a sound will be hearable while the screen will swich off. -
Page 30: Maintenance Menu
➢ The maintenance menu is reserved to the technicians in order to configure the unit. ➢ Do not enter this menu. 4.17. Shutdown menu ➢ Press “yes” button on the “shutdown” menu to shutdown the VX25 unit. VX25 User Manual... -
Page 31: How Do I
5. How do I...? VX25 User Manual... -
Page 32: How Do I Measure Visual Acuity
Change the optotype masks Display a column of optotypes ➢ Press the vertical mask button. Display a line of optotypes ➢ Press the horizontal mask button. Display a single optotype ➢ Press the single letter mask button VX25 User Manual... -
Page 33: Display Optotypes On A Red /Green Background
Focus on an optotype/ Use cursor mode The cursor mode adds bars above and under the optotype which indicates which optotype to read. Activate / desactivate cursor mode ➢ Press the “Single letter” button. Change the pointed optotype ➢ Use the left/right/up/down arrows VX25 User Manual... -
Page 34: How Do I Use The Special Tests
➢ Press the button of the group to which the test belongs (1,2 or 3) until the test appears. Change a special test presentation Worth Press down arrow Press left arrow Press right arrow Initial Display Press B/W Schober Initial display Press B/W VX25 User Manual... -
Page 35: How Do I Use Etdrs Mode
5.4. How do I return to the previous test? ➢ Press the"Return to the Previous Test" button. Note: use of this button is valid in terms of test type (e.g. letter, digit, Worth, etc.), but not in terms of acuity, mask or background. VX25 User Manual... -
Page 36: How Do I Use Contrast Tests
The orientation of the waves is always the same Step Orientation of the top of the waves Step Orientation of the top of he waves Left Vertical Vertical Left Left Right Right Vertical Vertical Right Left Left Vertical Right Left Vertical Right Vertical Vertical Left VX25 User Manual... - Page 37 Green curve : curve of the answers Saving the result Insert a USB key in the VX25. When the result is displayed, an image is automatically saved on the USB key with the date and the hour. VX25 User Manual...
-
Page 38: How Do I Use Pelli Robson Test
N H O 1,35 7,4% N R D 1,50 6,67% V R C 1,65 6,06% O V H 1,80 5,55% C D S 1,95 5,12% N D C 2,10 4,76% K V Z 2,25 4,44% O H R VX25 User Manual... -
Page 39: How Do I Use The Ishihara Tests
Change the color range ➢ Press the up or down arrow. Change the palette within the same color range ➢ Press the left or right arrow. Return to the initial Ishihara test ➢ Press the ‘Change’ button. VX25 User Manual... -
Page 40: How Do I Use The Fixation Points
➢ Press the button of the group with which the image of the eye is associated (1,2 or 3) until the image of a ballon appears. Change the image ➢ Use left/right arrows to see the didactic images. VX25 User Manual... -
Page 41: How Do I Display Media (Slideshow, Video)
5.9. How do I display media (slideshow, video)? The VX25 can display media in the form of a video. The video formats ASF, WMV, WMA, OGG, MOV, RM, RA, RAM, MP4, MPEG, AVI, VOB, MPG are supported. There is a default media file already stored in the VX25, but you can replace it by another. -
Page 42: What Should I Do If
6. What should I do if...? VX25 User Manual... -
Page 43: The Vx25 Does Not Start
➢ Check that the power cord is correctly plugged into a power outlet. ➢ Check that the power cord is correctly plugged into the transformer and the VX25. ➢ Check that the indicator light on the the transformer is lit. -
Page 44: Maintenance
7. Maintenance VX25 User Manual... -
Page 45: Cleaning The Vx25 Casing
Important! Switch off and unplug the VX25 before cleaning. 7.1. Cleaning the VX25 casing ➢ Use a soft, damp cloth. To remove persistent stains: ➢ Apply a little household detergent (but no solvents or abrasive products). ➢ Never project liquids on the equipment. -
Page 46: Appendices
8. Appendices VX25 User Manual... -
Page 47: Technical Specifications
250 cd/m² Reading distance 5 meters Visual acuity range 0.1 to 2.0 _ 20/500 to 20/10 100-240V CA- 50/60 Hz – 1.3A VX25 power supply Screen power supply 12 V DC Max 60W Consumption Protection against elecric shocks Class I... -
Page 48: Conformity To International Standards
Electromagnetic immunity The VX25 is intended for use in the elecromagnetic environnement specified below . The customer or the user of the VX25 should assure that it is used in such an environment. - Page 49 90°, 135°,180°, 225°, 270° a typical commercial or hospital variations on power supply 225°, 270° and 315° and 315° environment. If the user of the VX25 input lines requires continued operation during IEC 61000-4-11 0% UT; 1 cycle and 70% 0% UT;...
- Page 50 Electromagnetic environment - guidance level Test level Portable and mobile RF communications equipment should be used no closer to any part of the VX25, including cables, than the recommended separation distance calculated from the equation applicable to the frequency of the transmitter.
-
Page 51: Manufacturer
Empfohlene Abstände zwischen tragbaren und mobilen HF-Kommunikationsgeräten und dem VX25 Rated Separation distance according to frequency of transmitter m maximum output 150 kHz to 80 MHz 150 kHz to 80 80 MHz to 800 MHz 800 MHz to 2,5 power of... -
Page 52: Explanation Of Visual Acuity Units
Monoyer Monoyer scale Distance-dependent conventions Snellen 300 Snellen at 3m Snellen 400 Snellen ar 4m Snellen at 5m Snellen 500 Snellen at 6m Snellen 600 Snellen at 10 feet Snellen 10 Snellen at 20 feet Snellen 20 VX25 User Manual... -
Page 53: Contact
Tel.: (+35) 1 214 170 225 Fax: (+35)1 214 170 227 Linha Verde: 800 205 142 Luneau Technology USA Inc. 224 W James St Bensenville, IL 60106 Tel : +1 800 729 1959 contact.us@luneautech.com Export Technical Support Tél.: (+33) 977556335 techsupport@luneautech.com VX25 User Manual...
Need help?
Do you have a question about the VX25 and is the answer not in the manual?
Questions and answers